
Image by Editor
Named ranges are one of Excel’s most underrated features. Instead of referring to cell ranges, you can assign them meaningful names like SalesData. This helps to create formulas that are easier to read, understand, and maintain, especially in large workbooks.
In this tutorial, we will show how to use named ranges in formulas.
What Are Named Ranges?
A named range is simply a descriptive name that represents a cell or range of cells in your spreadsheet. Instead of using cell references like A1:B10 in your formulas, you can use descriptive names like “Total_Price” or “Sales_Data”.
Benefits of Using Named Ranges:
- Readability: Formulas become self-explanatory (e.g., =SUM(Monthly_Expenses) vs =SUM(C5:C20)).
- Maintainability: When you modify your spreadsheet structure, you only need to update the named range definition, not every formula.
- Error reduction: Descriptive names reduce the chance of referencing the wrong cells.
- Reusability: Named ranges can be used across multiple formulas and worksheets.
- Navigation: Quickly jump to specific data areas in large spreadsheets.
Create Named Ranges
Method 1: Use the Name Box
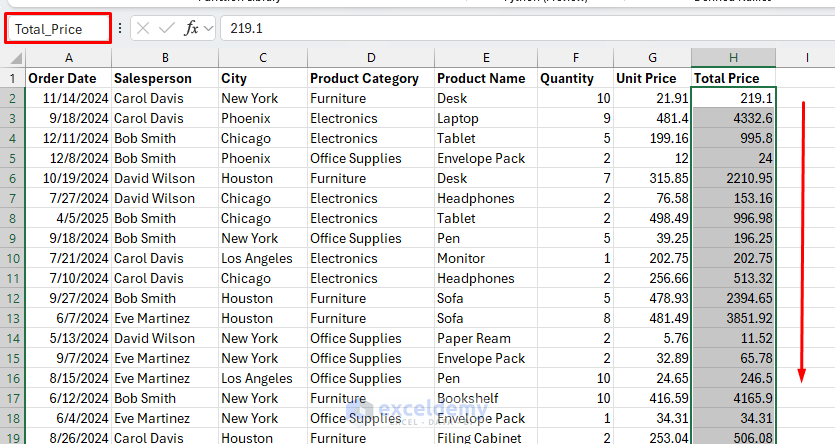
- Select the cell or range you want to name.
- Click on the Name Box (located to the left of the formula bar).
- Type a descriptive name (must start with a letter or underscore, no spaces).
- Insert Total_Price.
- Press Enter.
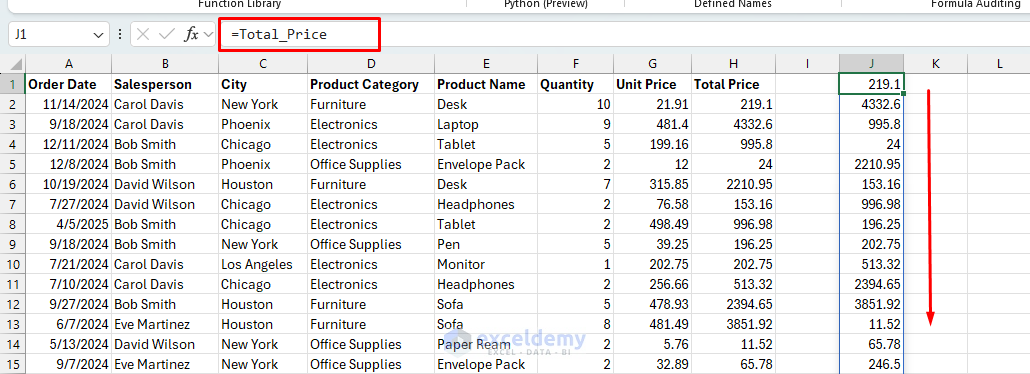
Verify It:
- Select a cell, and insert the named range.
=Total_Price
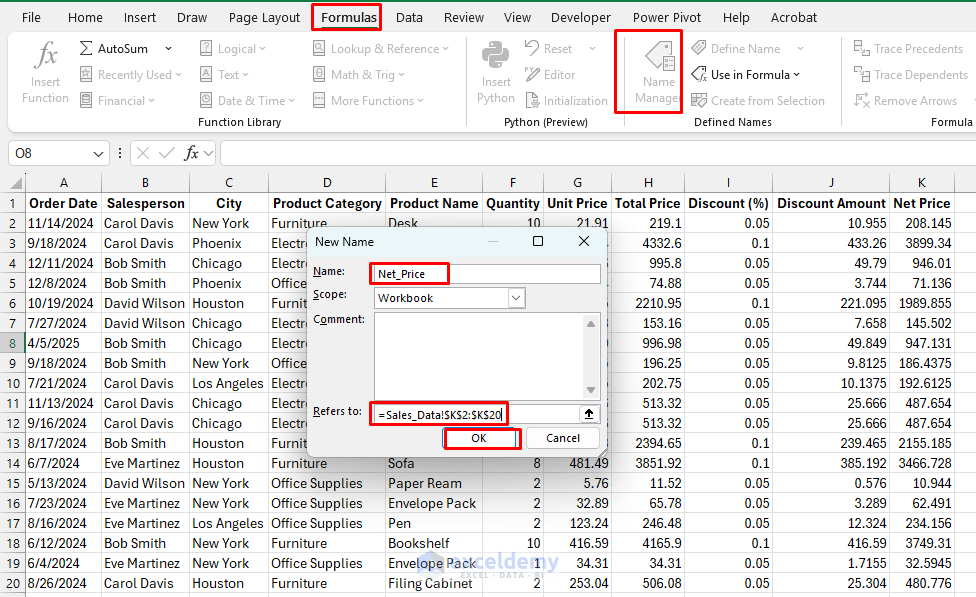
Method 2: Use the Name Manager
- Go to the Formulas tab >> select Name Manager.
- In the Name Manager dialog box >> click New.
- Or go to the Formulas tab >> click Define Name.
- In the New Name box;
- Enter a name: Net_Price.
- In Refers to: field, insert the following cell range: Sales_Data!$K$2:$K$20
- Click OK.
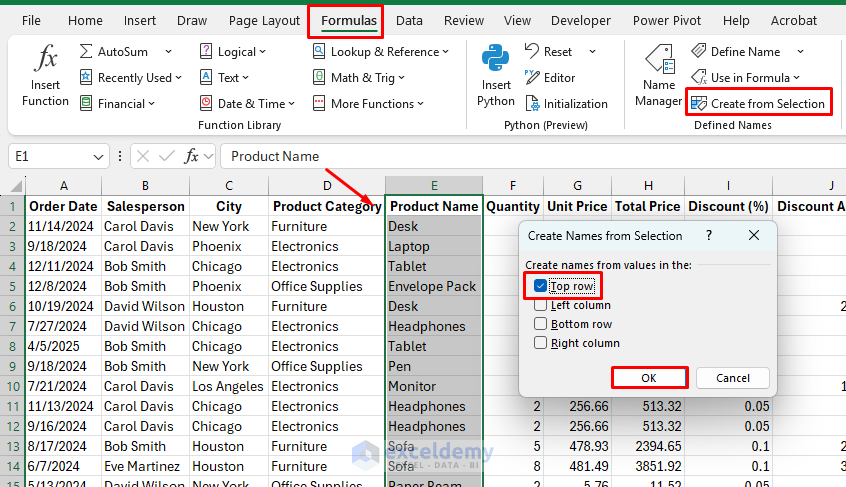
Method 3: Create Names from Selection
If you have headers or labels next to your data:
- Select the data, including the headers/labels.
- Go to Formulas tab >> select Create from Selection.
- Specify whether your labels are in the top row, left column, etc.
- Select Top Row.
- Click OK.
Naming Conventions
- Start with a letter or underscore.
- No spaces (use underscores _ if needed).
- Case-insensitive (SalesData = salesdata) but use capitalization for readability (e.g., Monthly_Revenue).
- Be descriptive but concise.
- Consider adding prefixes for categorization (e.g., fin_Annual_Budget, mkt_Campaign_Costs).
- It cannot look like a cell address (e.g., A1, B2).
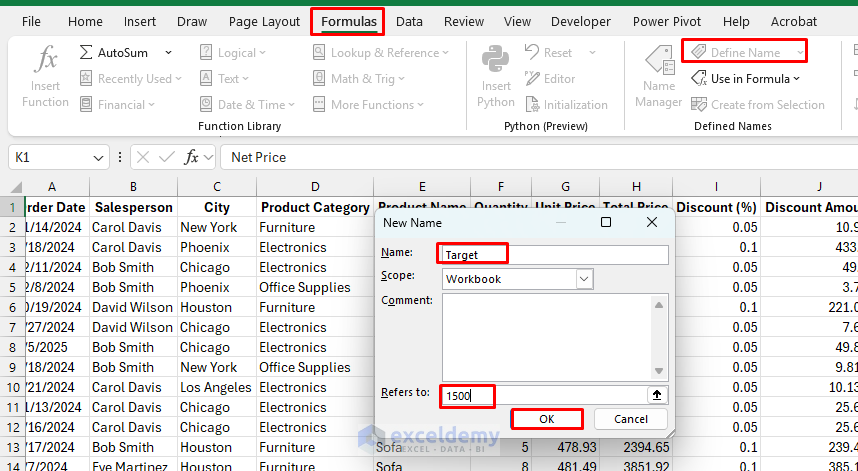
Create Named Constants
You can create named constants for frequently used values:
- Go to the Formulas tab >> click Define Name.
- Enter the name: Target.
- In the Refers to field, enter: 1500 (no cell reference).
Use Named Ranges in Formulas
Once you’ve created named ranges, you can use them in formulas just like you would use cell references. Instead of using a direct cell reference (=SUM(B2:B10)), let’s use the named range in the formula.
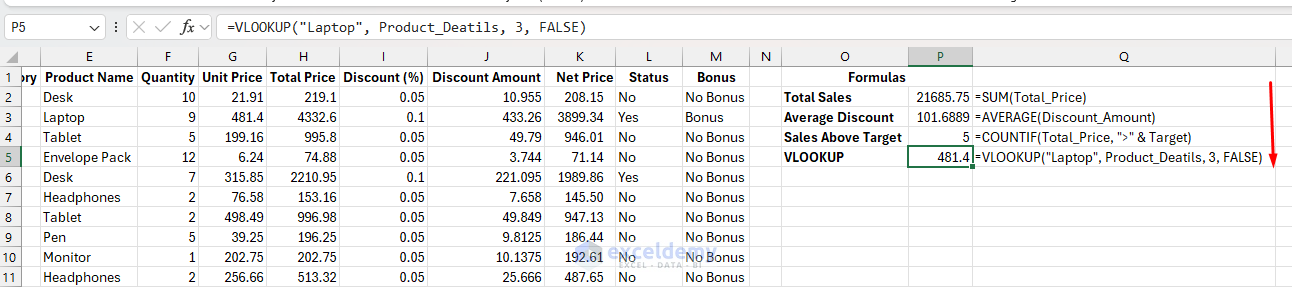
Calculate Total Sales:
- Select a cell and insert the following formula.
Formula:
=SUM(Total_Price)
Calculate Average Discount Given:
Formula:
=AVERAGE(Discount_Amount)
Number of Sales Above Target:
Formula:
=COUNTIF(Total_Price, ">" & Target)
Use in VLOOKUP:
Name the product database range Product_Details. Now, search the laptop price from the product database.
Formula:
=VLOOKUP("Laptop", Product_Deatils, 3, FALSE)
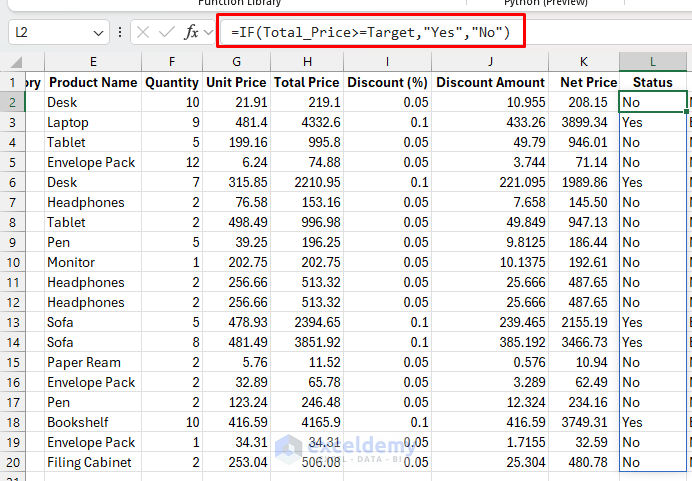
Determine Sales Target Status:
Formula:
=IF(Total_Price>=Target,"Yes","No")
This formula determines the status of the target, whether the target is met by the salesperson or not.
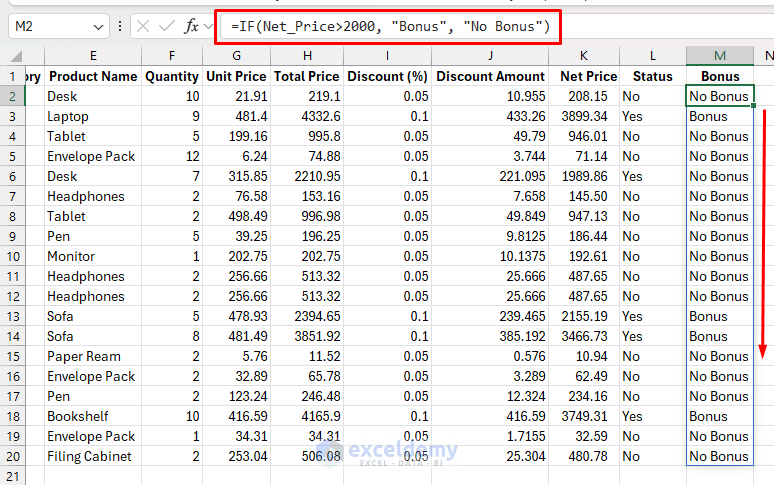
Apply a Conditional Bonus:
Formula:
=IF(Net_Price>2000, "Bonus", "No Bonus")
This formula checks whether any purchases deserve a bonus or not based on the condition.
Manage Named Ranges
To view, edit, or delete named ranges:
- Go to the Formulas tab >> select Name Manager.
- In the Name Manager box;
- Add new named ranges.
- Edit names and ranges.
- Delete unused names.
- Filter names by scope.

Advanced Techniques
Dynamic Named Ranges
Dynamic named ranges automatically adjust as data is added or removed. These are particularly useful for growing datasets.
- Go to the Formulas tab >> select Name Manager.
- In the Name Manager dialog box >> click New.
- Enter a name: Product_Names.
- In the Refers to: field, insert the following formula:
=OFFSET(Sheet1!$E$2, 0, 0, COUNTA(Sheet1!$E:$E)-1, 1)
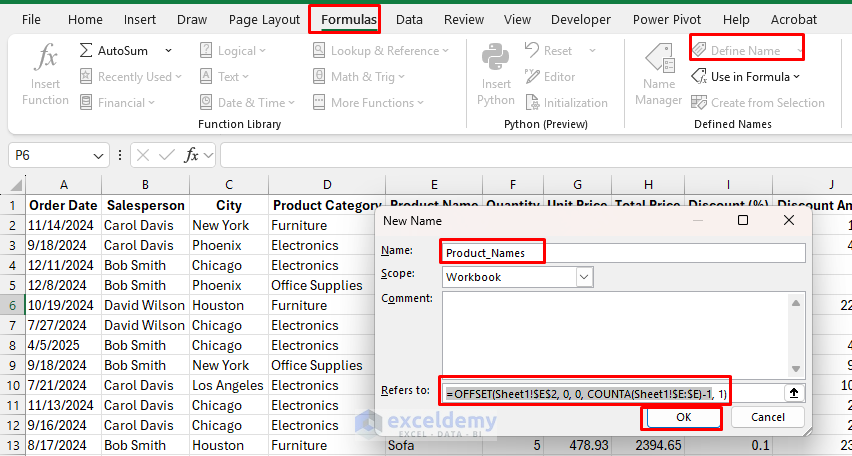
This formula creates a range that starts at cell E2 and grows downward as far as there are non-empty cells in column E. It will expand or shrink as data is added/removed.
Named Ranges with Absolute/Relative References
When defining named ranges, be mindful of absolute ($) and relative references, especially when you want the named range to refer to different cells based on the active cell.
Conclusion
Named ranges transform the Excel formulas from cryptic cell references into readable, self-documenting expressions. It makes Excel smarter with clear, meaningful names. They reduce errors, save time during maintenance, and boost productivity, especially when managing sales or financial data. Start using named ranges in formulas, and you’ll quickly see the benefits in your workflow and formula clarity.
Get FREE Advanced Excel Exercises with Solutions!

This is absolutely amazing. Thank you for sharing your knowledge.
Hello Tolani,
You are most welcome. Thanks for your feedback and appreciation, it means a lot to us. Keep exploring Excel with ExcelDemy!
Regards
ExcelDemy