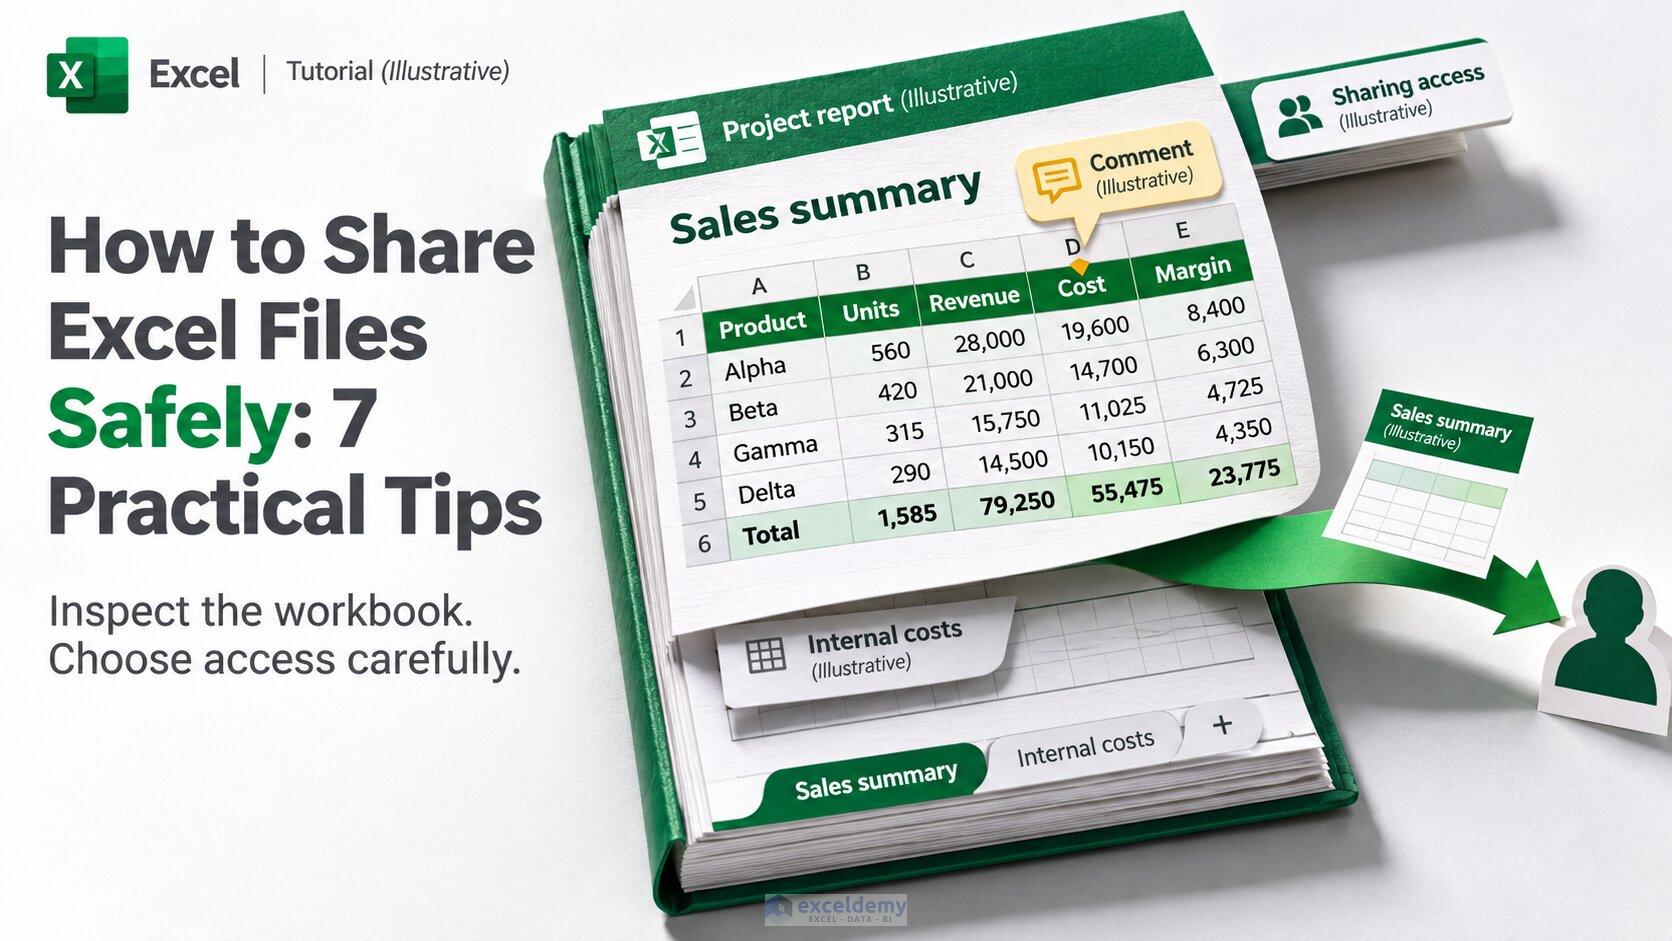
You’ve finished an Excel report and are ready to send it to a colleague or client. The figures look correct, the charts are polished, and the file is neatly organised. But have you checked what else the workbook contains?
An Excel file can hold more information than the worksheets currently on screen. Hidden tabs, comments, external connections, and sharing permissions may expose information you never intended to distribute.
Whether you’re sharing a budget, project tracker, or sales report, these seven tips will help you protect your data without making collaboration unnecessarily difficult.
1. Share The Right File With The Right People
Before sending a workbook, ask whether the recipient needs the entire file.
A client requesting monthly sales totals probably doesn’t need employee-level transactions, internal pricing calculations, or other confidential records.
Create a separate copy containing only the necessary information. Where appropriate, copy the relevant results into a new workbook rather than sending the complete working file. If the recipient only needs to read the numbers, exporting the relevant range or sheet as a PDF (File > Export) removes formulas, hidden sheets, and most workbook metadata entirely.
For ongoing collaboration, OneDrive or SharePoint can be more manageable than emailing multiple attachments.
In Excel, select Share, review the link settings, and choose who can access the workbook. Depending on your organisation’s settings, the link options typically include Anyone with the link, People in your organisation, People with existing access, and Specific people. When available, select Specific people instead of creating a link that anyone can open.
Check existing access as well as the new sharing link. Someone may already have permission through a shared folder, group, or SharePoint site. The Manage Access pane in the Share dialog lists direct permissions and sharing links, which makes it a quick place to audit them.
Decide whether recipients need editing permission or only viewing access. Not everyone who needs to read a report should be able to change its formulas. In the link settings, the Allow editing toggle controls this, and a Block download option may be available for view-only links to Specific people. Some organisations also let you set an expiry date or a password on links, depending on their policies.
Remember that view-only access doesn’t always prevent downloading or copying. Where supported, consider additional download restrictions for sensitive reports, while recognising that they cannot prevent every form of information capture, such as screenshots or manually retyping the data.
2. Protect Your Connection When Working Remotely
Excel collaboration doesn’t always happen at an office desk. You might review a financial report from a hotel, update a project tracker at an airport or access OneDrive using café Wi-Fi.
Before connecting, verify the network name and avoid unexpected requests to install software or enter corporate passwords.
Microsoft 365 services use encrypted connections (HTTPS/TLS), so the file contents aren’t sent in plain text, but protecting your overall network connection may still be useful on unfamiliar networks.
A VPN adds connection privacy by encrypting traffic routed through its tunnel between your device and a VPN server. If you’re exploring this option, you can review X-VPN to understand its supported devices and connection features.
However, a VPN doesn’t control who can open your Excel file or prevent an authorised recipient from forwarding its contents.
For company data, always follow your organisation’s approved network and remote-access policies.
3. Check For Hidden Information Before Sending
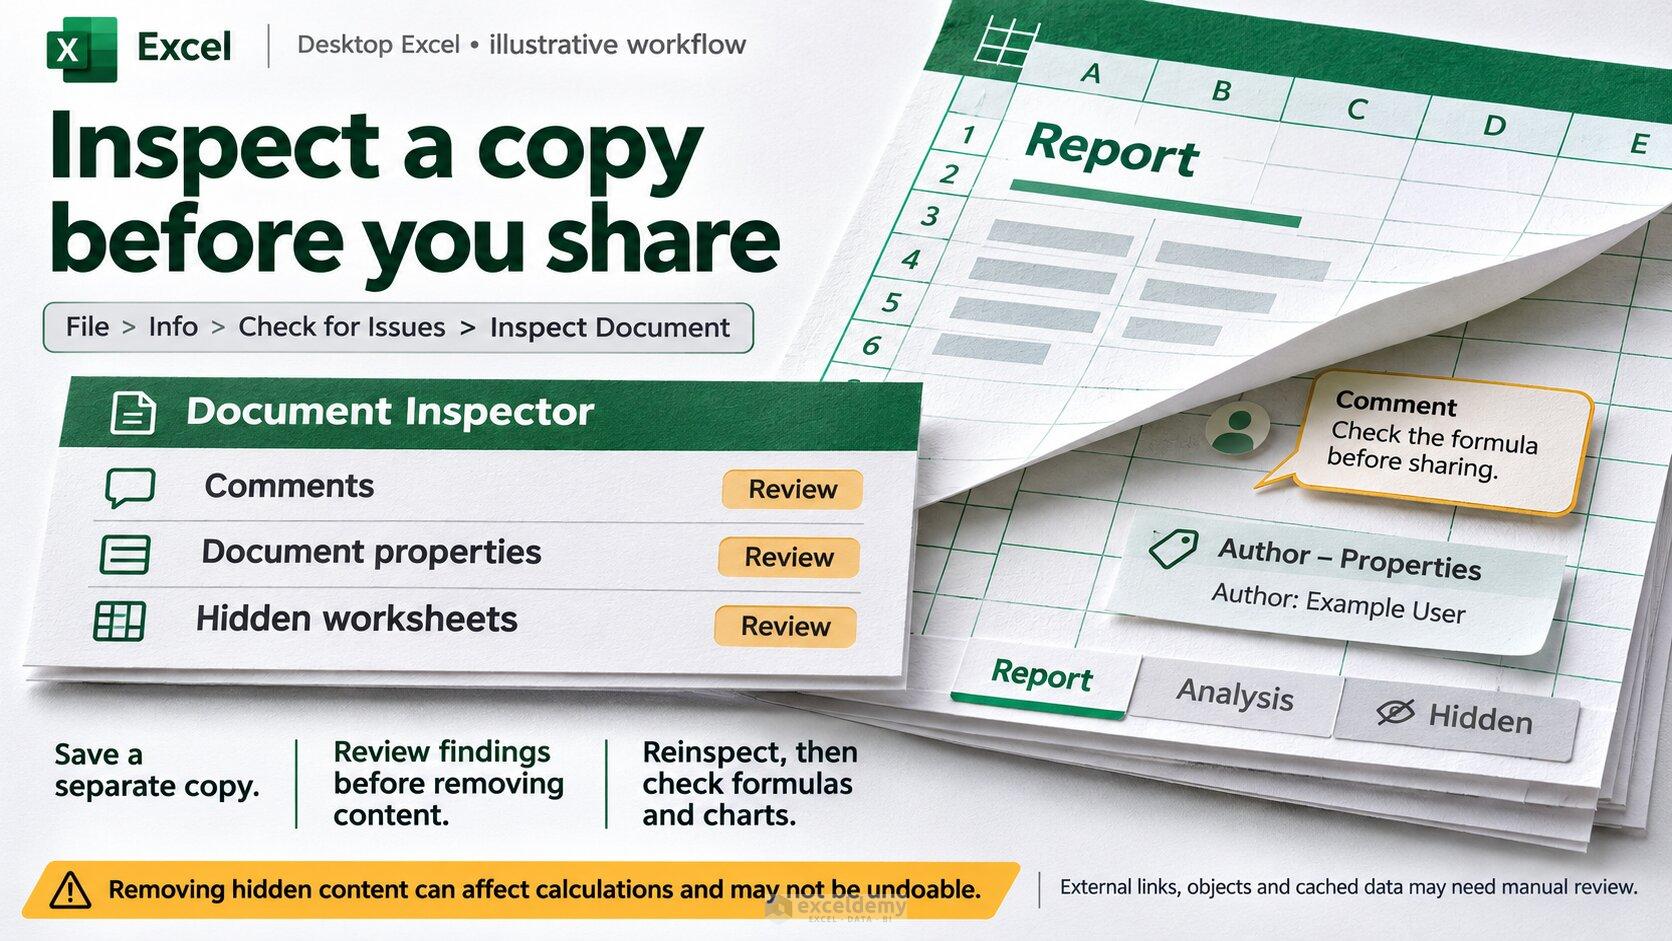
Inspect a copy before you share
One of Excel’s most overlooked risks is sharing information that isn’t immediately visible.
A workbook may contain hidden worksheets, comments, document properties, personal information, and references to external files.
For example, a client-facing report might include a hidden worksheet with internal cost calculations. Excel also has a “very hidden” worksheet state that doesn’t appear in the normal right-click Unhide list. It can only be changed in the Visual Basic Editor (Alt + F11) by selecting the sheet and changing its Visible property in the Properties window. If a workbook came from someone else, check there as well.
Metadata is another quiet leak. Open File > Info and look at the Properties panel, where fields such as Author and Last Modified By may reveal names or usernames. You can also enable File > Options > Trust Center > Trust Center Settings > Privacy Options > Remove personal information from file properties on save.
PivotTables deserve a second look. A PivotTable may store a cached copy of its full source data inside the file, even if you delete the source sheet and only a summary is visible. In PivotTable Options > Data, clearing Save source data with file reduces that exposure, though you will need to refresh the PivotTable after reopening it.
Before sharing, save a separate copy of the workbook. Then, in desktop Excel:
- Open File > Info.
- Select Check for Issues > Inspect Document.
- Choose the categories you want to inspect, such as comments and notes, document properties and personal information, hidden rows and columns, hidden worksheets, and custom XML data.
- Select Inspect and review the findings.
- Remove unnecessary information from the copy, then run the inspection again.
Review each finding before removing anything. Deleting hidden rows, columns, or worksheets may affect formulas, charts or calculations, and some changes cannot be undone through Excel’s usual Undo function.
After cleaning the file, check that its formulas, charts, and totals still work as expected.
Document Inspector also has limitations. It cannot automatically remove every type of hidden content, so external links, embedded objects, and certain cached data may need manual review.
4. Understand What Excel Password Protection Actually Does
Excel provides several protection options, but they solve different problems.
File encryption helps prevent someone from opening a workbook without the password. In current versions of Excel, encrypted .xlsx files use AES-256 encryption, so the contents are scrambled in the file itself rather than merely hidden behind a prompt.
In desktop Excel for Windows, you can enable it through File > Info > Protect Workbook > Encrypt with Password. A related option, File > Save As > Tools > General Options, lets you set a separate Password to open and Password to modify. The modify password only controls whether someone can save changes to your file, so it is not a substitute for encryption.
Choose a strong password and store it securely. Microsoft cannot recover a forgotten file-encryption password, so make sure you have a reliable way to retain it.
If you’re sending an encrypted file to someone else, communicate the password through a separate, trusted channel.
Worksheet protection serves another purpose. It can help prevent colleagues from accidentally changing formulas or locked cells. Cells are locked by default, but the lock only takes effect once you switch on Review > Protect Sheet. To leave input cells editable, unlock them first through Format Cells > Protection, or use Review > Allow Edit Ranges to define specific editable areas. You can also tick Hidden in the same Protection tab to stop formulas showing in the formula bar on a protected sheet.
Workbook structure protection restricts actions such as adding, deleting, or renaming worksheets.
Neither worksheet protection nor simply hiding a tab is a reliable way to keep sensitive data confidential. Worksheet and workbook-structure passwords are not encryption. The protection settings sit in the file’s XML and can be removed with freely available tools, and the data stays readable to software that opens the file without Excel.
For sensitive information, prioritise appropriate file encryption, restricted sharing and removing data that recipients don’t need. If your organisation uses Microsoft Purview, the Sensitivity button on the Home tab can apply a sensitivity label that enforces encryption and usage rights, so check whether it is available to you.
5. Review Formulas, External Links And Macros
An Excel file can depend on other workbooks or external data sources.
Before sharing, check whether formulas reference local folders, internal network drives, or confidential workbooks.
In desktop Excel, review Data > Queries & Connections for external data sources. Also check Workbook Links or Edit Links, depending on your Excel version, for references to other workbooks.
External references may appear in formulas, defined names, charts, or other workbook elements, so checking visible cells alone may not be enough. As a quick search, press Ctrl + F, click Options, set Within to Workbook and Look in to Formulas, then search for “[” or “.xls”, since references to other workbooks appear in the form [Book.xlsx]. Then open Formulas > Name Manager and scan the Refers To column for paths or file names. Charts and data validation rules can also point to other files.
A recipient may receive errors when referenced files aren’t accessible. Certain links or cached data may also reveal information about your internal workflow.
If the recipient needs only the final figures, consider supplying a separate copy containing values rather than live external references. Copying the range and using Paste Special > Values (Ctrl + Alt + V) converts formulas to static numbers, while Break Link in Edit Links turns external references into their last stored values. Check the results afterwards, especially if charts or other calculations depend on them.
Be cautious with macro-enabled workbooks (.xlsm), especially files received from unfamiliar senders. A standard .xlsx file cannot contain macros, so saving a copy in that format strips VBA code, though you should confirm the workbook still works without it.
Never enable macros simply because a downloaded spreadsheet tells you to do so. Excel opens files from the internet in Protected View, and Microsoft blocks macros in downloaded Office files by default in current versions. Confirm the source and whether the automation is necessary before changing any Trust Center macro settings.
6. Prevent Accidental Changes During Collaboration
When several people edit the same spreadsheet, mistakes can happen even without malicious activity.
For shared project trackers, clearly identify which columns employees should update.
You can use worksheet protection to reduce accidental changes to important formulas while leaving designated input cells editable. Adding data validation (Data > Data Validation) to those input cells, such as a drop-down list or a number range, also stops bad entries from breaking totals.
For collaborative files stored on OneDrive or SharePoint, supported versions of Excel allow multiple users to work on the same workbook with AutoSave switched on.
Make sure everyone uses an Excel version that supports co-authoring and that the workbook is saved in a compatible format, normally .xlsx. Older formats such as .xls and some features, including certain legacy sharing options, can prevent co-authoring.
Encourage colleagues to avoid creating separate, conflicting copies such as Budget_Final_v3_Updated.xlsx.
Where supported, use version history (File > Info > Version History) to review previous changes and recover an earlier version when necessary. In Microsoft 365, you can also use Review > Show Changes to see who edited which cells in a co-authored workbook.
Version history can help correct mistakes, but it isn’t a substitute for access controls or a complete audit of how information has been used.
For critical reports, assign someone responsibility for checking the final numbers before publication or distribution.
7. Review And Remove Access When Projects End
Sharing a workbook shouldn’t mean giving someone access forever.
Once a project finishes, review who can still open the file.
In OneDrive or SharePoint, use the available access-management controls, such as Manage Access, to remove individuals or disable sharing links that are no longer needed.
Pay particular attention to external contractors, former employees, and temporary collaborators.
If someone still has access after a sharing link is removed, check whether their permissions come from a shared folder, group or SharePoint site.
If a spreadsheet contains sensitive financial or customer information, follow your organisation’s data-retention policy rather than leaving unnecessary copies scattered across personal devices and cloud folders.
Remember that revoking access to a shared cloud file generally cannot retrieve copies someone has already downloaded.
That makes careful sharing decisions important from the beginning.
Quick Checklist: Which Excel Protection Should You Use?
| Your Goal | Recommended Approach |
|---|---|
| Stop unauthorised people opening a file | File-level password encryption |
| Let a client view a report without editing it | Restricted sharing with view-only permissions |
| Limit downloading where supported | Review additional download restrictions |
| Prevent accidental changes to formulas | Worksheet protection |
| Remove personal details and hidden content | Document Inspector and manual review |
| Check external workbook references | Queries & Connections and Workbook Links |
| Collaborate without emailing multiple copies | OneDrive or SharePoint co-authoring |
| End a contractor’s access | Review direct, inherited, and link-based permissions |
Final Thoughts
Sharing Excel files safely is about more than adding a password.
Start by sending only the information recipients need. Review hidden content, choose appropriate sharing permissions, protect sensitive files, and keep control of who can access them.
A few checks before pressing Share can prevent data exposure, reduce confusion, and make everyday spreadsheet collaboration much easier.
Get FREE Advanced Excel Exercises with Solutions!