Method 1 – Decide Which Accounting Method You Will Use
- Businesses primarily employ two accounting techniques: Accrual Accounting and Cash Accounting.
- The Cash Accounting method requires you to record income and outlays as they are paid or received.
- Revenues and costs are tracked using accrual accounting when earned or incurred.
- We chose the Cash Accounting method.
Method 2 – Choose a Suitable Entry System
You need to be careful when choosing the entry system, as it affects the way you operate your economic affairs and your bookkeeping procedures.
- 2 Entry systems you can choose from- Single and Double entry systems.
- Single Entry system, you will record all your transactions only once as an expense or an income. This approach is simple and appropriate for smaller companies without substantial inventories or capital equipment investments.
- To “balance the books” between accounts, the Double Entry system records each transaction twice, once as a debit and once as a credit. It can avoid mistakes in transaction recording despite being more challenging.
- For a small, straightforward business with few transactions, single-entry bookkeeping is an excellent option.
Method 3 – Create a Chart of Accounts
NOTE
- A chart of accounts is the very first spreadsheet you need to build. The accounts that are set up in your bookkeeping system are listed here.
- A chart of accounts makes it possible to keep track of all financial operations.
- As you enter transactions, they are classified into one of the categories represented by each account mentioned on this sheet.
- The accounts in a template are typically already stated, but you will probably need to make some adjustments to make it work for your business.
- You should identify the kind (revenue, expense, or cost of items sold) and a number for each account.
- You can also include a succinct description once you begin recording.
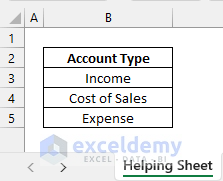
- Create a Helping Sheet and a list of account types. The account types here are Income, Cost of Sales, and Expense.
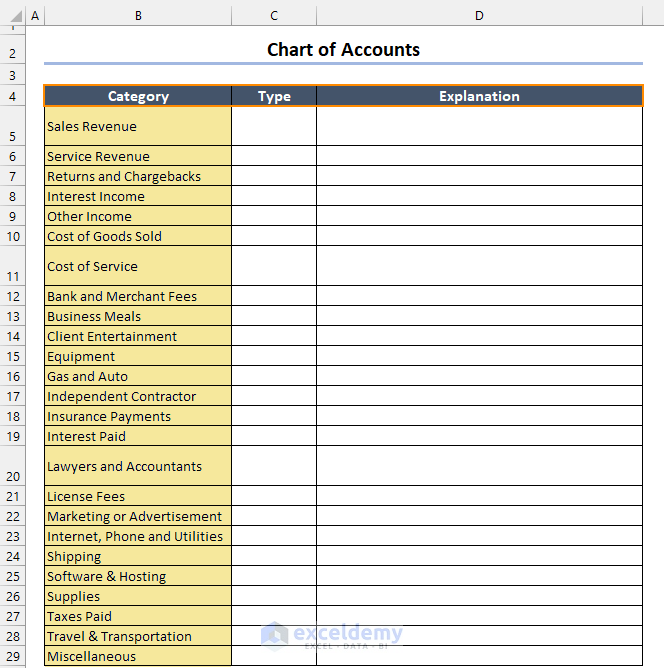
- Create a separate sheet and make a detailed list of different types of transaction items. This list will be called the Chart of Accounts.
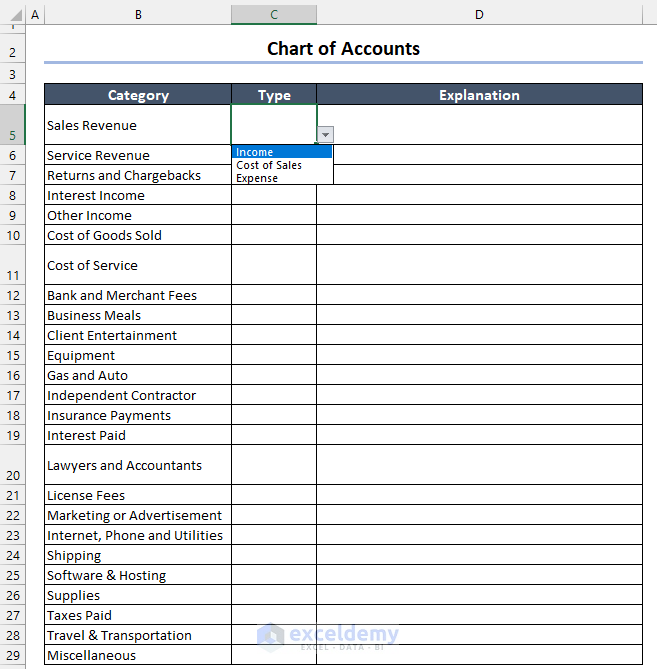
- Create 2 more columns named: Type and Explanation. Assign the types of accounts in a drop-down list from the helping sheet and give a brief explanation of the items in the 3rd column.
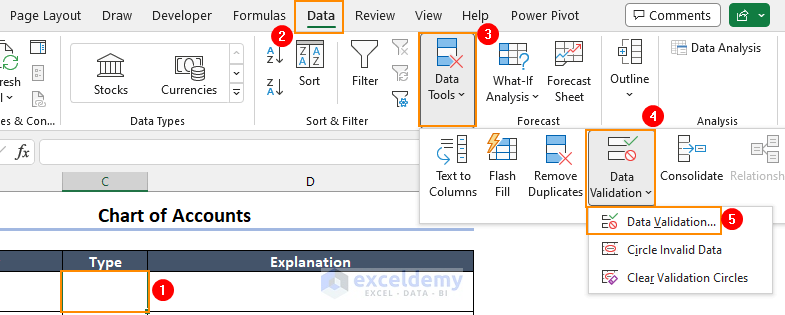
- To create a drop-down list, select a cell in the Type column and follow the steps below:
Data tab ⇒ Data Tools group ⇒ Data Validation drop-down ⇒ Data Validation button
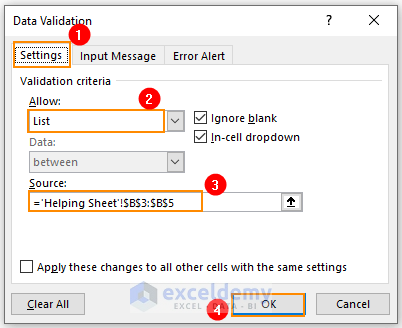
- From the Data Validation window, go to the Settings section and then select List in the Allow box.
- Select the source data. The source data is:
='Helping Sheet'!$B$3:$B$5- Then press OK.
- A drop-down list will be created like the following image.
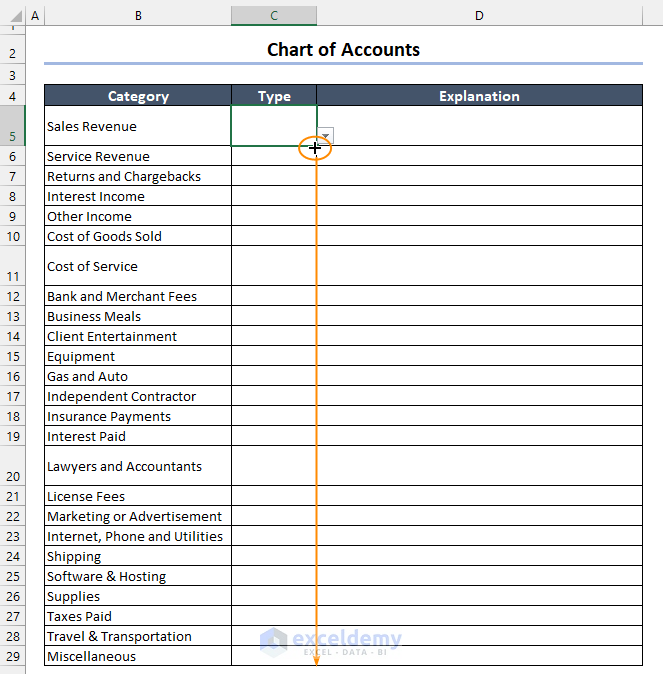
- Drag the fill handle icon down to copy this drop-down list in the cells below.
- Choose a suitable account type for each of the categories, and add your own explanation. This may look like the following image.
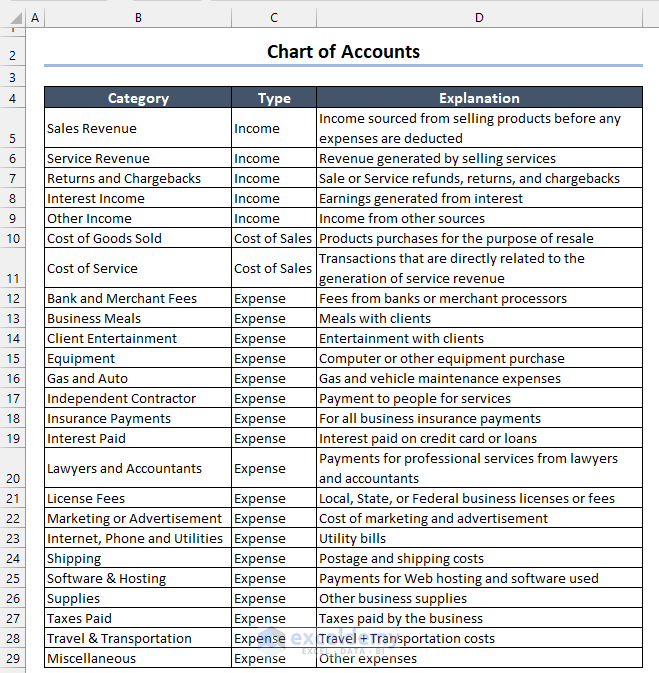
Note that these categories are not fixed. Modify this column according to your business types and other suitable factors.
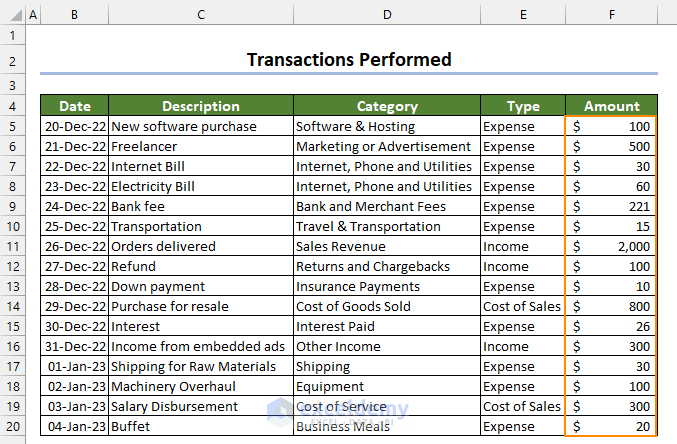
Method 4 – Create a Transaction Sheet
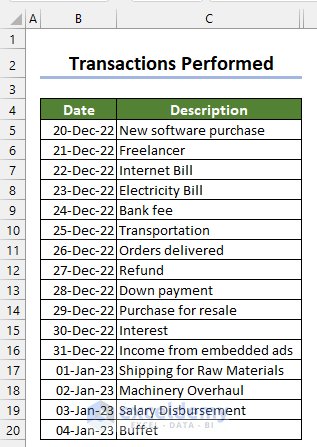
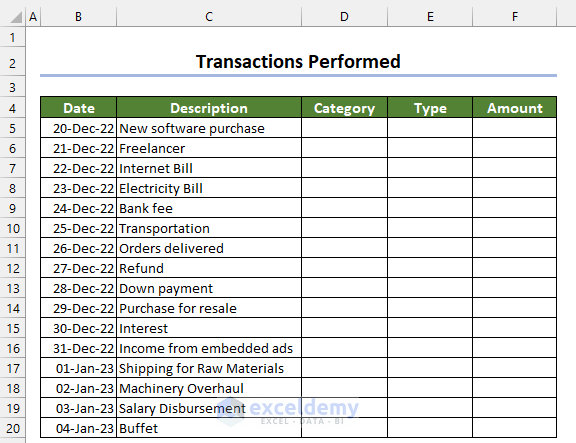
- Create a new sheet and name it Transaction sheet.
- List all the transactions we have performed in a specific time span.
- We performed the following transactions from Dec 20, 2022, to Jan 4, 2023.
- Record them well and create 3 more columns: Category, Type, and Amount.
- In Step 3, create another drop-down list for the category column. The source data will be:
='Chart of Accounts'!$B$5:$B$28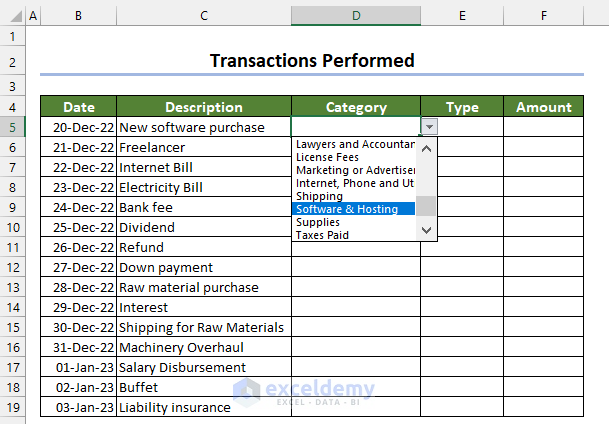
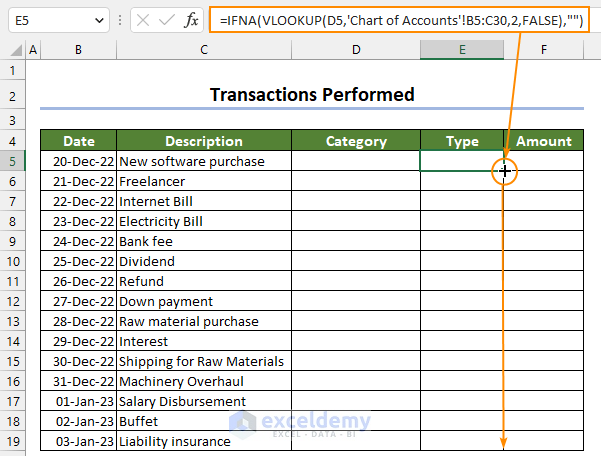
- Go to cell E5 of the Type column and enter the following formula:
=IFNA(VLOOKUP(D5,'Chart of Accounts'!$B$5:$C$30,2,FALSE),"")This formula will automatically assign the account type when you select a Category from the drop-down list.
- Selecting all the Categories and Types, the sheet will look as follows:
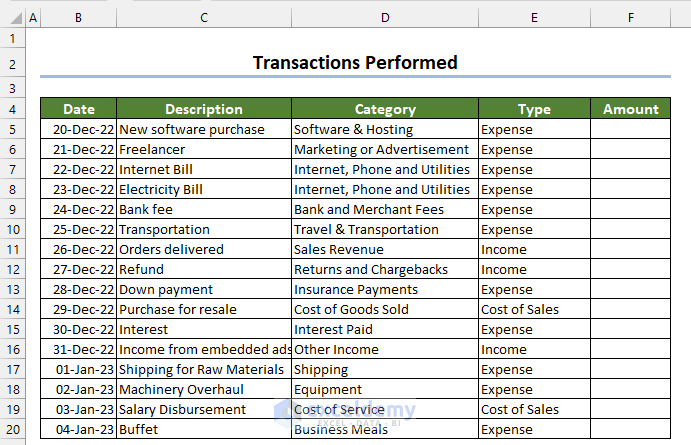
- Record the amount of the transactions in the Accounting format of Excel.
Method 5 – Create a Revenue Sheet
- Create another sheet, and name it a Revenue sheet.
- In this sheet, set a date range in cells E5 and E6.
- Write the following formula in cell B9.
=FILTER(Transactions!B5:F20,(Transactions!B5:B20>=Revenue!E5)*(Transactions!B5:B20<=Revenue!E6)*(Transactions!E5:E20='Helping Sheet'!B3))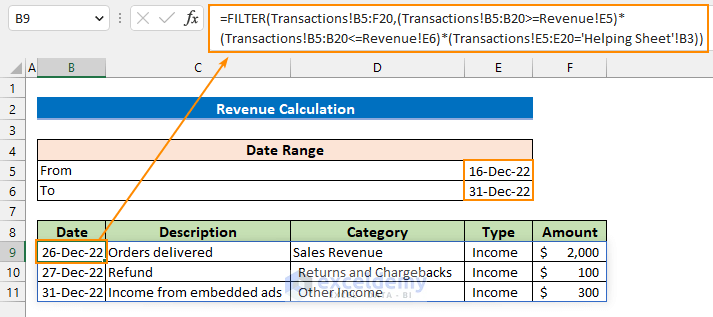
- This formula will return all the data (Description, Category, Type, and Amount in this date range) from the Transactions sheet.
- Create another column for Total Income, and enter the following formula in cell H9.
=SUM(F:F)
Method 6 – Create Cost of Sales and Expense Sheets
- Create two more sheets: Cost of Sales and Expense sheets.
- For the Cost of Sales sheet, the formula will be:
=FILTER(Transactions!B5:F20,(Transactions!B5:B20>=Revenue!E5)*(Transactions!B5:B20<=Revenue!E6)*(Transactions!E5:E20='Helping Sheet'!B4))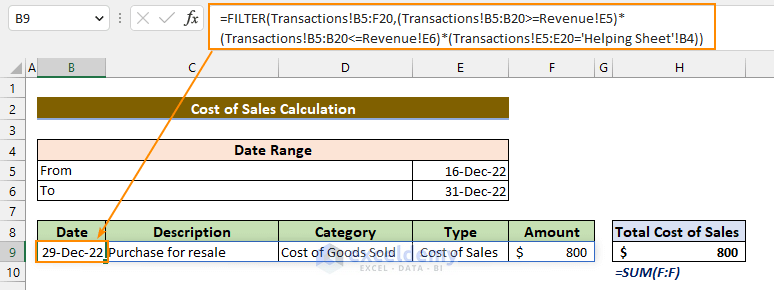
- For the Expense sheet, the formula will be:
=FILTER(Transactions!B5:F20,(Transactions!B5:B20>=Revenue!E5)*(Transactions!B5:B20<=Revenue!E6)*(Transactions!E5:E20='Helping Sheet'!B5))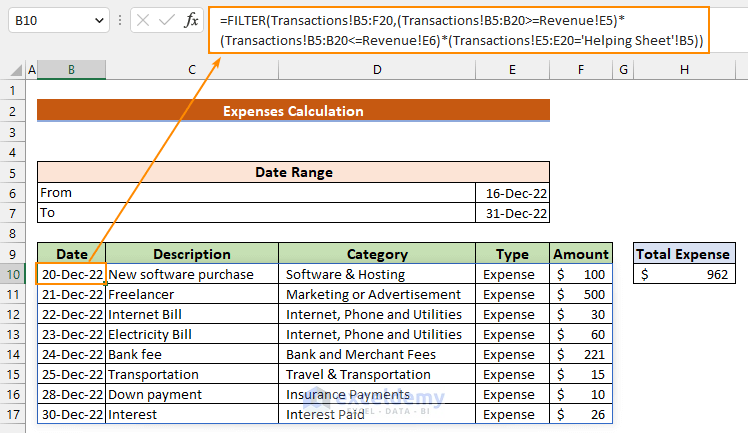
- Just like the 5th step, add them up using the SUM function.
Last Step: Create a Sheet to Calculate Profit or Loss
- Add one more sheet to calculate Profit or Loss.
- The Gross Profit or Loss = Revenue-Cost of Sales
Excel Formula:
=Revenue!H9-'Cost of Sales'!H9- The Net Profit or Loss = Gross Profit or Loss-Expense
Excel Formula:
='Profit or Loss'!C4-Expense!H10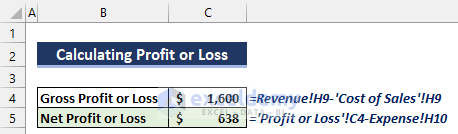
Download Practice Workbook
You can download the following practice workbook to practice while reading this article.
Related Articles
- How to Create an Order Form in Excel
- How to Create a Cash Book in Excel
- Excel Test for Accounting Interview
- Advanced Excel Test
- How to Create Invoice in Excel with Database
<< Go Back to Excel for Accounting | Learn Excel
Get FREE Advanced Excel Exercises with Solutions!

Thank you for the information it is useful but hope to continue to learn from you more
Hi, Bosco!
Thanks for your appreciation. To get more informative contents stay in touch with ExcelDemy.
Regards
ExcelDemy
Thank you so much for this information! It is the best explanation and image instructions I have found on the internet.
Hello Gayla,
You are most welcome. Thanks for your feedback. Glad to hear that you really liked our instructions and explanations.
Keep exploring Excel with ExcelDemy!
Regards,
ExcelDemy