The sample dataset showcases the transaction history of a shop.
Template 1- Maintaining Expense Accounts for a Shop in Excel Sheet
Steps:
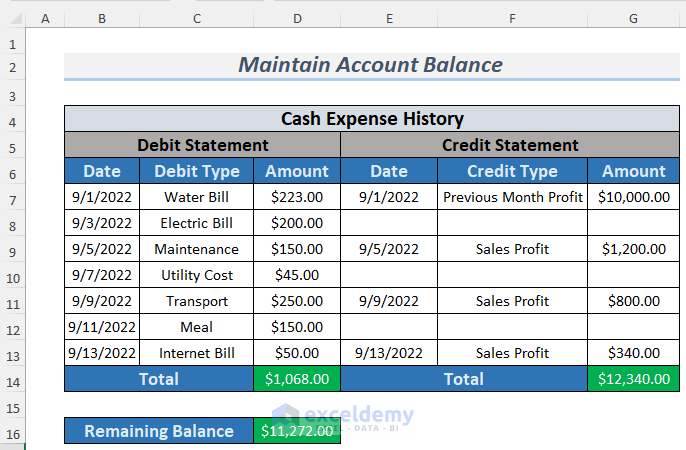
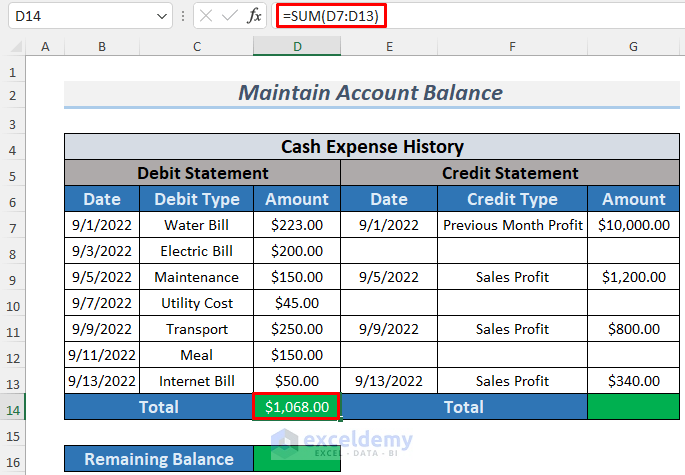
- Create a chart as shown below.
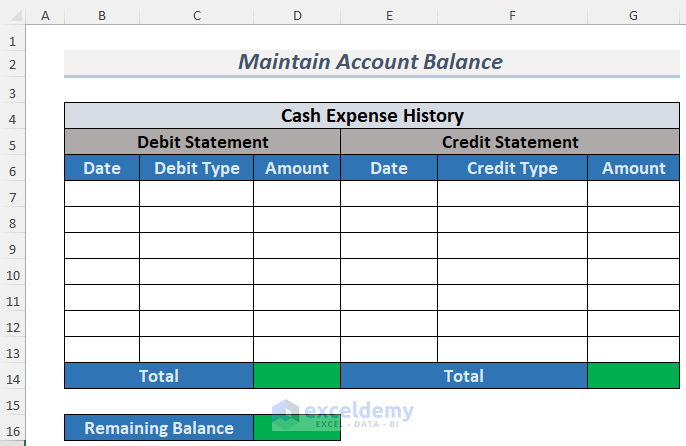
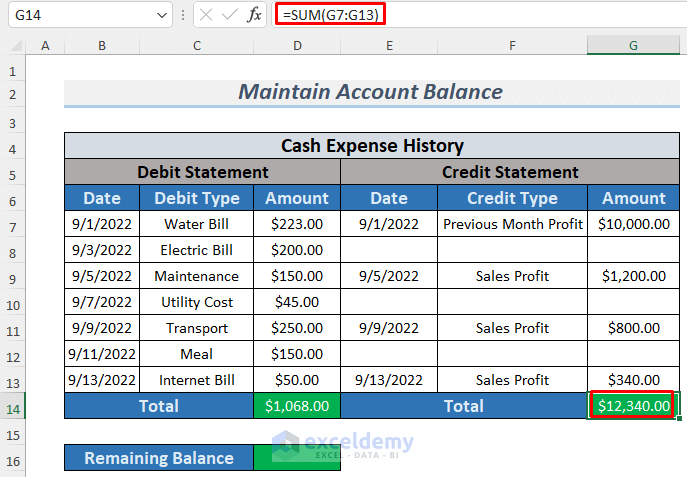
- Enter account data.
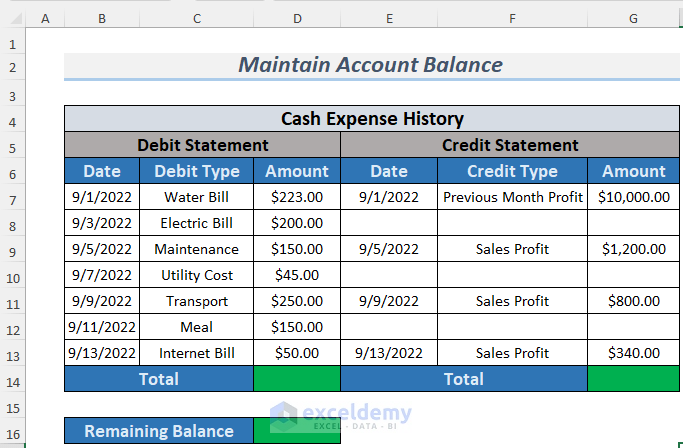
- Use the following formula to calculate the total debit amount.
=SUM(D7:D13)
- Calculate the credit amount as shown below.
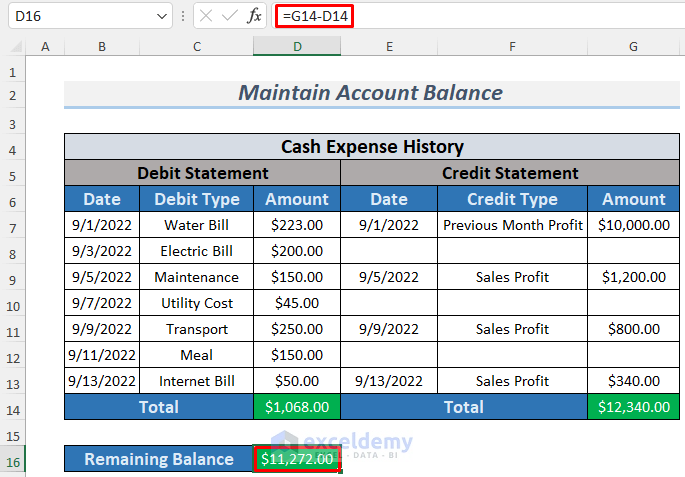
- Enter the formula to determine the remaining balance.
=G14-D14
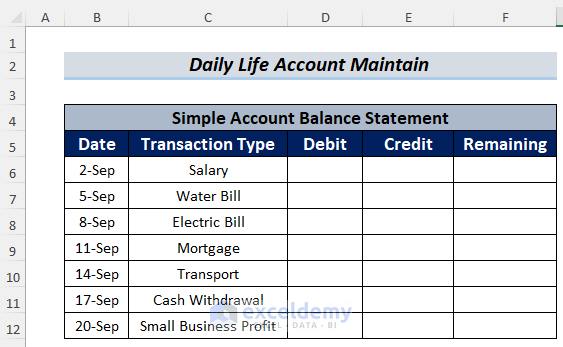
Template 2 – Maintaining Daily Life Accounts in Excel
Steps:
- Create a chart as shown below.
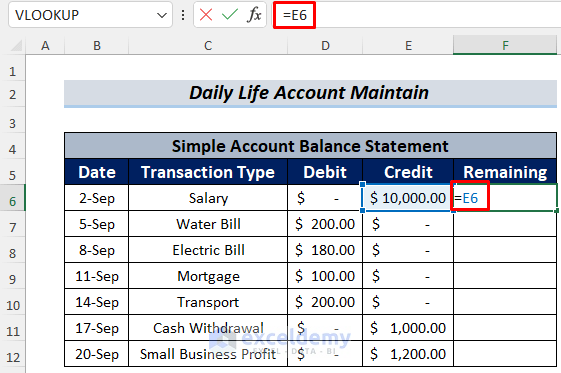
- Enter the transaction data and store the value of E6 in F6 by using the following formula.
=E6
- Press ENTER.
- Use this formula in F7.
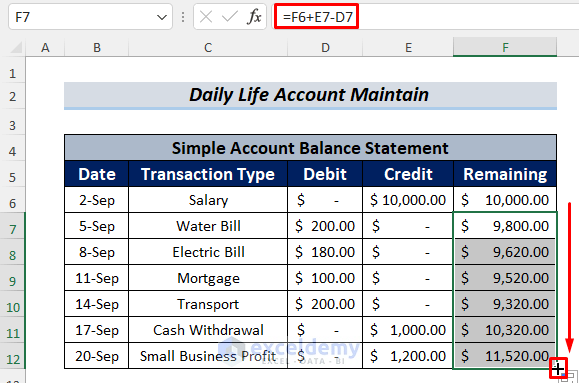
=F6+E7-D7
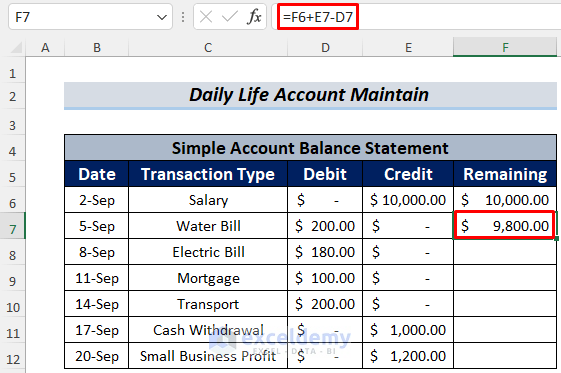
The formula will show you the remaining balance.
- Drag down the Fill Handle to see the result in the rest of the cells.
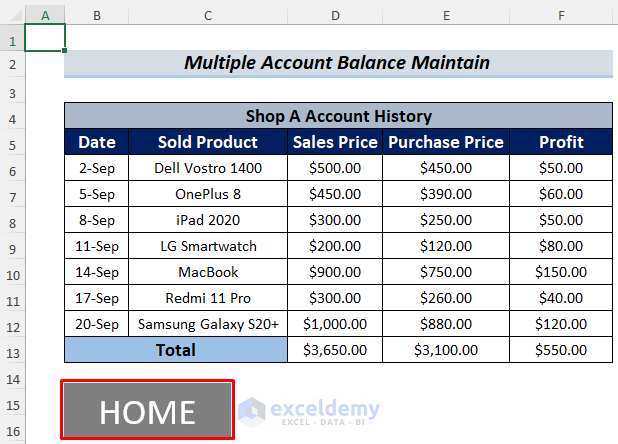
Template 3 – Managing Multiple Accounts in an Excel Sheet
Steps:
- Two Excel sheets will be used. One for the selection of a shop (here, Home) and the other to store the account history .
- Insert a new sheet and go to Insert >> Text >> WordArt.
- Use Buttons or Shapes.
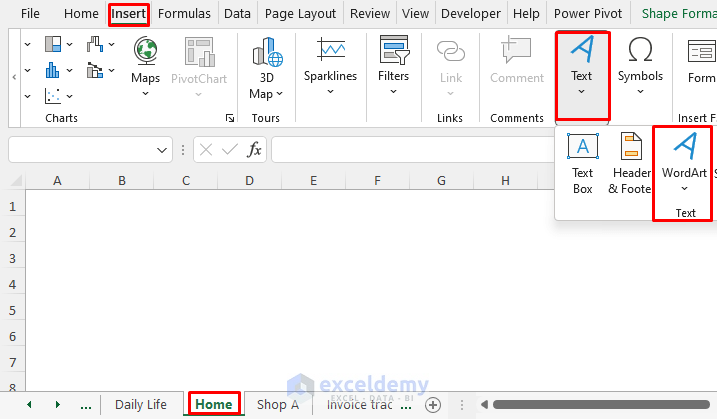
- Create WordArts. Here, two.
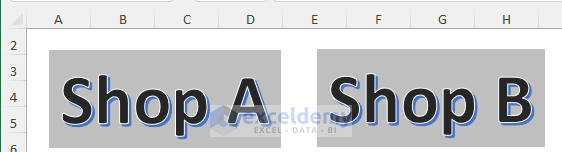
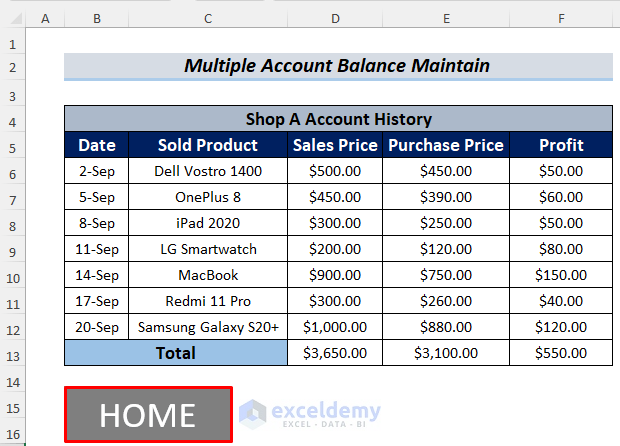
- Create your Excel chart for account maintenance in a new sheet (here, Shop A).
- Use the SUM function as described in the previous method to calculate the total amounts.
- Create another WordArt (HOME) which will be linked to the Home sheet.
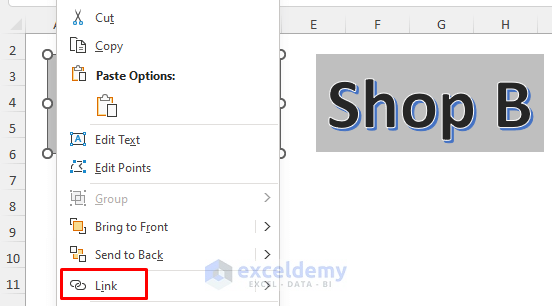
- Go back to the Home sheet and right-click Shop A WordArt.
- Select Link.
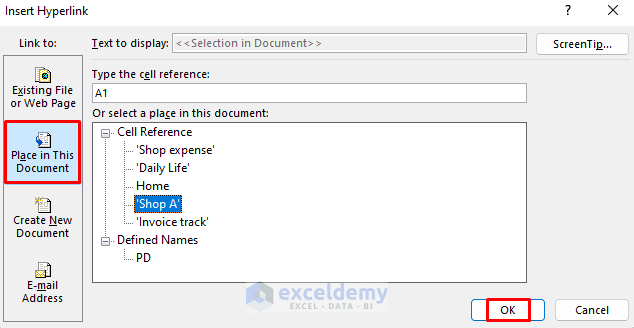
- In Insert Hyperlink, select Place in This Document >> Cell Reference >> Shop A.
- Click OK.
- Click the Shop A WordArt to go to Shop A.
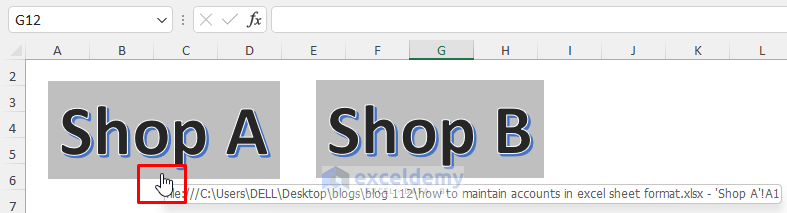
- Link the HOME WordArt to Home.
Template 4 – Maintaining Accounts by Keeping an Invoice History in Excel
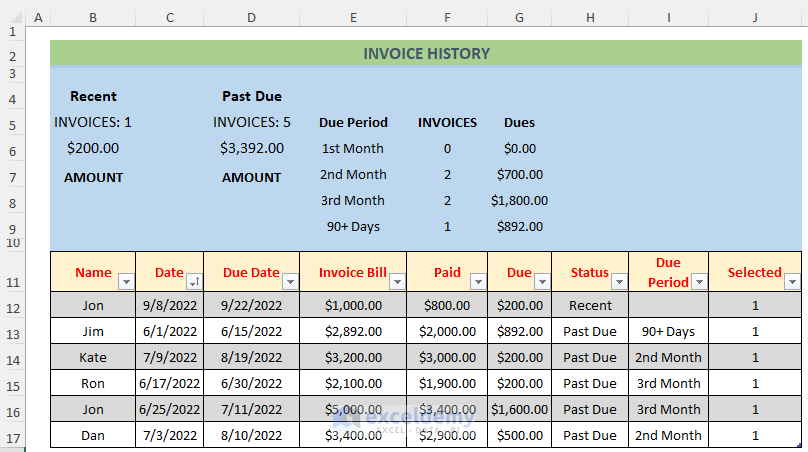
Download the template and use it.
The Due Period refers to the time between the Due Date and the Present Date. For example, Jim’s Due Date was 15th June, which is more than 90 days from the present date. So, the Due Period will be +90 Days. If the Due Date is posted to the present date, the Due Status will be Recent. Otherwise, it will be Past Due. The blue area shows a summary of the Invoice History.
Download Practice Workbook
How to Maintain Accounts in Excel: Knowledge Hub
<< Go Back to Excel for Accounting | Learn Excel
Get FREE Advanced Excel Exercises with Solutions!

Thank you so much. You have assisted me allot of learning excel account.
Hello Ayub,
You are most welcome. Thanks for your feedback and appreciation. Glad to hear that our assistance helped you to learn Excel account.
Regards
ExcelDemy