
Image by Editor
Microsoft Word is one of the most popular tools for managing documents. It has powerful tools to ensure proper text placement, formatting, and page control. It helps to create well-structured documents that are easier to read and present professionally.
In this article, we will show how to control text placement and page breaks to master document flow in Word.
1. Using Paragraph and Line Spacing
To maintain document flow proper paragraph and line spacing is a must. It enhances the document readability.
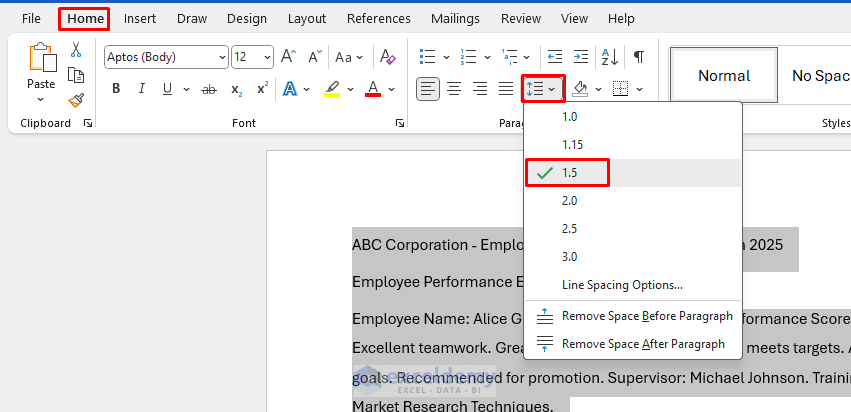
Adjust Line Spacing:
- Select all text >> press Ctrl + A.
- Go to the Home tab >> from Paragraph >> select Line Spacing.
- Choose options like 1.0 (single), 1.5, or 2.0 (double spacing).
Control Space Before and After Paragraphs:
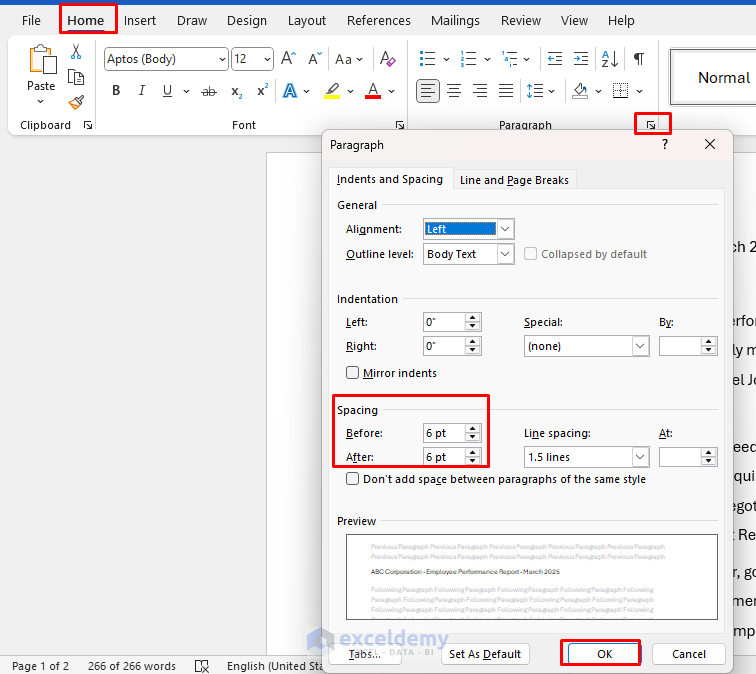
- Click Paragraph Settings (small arrow in the Paragraph group).
- Set Spacing to create clear gaps between sections. Modify the spacing before and after a paragraph to control text density.
- Before: 6 pt
- After: 6 pt
2. Use Headings, Indents, and Alignment for Text Placement
Apply Headings:
- Select the sentence.
- Go to the Home tab >> from Styles >> select Heading.
- Apply Heading 2,3, etc. based on priority.

Indent First Line:
- You can use Tab or adjust settings.
- Go to the Home tab >> from Paragraph >> select Indents and Spacing.

Hanging Indents:
- For citations, you can use the special indent.
- Go to the Home tab >> from Paragraph >> select Special Indent >> select Hanging.
Alignment Options:
- Go to the Home tab >> from Paragraph >> select Alignment.
- Select Left, Center, Right, or Justify.

3. Use Bullet Points for Clarity
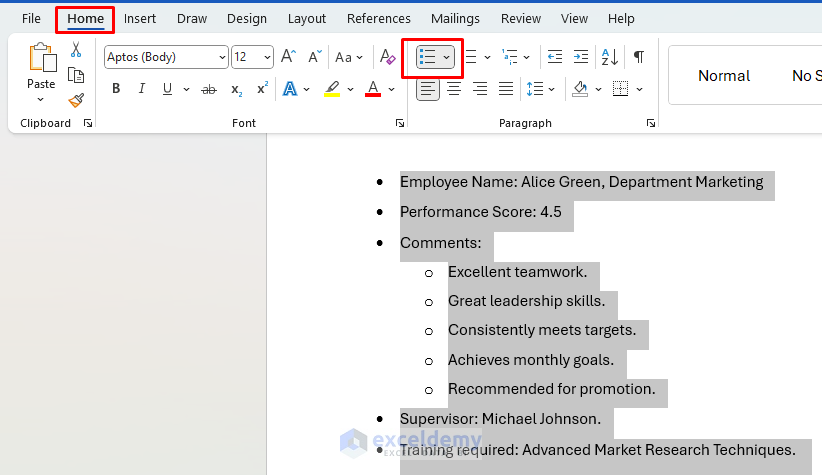
You can use bullet points to make information easier to read.
- Select sections.
- Go to the Home tab >> select Bullet List.
- Choose a clean, professional bullet style.
4. Using Page Breaks for Better Flow
Page breaks help to avoid unwanted text movement when you edit content.
Insert a Manual Page Break:
- Go to Insert tab >> select Page Break.
- Or press Ctrl + Enter.

Use Section Breaks:
- Go to the Layout tab >> select Breaks, then choose from:
- Next Page: Starts a new section on the next page.
- Continuous: Creates a section break without starting a new page.
- Even/Odd Page: Forces text to start on an even/odd-numbered page.

5. Keeping Text Together
To avoid unwanted splitting of important text across pages, you can use the Line and Page Breaks option.
Keep Paragraphs Together:
- Select the paragraph.
- Go to Layout tab >> from Paragraph >> select Line and Page Breaks.
- Select Keep with next.
Prevent Widows and Orphans:
- Select Widow/Orphan control to avoid single lines at the top or bottom of pages.

6. Use Tables and Text Boxes for Precise Placement
The table helps to categorize data and give a clear view. To place any specific paragraph in a certain position you can us ethe text box.
Insert Tables:
- Go to the Insert tab >> select Table.
- Then adjust row and column sizes to position the text precisely.

Insert Text Boxes:
- Go to the Insert tab >> select Text Box to move text anywhere on the page.

7. Work with Columns for Multi-Column Layouts
Add Columns:
- Go to the Layout tab >> select Columns and choose the desired format.
Adjust Column Width and Spacing:
- Use More Columns under the same menu to fine-tune the layout.

8. Use Headers, Footers, and Page Numbers
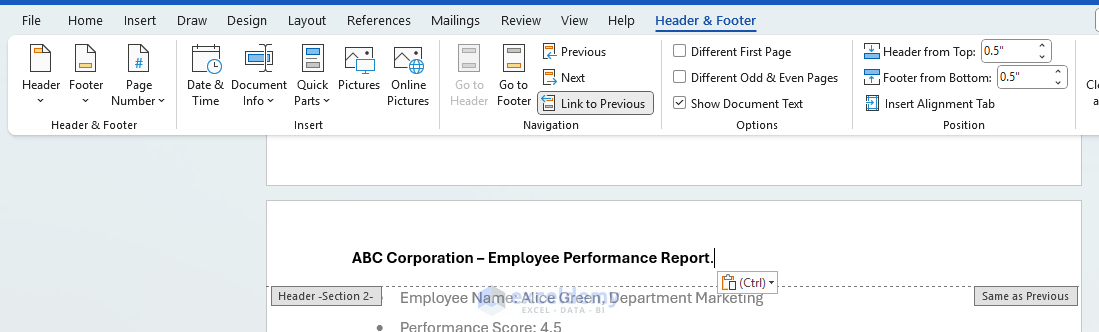
Insert Headers and Footers:
- Click Insert tab >> select Header & Footer.
- Select a professional header style.

- In the header, type:
- ABC Corporation – Employee Performance Report.
Control Header/Footer Placement:
- You can use Different First Page or Different Odd & Even Pages for varied layouts.

Insert Page Numbers:
- Go to the Insert tab >> select Page Number >> choose Position.

9. Use Text Wrapping for Images and Objects
Wrap Text Around Objects:
- Select an image.
- Go to the Picture Format tab >> select Wrap Text and pick a layout.
Position Images Freely:
- Go to the Layout Options tab >> select Move with Text or Fix Position on Page.
10. Use Styles for Consistency
Apply Styles:
- Go to the Home tab >> select Styles to format text consistently.
Modify Styles:
- Right-click a style and choose Modify to customize.
Conclusion
Mastering text placement and page breaks in Word will enhance document clarity and professionalism. By following the above techniques, you can control how your content flows, ensuring a polished final product. Explore and practice these techniques and features to become proficient in structuring well-organized documents.
Get FREE Advanced Excel Exercises with Solutions!
