An Excel Event Calendar is a tool that tracks and schedules events, meetings, and appointments in a calendar format. It can be a useful tool for individuals and organizations who need to keep track of multiple events and commitments. In this article, I will explain step-by-step procedures to create an event calendar in Excel. I hope it will be very helpful for you if you are looking for an efficient way to do so.
How to Create Event Calendar in Excel: with Easy Steps
In order to create an event calendar, I have used many Excel functions such as MATCH, DATE, WEEKDAY, etc. Let’s dive into detail.
Step 1: Create an Event List to Create an Event Calendar
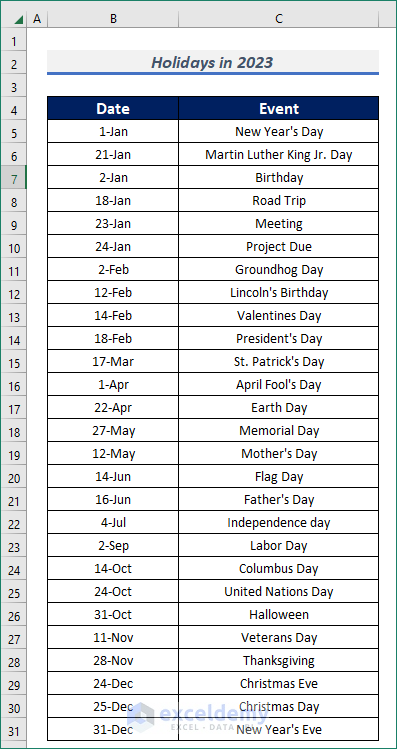
- If we want to create an event list, we need to have a proper event list first. For the creation of a holiday list across the year in 2023, I have arranged all the holidays along with dates in the Date and Event columns.
Step 2: Arrange Months in a List to Create an Event Calendar
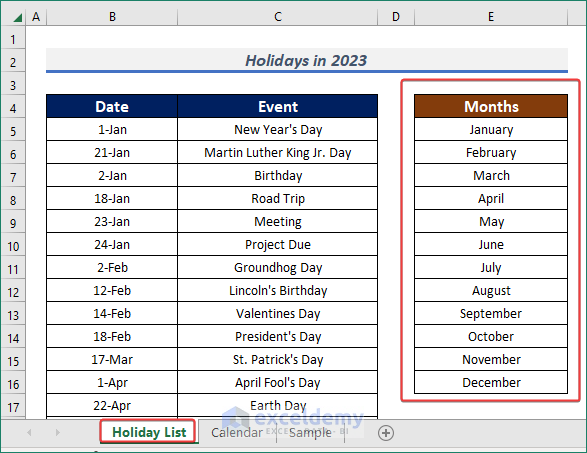
- As I have to create an event list across the year, I need to have the month’s name in the list. So, I created a list named Month with all the month’s names. Later it’ll come in handy.
Step 3: Create a Yearly Calendar
I have divided the whole calendar creation process into several small sections for better understanding. They are described in the following section.
3.1 Create a Calendar Format
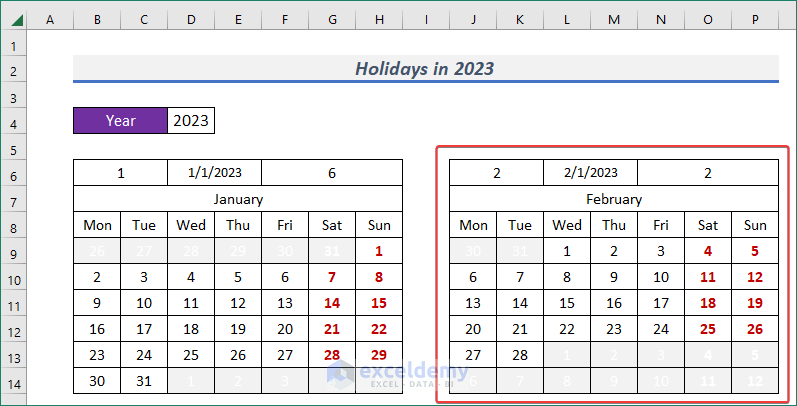
- Insert the year’s name in your preferred location.
- Then, use the following formula to auto-update it in the title.
="Holidays in " & $D$4
- Next, create a calendar format with the day’s names on it.
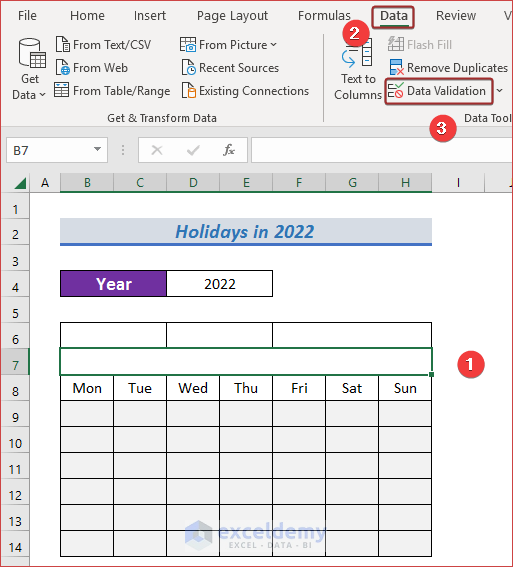
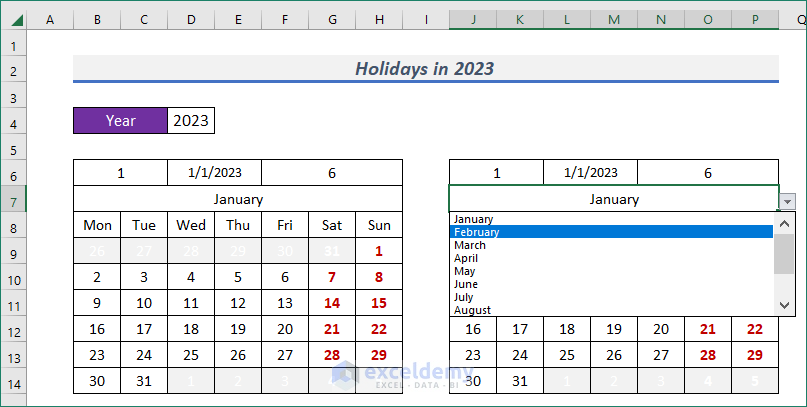
- After that, create a drop-down list with months. For this, select a cell (i.e. B7) and go to Data Validation from the Data

- A Data Validation wizard will appear.
- Go to Settings.
- Then, select List from Allow and month’s names from the Month column which is in Holiday List named sheet.
- Press OK to finish the drop-down creation process.

- Now, we can see the drop-down list with months.

- Afterward, apply the following formula to have the month’s index defined from the drop-down.
=MATCH(B7,'Holiday List'!$E$5:$E$16,0)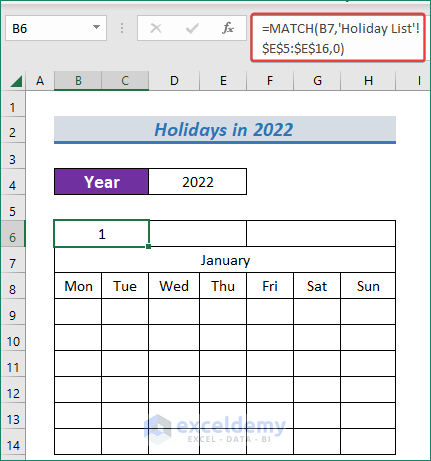
- To have the first date with the defined month from the drop-down of the year, use the following formula.
=DATE($D$4,B6,1)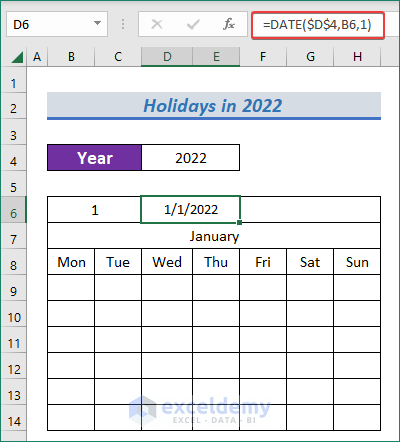
- Insert the following formula to find the day’s index number where I have considered Monday as 0 and Sunday as 6.
=WEEKDAY(D6,3)
Read More: How to Create Calendar with Time Slots in Excel
3.2 Insert Dates to Calendar
- Insert the following formula to have the first date in the first cell of the calendar.
=D6-F6- Here, D6 represents the first date of that month and F6 defines the first day’s index number.

- Apply the formula mentioned below to have the next date in the calendar.
=B9+1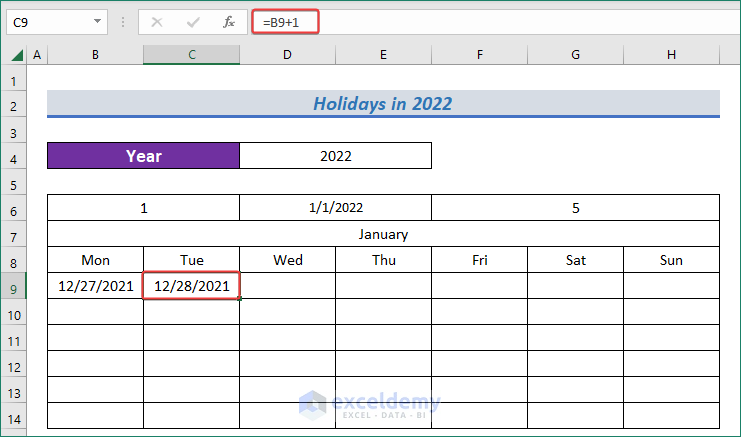
- Now, use Fill Handle to AutoFill the horizontal cells.
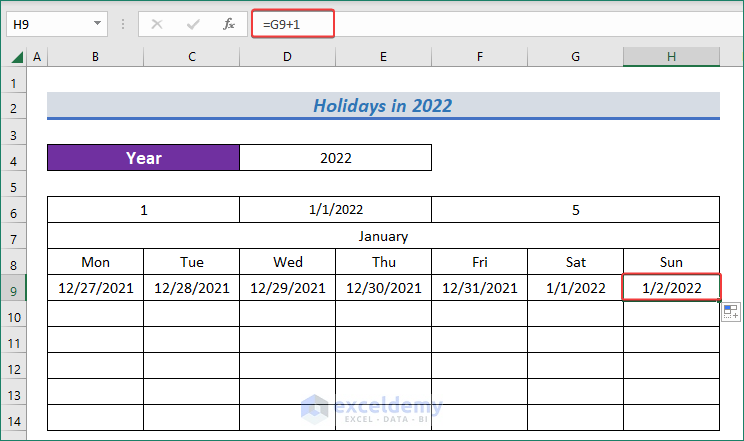
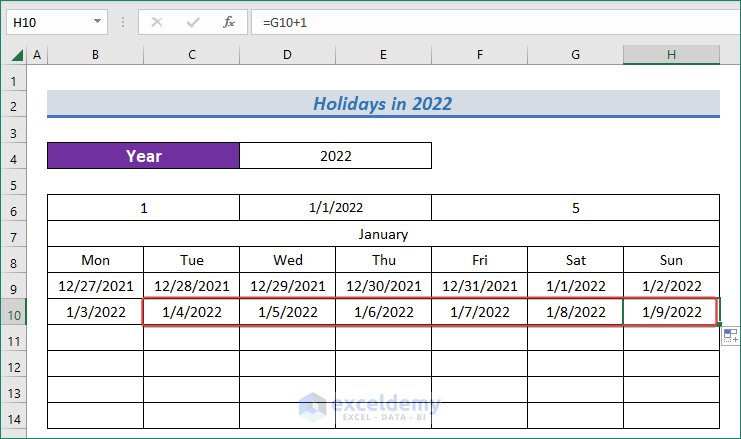
- To have the date in the first cell of the second row, use the following formula.
=G9+1
- Followingly, apply the following formula to have the date in the second cell of the second row.
=B10+1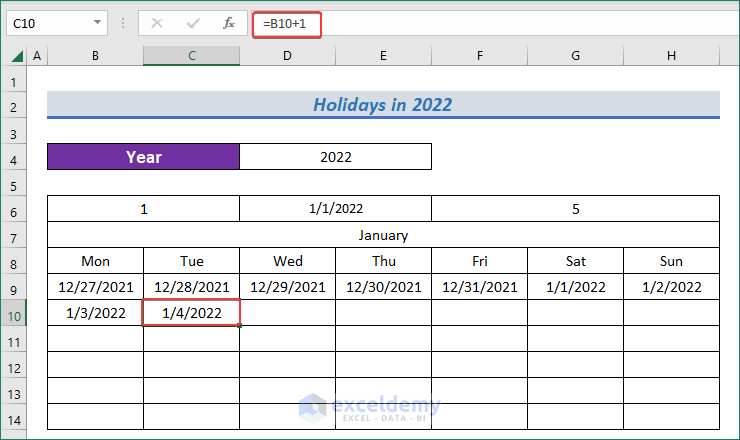
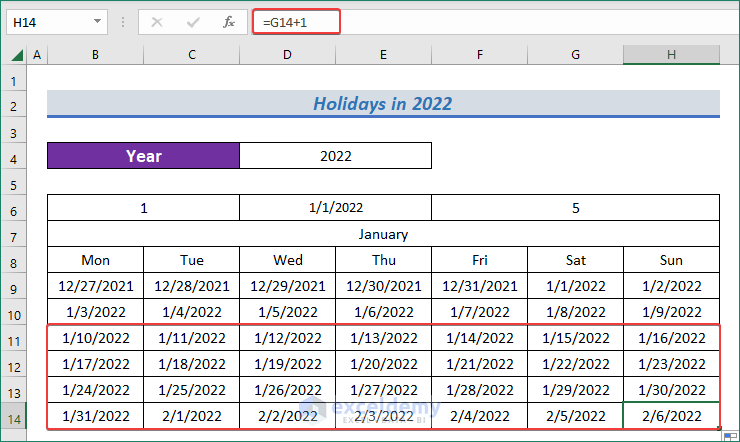
- Next, AutoFill the cells in the horizontal line with Fill Handle.
- Now, select all the cells in the second row of the calendar and use Fill Handle to AutoFill the remaining cells of that month.
3.3 Change Date Format
- Fix the date format with only days. Select all the dates.
- Click on the extension part of the Number Format feature under Home.
- From the available options, click on More Number Formats…

- A wizard named Format Cells will appear.
- Go to Custom from Number.
- Input d in the Type section and click OK.
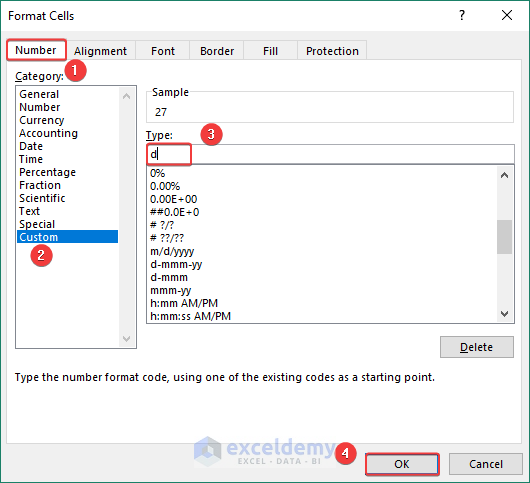
- Thus, we can have the calendar with just days.

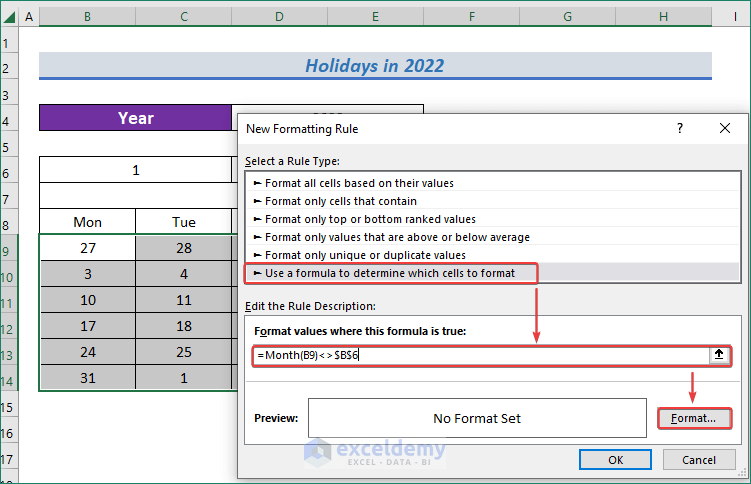
3.4 Emit Unnecessary Dates
- In the calendar, we have dates from both the previous and next month. Need to make them almost unseeable.
- For this, select all the dates and go to Home.
- Click on New Rule… from Conditional Formatting.

- Pick Use a formula to determine which cells to format from the Select a Rule Type section.
- Insert the following formula in the Edit the Rule Description section.
=Month(B9)<> $B$6- Then, click on Format to define the format of the cells which matches the criteria.
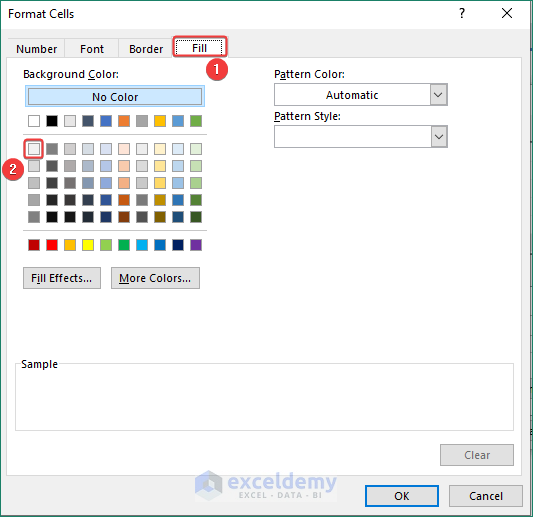
- Select a color to fill the cell from Fill.
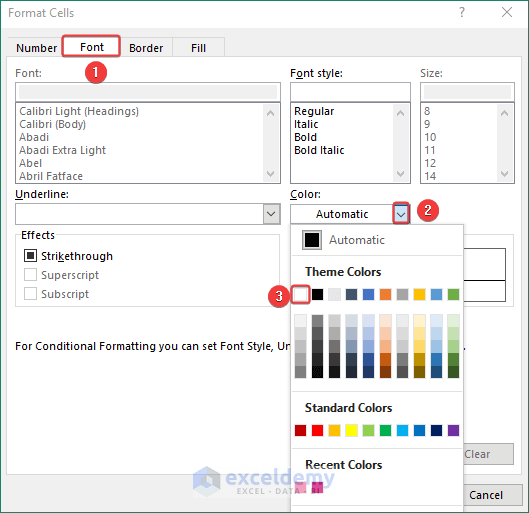
- And font color from the Color option under Font and click on OK.
- Then, click OK to apply the formatting.

- We can see the application format in the calendar which matches the formula.
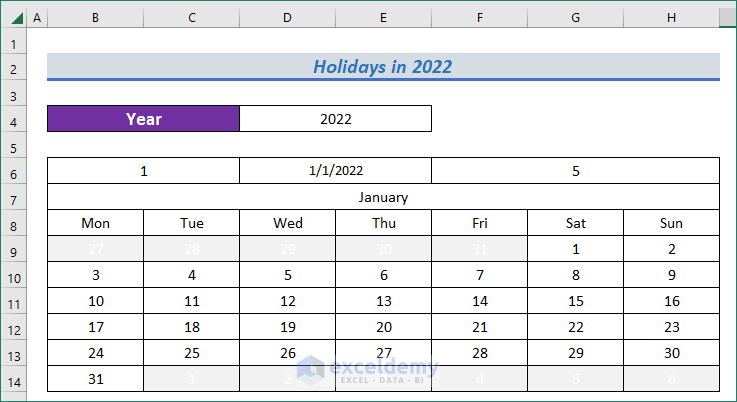
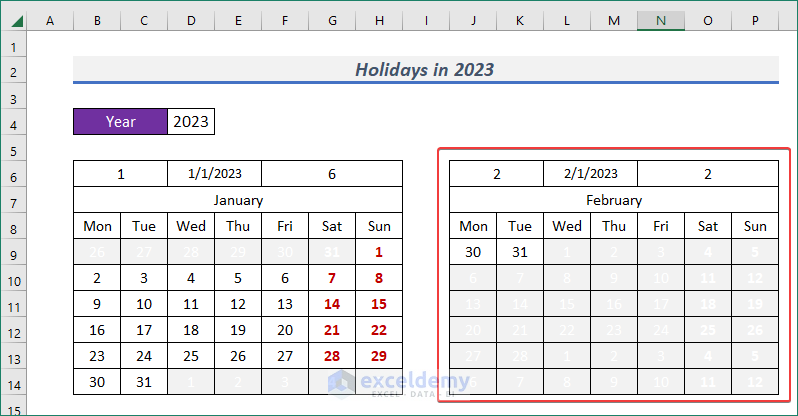
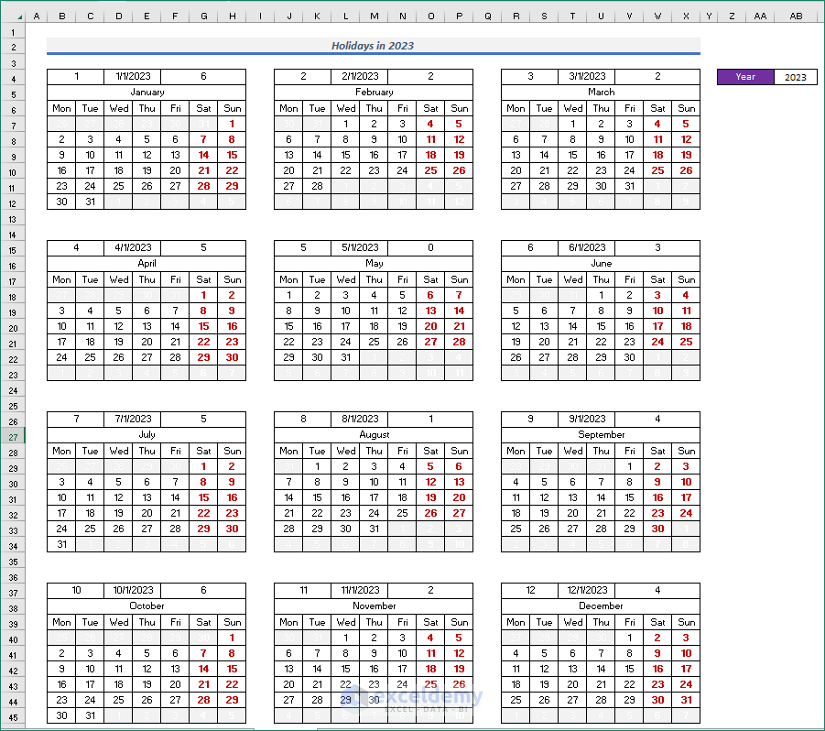
- I have just made a monthly calendar. Use Copy and Paste method to have a duplicate.
- Now, define the next month (i.e. February) from the drop-down.
- It will be applied for that month. But we need to define the dates for the next month.
- So, select all the dates and go to Home.
- Click on Manage Rule… from Conditional Formatting.
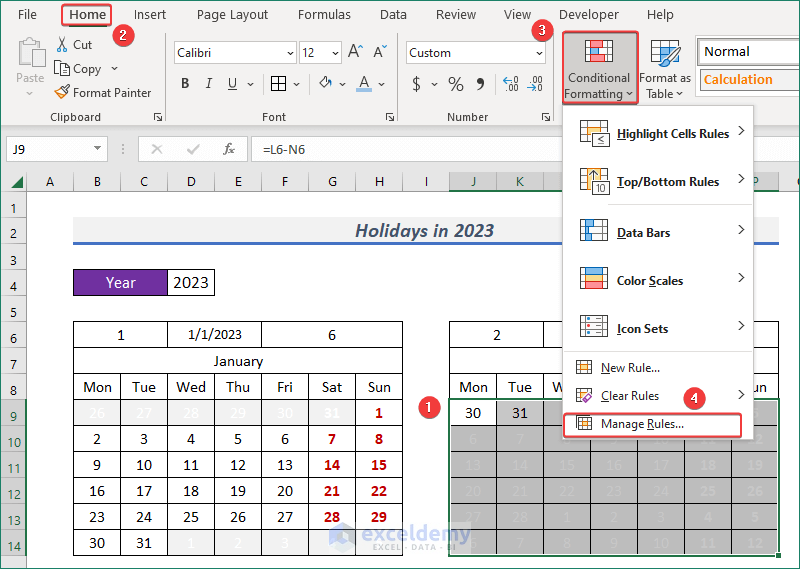
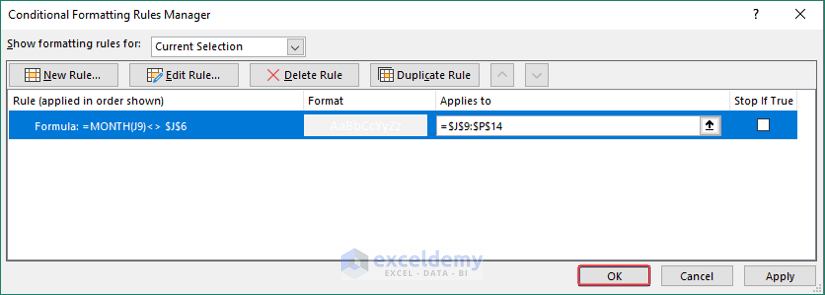
- A Conditional Formatting Rules Manager wizard will appear.
- Next, click on Edit Rule…

- Afterward, insert the following formula in the Edit the Rule Description section and click OK.
=Month(J9)<> $J$6
- Click OK again.
- We will have a perfect calendar for that month.
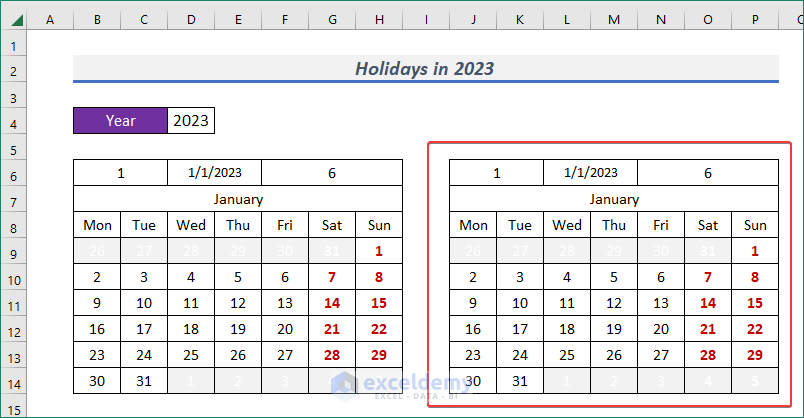
- Now, create a complete calendar for the whole year following similar procedures.
Step 4: Assign Events to Calendar
- Select all the dates first.
- Next, go to the Home tab.
- Click on New Rule… from Conditional Formatting.
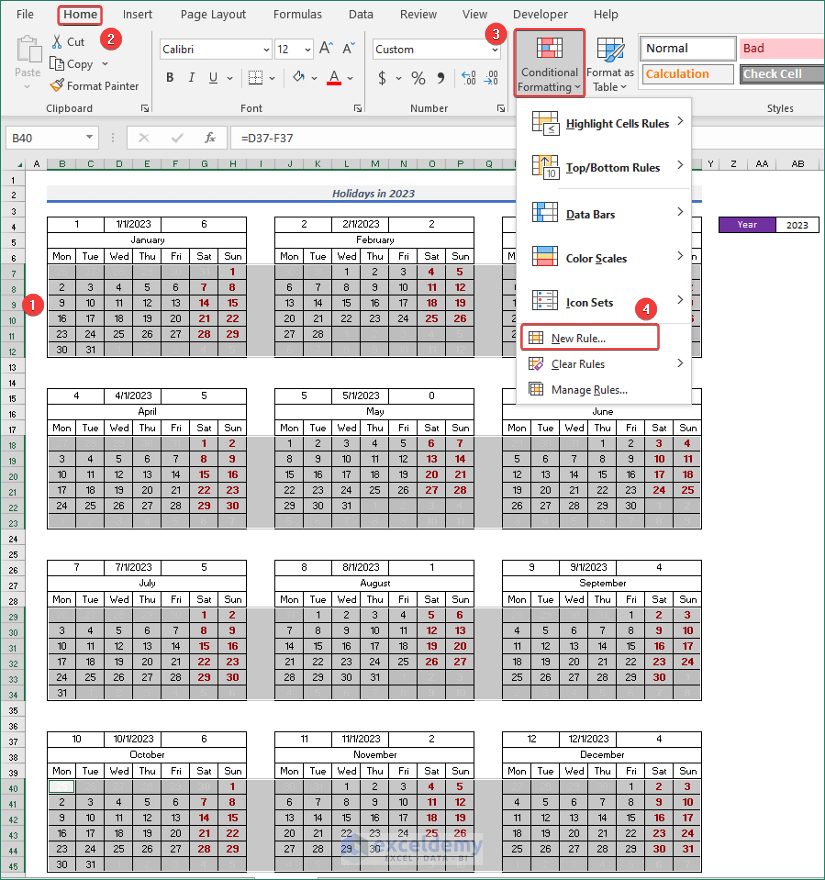
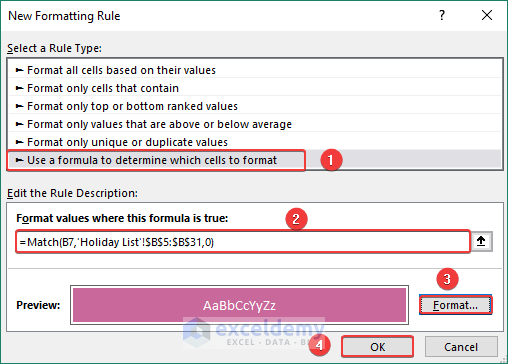
- After that, pick Use a formula to determine which cells to format from the Select a Rule Type section.
- Insert the following formula in the Edit the Rule Description section.
=MATCH(B7,'Holiday List'!$B$5:$B$31,0)- Then, define the format of the cells from the Format section when matches the criteria.
- Finally, click OK to finish the entire process.
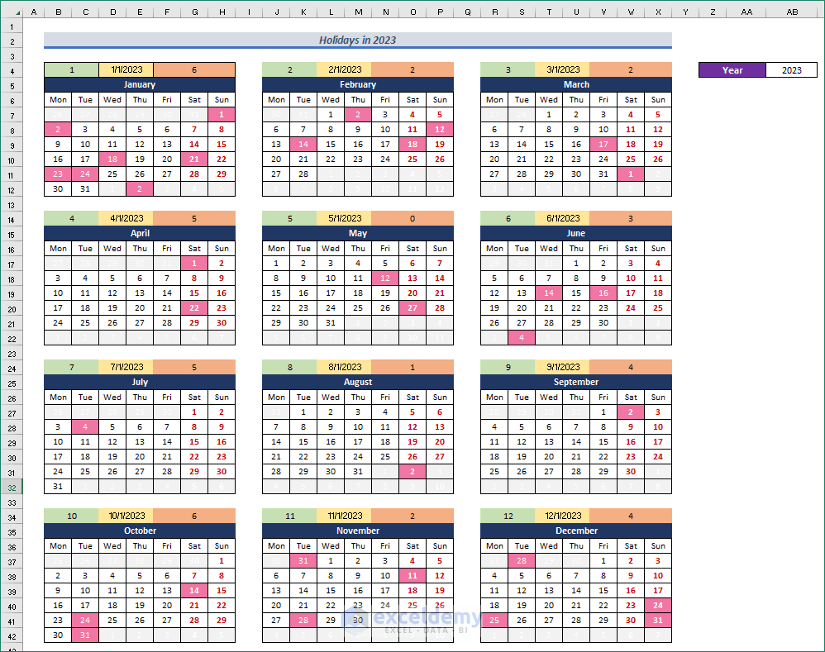
- At last, we have an entire event calendar.
Download Practice Workbook
Download this practice workbook to exercise while you are reading this article.
Conclusion
At the end of this article, I like to add that I have tried to explain step-by-step procedures to create an event calendar in Excel. It will be a great pleasure for me if this article helps any Excel user even a little. For any further queries, comment below. You can visit our site for more articles about using Excel.
Related Articles
<< Go Back to Excel Calendar Templates | Excel Templates
Get FREE Advanced Excel Exercises with Solutions!
