We will create a calendar for 1 week for ease of understanding. However, you will get the monthly calendar in the downloadable excel file.
Step 1 – Prepare Starting Time and Time Slots Setup
- Create a 24-hour timetable and a time interval table.
- Insert the Start Time for 24 hours in Column B and the Time Interval in Column D.

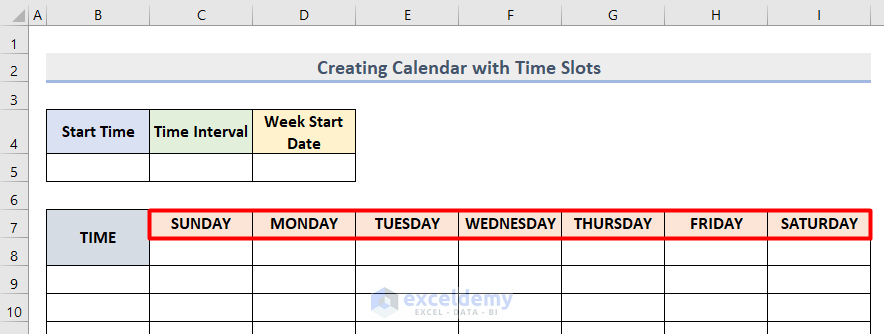
Step 2 – Create an Outline for the Calendar
- Create a table with titles for Start Time, Time Interval, and Week Start Date.
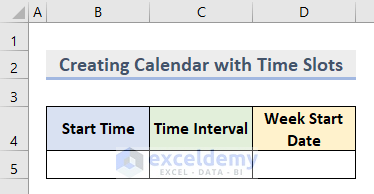
- Below that, insert 7 days’ names and add a column titled TIME.
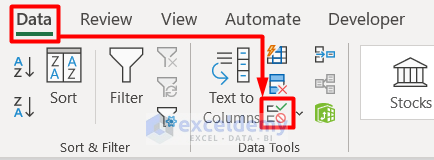
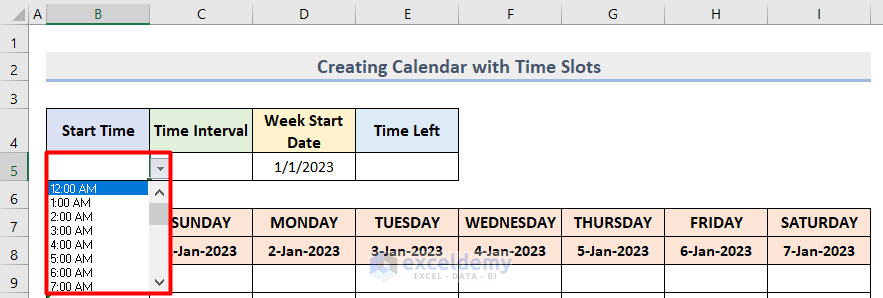
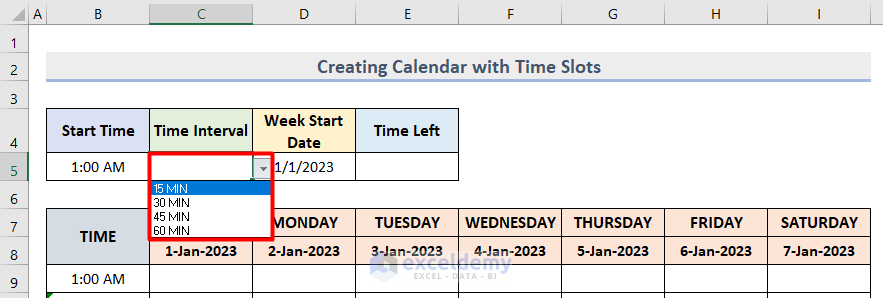
Step 3 – Apply Data Validation Based on Starting Time and Time Slots
- Select cell B5.
- Go to the Data tab and click on the Data Validation icon.
- Choose List from the Allow option.
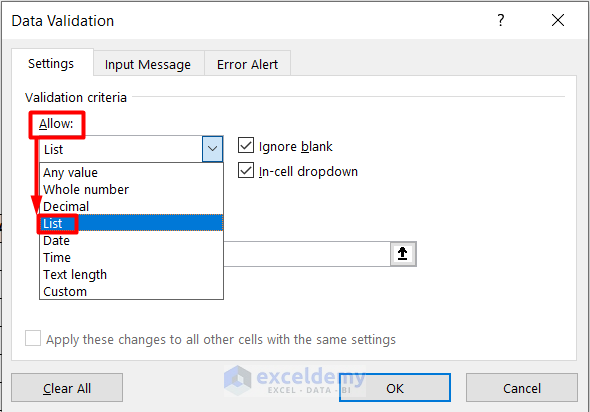
- Set the source as the cell range B5:B28 from the Dataset sheet.
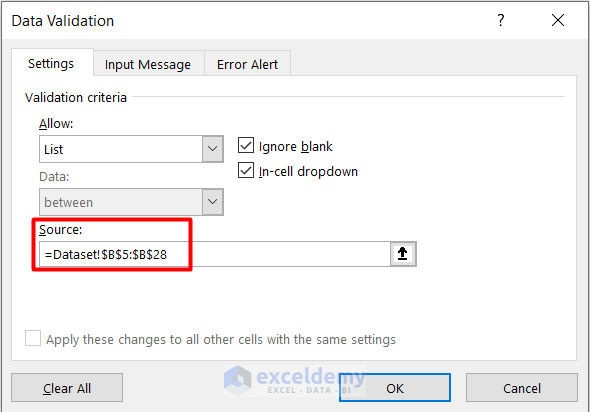
- Repeat the process for cell C5.
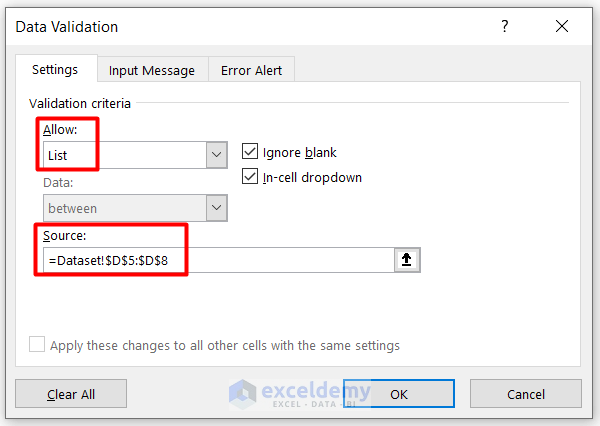
- Press OK.
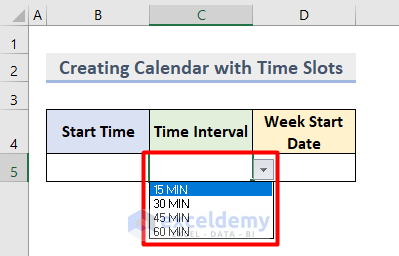
- As a result, you will see that the cells are now data validated and both have Arrows to open respective valued lists.
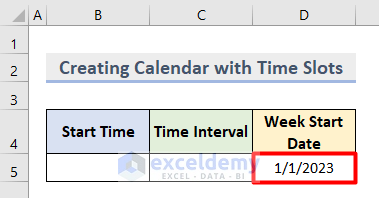
- Insert your desired Week Start Date in cell D5.
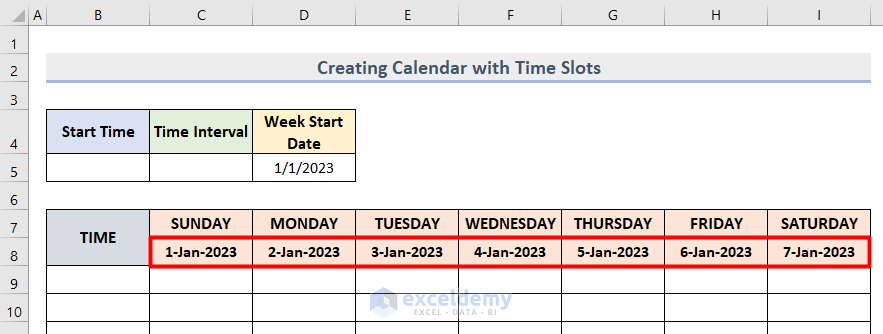
Step 4 – Insert Dates in the Calendar
- In cell C8, enter the following formula to get the first date:
=D5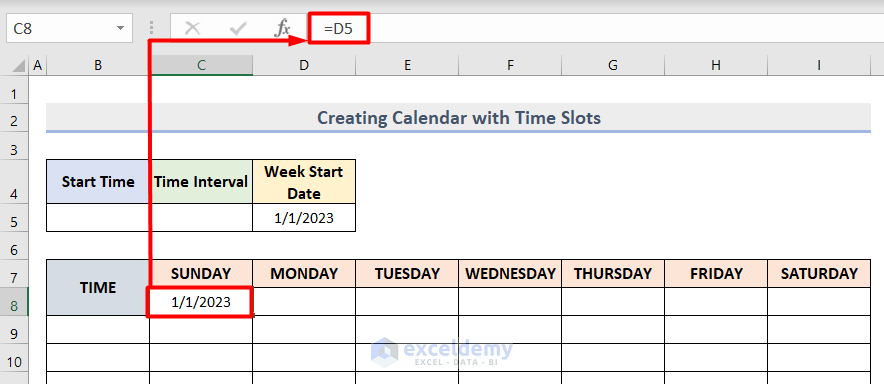
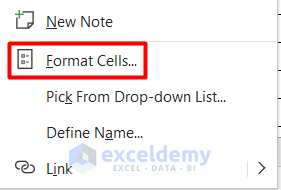
- Right-click on the first date and choose Format Cells from the Context Menu.
- Set your preferred date format in the Type box of the Date section under the Number tab.
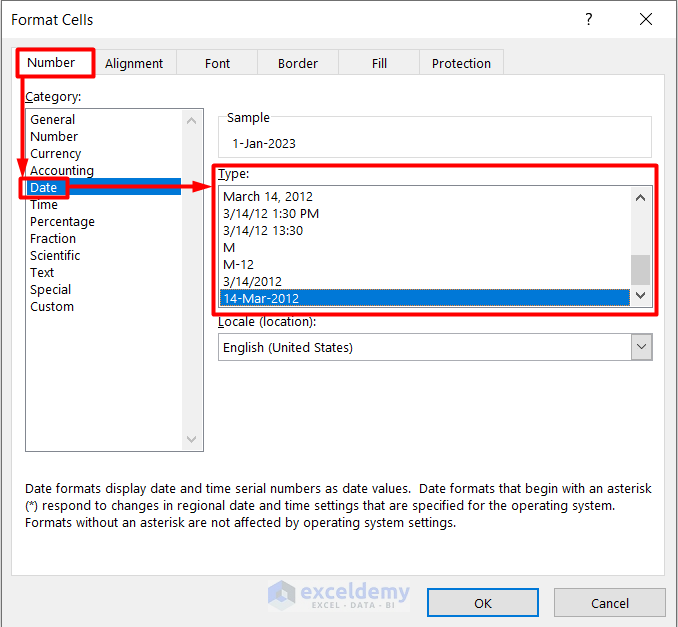
- Press OK to close the Format Cells window.
- Insert the following formula in cell D8 to get the consecutive date:
=C8+1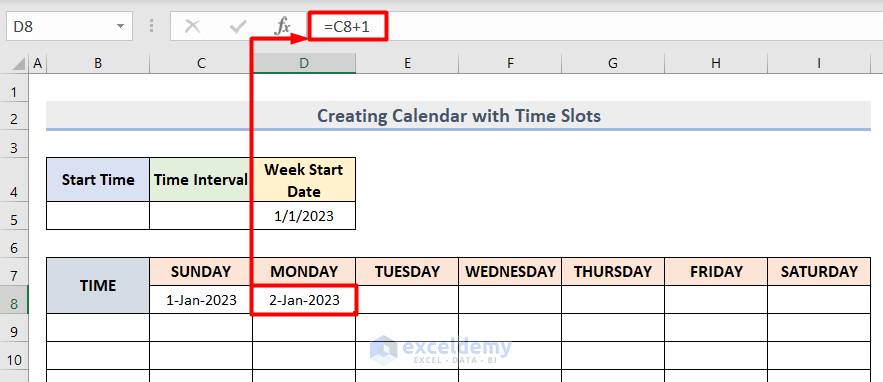
- Autofill this formula for the entire week.
Read More: How to Create an Event Calendar in Excel
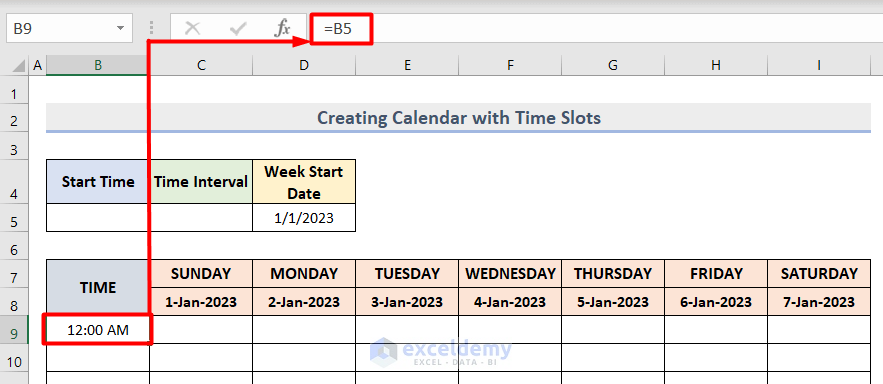
Step 5 – Insert Time Slots in the Calendar
- Select cell B9 and insert the following formula to get the Start Time:
=B5
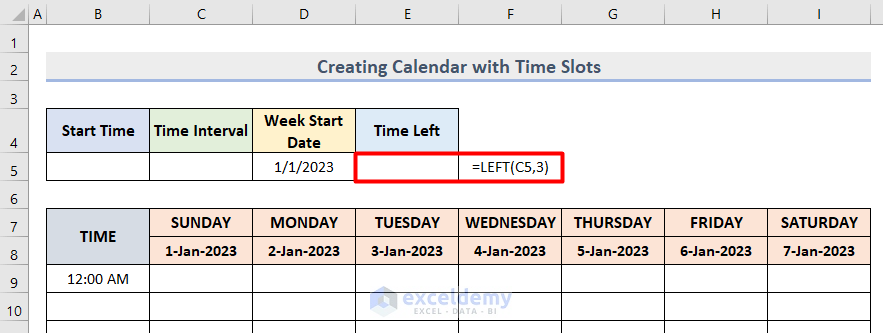
- Insert the following formula in cell E5 to count the interval of time (considering the first 3 characters):
=LEFT(C5,3)
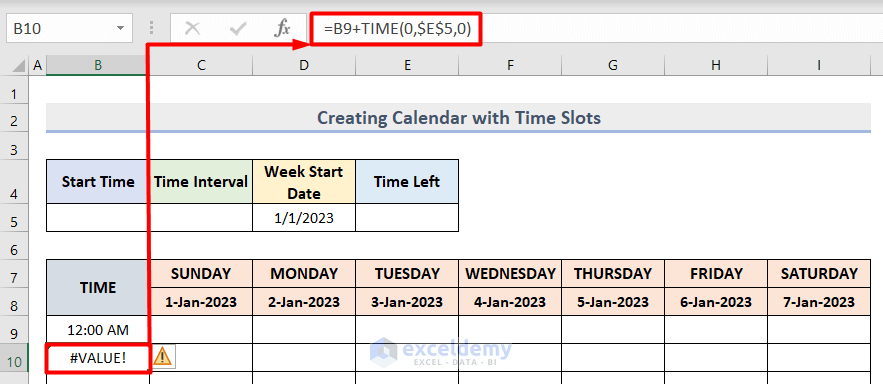
- In cell B10 enter the following formula to get the consecutive time:
=B9+TIME(0,$E$5,0)
- AutoFill this formula for the entire column.
Note: Remember that initially, you might see a #VALUE! error, but it will be resolved once you provide the date and interval from the data validation lists.
Final Output
The final output will be a dynamic calendar with customizable time slots.
- Choose a time from the list of Start Time.
- Choose any interval of time from the list of Time Interval.
- You will get the final calendar with time slots as shown below.
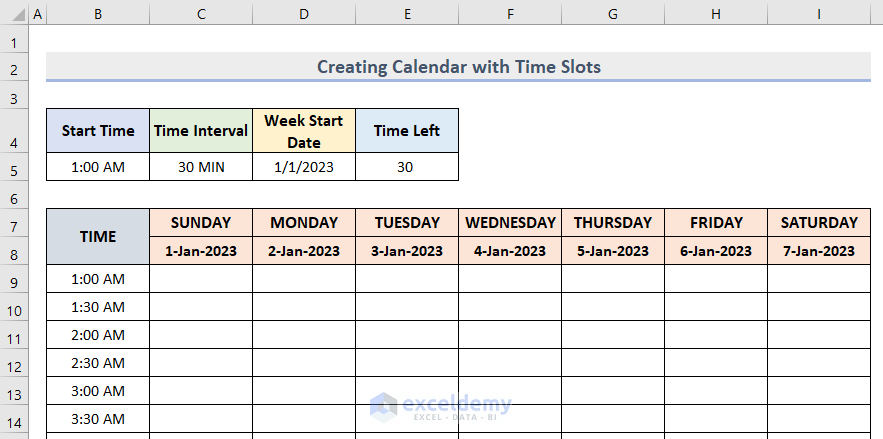
- For your flexibility, you can change the start time and interval and make the calendar more dynamic according to your preference.
Download Practice Workbook
You can download the practice workbook from here:
Related Articles
<< Go Back to Excel Calendar Templates | Excel Templates
Get FREE Advanced Excel Exercises with Solutions!
