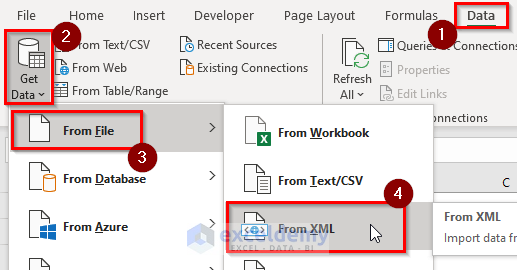
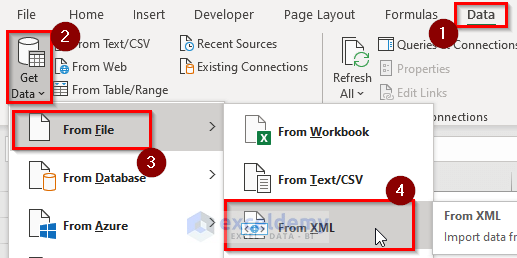
Method 1 – Using XML from Local System
Steps:
- Go to the Data tab and click on Get Data.
- Select From File and then click on From XML.
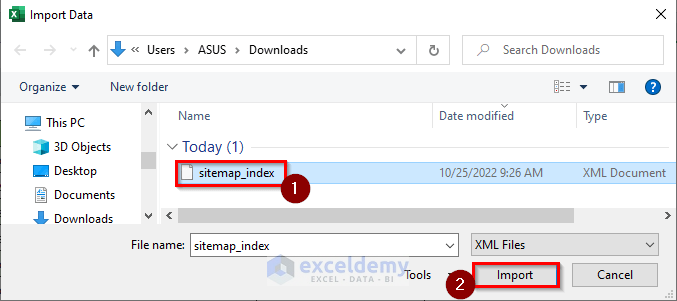
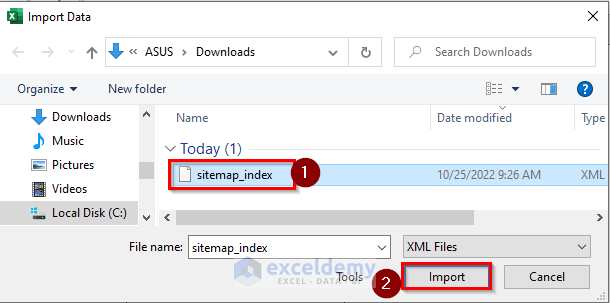
- Select an XML file and click Import.
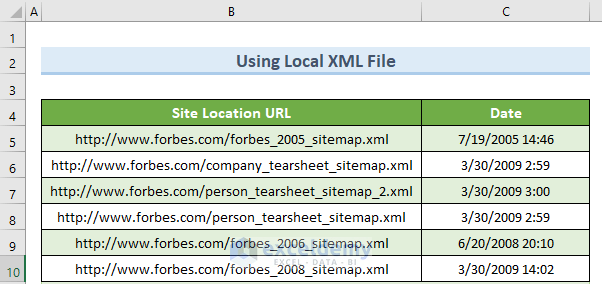
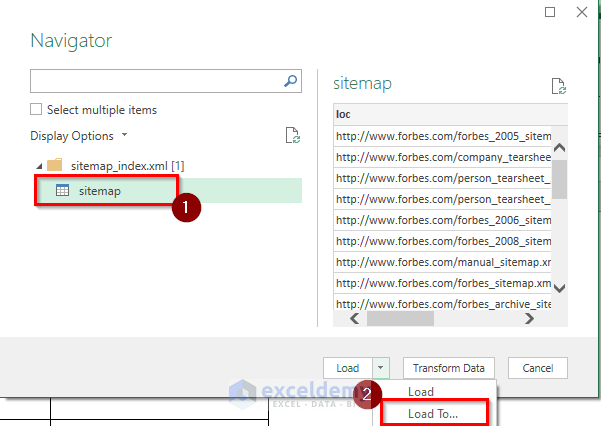
- In the Navigator window, select the XML data name and click Load.

- Create Excel columns from the imported file.
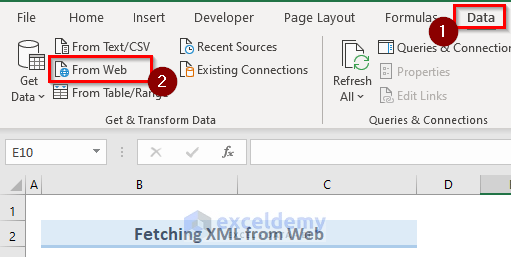
Method 2 – Fetching XML from Web
Steps:
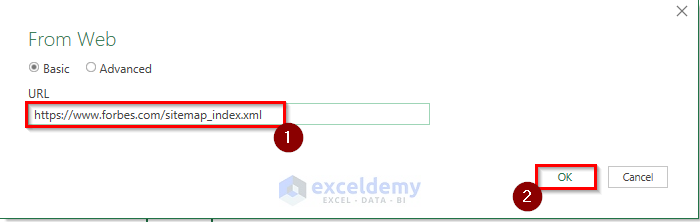
- Go to the Data tab and click From Web.
- Paste the URL of the XML file and click OK.
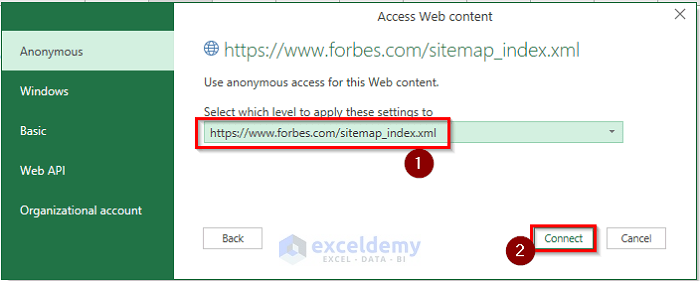
- Select the appropriate file path and click Connect.
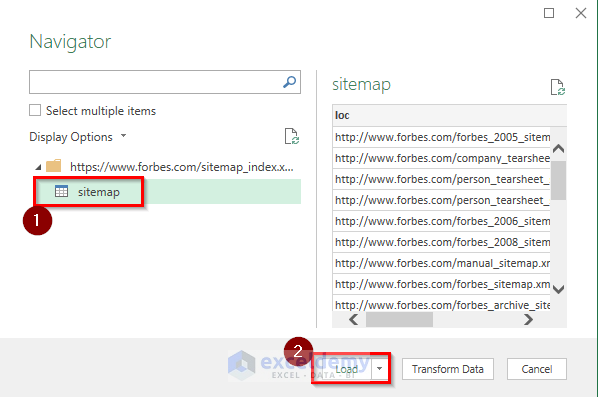
- Select the XML data name and click Load.
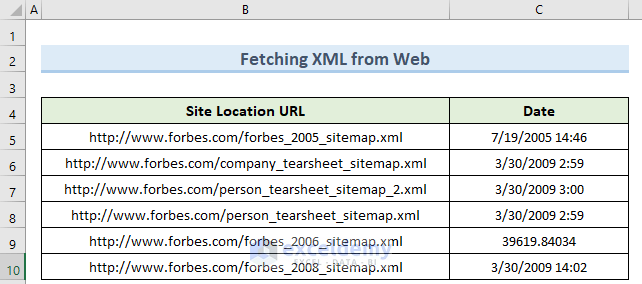
- You should get the respective Excel columns.
Method 3 – Applying the FILTERXML Function
Steps:
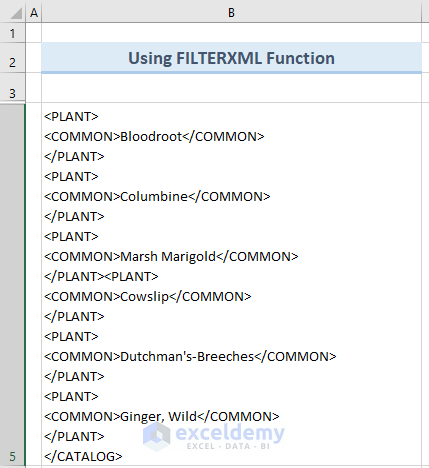
- Copy the XML file data and paste it into cell B4 of an Excel sheet.
- Go to a new sheet and insert this formula in cell B5:
=FILTERXML(FILTERXML!B5,"//PLANT/COMMON")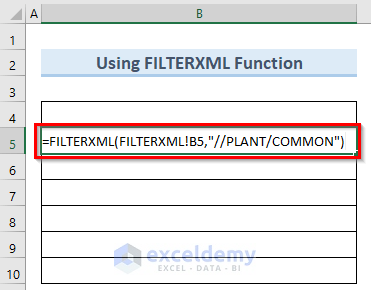
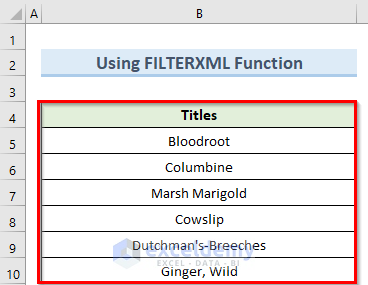
- Press Enter, which should generate the Excel columns from the XML file.
Method 4 – Utilizing VBA Code
Steps:
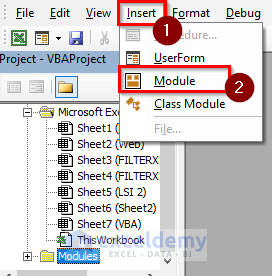
- Go to the Developer tab and select Visual Basic.

- Select Insert in the VBA window and click Module.
- Type in the formula below in the new window:
Sub XML_to_Column()
Application.ScreenUpdating = False
Application.DisplayAlerts = False
Dim wBook As Workbook
With Workbooks.OpenXML("C:\Users\ASUS\Downloads\sitemap_index.xml" _
, , xlXmlLoadImportToList)
.SaveAs ("C:\Users\ASUS\Downloads\Salary_Sheet.xlsx")
.Close
End With
End Sub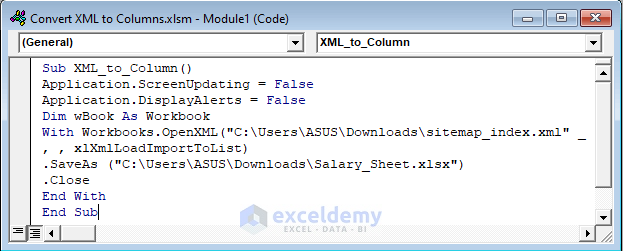
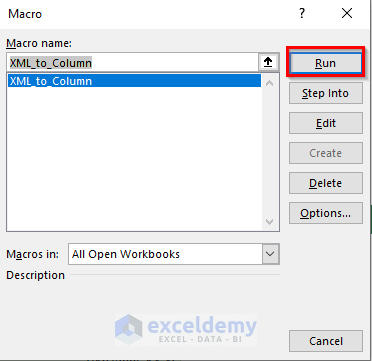
- Open the macro from the Developer tab by clicking on Macros.
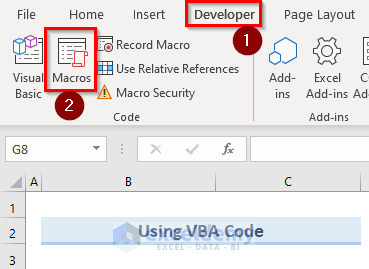
- In the Macro window, select the XML_to_Column macro and click Run.
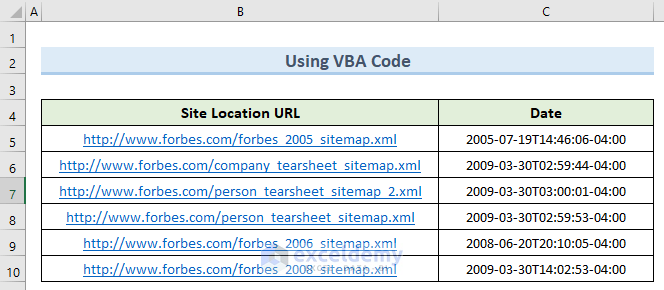
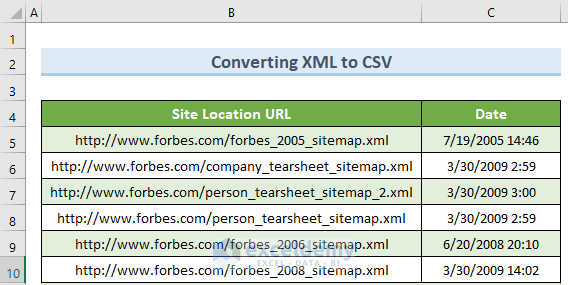
- The VBA code will create the columns inside cells B4 to C10.
How to Convert XML to CSV in Excel
Steps:
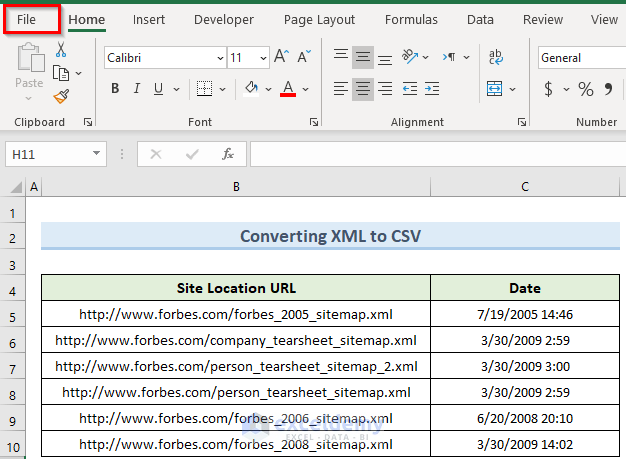
- Click the File option in the top-left corner of the window.
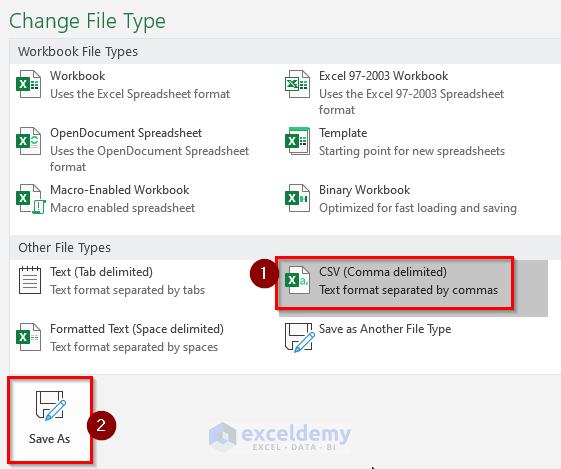
- Select Export and then click on Change File Type.

- Select CSV under Other File Types and click Save As.
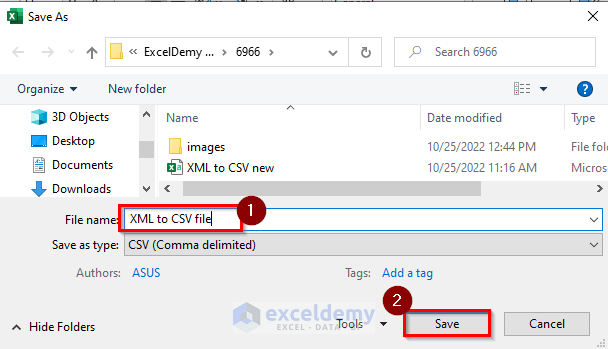
- Give a name to the file and click Save.
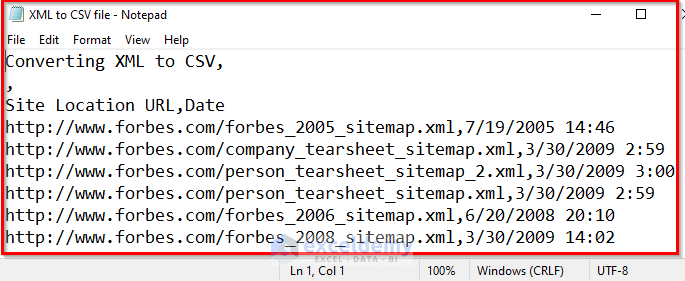
- This will generate the CSV file which you can open with Notepad or any other text editor.
How to Convert XML to Excel Table
Steps:
- Navigate to the Data tab and select Get Data.
- Click From XML under From File.
- Select the XML file and click Import.
- Select the XML data name and click Load To.
- In the Import Data window, select Table and click OK.
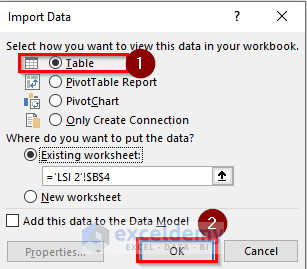
- This will convert the XML file into an Excel table.
Download Practice Workbook
You can download the practice workbook from here.
Related Articles
- Difference Between XML and Excel Files
- [Solved]: XML File Not Opening in Excel
- How to Edit XML File in Excel
- VBA Code to Convert XML to Excel
<< Go Back to Import XML to Excel | Importing Data in Excel | Learn Excel
Get FREE Advanced Excel Exercises with Solutions!
