XML files are used for data purposes. But when we need to use this data, we can not open an XML file directly using MS Excel. However, there are some tricks to using those XML data in Excel. Sometimes we extract data from the XML file, sometimes we convert the XML file into Excel-supported file format. In this article, we will discuss how to convert XML into Excel using VBA code.
Download Practice Workbook
You can download the following practice workbook to exercise while you are reading this article.
What Is XML File?
XML stands for Extensible Markup Language. XML file is used to store, process, and transport data. It is quite similar to HTML. It contains both texts and programming languages.
XML is very popular for web page usage since it has the opportunity to customize the file from any device. Besides, when using an XML file, it easily performs operations like searching for any information, replacing it, etc.
How to Create an XML File Using Notepad
Before Starting the main discussion, we will first see how to create an XML file. So, in this section, we will create a sample XML file using Notepad to convert that into Excel.
📌 Steps:
- First, we need to open the Notepad.
- Then click the right button on the mouse.
- Now, choose New from the Context Menu.
- After that, click on the Text Document option.
- A blank page of notepad appears here.
- We already know that XML file consists of both text and programming language. Here, we put a structure on the notepad page.
- In the first line, we put a declaration that will create an XML file with closing at the end of that line.
- Now, go to the File tab.
- Then click on the Save As option.
- Go to the desired folder from File Explorer.
- Put the name of that file with the .XML extension.
- We can see that file is saved in the desired folder.
Steps to Convert XML to Excel Using a VBA Code
In this section, we will show all the steps to convert the created XML file into Excel.
📌 Step 1: Go to VBA Module
In this step, we will show how to get into the VBA module.
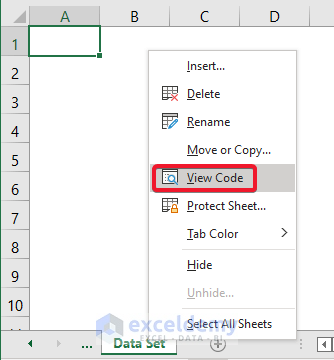
- First, enter a blank Excel sheet.
- Go to the Sheet Name section at the bottom section.
- Press the right button of the mouse.
- Choose View Code from the appeared Context Menu.
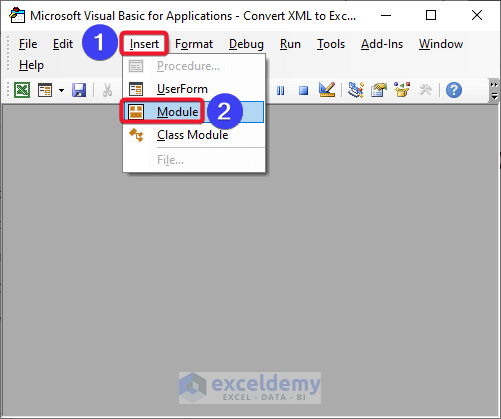
- VBA window appears now.
- Click on the Insert tab.
- Choose the Module option from there.
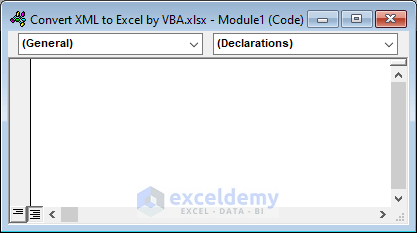
- Now, the VBA module window appears to write code.
Read More: How to Open XML File in Excel for Income Tax (2 Easy Ways)
📌 Step 2: Write VBA Code in the Module and Run
In this section, we will run the VBA code.
- Copy and paste the following VBA code on the module.
Sub Conversion()
Application.ScreenUpdating = False
Application.DisplayAlerts = False
Dim w_book As Workbook
With Workbooks.OpenXML("D:\OneDrive\Softeko\25-0180_5352\Salary_Sheet.xml" _
, , xlXmlLoadImportToList)
.SaveAs ("D:\OneDrive\Softeko\25-0180_5352\Salary_Sheet.xlsx")
.Close
End With
End Sub
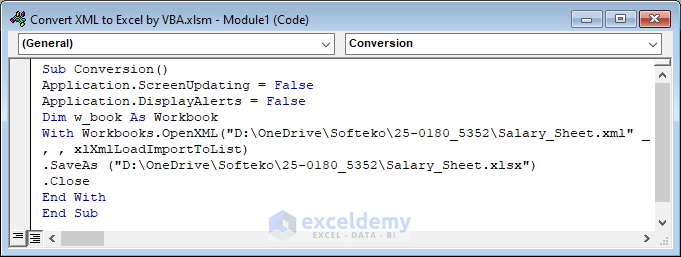
- Press the F5 button to run the code.
Check the Converted File
Here, we will check the newly created file after the successful implementation of the VBA code.
- Open the folder from File Explorer.
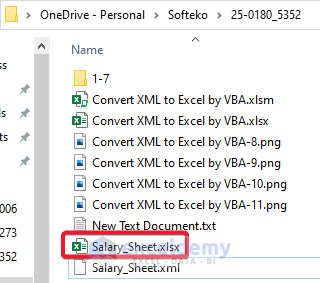
We can see that the Excel file is saved here successfully.
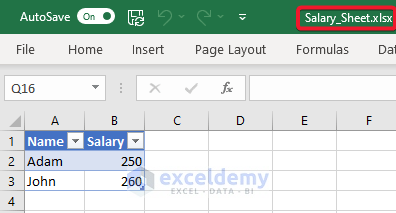
Data were also extracted here properly.
Read More: How to Convert XML to XLSX Without Opening File
Conclusion
In this article, we described how to create an XML file and convert that into Excel using VBA code. I hope this will satisfy your needs. Please have a look at our website Exceldemy.com and give your suggestions in the comment box.