Reasons for an Unsaved Excel File
- Excel stops automatically and fails to run properly.
- Closing Excel files without saving them.
- Error in your PC.
Unsaved Excel File Not in Recovery: 5 Issues and Solutions
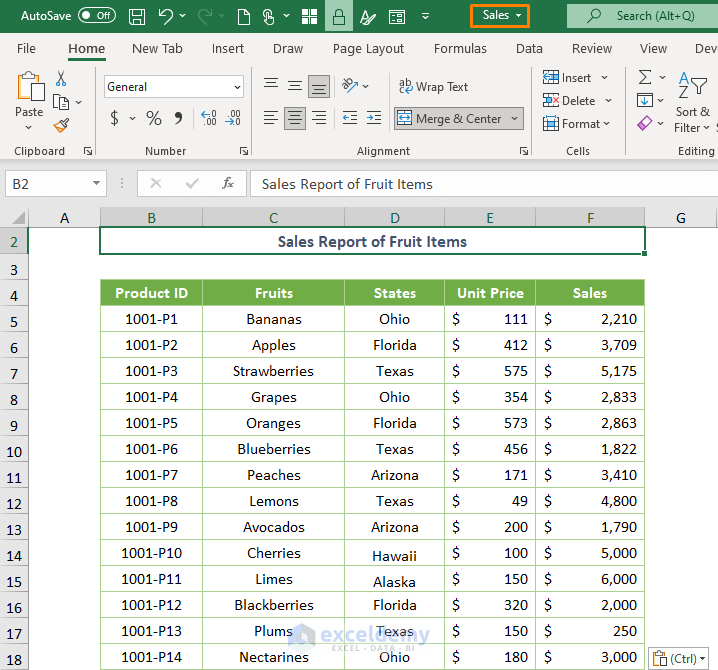
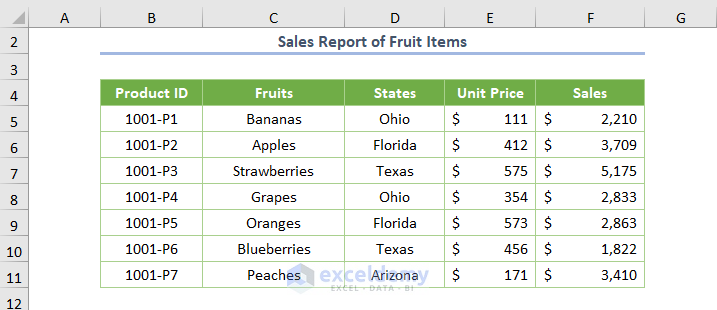
We have an Excel file named Sales.xlsx with blank cells. We added some information. Suddenly, Excel stopped working.
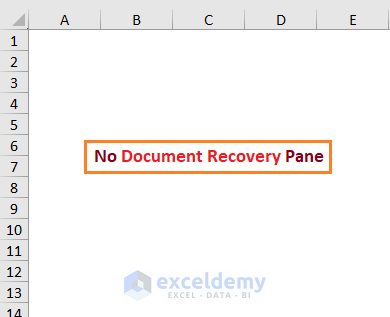
If you open an Excel workbook, you’ll see the Document Recovery pane on the left side of the Excel program. You’ll be able to auto-recover your unsaved Excel file.

If you close the pane, it won’t appear again. Alternatively, you might not have received the auto-recovery pane or the version won’t be up-to-date.
Reason 1 – AutoRecover Is Disabled
- Go to File and choose Options.
- In the Excel Options dialog box, go to Save.
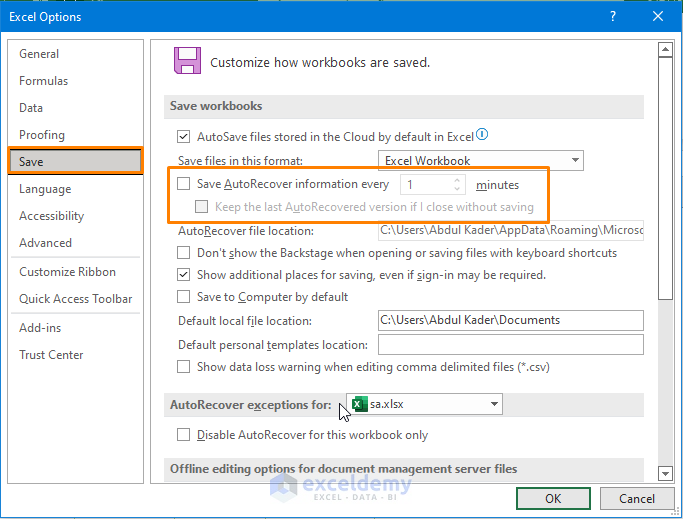
- The box before the AutoRecover feature is unchecked.
- Check the box before the AutoRecover feature as shown in the below screenshot.
Reason 2 – Timing to AutoRecover Is Set to Default
We added B2:F11 cells in the blank Sales.xlsx file.
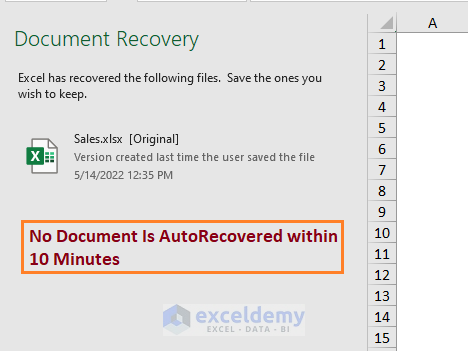
After Excel crashed and rebooted, you’ll see the Sales.xlsx [Original] which doesn’t have the new value, as it wasn’t saved in time.
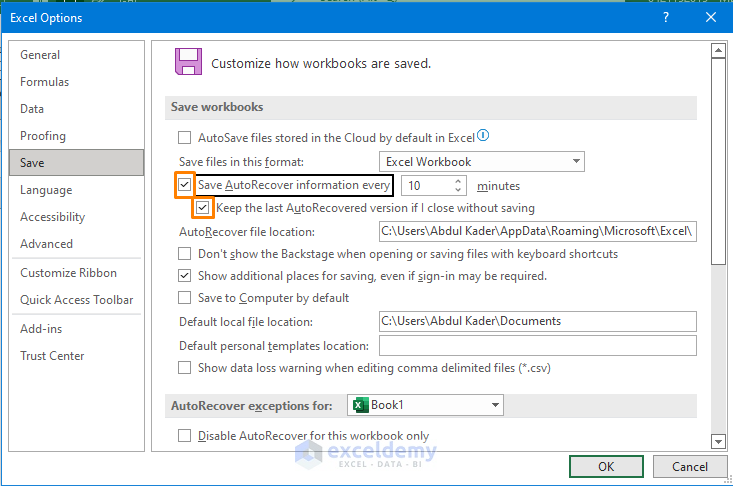
- Put 1 instead of 10 in the time of the AutoRecover feature and press OK.

This should create more auto-recovery files and help you retrace changes faster.
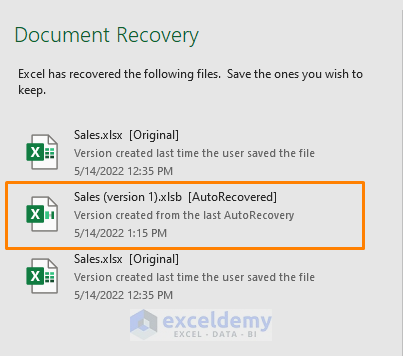
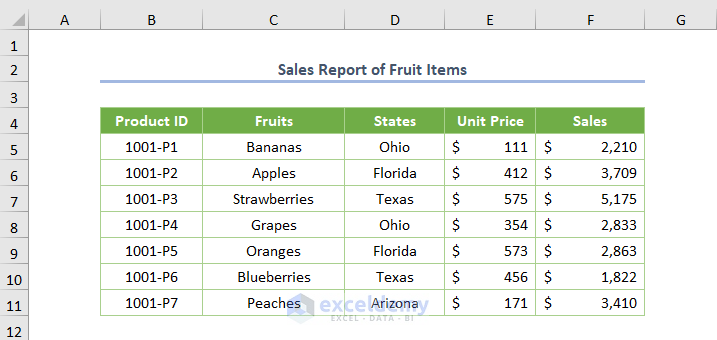
- If you click on the file, you’ll get the dataset.
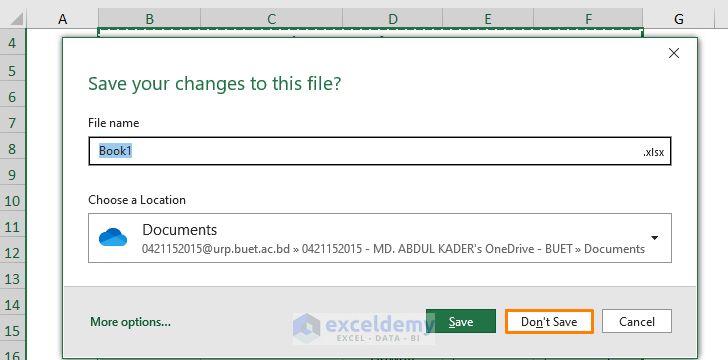
Reason – You Didn’t Save the Excel File
We didn’t save the file Book1 or closed the file forcefully (Book1-default name).
Case 3.1 – Unsaved File Recovery from Excel Options
- Go to File then to Open, and click on the Recover Unsaved Workbooks option.
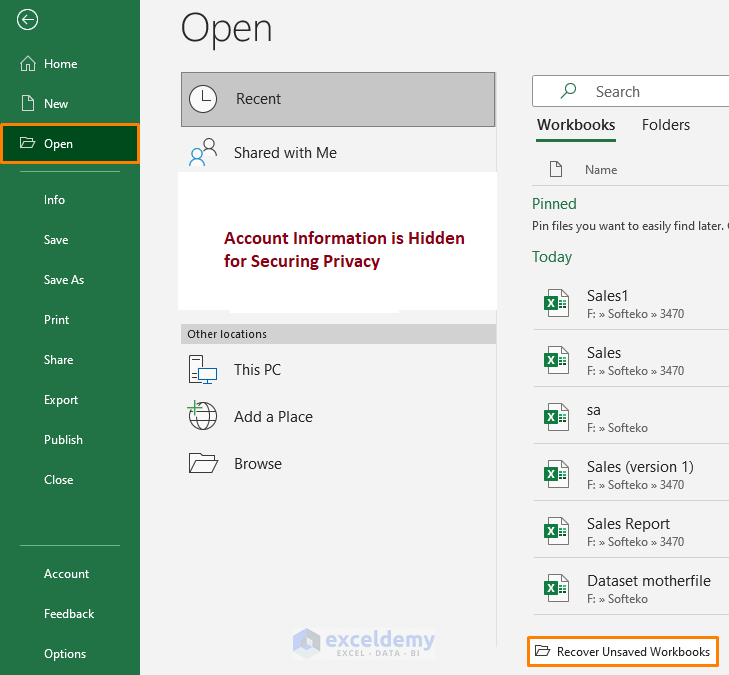
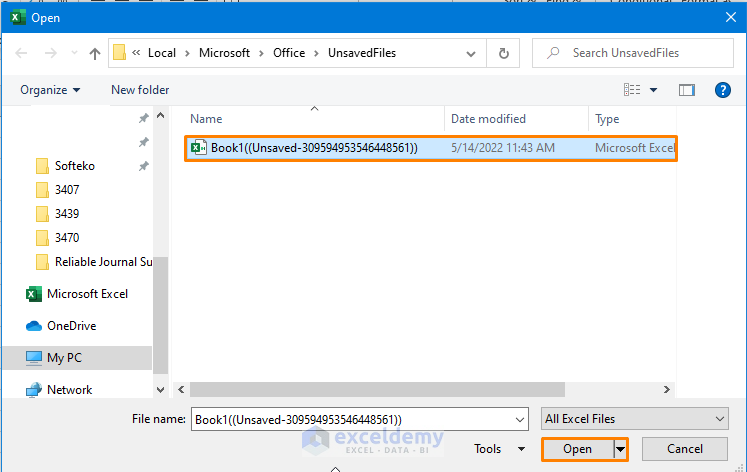
- Select the Book1 file.
- Press the Open button for recovering the file.
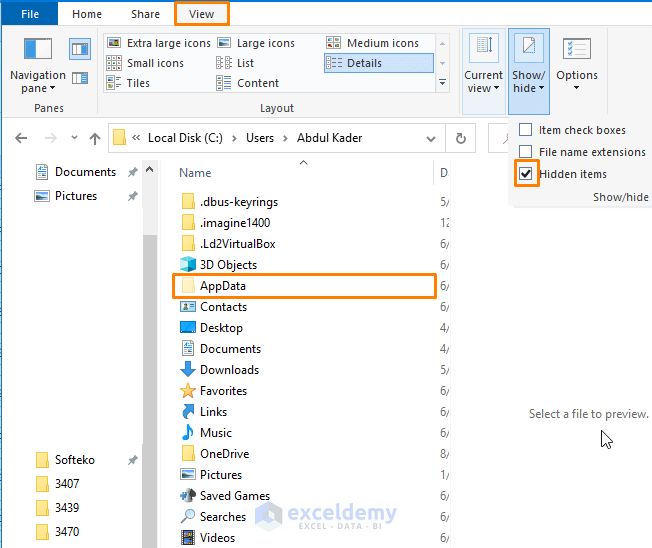
Case 3.2 – Unsaved File Recovery from File Explorer
- Go to File Explorer and go to the UnsavedFiles folder.
- The path looks like the following:
C:\Users\[Name]\AppData\Local\Microsoft\Office\UnsavedFiles
- Turn on Hidden items from the View tab in the File Explorer to get the AppData folder.
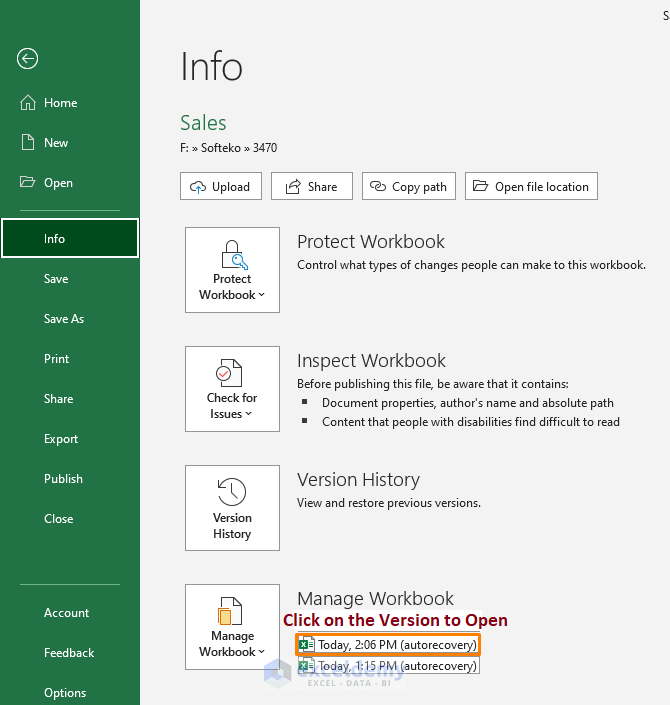
Reason 4 – Trying to Recover an Earlier Version
- Go to File then to Info and look at the Manage Workbook option.
You’ll see the version history.
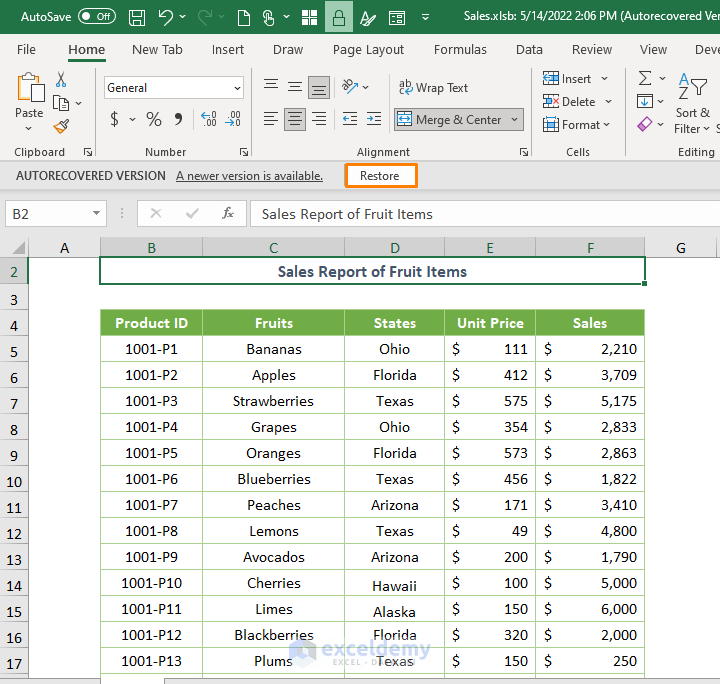
- Click on the version to open the file. We clicked on the first version.
- Click on Restore and save it separately if you want to work with the version.
Read More: How to Recover Previous Version of Excel File
Reason 5 – Using AutoSave in Microsoft 365
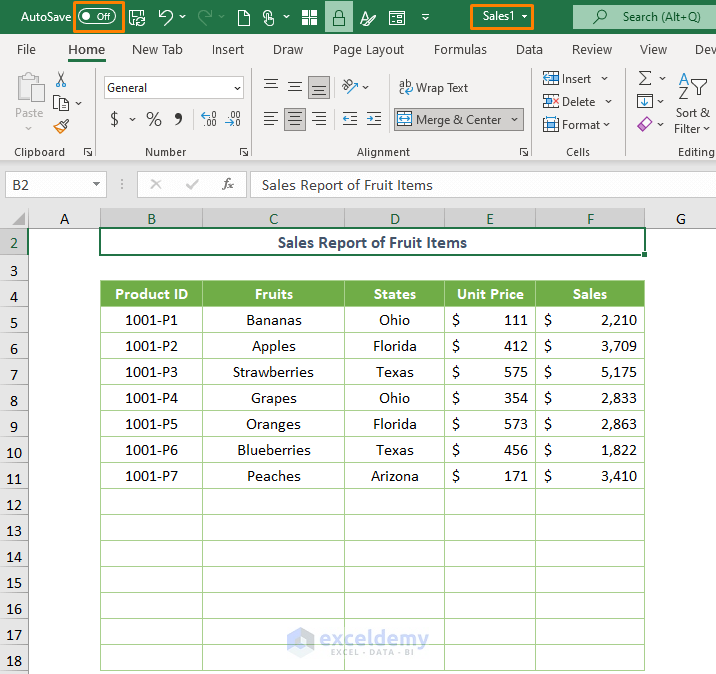
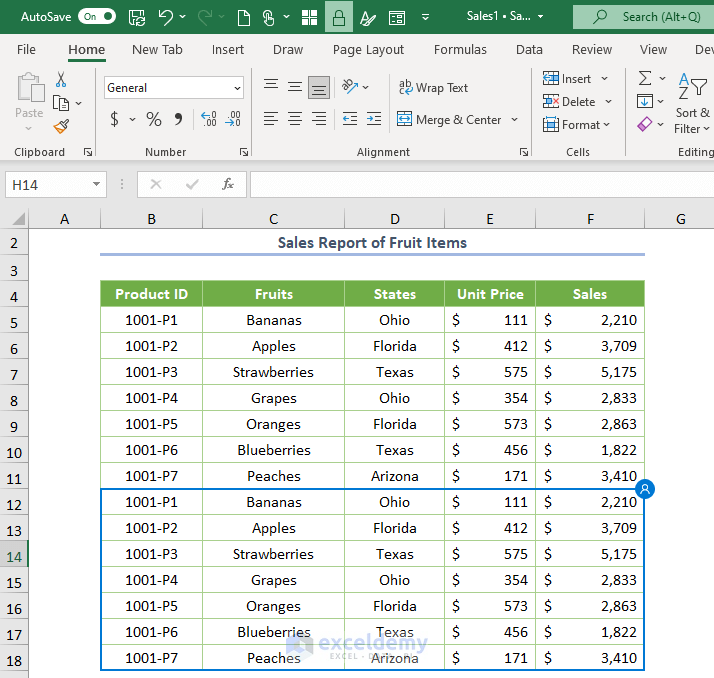
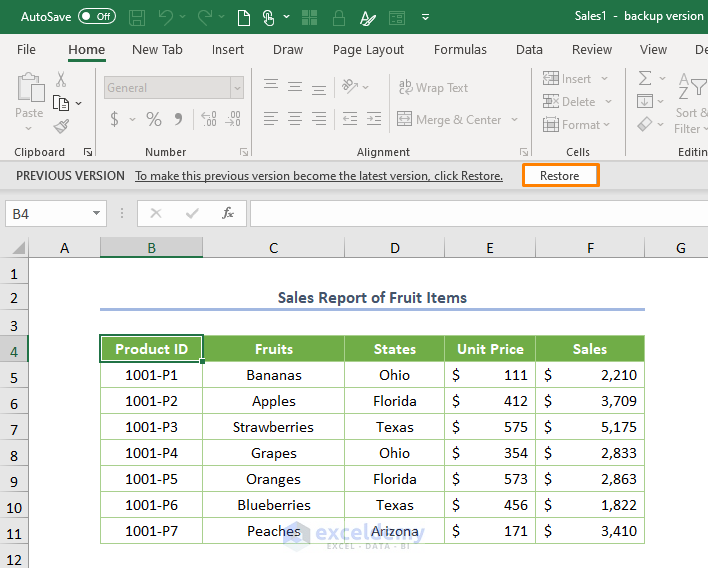
In the Sales1 file, there is a dataset covering B2:B11 cells.
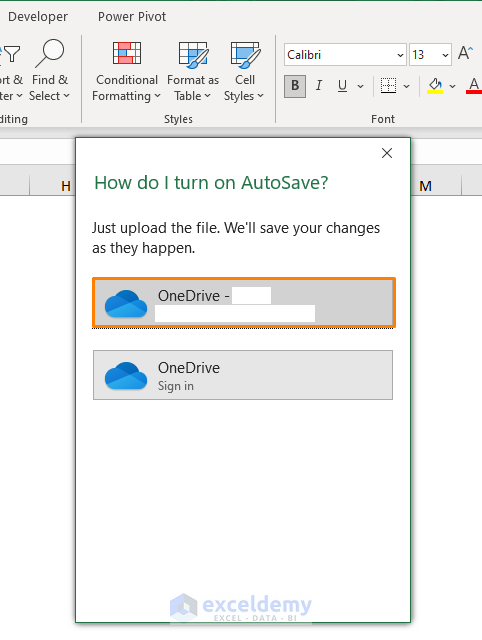
- To turn on the AutoSave feature, click on the button showing Off located in the upper-left corner of Excel.
- Choose a OneDrive account.
- Add information about new products (B12:F18 cells).
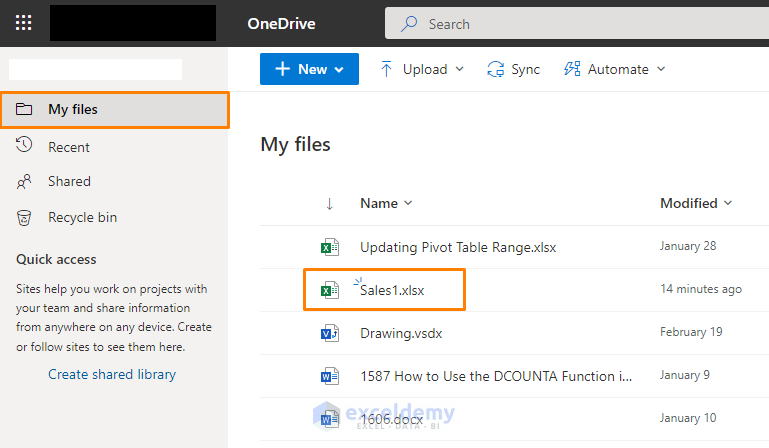
- Go to your OneDrive account and you’ll see the file named Sales1.xlsx.
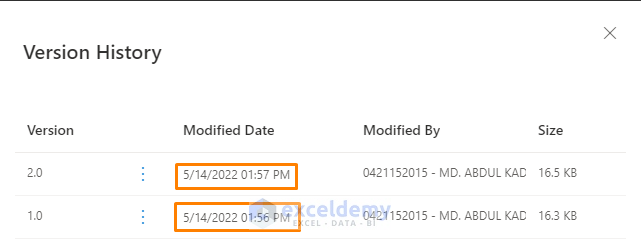
- Right-click and choose the Version History option.

You’ll see the following versions.
- Click over the version and choose the Open File option.
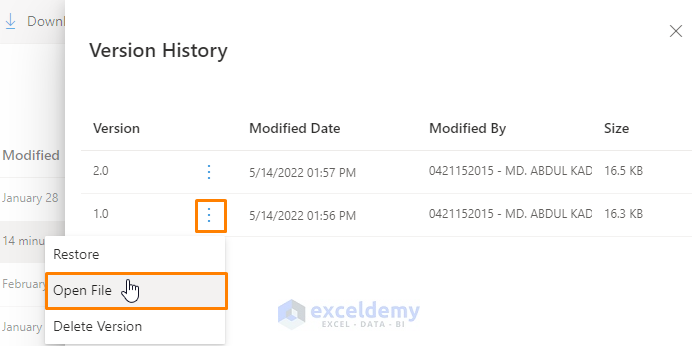
- You’ll get the first version as shown below. Choose the Restore option if you want to work with the file.
Download the Practice Workbook
Related Articles
- How to Find Backup Files in Excel
- How to Backup Excel Files to a Flash Drive
- How to Auto Backup Excel File
- How to Recover Corrupted Excel File
- How to Recover Excel File after Crash
- How to Recover Corrupted Excel Files from USB
- How to Recover Permanently Deleted Excel Files Online
- How to Undo Changes in Excel after Save and Close
- How to Recover Overwritten Excel File with No Previous Version
<< Go Back to Recover Excel File | Excel Files | Learn Excel
Get FREE Advanced Excel Exercises with Solutions!
