Excel is the most widely used tool when it comes to dealing with huge datasets. We can perform myriads of tasks of multiple dimensions in Excel. Sometimes we need to use the Track Changes option in Excel. But we must enable it first. In this article, I will discuss a solution that you can use for the problem track changes in Excel not showing.
How to Solve Track Changes Not Showing Problem in Excel: 6 Steps
Track Changes is a useful tool in Excel when you want your worksheet to be reviewed by or shared with others. It also comes in handy if you want to track all the changes that you have made in the workbook. Normally you do not see the Track Changes option in the Review tab.

So let’s see the steps to enable Track Changes in Excel.
Step 1: Customize Ribbon to Bring Excel Options
- Go to the Review Tab.
- Then call the Customize the Ribbon option by right-clicking your mouse. After that, select it.

Step 2: Create a New Group from Excel Options
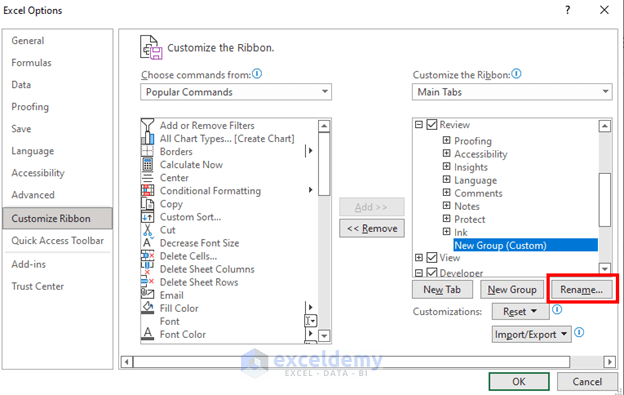
- Excel Options box will appear. Select New Group.

Step 3: Rename the New Group
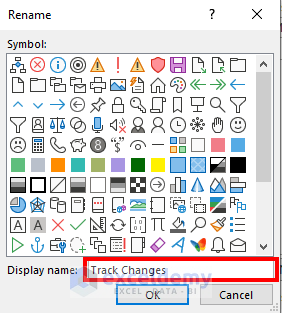
- Now, you have to rename the newly created group. For this, select Rename.
- Then type the display name. I have given the name Track Changes.
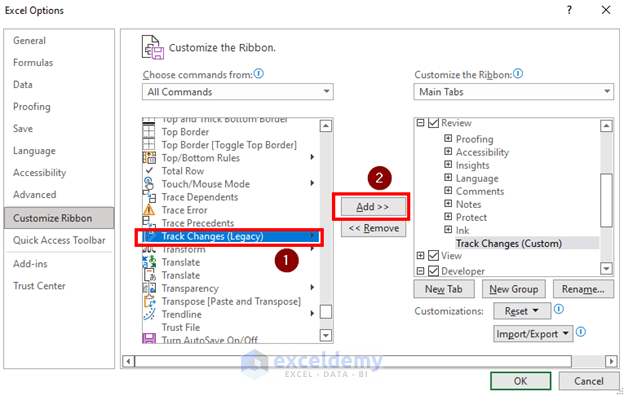
Step 4: Choose All Commands from Drop-Down Box
- After that, select All Commands from the drop-down box (see the image below).

Step 5: Add Track Changes from All Commands
- Now, you have to enable the track changes. For this, select Track Changes (Legacy) from the list of the commands and then Add.
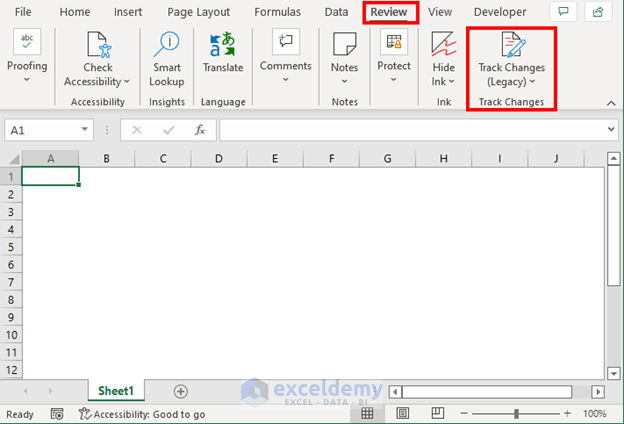
Step 6: Enable Track Changes to Complete the Task
- Now, click OK and complete the process.

- You will see that Excel has enabled the Track Changes option.
Read More: [Solved]: Track Changes Greyed Out in Excel
Things to Remember
- Track Changes are not available by default.
- You can use Co-Authoring as a replacement for Track Changes.
Conclusion
In this article, I have shown an easy way to enable Track Changes. I hope it helps everyone. If you have any kind of suggestions, ideas, or feedback, please feel free to comment down below.
Related Articles
- How to Use Formula to Track Cell Changes in Excel
- How to Check Edit History in Excel Online
- How to See Who Made Changes in Excel
- Excel VBA: Track If a Cell Value Changes
<< Go Back to Track Changes | Share Workbook | Workbook in Excel | Learn Excel
Get FREE Advanced Excel Exercises with Solutions!
