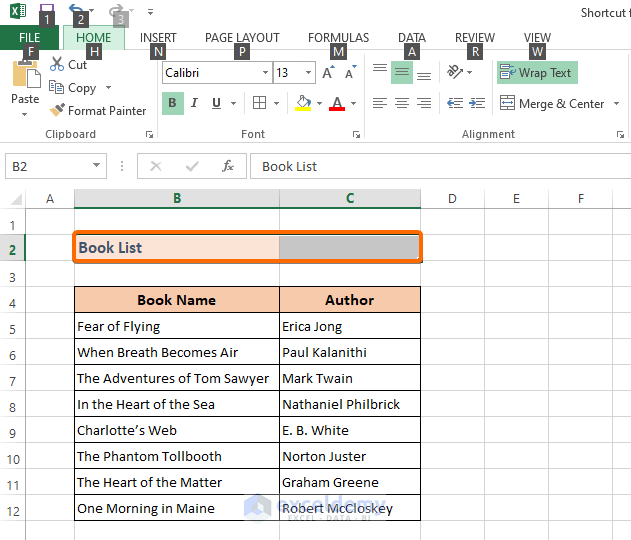
To illustrate, we have a data table with two columns and the title of the table in a single cell.

Example 1 – Shortcut for Merge & Center in Excel
❶ Select the two cells to merge.
❷ Press the ALT key.
The keyboard shortcut hints will display as shown in the image below.
❸ Press H to select the Home menu.
❹ Press M to go to the Merge & Center group.
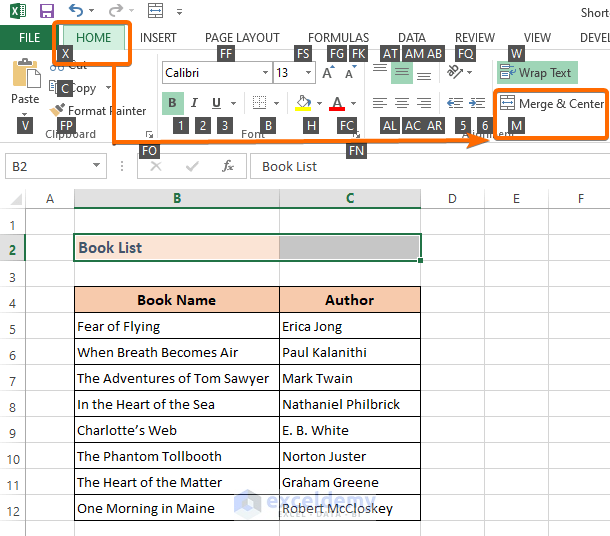
❺ Press C to apply the Merge & Center command.
The shortcut keys for the Merge & Center are ALT > H > M > C. Select the cells and press the keys in sequence. Pressing the final key (C) will center-align as shown in the image below.

Read More: How to Combine Cells Using Excel Formula (6 Methods)
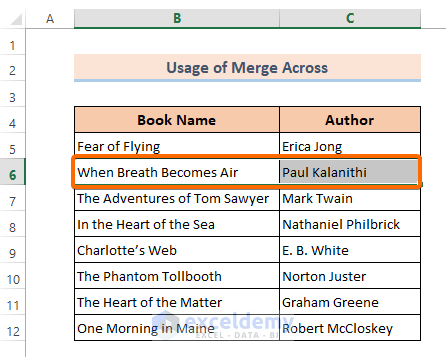
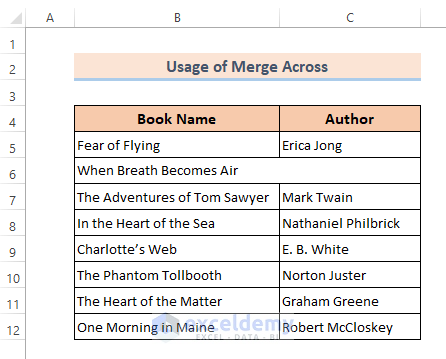
Example 2 – Shortcut for Merge Across in Excel
❶ Select the cell row to merge.
❷ Press ALT > H > M > A in sequence.
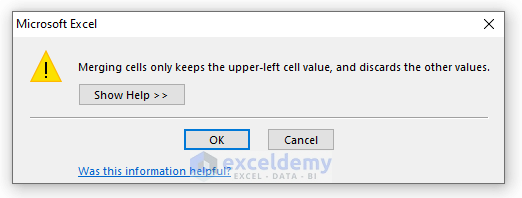
A warning box will open.
❸ Hit OK.
The selected cells will merge as shown in the image below.
Read More: How to Combine Two Cells in Excel (6 Quick Methods)
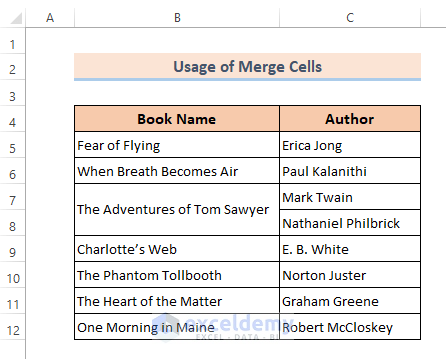
Example 3 – Shortcut for Merge Cells in Excel
❶ Select the cells to merge.
❷ Press ALT > H > M > M in sequence.
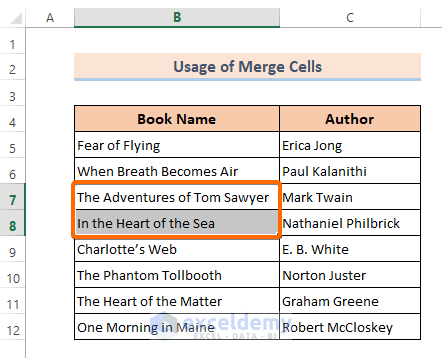
A warning box will open.
❸ Hit OK.

The cells will merge vertically as shown in the image below:
Read More: Excel Shortcut to Merge Cells (3 Methods + Bonus)
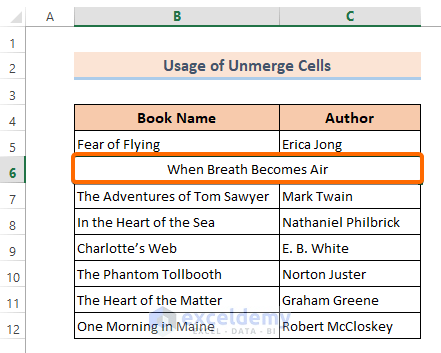
How to Unmerge Cells
❶ Select the cell where you have applied the Merge & Center command.
❷ Press ALT > H > M > U in sequence.
Add Merge & Center to the Quick Access Toolbar
❶ Go to the Home menu from the main ribbon.
❷ Under the Alignment group, right-click on Merge & Center.
❸ Select Add to Quick Access Toolbar.
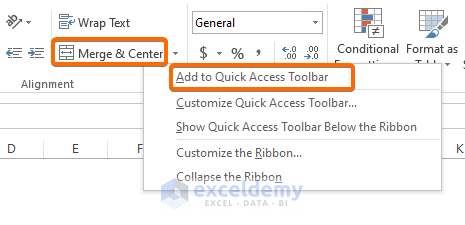
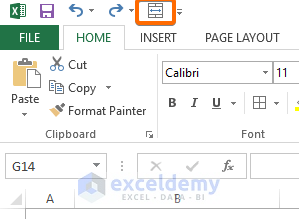
The Merge & Center icon will be added to the quick access toolbar.
Make a Custom Shortcut Key for Merge & Center Using VBA
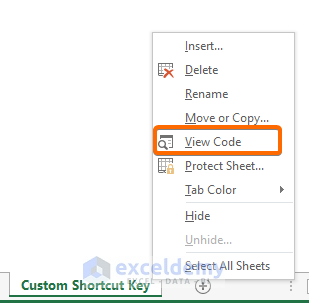
❶ Right-click on the worksheet name and select View Code, or press ALT + F11, to open the VBA editor.
❷ Go to Module from the Insert ribbon.
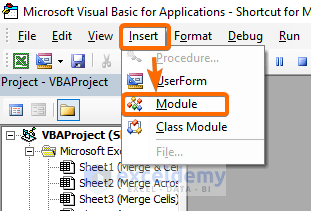
❸ Enter the following VBA code,
Sub MergeAndCenter()

With Selection

.HorizontalAlignment = xlCenter

.Merge

End With

End Sub
❹ Save the code and return back to the worksheet.
❺ Press ALT + F8 to open up the Macro dialog box.
❻ Select the MergeAndCenter function and go to Options.
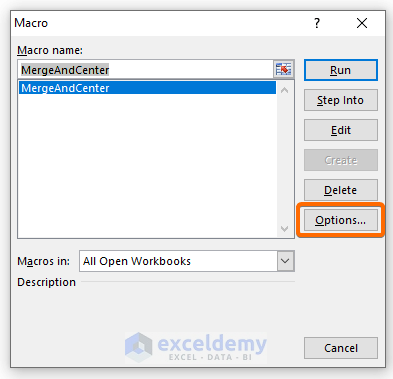
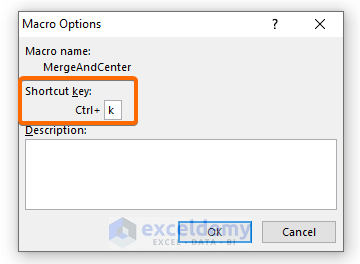
A new dialog box named Macro Options appears.
❼ Set your preferred shortcut key.
❽ Click OK.
Wherever you want to apply the Merge & Center command, select the cells and press the shortcut key(s) you set.
Read More: How to Combine Cells in Excel (4 Methods + Shortcut)
Download Practice Workbook
Related Articles
- How to Combine Names in Excel with Space (6 Approaches)
- Combine Two Cells in Excel with a Dash (5 Methods)
- Combine Cells into One with Line Break in Excel (5 Methods)
- How to Combine Cells with Same Value in Excel (3 Easy Ways)

