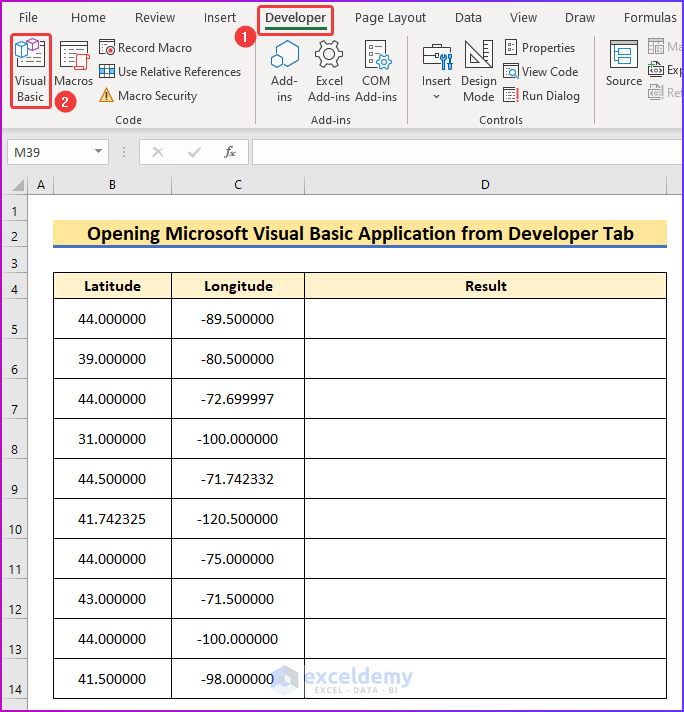
Method 1 – Open Microsoft Visual Basic Application from Developer Tab
- Go to the Developer tab of the ribbon
- From the Code group, select Visual Basic.
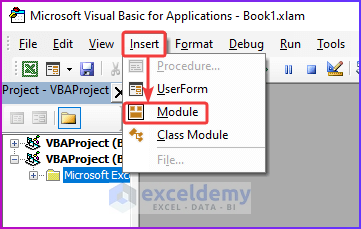
- You will see the Visual Basic window.
- From the Insert tab, choose Module.
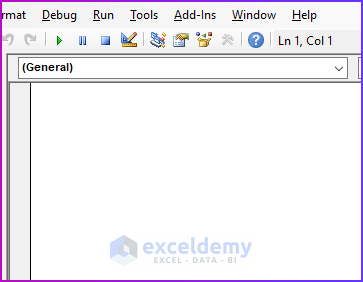
- A module will look like the following image after opening, where you can write the code.
Method 2 – Select Necessary Reference from Tool Option
- From the Tools tab of the VBA window, select References.
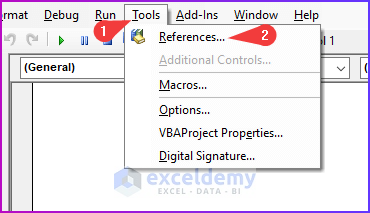
- You will see a list of available references in the References – VBAProject dialog box.
- Select Microsoft XML, v3.0, and make sure the reference is marked.
- Press OK.

Method 3 – Use Code to Build Required Custom Function
- Copy the following code and paste it into the module from the first step.
- We named the custom functions as ReverseGecoder.
Option Explicit
Function ReverseGeocoder(lati As Double, longi As Double) As String
On Error GoTo 0
Dim xD As New MSXML2.DOMDocument
Dim URL As String, vbErr As String
xD.async = False
URL = "https://nominatim.openstreetmap.org/reverse?lat=" + CStr(lati) + _
"&lon=" + CStr(longi)
xD.Load ("https://nominatim.openstreetmap.org/reverse?lat=" + CStr(lati) + _
"&lon=" + CStr(longi))
If xD.parseError.ErrorCode <> 0 Then
Application.Caller.Font.ColorIndex = vbErr
ReverseGeocoder = xD.parseError.reason
Else
xD.SetProperty "SelectionLanguage", "XPath"
Dim loca As MSXML2.IXMLDOMElement
Set loca = xD.SelectSingleNode(" / reversegeocode / result")
If loca Is Nothing Then
Application.Caller.Font.ColorIndex = vbErr
ReverseGeocoder = xD.XML
Else
Application.Caller.Font.ColorIndex = vbOK
ReverseGeocoder = loca.Text
End If
End If
Exit Function
0:
Debug.Print Err.Description
End Function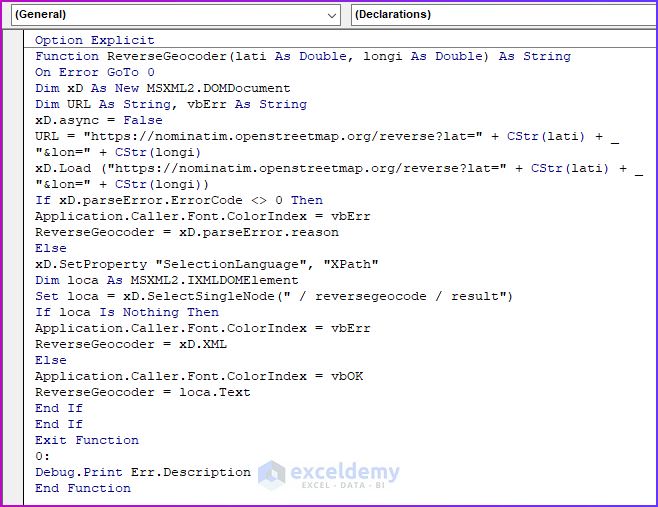
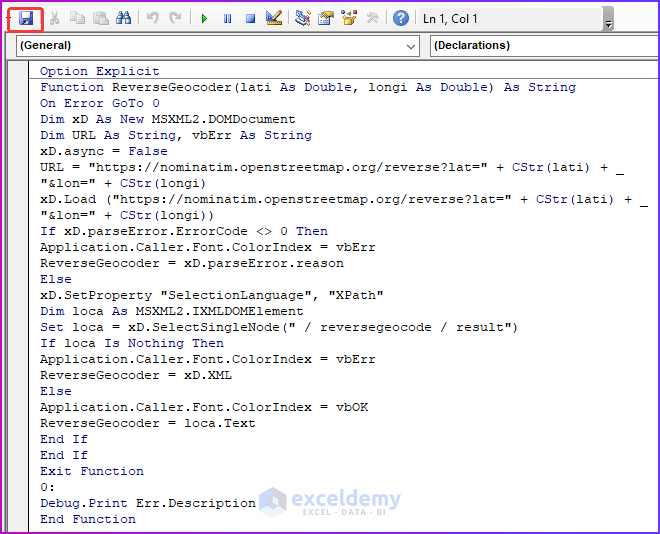
- After pasting the code save it, and go back to the worksheet with the coordinates.
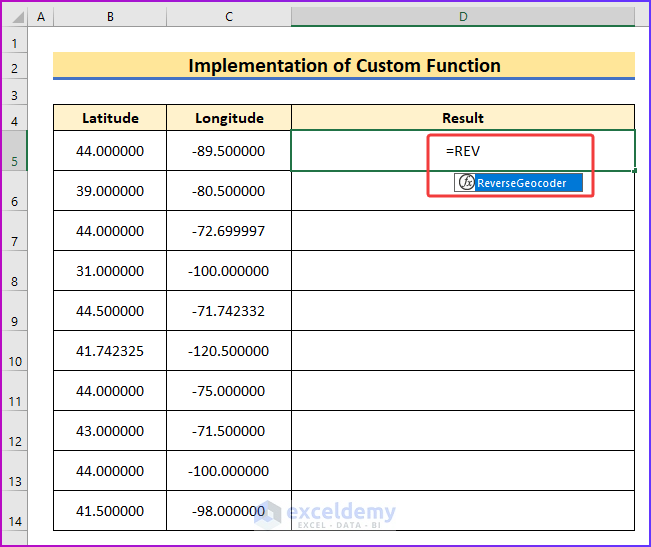
Method 4 – Implement Custom Function
- In your Excel sheet, type =REV in cell D5 and you will see the auto-suggestion of the custom function from the previous step.
- Select the function press Tab on the keyboard or double-click on the function using the mouse.
- Implement the function type the following formula in cell D5.
=ReverseGeocoder(B5,C5)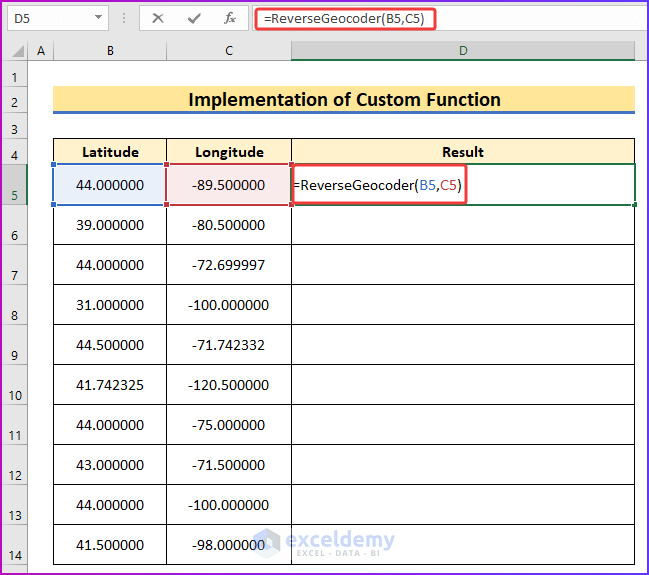
- Press Enter and see the desired location for the coordinates of cells B5 and C5.

Method 5 – Show Final Result
- The AutoFill feature in the following image is if you take your cursor at the lower right corner of cell D5.
- Drag the feature to the lower to implement the formula in the lower cells as well.

- You will be able to see all the locations by using the custom functions which work as a reverse geocoder.

Things to Remember
- If you don’t activate the reference before implementing the custom function, it won’t show the desired result.
- Your Excel file might act slower after implementing the function, so keep patience after using AutoFill.
Download Practice Workbook
You can download the free Excel workbook here and practice on your own.
<< Go Back to Geocoding in Excel | Learn Excel
Get FREE Advanced Excel Exercises with Solutions!

Hi Araf, thank you for sharing Knoledge.
is it possible to get only the city name? what should i change in the code?
Hello KHALED
Thanks for your nice words. Your appreciation means a lot to us. You only want to get the city name from lat and long values.
I am delighted to inform you that I have developed another VBA User-defined function named ExtractCityNames that will extract the city names by taking input from the User-defined function mentioned in this article.
Follow these steps:
Things to Remember: The return time can be longer than usual as we use complex Excel VBA User-defined functions.
I am attaching the solution workbook for better understanding. Hopefully, the idea will fulfil your goal. Stay Blessed.
DOWNLOAD SOLUTION WORKBOOK
Regards
Lutfor Rahman Shimanto
Excel & VBA Developer
ExcelDemy
Great Job, thanks!
I would like to have all information in different fields, e.E. Country, Street, House number, etc. Especially I need the Country values. Any idea?
Peter
Hello Peter Berger
Thanks for your nice words. Your appreciation means a lot to us.
You wanted to get all the address information in different columns. To do so, I have developed another assistive VBA user-defined function and improved the existing user-defined function named ReverseGeocoder. Using these two functions, you can quickly fulfil your goal.
Follow these steps:
I hope you have found the VBA user-defined function helpful. I have attached the solution workbook; good luck.
DOWNLOAD SOLUTION WORKBOOK
Regards
Lutfor Rahman Shimanto
Excel & VBA Developer
ExcelDemy
The extraction of cities work not well:
The identified city here is not “Marmara Bölgesi”, it’s Istanbul!
41.03 28.96 Kadir Has Caddesi, Küçükmustafapaşa, Yavuz Sultan Selim Mahallesi, İstanbul, Fatih, İstanbul, Marmara Bölgesi, 34083, Türkiye “Marmara Bölgesi”
The identified city here is not “France métropolitaine”, it’s Troyes!
48.30 4.08 55, Rue de la Cité, Quartier de la Cité, Troyes, Aube, Grand Est, France métropolitaine, 10000, France “France métropolitaine”
Additional to my last message it would better to take the nominatim results and use the field like in the second block, the block of the answer, for single fields in Excel. Then no errors would be possible.
Example of an answer from nominatim:
25b, Bauherrenstrasse, Höngg, Kreis 10, Zurich, District Zurich, Zurich, 8049, Switzerland
25b
Bauherrenstrasse
Höngg
Zurich
District Zurich
Zurich
CH-ZH
8049
Switzerland
ch
Kind regards
Peter
Dear Peter Berger
Thanks for your feedback. Perhaps you are right about using the direct results from Nominatim, which would lead to more accurate outcomes. However, we have to get the result from the response from the Nominatim API.
In addition to your previous post, you wanted to get all the information in a column but in different cells. Do not worry! I have improved the previously given code by using a 2D array.
SOLUTION Overview:
Required Excel VBA User-Defined Functions:
Hopefully, you have found the idea helpful. Download the solution workbook. Stay blessed.
DOWNLOAD SOLUTION WORKBOOK
Regards
Lutfor Rahman Shimanto
Excel & VBA Developer
ExcelDemy
Thanks a lot for these codes. They worked pretty well but on a few set of coordinates.
I have over 5,000 sets of coordinates and am wondering if there is anything that can reverse geocode these in minutes?
Regards,
Olaide
Hello Olaide
Thanks for thanks! You are very welcome. Your appreciation means a lot to us.
You are right! The user-defined function works perfectly fine for a few sets of coordinates. I have reviewed the code and estimated the time required to perform it on a pair of coordinates; it takes 5.7 seconds on my machine (the time can vary from device). It will take almost 8 hours to perform 5000 sets of coordinates with a spontaneous internet connection.
The user-defined function mentioned in this article uses the OpenStreetMap Nominatim API to perform reverse geocoding. It retrieves location information based on the lat and long values given to it. It must take the required time to perform perfectly.
So, it is impossible to reverse geocode 5000 sets of coordinates within minutes. If you ever feel like getting location information without applying the user-defined function like the regular Excel function, you can use the following sub-procedure. You need to run the code, and it will consider the lat and long values as columns B and C starting from row 3 and display the result in column D.
I hope you understand the situation. Stay blessed.
Regards
Lutfor Rahman Shimanto
Excel & VBA Developer
ExcelDemy
I’m glad I came back here! it didn’t work for me before but I see that you updated it. I’m going to give it a shot! fingers crossed.
Hello Jen,
Thanks for coming back, hopefully it will work this time. If it doesn’t work, you can let us know your problem in the comment section below.
Regards
ExcelDemy
SO YAYYY IT WORKS BUT… Can I get the code with less information and would that require less RAM to perform? Like I dont need the county or the town… Just the physical address like house number, road, city, state and zip code? Thanks again!
Dear Jen
Thanks for explaining your requirements clearly. I have reviewed the existing user-defined function and tried to improve it to achieve your goal. The improved user-defined function will try to populate house numbers, roads, cities, states and zip codes by taking Lat and Long values; if any item is missing, it will display an extension like Incomplete!
Follow these steps:
I hope you have found the user-defined function of reverse geocoding you were looking for. I have attached the solution workbook as well. Good luck.
DOWNLOAD SOLUTION WORKBOOK
Regards
Lutfor Rahman Shimanto
Excel & VBA Developer
ExcelDemy
hello,
i am not a vba expert.
tried the suggested sub
after macro got results merely on integer lat lon
here is an example
57 25 Snaudas, Mālpils pagasts, Siguldas novads, LV-2152, Latvija
if coordinates are with decimals, it yields
The download of the specified resource has failed.
thanks
juris hazners
Hello Juris Hazners,
Thanks for your comment! The issue occurs because the VBA script might not be correctly formatting the latitude and longitude values with decimals when sending the request to the API. Try ensuring that both latitude and longitude are passed as decimal numbers (with a period . as the decimal separator), not integers or comma-separated values.
Also, check your regional settings in Excel, if your system uses a comma (,) instead of a dot (.) for decimals, that could cause the “resource download failed” error.
You can fix it by adjusting the VBA code line where the URL is created, for example:
url = “https://nominatim.openstreetmap.org/reverse?format=json&lat=” & Replace(lat, “,”, “.”) & “&lon=” & Replace(lon, “,”, “.”)
This ensures the coordinates are formatted properly before calling the API. Hope this helps!
Regards,
ExcelDemy