Here’s the overview of performing ReDim 2D array in Excel VBA. Here, we decrease the array size.
How to Open the VBA Macro Editor in Excel
Steps:
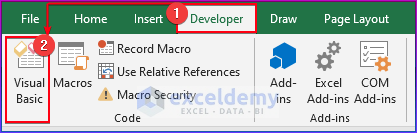
- Open the Developer tab and select the Visual Basic command, or press Alt + F11.
- The Visual Basic window will open.
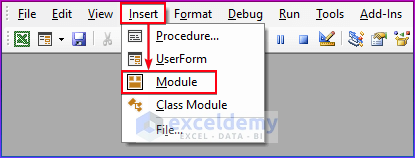
- From the Insert option, choose the new Module to write the VBA code.
Redim 2D Array with VBA in Excel: 3 Examples
Example 1 – Using ReDim Preserve Statement for 2D Array to Resize Both Dimensions
Case 1.1 – Increase Column Dimension

- Insert and run the following code in a module.
Sub Increase_Column_Dimension()
    Dim ArrayIndex() As Variant
    ReDim ArrayIndex(1 To 3, 1 To 2)
    ArrayIndex(1, 1) = "Ronin"
    ArrayIndex(2, 1) = "John"
    ArrayIndex(3, 1) = "Jimmy"
    ArrayIndex(1, 2) = 25000
    ArrayIndex(2, 2) = 26000
    ArrayIndex(3, 2) = 20000
    ReDim Preserve ArrayIndex(1 To 3, 1 To 3)
    ArrayIndex(1, 3) = "Developer"
    ArrayIndex(2, 3) = "IT"
    ArrayIndex(3, 3) = "Software"
    Range("C6:E8").Value = ArrayIndex
End Sub
VBA Breakdown
- This code starts with the Sub statement and the name of the subroutine, “Increase_Column_Dimension()“.
Sub Increase_Column_Dimension()- This line defines a Variant variable named “ArrayIndex” as an empty array.
Dim ArrayIndex() As Variant- The “ArrayIndex” variable’s dimensions are changed in this line using the ReDim command to 3 rows by 2 columns.
ReDim ArrayIndex(1 To 3, 1 To 2) - These lines assign the names “Ronin,” “John,” and “Jimmy” to the first column of the “ArrayIndex” variable, and the associated salaries of $25,000, $26,000, and $20,000 to the second column.
ArrayIndex(1, 1) = "Ronin"
ArrayIndex(2, 1) = "John"
ArrayIndex(3, 1) = "Jimmy"
ArrayIndex(1, 2) = 25000
ArrayIndex(2, 2) = 26000
ArrayIndex(3, 2) = 20000- The “ArrayIndex” variable is resized in this line by adding a third column while keeping the current values intact. This is done using the ReDim Preserve command.
ReDim Preserve ArrayIndex(1 To 3, 1 To 3)- These lines add the employment descriptions “Developer,” “IT,” and “Software” to the “ArrayIndex” variable’s new third column.
ArrayIndex(1, 3) = "Developer"
ArrayIndex(2, 3) = "IT"
ArrayIndex(3, 3) = "Software"- This line assigns the array elements in the “ArrayIndex” variable from the range of C6 cell to E8 cell in the active worksheet.
End SubWe have defined an array of 3 rows and 2 columns. This code adds a new column with new array elements using a simple VBA macro.
Case 1.2 – Decrease Column Dimension
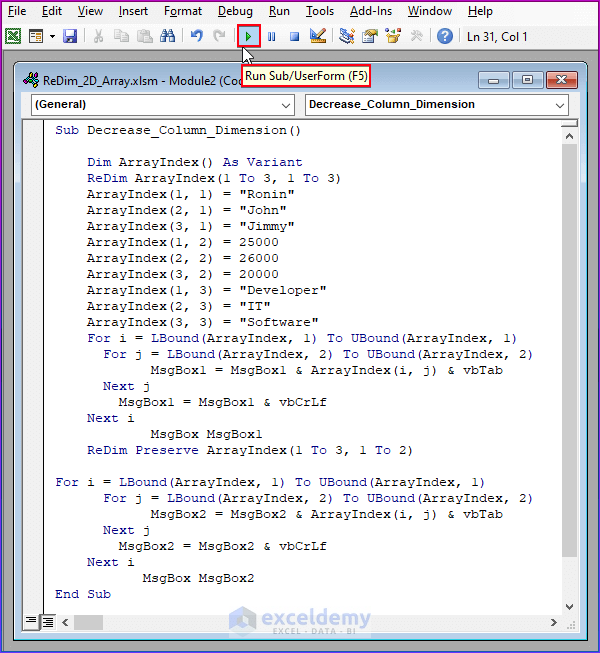
- Insert and run the following code in a module.
Sub Decrease_Column_Dimension()
    Dim ArrayIndex() As Variant
    ReDim ArrayIndex(1 To 3, 1 To 3)
    ArrayIndex(1, 1) = "Ronin"
    ArrayIndex(2, 1) = "John"
    ArrayIndex(3, 1) = "Jimmy"
    ArrayIndex(1, 2) = 25000
    ArrayIndex(2, 2) = 26000
    ArrayIndex(3, 2) = 20000
    ArrayIndex(1, 3) = "Developer"
    ArrayIndex(2, 3) = "IT"
    ArrayIndex(3, 3) = "Software"
    For i = LBound(ArrayIndex, 1) To UBound(ArrayIndex, 1)
      For j = LBound(ArrayIndex, 2) To UBound(ArrayIndex, 2)
            MsgBox1 = MsgBox1 & ArrayIndex(i, j) & vbTab
      Next j
        MsgBox1 = MsgBox1 & vbCrLf
    Next i
            MsgBox MsgBox1
    ReDim Preserve ArrayIndex(1 To 3, 1 To 2)
For i = LBound(ArrayIndex, 1) To UBound(ArrayIndex, 1)
      For j = LBound(ArrayIndex, 2) To UBound(ArrayIndex, 2)
            MsgBox2 = MsgBox2 & ArrayIndex(i, j) & vbTab
      Next j
        MsgBox2 = MsgBox2 & vbCrLf
    Next i
           MsgBox MsgBox2
End Sub
VBA Breakdown
- This code starts with the Sub statement and the name of the subroutine, “Decrease_Column_Dimension()“.
Sub Decrease_Column_Dimension()- The first column contains the names “Ronin,” “John,” and “Jimmy,” the second column contains the corresponding salaries of $25,000, $26,000, and $20,000, and the third column contains the job titles “Developer,” “IT,” and “Software.” These lines create a 3×3 array called “ArrayIndex” and fill it with some data.
Dim ArrayIndex() As Variant
    ReDim ArrayIndex(1 To 3, 1 To 3)
    ArrayIndex(1, 1) = "Ronin"
    ArrayIndex(2, 1) = "John"
    ArrayIndex(3, 1) = "Jimmy"
    ArrayIndex(1, 2) = 25000
    ArrayIndex(2, 2) = 26000
    ArrayIndex(3, 2) = 20000
    ArrayIndex(1, 3) = "Developer"
    ArrayIndex(2, 3) = "IT"
ArrayIndex(3, 3) = "Software"- This line of code concatenates each element of the “ArrayIndex” array into a string variable called “MsgBox1” with a tab as a separator after iterating through each element of the array using two stacked “For” loops. The string variable is combined with a newline character following the conclusion of each row. (vbCrLf). The “MsgBox” command is then used to display the full string in a message box.
 For i = LBound(ArrayIndex, 1) To UBound(ArrayIndex, 1)
      For j = LBound(ArrayIndex, 2) To UBound(ArrayIndex, 2)
            MsgBox1 = MsgBox1 & ArrayIndex(i, j) & vbTab
      Next j
        MsgBox1 = MsgBox1 & vbCrLf
    Next i
MsgBox MsgBox1- This line resizes the “ArrayIndex” array by eliminating the third column while keeping the old values by using the “ReDim Preserve” statement.
ReDim Preserve ArrayIndex(1 To 3, 1 To 2)- This is similar to the preceding piece of code, this one runs through the “ArrayIndex” array once more following the removal of the third column. The components are combined into a new string variable called “MsgBox2,” and the “MsgBox” method is used to display the complete string in a message box.
For i = LBound(ArrayIndex, 1) To UBound(ArrayIndex, 1)
      For j = LBound(ArrayIndex, 2) To UBound(ArrayIndex, 2)
            MsgBox2 = MsgBox2 & ArrayIndex(i, j) & vbTab
      Next j
        MsgBox2 = MsgBox2 & vbCrLf
    Next i
           MsgBox MsgBox2
End SubWe have defined an array of 3 rows and 3 columns. We decreased a column dimension using a simple VBA macro.
Read More: Excel VBA 2 Dimensional Array Initialization
Example 2 – Using the ReDim Preserve Statement for a 2D Array to Increase Both Dimensions
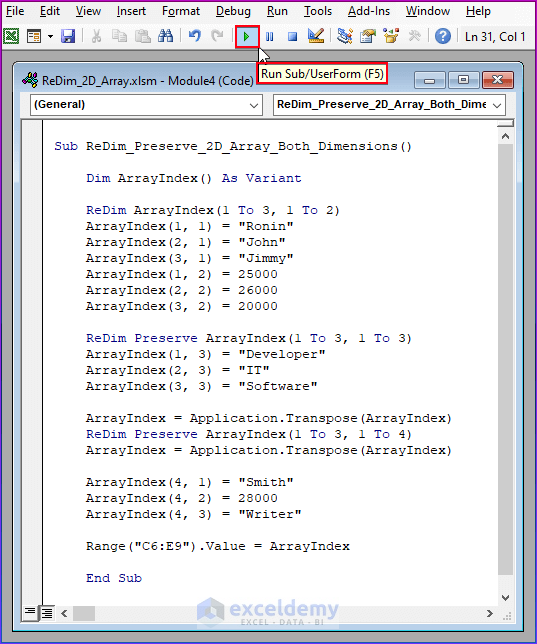
- Insert and run the following code in a module.
Sub ReDim_Preserve_2D_Array_Both_Dimensions()
    Dim ArrayIndex() As Variant
    ReDim ArrayIndex(1 To 3, 1 To 2)
    ArrayIndex(1, 1) = "Ronin"
    ArrayIndex(2, 1) = "John"
    ArrayIndex(3, 1) = "Jimmy"
    ArrayIndex(1, 2) = 25000
    ArrayIndex(2, 2) = 26000
    ArrayIndex(3, 2) = 20000
    ReDim Preserve ArrayIndex(1 To 3, 1 To 3
    ArrayIndex(1, 3) = "Developer"
    ArrayIndex(2, 3) = "IT"
    ArrayIndex(3, 3) = "Software"
    ArrayIndex = Application.Transpose(ArrayIndex)
    ReDim Preserve ArrayIndex(1 To 3, 1 To 4)
    ArrayIndex = Application.Transpose(ArrayIndex)
    ArrayIndex(4, 1) = "Smith"
    ArrayIndex(4, 2) = 28000
    ArrayIndex(4, 3) = "Writer"
    Range("C6:E9").Value = ArrayIndex
    End Sub
VBA Breakdown
- This code starts with the Sub statement and the name of the subroutine,
"ReDim_Preserve_2D_Array_Both_Dimensions()".
 Sub ReDim_Preserve_2D_Array_Both_Dimensions()
- This line designates the variable “ArrayIndex” as a variant data type, which allows it to store any kind of data. Although the array’s size has not yet been determined, the variable is one.
Dim ArrayIndex() As Variant- With the “ReDim” statement, the “ArrayIndex” variable is resized in this line to have 3 rows and 2 columns. With the help of this line, the array is set up as a two-dimensional array with three rows and two columns. At this time, the array’s values are not defined.
ReDim ArrayIndex(1 To 3, 1 To 2)- These lines assign values to the “ArrayIndex” variable, populating the 3×2 array with the first column containing the names of three people, and the second column containing the third person’s salary.
ArrayIndex(1, 1) = "Ronin"
ArrayIndex(2, 1) = "John"
ArrayIndex(3, 1) = "Jimmy"
ArrayIndex(1, 2) = 25000
ArrayIndex(2, 2) = 26000
ArrayIndex(3, 2) = 20000- This line maintains the array’s current data while resizing the “ArrayIndex” variable to have 3 rows and 3 columns. The array’s data is protected from loss when resizing using the “Preserve” keyword.
ReDim Preserve ArrayIndex(1 To 3, 1 To 3)- These lines populate the third column of the “ArrayIndex” variable with the job titles of the people by assigning values to the new column.
ArrayIndex(1, 3) = "Developer"
ArrayIndex(2, 3) = "IT"
ArrayIndex(3, 3) = "Software"- This line flips the rows and columns of the “ArrayIndex” variable. To add a new row to the array, this is required.
ArrayIndex = Application.Transpose(ArrayIndex)- The existing data in the array is preserved as the “ArrayIndex” variable is resized to have 3 rows and 4 columns in this line. No variables are initialized for the new row.
ReDim Preserve ArrayIndex(1 To 3, 1 To 4)- The “ArrayIndex” variable gets transposed back to its original orientation by this line.
ArrayIndex = Application.Transpose(ArrayIndex)- These lines assign values to the new row in the “ArrayIndex” variable, filling the fourth row with the name, salary, and job title of a new individual.
ArrayIndex(4, 1) = "Smith"
ArrayIndex(4, 2) = 28000
ArrayIndex(4, 3) = "Writer"- This line assigns a set of worksheet cells the values contained in the “ArrayIndex” variable. It specifically gives the cells in the range C6:E9 the values from the 3×4 array.
Range("C6:E9").Value = ArrayIndex- Finally, this VBA macro ends with an End statement.
End SubRead More: How to ReDim Preserve 2D Array in Excel VBA
Example 3 – Using the ReDim Statement for a 2D Array to Combine Array Elements from Multiple Worksheets
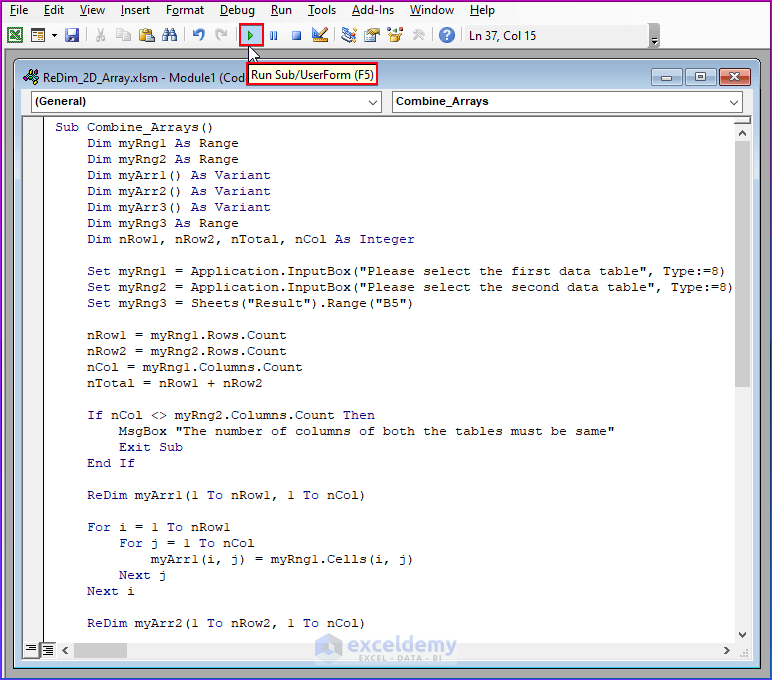
- Insert and run the following code in a module.
Sub Combine_Arrays()
    Dim myRng1 As Range
    Dim myRng2 As Range
    Dim myArr1() As Variant
    Dim myArr2() As Variant
    Dim myArr3() As Variant
    Dim myRng3 As Range
    Dim nRow1, nRow2, nTotal, nCol As Integer
    Set myRng1 = Application.InputBox("Please select the first data table", Type:=8)
    Set myRng2 = Application.InputBox("Please select the second data table", Type:=8)
    Set myRng3 = Sheets("Result").Range("B5")
    nRow1 = myRng1.Rows.Count
    nRow2 = myRng2.Rows.Count
    nCol = myRng1.Columns.Count
    nTotal = nRow1 + nRow2
    If nCol <> myRng2.Columns.Count Then
        MsgBox "The number of columns of both the tables must be same"
        Exit Sub
    End If
    ReDim myArr1(1 To nRow1, 1 To nCol)
    For i = 1 To nRow1
        For j = 1 To nCol
            myArr1(i, j) = myRng1.Cells(i, j)
        Next j
    Next i
    ReDim myArr2(1 To nRow2, 1 To nCol)
    For i = 1 To nRow2
        For j = 1 To nCol
            myArr2(i, j) = myRng2.Cells(i, j)
        Next j
    Next i
    ReDim myArr3(1 To nTotal, 1 To nCol)
    For i = 1 To nRow1
        For j = 1 To nCol
            myArr3(i, j) = myArr1(i, j)
        Next j
    Next i
    For i = 1 To nRow2
        For j = 1 To nCol
            myArr3(i + nRow1, j) = myArr2(i, j)
        Next j
    Next i
   For i = 1 To nTotal
        For j = 1 To nCol
            myRng3.Cells(i, j) = myArr3(i, j)
        Next j
    Next i
End Sub
VBA Breakdown
- We have declared multiple variables, including ranges, arrays, and integers, throughout the code. The user is asked to choose the two data ranges that should be blended. The code verifies the number of columns in each of the two ranges. If they don’t, the code terminates and an error notification is shown.
Set myRng1 = Application.InputBox("Please select the first data table", Type:=8)
    Set myRng2 = Application.InputBox("Please select the second data table", Type:=8)
    Set myRng3 = Sheets("Result").Range("B5")
    nRow1 = myRng1.Rows.Coun
    nRow2 = myRng2.Rows.Count
    nCol = myRng1.Columns.Count
    nTotal = nRow1 + nRow2
    If nCol <> myRng2.Columns.Count Then
        MsgBox "The number of columns of both the tables must be same"
        Exit Sub
End If- To store the information from the two chosen ranges, two arrays are built. The data from each specified range is transferred into its appropriate array.
ReDim myArr1(1 To nRow1, 1 To nCol)
    For i = 1 To nRow1
        For j = 1 To nCol
            myArr1(i, j) = myRng1.Cells(i, j)
        Next j
    Next i
    ReDim myArr2(1 To nRow2, 1 To nCol)
    For i = 1 To nRow2
        For j = 1 To nCol
            myArr2(i, j) = myRng2.Cells(i, j)
        Next j
Next i- The total number of rows in both specified ranges and the total number of columns in each selected range are added together to generate a third array. The third array receives a copy of the data from the first array. Starting with the row following the last row of the first array, the data from the second array is duplicated into the third array. The output is written to a worksheet’s designated range.
ReDim myArr3(1 To nTotal, 1 To nCol)
    For i = 1 To nRow1
        For j = 1 To nCol
            myArr3(i, j) = myArr1(i, j)
        Next j
    Next i
    For i = 1 To nRow2
        For j = 1 To nCol
            myArr3(i + nRow1, j) = myArr2(i, j)
        Next j
    Next i
   For i = 1 To nTotal
        For j = 1 To nCol
            myRng3.Cells(i, j) = myArr3(i, j)
        Next j
Next iIn general, this VBA macro is helpful for creating a single table from two sets of data that have the same number of columns.
Read More: Excel VBA Multidimensional Arrays
How to Fix ‘Subscript Out of Range’ Error in Excel VBA
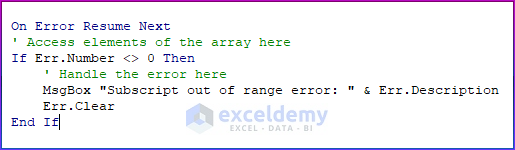
When you attempt to access an element in an array with an index that is either negative, greater than, or equal to the array’s size, you will receive the “subscript out of range” error. Make sure that you are accessing array elements with proper indices in order to fix this error. You can take the following actions to troubleshoot the error:
- Verify the array’s dimensions: Verify that the array’s dimensions were initialized correctly. Accessing an element outside of its range will result in the “subscript out of range” error if the array is too tiny.
- Verify the values of the index: Verify the index values you are using to access the array’s elements are within the acceptable range. The index values must be non-negative and smaller than the array’s size.
- If you’re using loops to access the elements of the array, double-check that the loop conditions are accurate. The loop should go from 0 to the array’s size less one.
- Employ error handling to catch the problem and handle it graciously if you are still receiving the “subscript out of range” message. The “On Error Resume Next” statement can be used to skip over the error and carry on with the code execution, or the “On Error Goto” statement can be used to leap to a specific error handling procedure.
Things to Remember
- We can apply ReDim only in dynamic arrays.
- We are unable to modify the data type using ReDim. The array can keep any data type that is specified while declaring the array.
Download the Practice Workbook
Related Articles
- Excel VBA Multidimensional Array for Assigning Values
- How to Use UBound on Multidimensional Array with VBA in Excel
- Excel VBA to Declare Multidimensional Array of Unknown Size

