Method 1 – Stop Name Conflict Dialog Box with Existing Version
The name conflict error comes from named ranges from several sheets colliding when you copy them. Here’s how you can keep the name ranges from the source.
Steps:
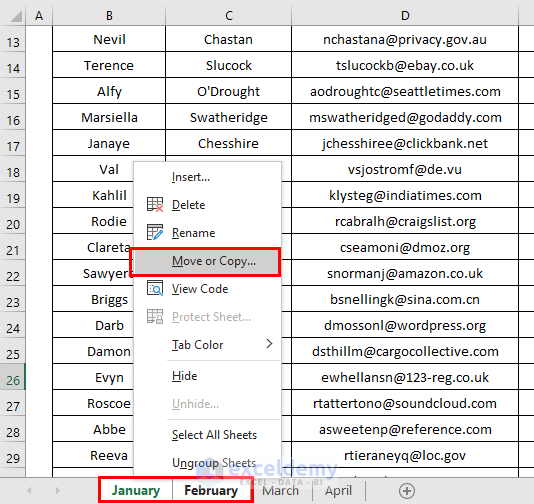
- Select the worksheet you want to move or copy and right-click on it. For selecting multiple sheets, press Ctrl and keep selecting the sheets.
- A list of options will appear. Click on Move or Copy.
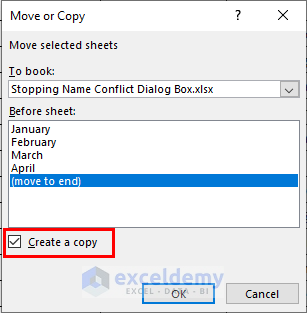
- A dialog box will appear. Select move to end and mark the Create a copy field (if you want to make a copy, otherwise keep the field unmarked).
- Click OK.
- The name conflict error box will appear, describing a named range that already exists in the workbook. If you want to make your copy with this existing version of the name, click Yes on the dialog box. So, the problem for this named range is solved.

- If you have more named ranges, then the dialog box will again appear with a different named range.

- The easiest way to get rid of this for a lot of named ranges is to click on the Yes to All field (in case you want to move on with the existing named range).

Read More: How to Create a Dialog Box in Excel
Method 2 – Rename the Version to Stop the Name Conflict Dialog Box
Steps:
- Open the error box just like Method 1.
- When you want to change the named range, click No on the error box

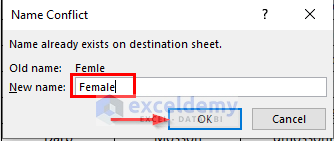
- The Name Conflict pop-up box will open. It will show the already existing name.
- In the New name field, type anything that you want as the new name range.
- Click OK and your worksheets will be copied now with the newly applied name range.
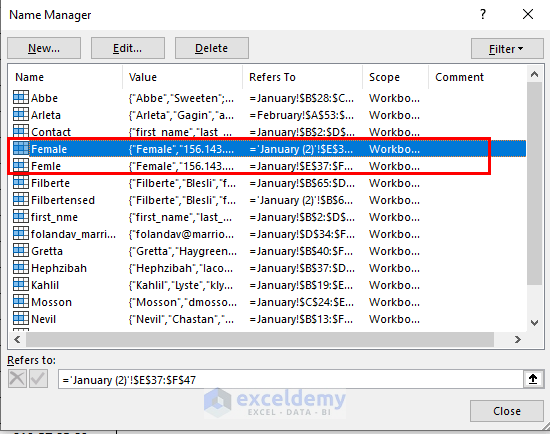
- If you open the Name Manager box (from the Formulas tab and Defined Names group), then you can see the previous name and the newly applied name.
Read More: How to Open the Insert Function Dialog Box in Excel
Method 3 – With Duplicate Range Names
The Name Conflict error won’t occur when you move or copy any single sheet in an Excel workbook. But in the case of copying a worksheet, if you open the Name Manager box, you will find that the scope of the duplicate names is confined to the respective worksheet, not along the workbook.
Read More: Dialog Box Launcher in Excel
Resolve If Name Conflict Error Occurs in Excel
If you don’t want the name conflict error to happen again, then you have to solve the problem thoroughly.
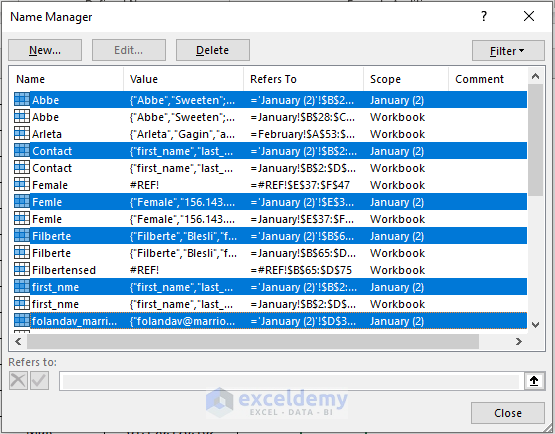
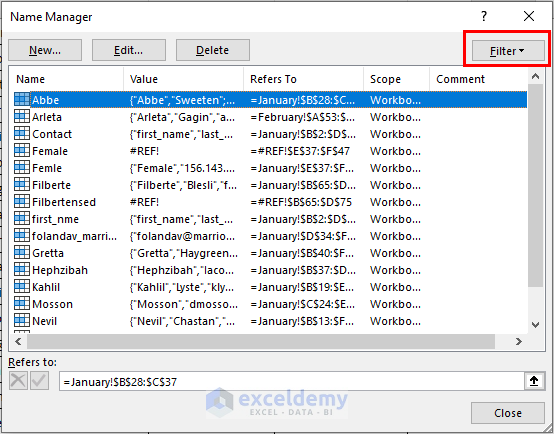
- Open the Name Manager dialog box. The keyboard shortcut to open the dialog box is Ctrl + F3.
- On the right side of the dialog box, you will find a menu with a dropdown Filter. Click on it.
- Select Names with Errors.
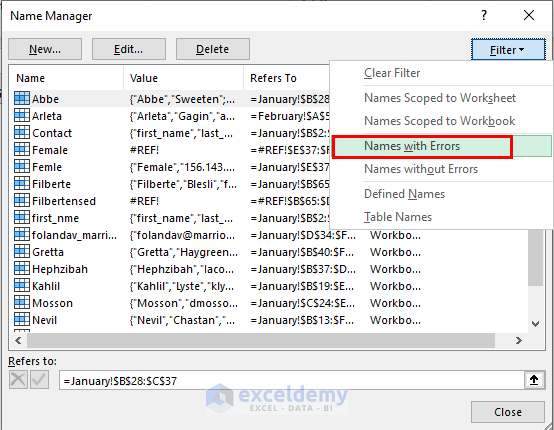
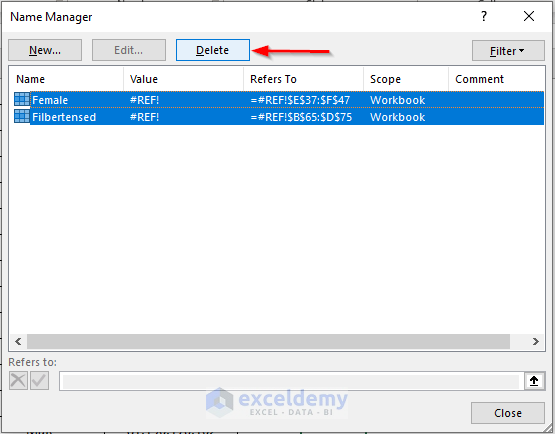
- The names will be filtered, and the dialog box will show only the names with errors.
- Select all the names with errors and click Delete.
Read More: How to Display Excel Options Dialog Box
Things to Keep in Mind
- Keep answering the question in the error box.
- Click Yes or Yes to All to keep the existing name and click No if you want to change the name.
- Press Shift + Ctrl + Esc to exit Excel after the error happens without solving it.
Related Articles
- How to Close Dialog Box in Excel
- [Solved!] Excel Dialog Box Hidden
- How to Input Dialog Box in Excel VBA
<< Go Back to Excel Parts | Learn Excel


hi, thanks for your information. I have another question is “Why excel in my computer doesnt have “Yes to all” button? which version excel have it? Can you let me know. Thanks
Hi DIEP TRAN,
The “Yes to all” button is a feature in Excel that allows you to apply a selected action to all the occurrences of the same conflict during a process. This button is usually available in the Name Manager dialog box, which pops up when you create, edit or delete names in your workbook.
The availability of the “Yes to all” button may vary depending on the version of Excel you are using. However, in most versions of Excel, including the latest version, which is Excel 2021, the “Yes to all” button should be available in the Name Manager dialog box.
If you are not seeing the “Yes to all” button in the Name Manager dialog box, it could be that the dialog box is not showing all the options. You can try expanding the dialog box to see if the “Yes to all” button is hidden or check your Excel settings to ensure that the option is enabled.
Overall, it’s best to consult the specific version of Excel you are using or refer to the documentation to learn more about the availability and functionality of the “Yes to all” button in Excel.
Regards
Rafiul | ExcelDemy Team