This is an overview.
Creating Your Own UserForm
You can develop a macro that works with different data in different circumstances, using custom dialog boxes (UserForm).
The following macro changes the text of a selected cell range to uppercase. But if the cell range has a formula, the macro does not change it. VBA’s built-in StrConv function is used here.
Sub ChangeCase()
For Each cell In Selection
If Not cell.HasFormula Then
cell.Value = StrConv (cell.Value, vbUpperCase)
End If
Next cell
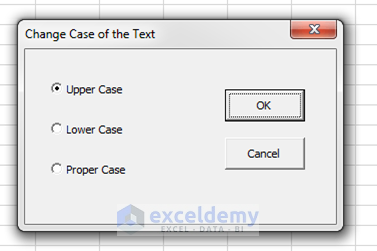
End SubThe macro can be improved: it can also change the cells to lowercase or proper case (only the first letter of each word is uppercase) and display a dialog box to ask the user what type of case to use.
Using this link, you can create a userform that will change cases to Upper, Lower or Proper.
Example 1 – Using a VBA Userform to Enter Data
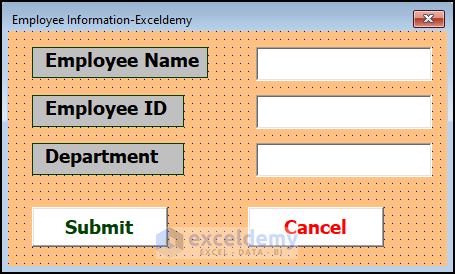
- Prepare a Userform. Choose a layout.
1.1 Names and Captions in the Property Window
- Multiple Controls were inserted using the Toolbox assigned to the Userform. The controls are listed below.
| Control | Name | Caption |
|---|---|---|
| Label | employeename | Employee Name |
| Label | employeeid | Employee ID |
| Label | department | Department |
| TextBox | eName | – |
| TextBox | eID | – |
| TextBox | eDepartment | – |
| CommandButton | SubmitData | Submit |
| CommandButton | CancelData | Cancel |
1.2 Assigned Macros
In the Userform, two macros were assigned to two Command Buttons.
Macro Assigned to the Submit Button
Private Sub SubmitData_Click()
   Dim mData As Long
   mData = Cells(Rows.Count, 1).End(xlUp).Row + 1
   Cells(mData, 1).Value = eName.Value
   Cells(mData, 2).Value = eID.Value
   Cells(mData, 3).Value = eDept.Value
   eName.Value = ""
   eID.Value = ""
   eDept.Value = ""
End Sub
Macro Breakdown
- eName.Value is the Text Value in the “Employee Name” entry in Userform.
- eID.Value is the Text Value in the “Employee ID” entry in Userform.
- eDept.Value is the Text Value in the “Department” entry in Userform.
- The VBA Cells property enters the provided entries in different columns of the same row.
 Cells(mData, 1).Value = eName.Value
 Cells(mData, 2).Value = eID.Value
Cells(mData, 3).Value = eDept.Value- The mData variable counts the existing rows and adds a new row.
mData = Cells(Rows.Count, 1).End(xlUp).Row + 1Macro Assigned to the Cancel Button
Private Sub CancelData_Click()
EmployeeInformation.Hide
End Sub 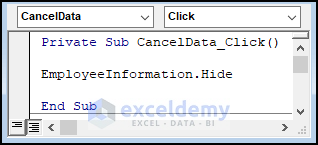
Macro Breakdown
- EmployeeInformation.Hide hides the Userform upon clicking the Cancel Button.
EmployeeInformation.Hide1.3 The Outcome of the Userform
- Press F5 to display the userform.
- Enter data and click Submit in the userform. The entered data gets stored in the Worksheet.
- Click Cancel to exit the userform.
Example 2 – Finding the BMI Using an Excel VBA Userform
- Create a Userform maintaining the layout.
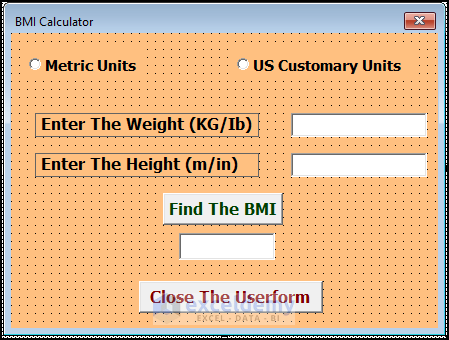
2.1 Names and Captions in the Property Window
- The controls are listed below.
| Control | Name | Caption |
|---|---|---|
| OptionButton | MetricUnits | Metric Units |
| OptionButton | USCustomaryUnits | US Customary Units |
| Label | EnterTheWeight | Enter The Weight |
| Label | EnterTheHeight | Enter The Height |
| TextBox | mWeight | – |
| TextBox | mHeight | – |
| TextBox | mBMI | – |
| CommandButton | FindTheBMI | Find The BMI |
| CommandButton | CloseTheUserform | Close The Userform |
2.2 Assigned Macros
Two macros were assigned to the Submit and Cancel buttons.
Macro Assigned to the Submit Button
Private Sub FindTheBMI_Click()
Dim bmiWeight As Double
Dim bmiHeight As Double
Dim bmiFind As Double
 If MetricUnits.Value = True Then
 Let bmiWeight = CDbl(mWeight.Value)
 Let bmiHeight = CDbl(mHeight.Value)
 bmiFind = (bmiWeight) / (bmiHeight) ^ 2
 bmiFind = Format(bmiFind, "0.00")
 Let mBMI.Value = bmiFind
 End If
 If USCustomaryUnits.Value = True Then
 Let bmiWeight = CDbl(mWeight.Value)
 Let bmiHeight = CDbl(mHeight.Value)
 bmiFind = (bmiWeight) / (bmiHeight ^ 2) * 703.0704
 bmiFind = Format(bmiFind, "0.00")
 Let mBMI.Value = bmiFind
 End If
End Sub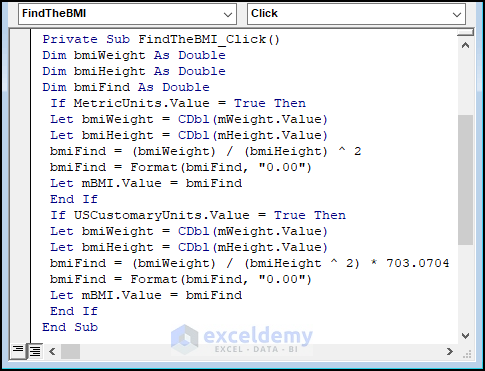
Macro Breakdown
- The Excel CDBL function converts the provided values to Double Data.
 Let bmiWeight = CDbl(mWeight.Value)
Let bmiHeight = CDbl(mHeight.Value)- The formulas find the BMIs:
- For Metric Units (KG-Meter)
bmiFind = (bmiWeight) / (bmiHeight) ^ 2- For US Customary Units (Ib-Inch)
bmiFind = (bmiWeight) / (bmiHeight ^ 2) * 703.0704Macro Assigned to the Cancel Button
Private Sub CloseTheUserform_Click()
Unload BMICalculator
End Sub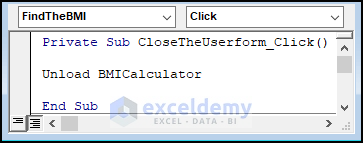
Macro Breakdown
- Unload BMICalculator exits the Userform upon clicking the Cancel Button.
Unload BMICalculator2.3 The Outcome of the Userform
- Press F5 to display the userform.
- Enter data and click Submit in the userform.
- The Userform displays the BMI.
- Click Cancel to exit the userform.
Calling Userforms by a Click in an Excel Worksheet
Insert a Macro Button in the worksheet.
Assigned Macro
- Create a Macro Button.
- Right-click> Select Assign Macro.
The Userform will be displayed.
Private Sub CancelData_Click()
EmployeeInformation.Show
'Or EmployeeInformation.Show
End Sub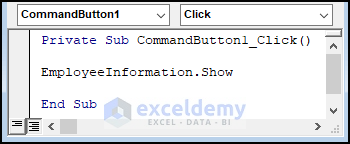
Download Excel Workbook
Download the Template.
Related Articles
- How to Make a Calculator in Excel
- How to Create a Calculator Using Macros in Excel
- Excel VBA: Create a Progress Bar While Macro Is Running
- How to Create Cascading Combo Boxes in Excel VBA User Form

