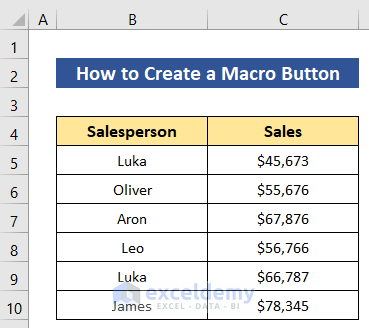
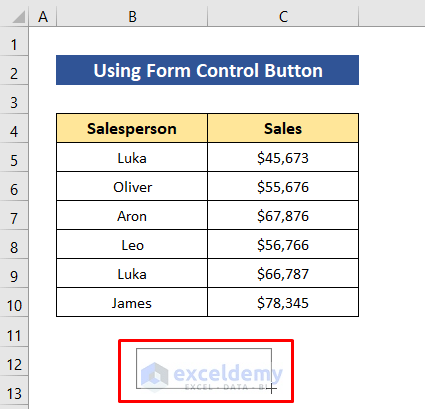
This is the sample dataset.
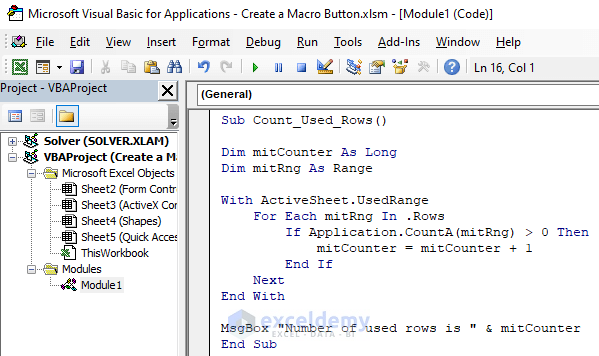
Use this code to assign to macro buttons that will return the row numbers in the active sheet.
Method 1 – Using the Control Button to Create a Macro Button
1.1. Using Form Control Button
Steps:
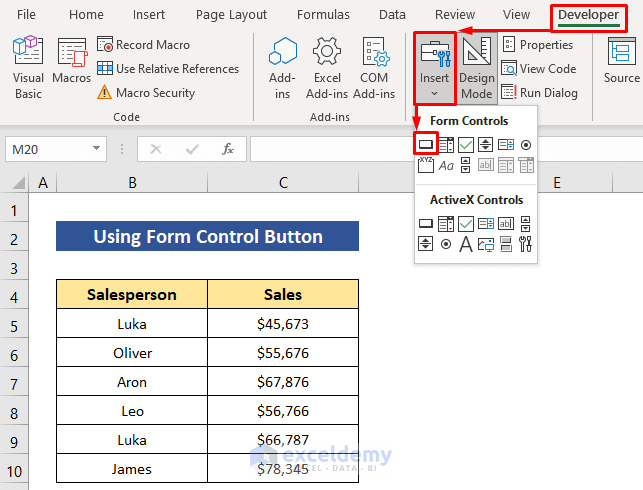
- Go to: Developer > Insert > Form Controls > Button.
Your cursor will display a plus sign.
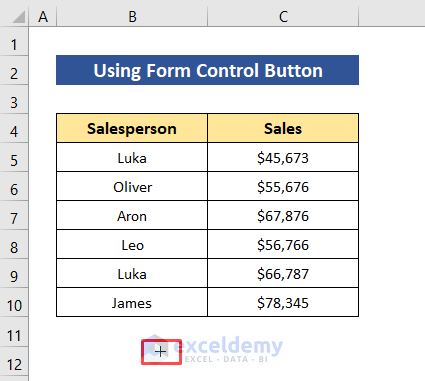
- Left-click and hold; drag the cursor to place the button.
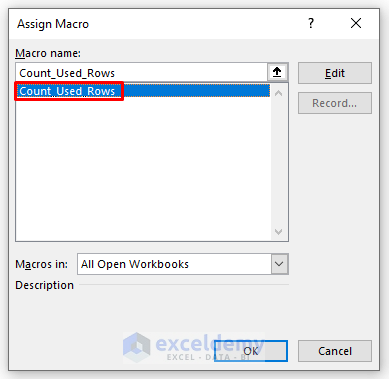
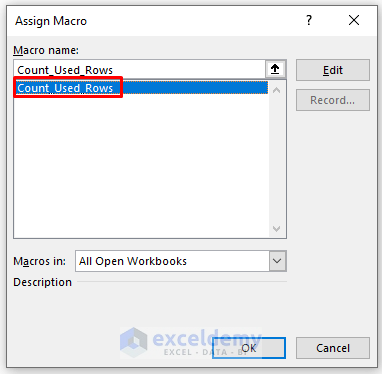
- In the Assign Macro dialog box, select the Macro name.
- Click OK.
You can change the button name and edit the size of the macro button.
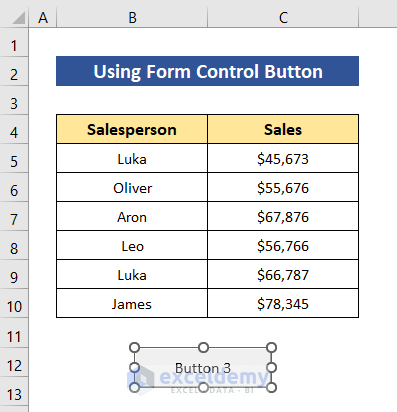
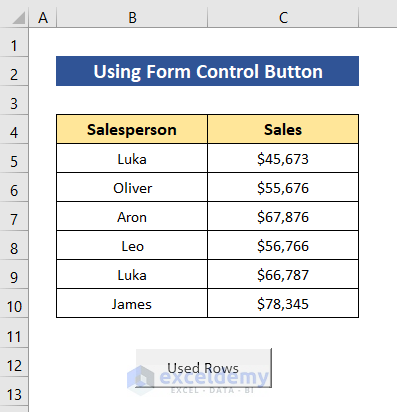
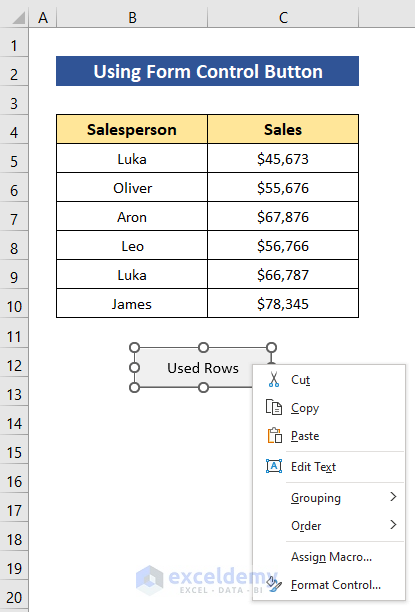
- Double-click the button and enter the name. Here, Used Rows.
- If you right-click the button, you will be able to further edit the macro button.
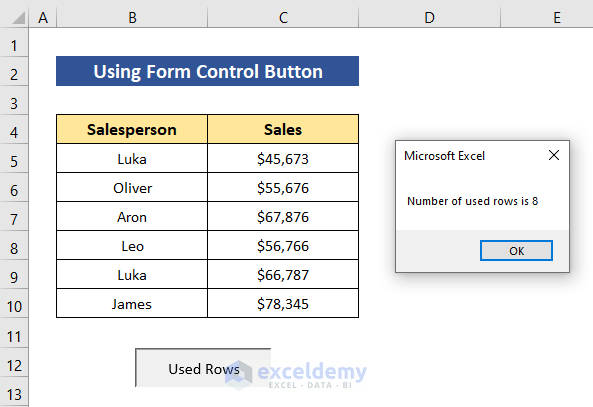
- Click the button to run the macro and see the output:
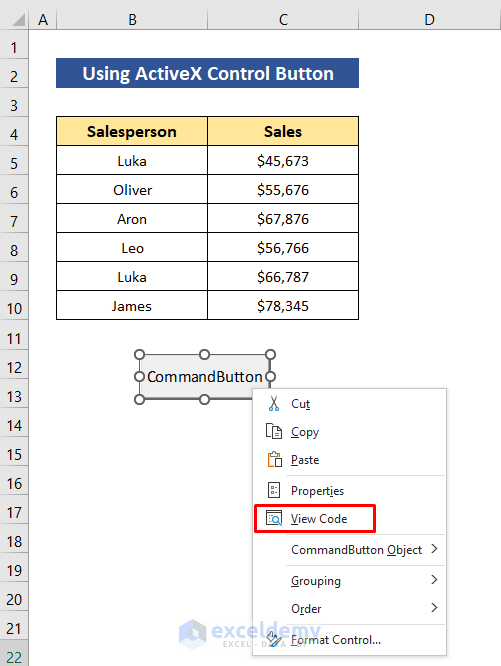
1.2. Using the ActiveX Control Button
Steps:
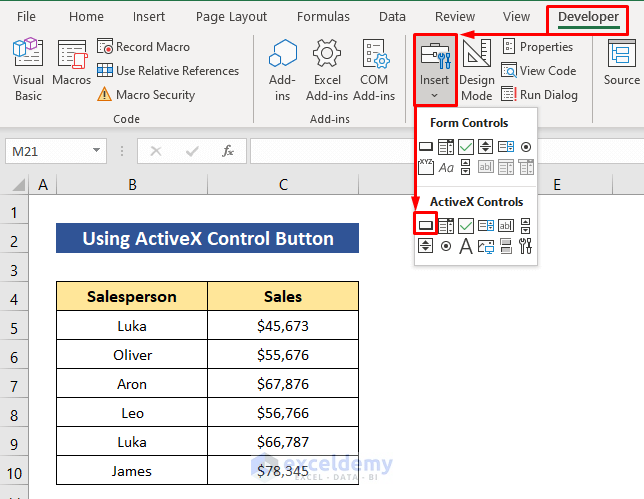
- Go to: Developer > Insert > ActiveX Controls > Button.
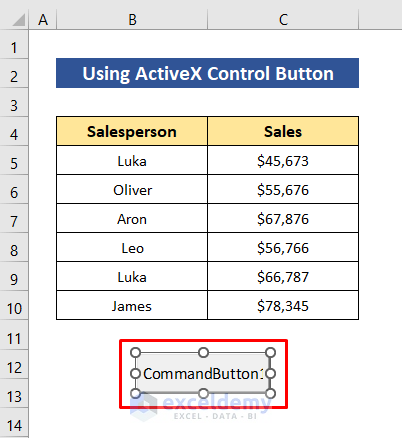
- Place the button in the sheet and set its size.
- Right-click the button and select View Code.
- In the VBA window, you will see the Sub and End procedures by default.
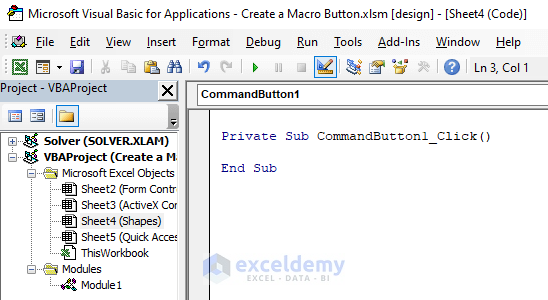
- Copy the codes from the module and paste them.
- Click the Run icon to activate the codes for the button.
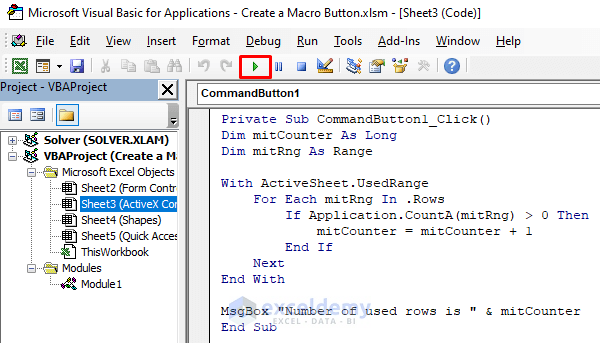
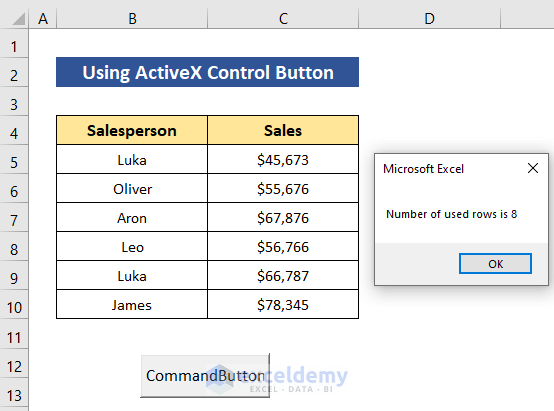
- Click the button to run the codes.
Method 2 – Inserting Shapes to Create a Macro Button
Steps:
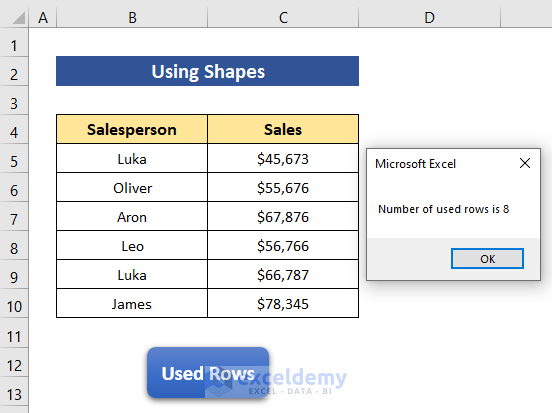
- Go to Insert and choose a shape in Shapes. Here, Rectangle with Rounded Corners.
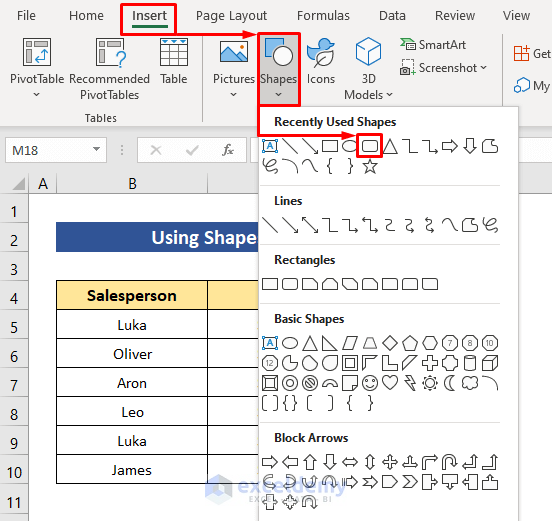
- Set the button size.
- In Shape Format, you can change the shape style. Here, Blue, Accent 5.
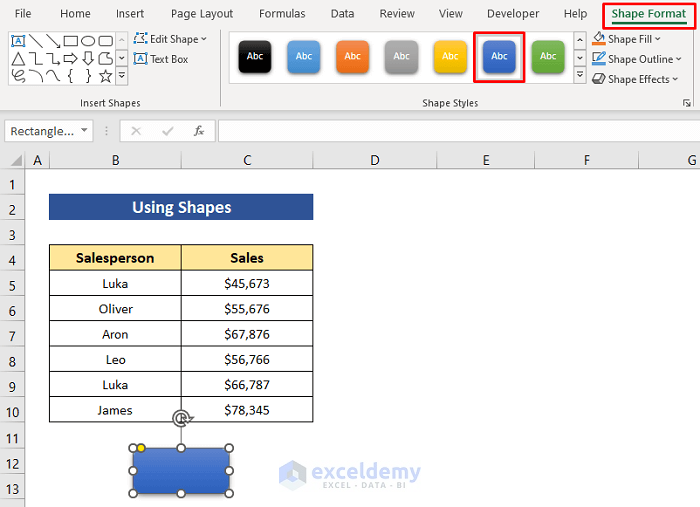
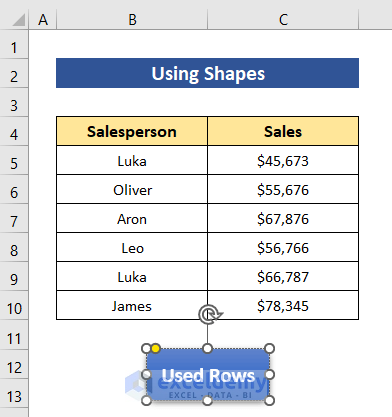
- Double-click the button and enter its name.
- Right-click the button and select Assign Macro.
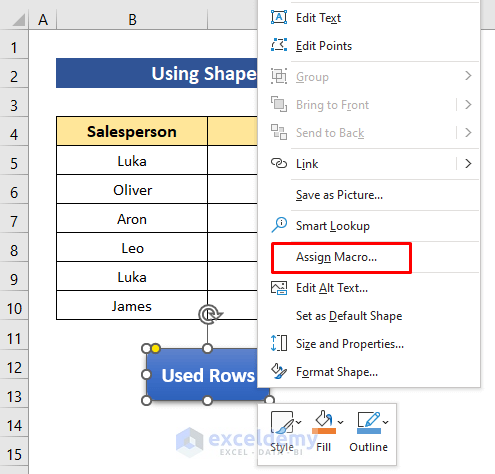
- Select the macro and click OK.
- Click the button to run the macro.
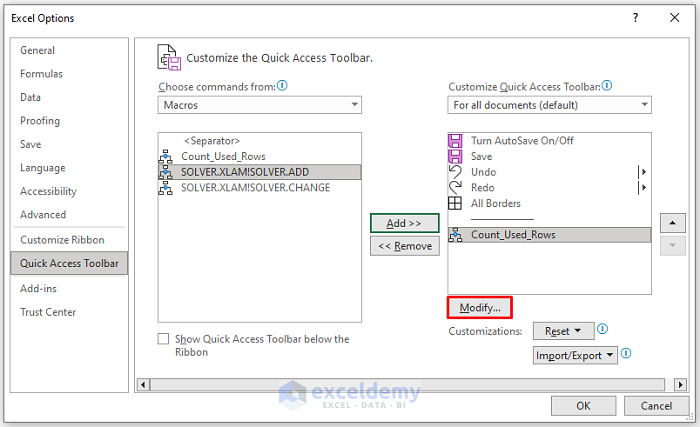
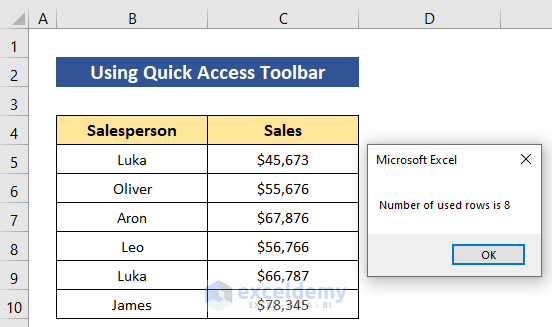
Method 3 – Using the Quick Access Toolbar to create a Macro Button
Steps:
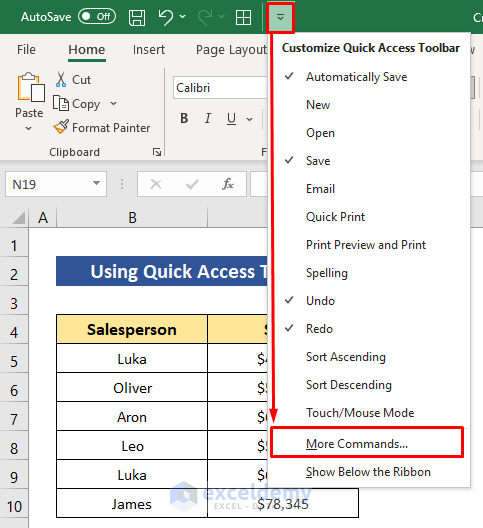
- Click the Customize Quick Access Toolbar icon.
- Select More Commands.
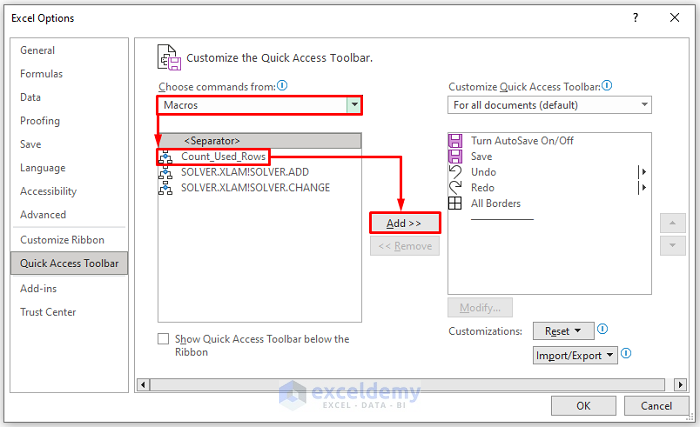
- Choose Macros in Choose commands from.
- Select your macro name and click Add>>.
- Click Modify to change the button symbol.
The Play icon was selected, here.
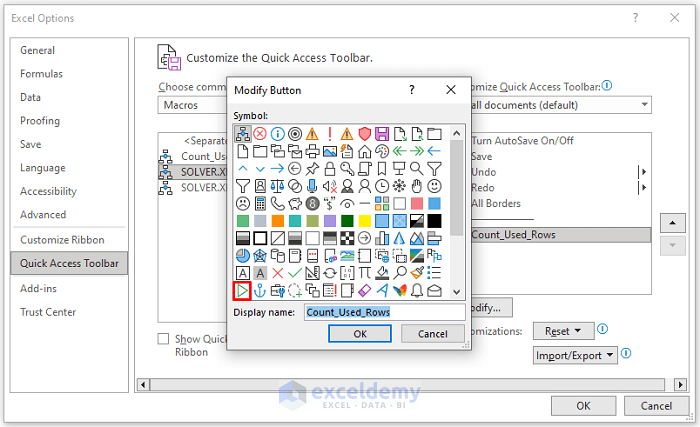
- Click OK.
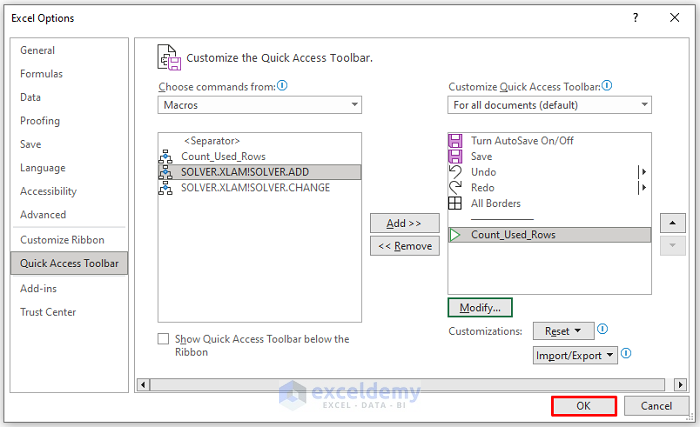
- Click the button.
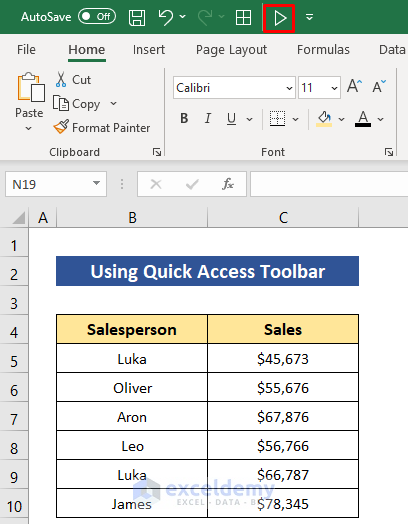
This is the output:
Download the free Excel workbook.
Get FREE Advanced Excel Exercises with Solutions!
