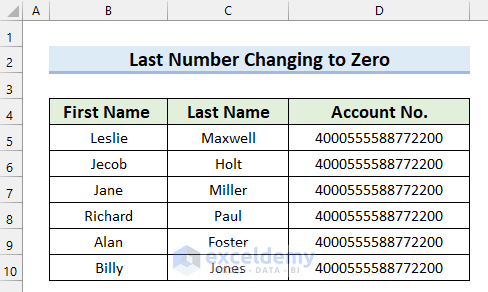
Why Does Excel Change Last Number to 0?
Excel can not store numbers that have more than 15 digits. It changes the 16th digit to 0.
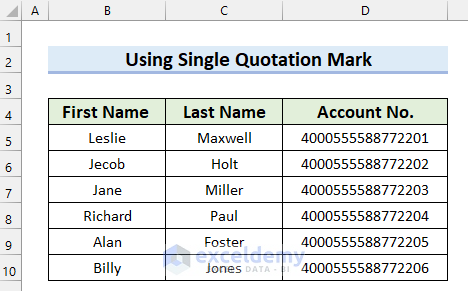
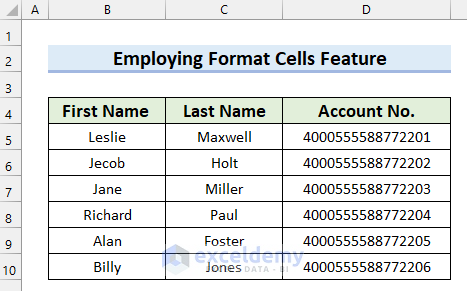
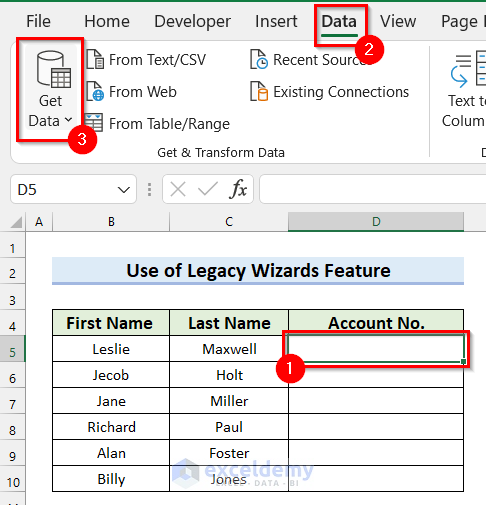
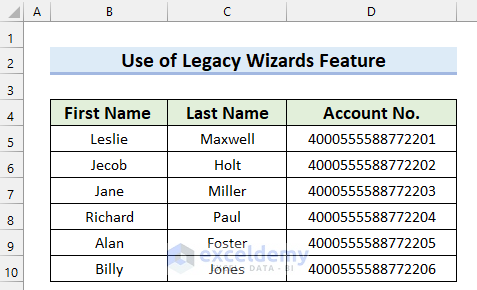
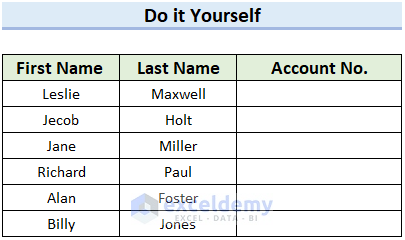
The following dataset contains the First and Last Name of 6 people and their Account No.
Method 1. Using the Single (‘) Quotation Mark
Steps:
- Select a cell. Here, D5.
- In D5 enter a single quotation mark (‘) and the number.
- Press ENTER.
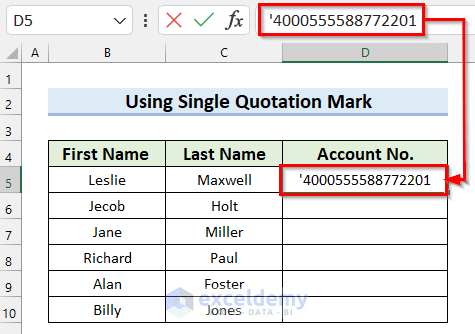
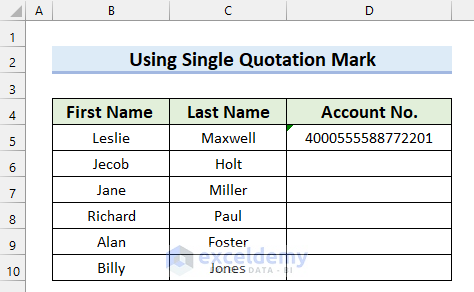
The last number didn’t change to 0 and the single quotation mark is not showing.
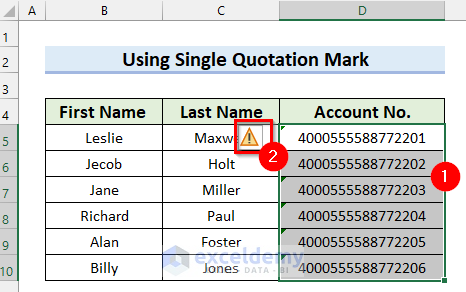
- Follow the same steps for other Account No.
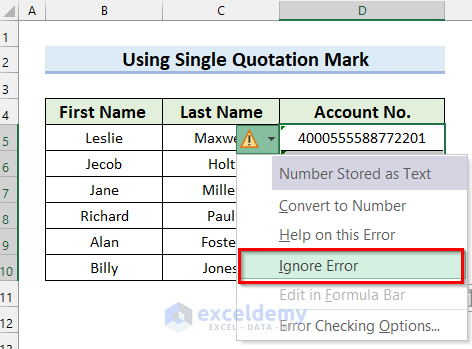
The last number didn’t change to 0 but an Error Warning is showing.

To remove the Error Warning:
- Select the cells in which the Error Earning is showing. Here, D5:D10.
- Click the Error Warning.
In the drop-down menu:
- Select Ignore Error.
This is the output.
Read More: [Fixed!] Why Is Excel Changing My Numbers?
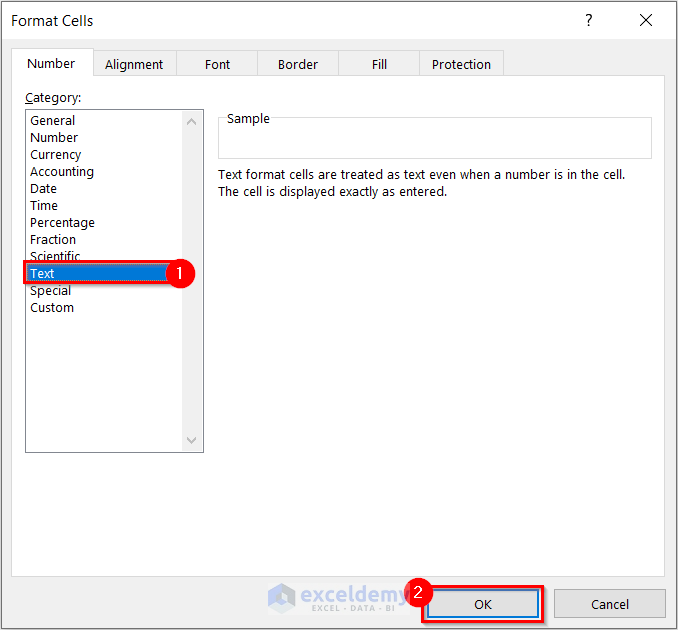
Method 2 – Using the Format Cells Feature to Stop Excel from Changing the Last Number to 0
Steps:
- Select the cells in which you want to enter Account No. Here, D5:D10.
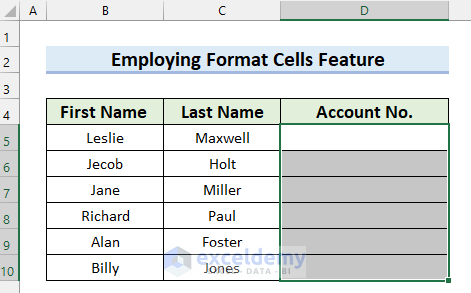
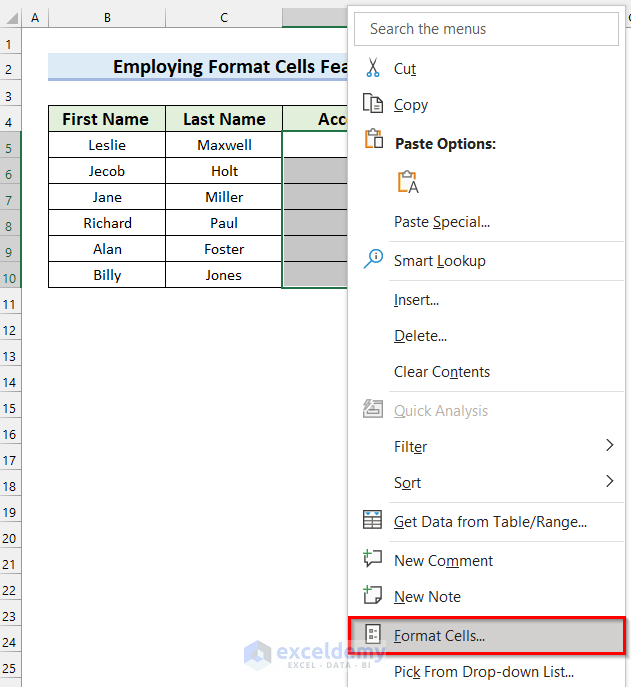
- Right-click the selected cells.
- Select Format Cells.
- In Format Cells, select Text.
- Click OK.
- Enter the Account No.. Here ,in D5.
- Press ENTER.
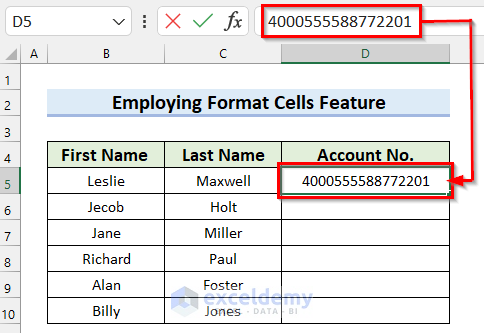
This is the output.
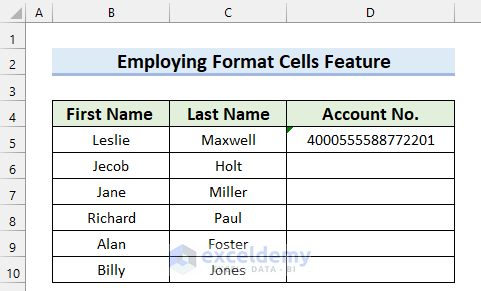
- Enter the other Account No..
An Error Warning is shown.
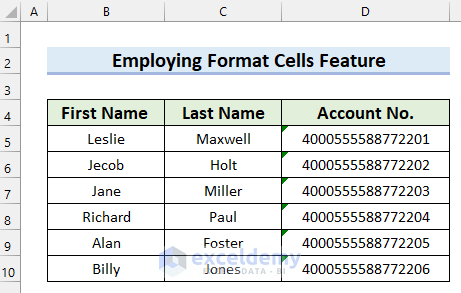
- Remove the Error Warning by following the steps in Method 1.
Read More: How to Stop Excel from Auto Formatting Numbers
Method 3 – Using the Legacy Wizards Feature in Excel
Steps:
Add the Legacy Wizards (From Text) to Excel.
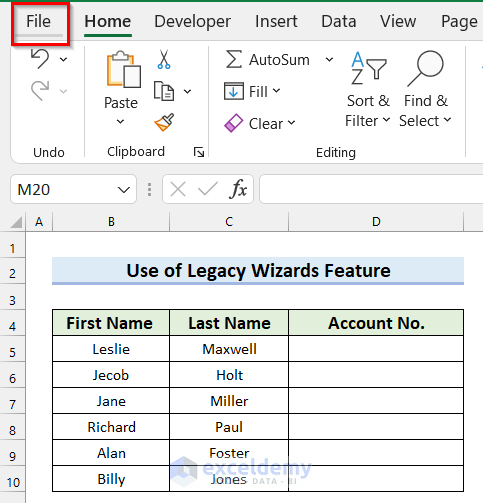
- Go to the File tab.
- Select Options.

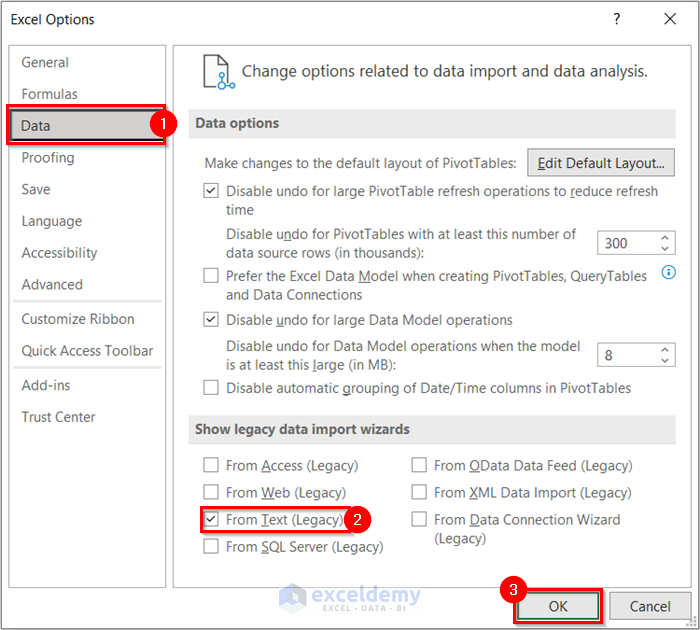
In the Excel Options dialog box:
- Go to the Data tab.
- Check From Text (Legacy).
- Click OK.
From Text (Legacy) will be added to Excel.
To import data from the Text File:
- Select the cell in which you want to insert Account No.
- Go to the Data tab.
- Select Get Data.
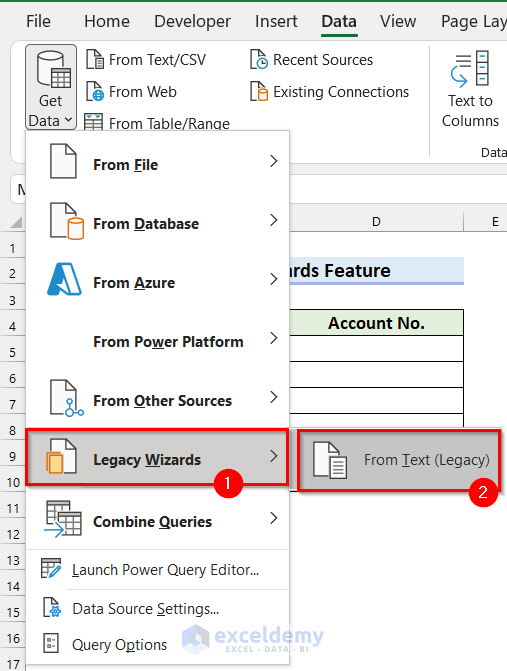
In the drop-down menu:
- Select Legacy Wizard.
- Select From Text (Legacy).
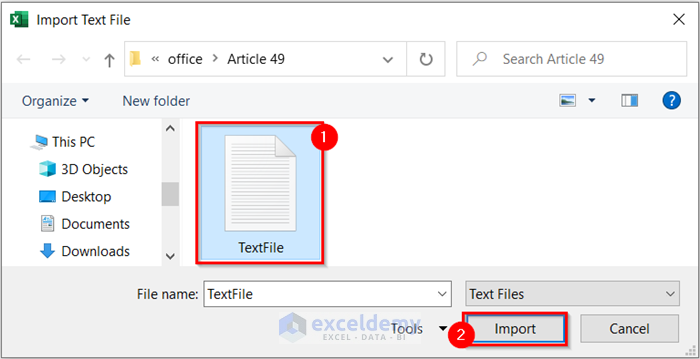
In Import Text File:
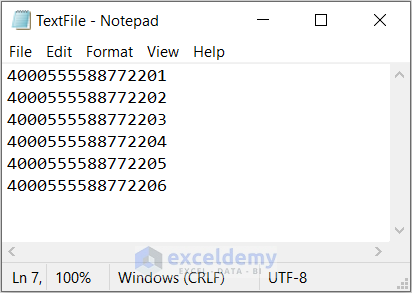
- Select the Text File in which you have stored data. Here, TextFile.
- Click Import.
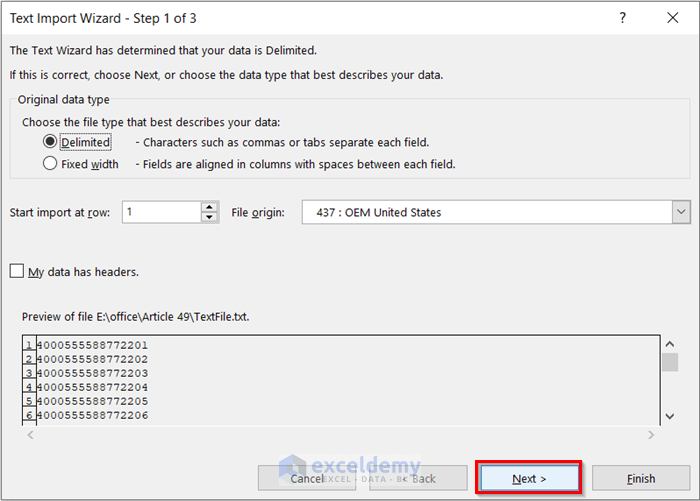
Data will be imported to Text Import Wizard. The Text Import Wizard – Step 1 of 3 dialog box opens.
- Select Next.
In the Text Import Wizard – Step 2 of 3 dialog box:
- Select Next.
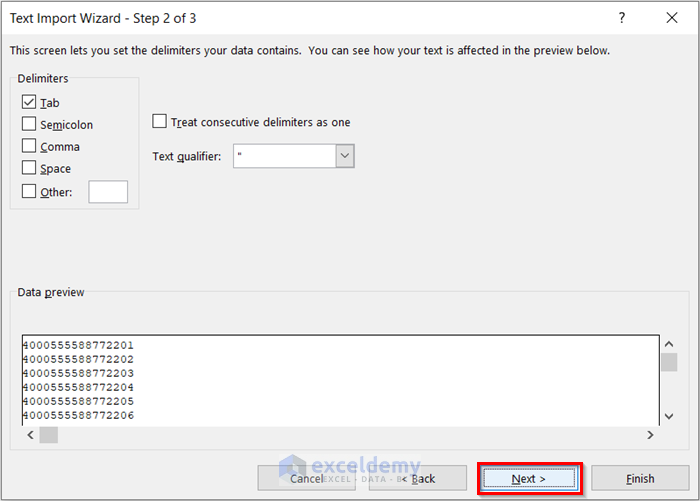
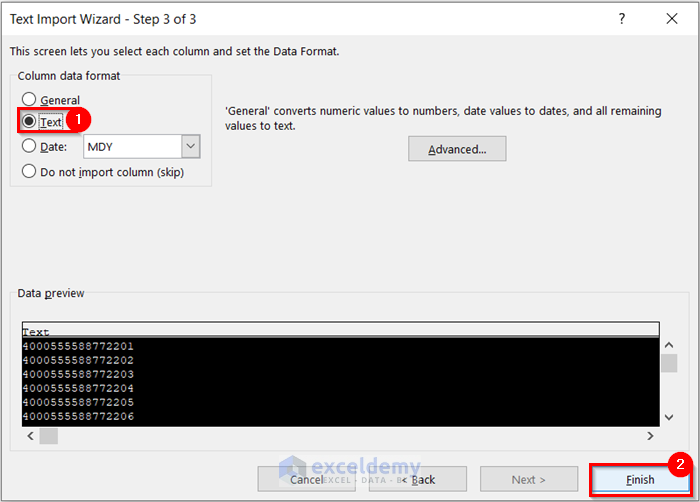
In the Text Import Wizard – Step 2 of 3 dialog box:
- Select Text.
- Click Finish.
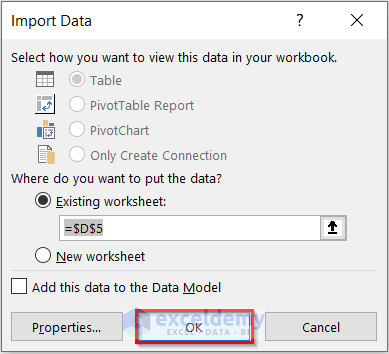
The Import Data dialog box will open. Your selected cell is already in the “Where do you want to put the data?” section.
- Click OK.
This is the output.
Read More: How to Stop Excel from Rounding 16 Digit Numbers
Method 4 – Applying the T Function to Stop Excel from Changing the Last Number to 0
Steps:
- Select the cell in which you want to insert the Account No. Here, D5.
- In D5, enter the following formula.
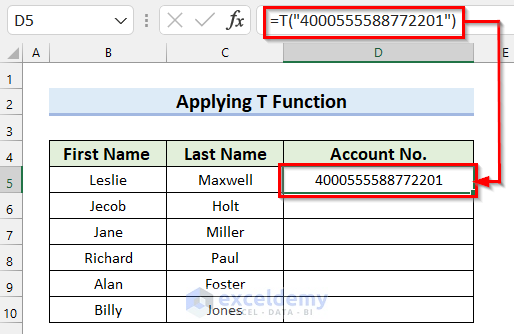
=T("4000555588772201") 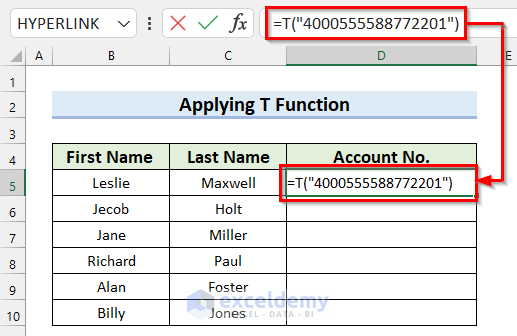
“4000555588772201″ is the value that will be returned.
- Press ENTER to see Account No.. The last number did not change to 0.
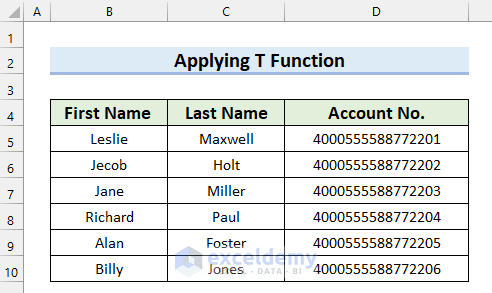
- Enter the other Account No..
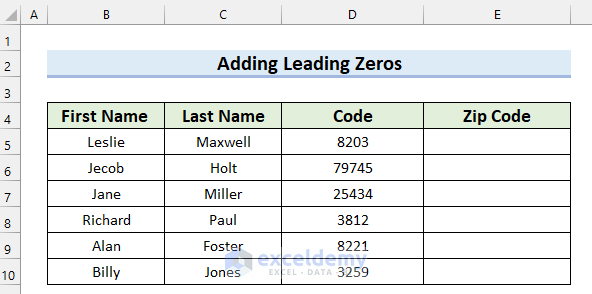
How to Add Leading Zeros in Excel
Whenever you enter a number with leading zeros, Excel automatically removes the leading zeros and keeps the rest of the digit.
This is the sample dataset. Leading Zeros are added to the Code to make it a 5-digit number.
Steps:
- Select the cell in which you want to insert the Zip Code. Here, E5.
- In E5, enter the following formula.
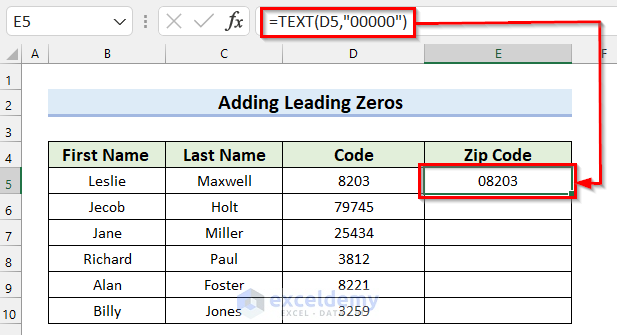
=TEXT(D5,"00000")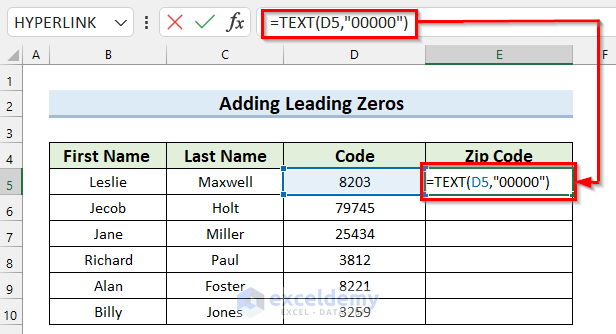
In the TEXT function, D5 is the value and “00000” is format_text. The formula will add leading zeros to the number in D5 and return a 5-digit number.
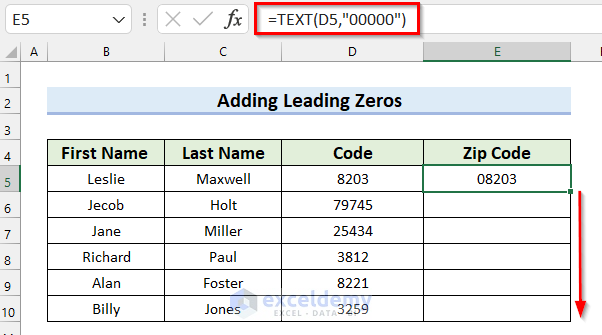
- Press ENTER to see the result.
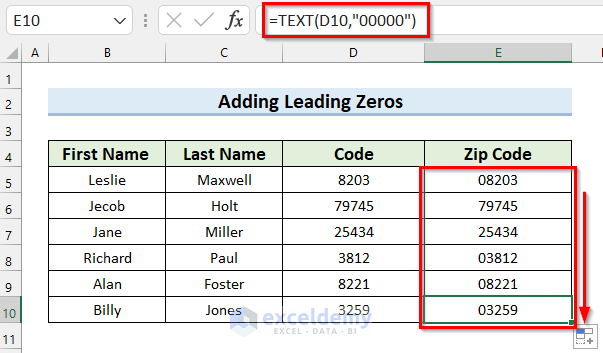
- Drag the Fill Handle to copy the formula.
This is the output.
Things to Remember
- The T function returns a value when the value is a text. Otherwise, it returns empty text. You must enter the number in double quotation marks (“”) to refer to it as a text.
Practice Section
Practice here.
Download Practice Workbook
Related Articles
- Why Excel Is Changing My Numbers to Decimals
- How to Stop Autocorrect in Excel for Dates
- [Fixed!] Excel Changing Dates to Random Numbers
- How to Stop Excel from Changing Numbers to Scientific Notation
- How to Stop Excel from Auto Formatting Hyperlinks
- How to Stop Excel from Changing Numbers to Dates
- How to Prevent Cell Format Changes Automatically in Excel
- Why Is Excel Changing My Numbers to Zero?
<< Go Back to Excel Auto Formatting | Excel Cell Format | Learn Excel
Get FREE Advanced Excel Exercises with Solutions!
