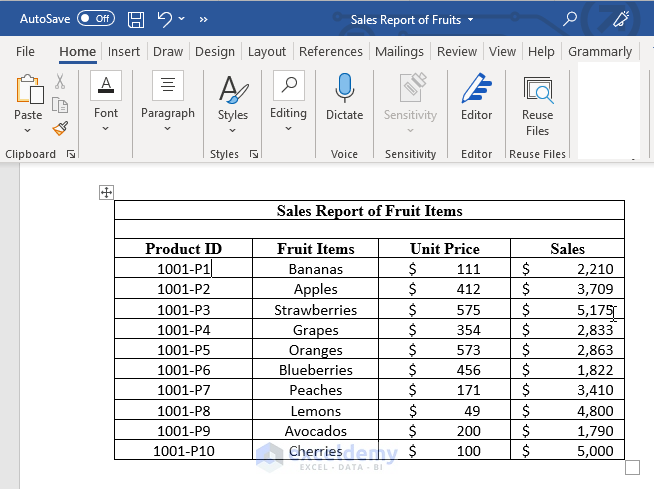
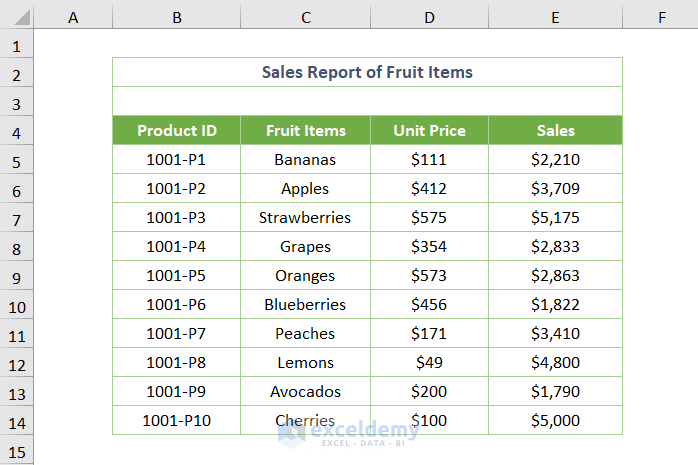
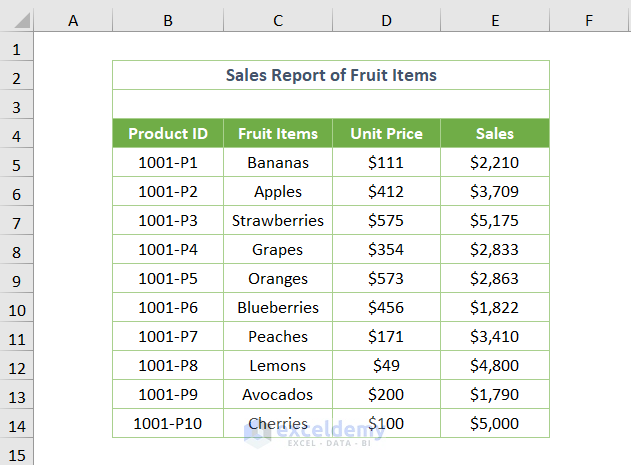
Assume that you have a table like the following one in your Word document. Here, the Sales Report of Fruit Items is given along with the necessary information i.e. Product ID, Fruit Items, Unit Price, and Sales in USD. You can use the following methods to convert the table below into Excel. The first five methods are suitable for converting a simple table and the last method can be used for complex tables.
Method 1 – Using the Copy and Paste Tool to Convert a Word Table into an Excel Spreadsheet
Steps
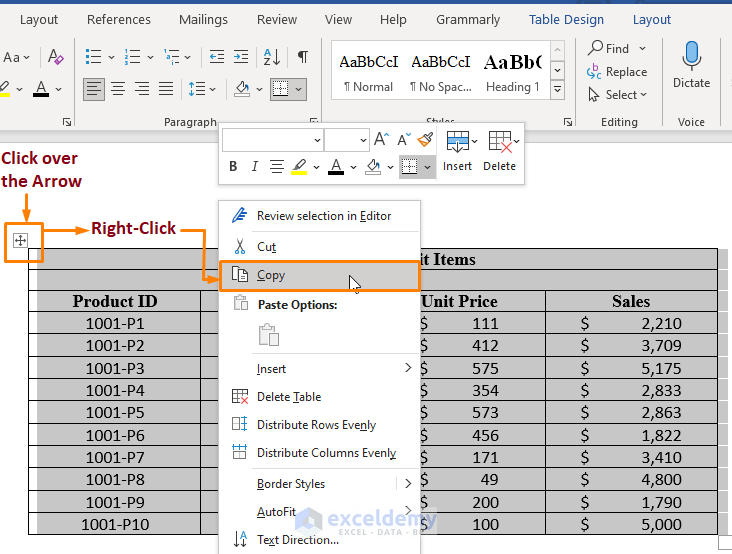
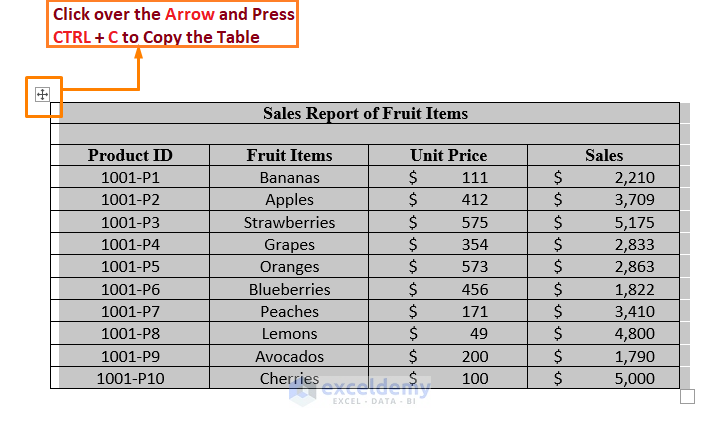
- Click on the upper-left arrow of the table to select the entire table.
- Right-click and choose Copy.
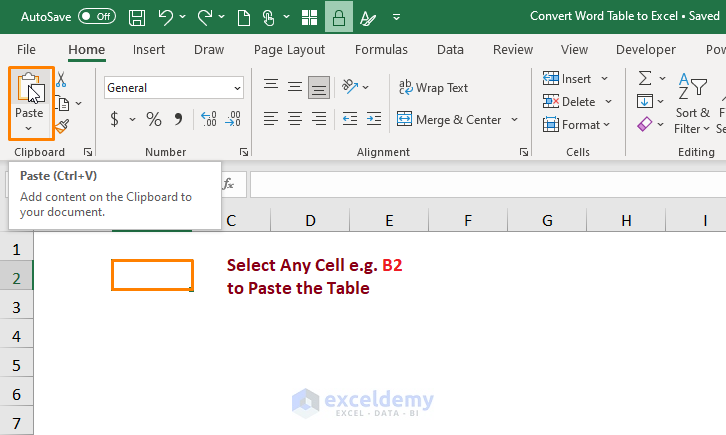
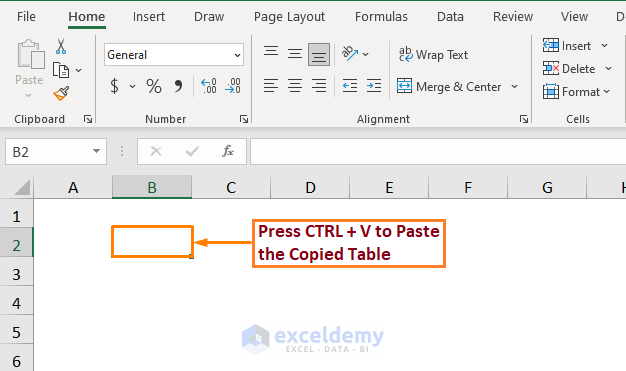
- Go to the Excel spreadsheet and select any cell within the workbook e.g. B2 cell.
- Choose the Paste option from the Clipboard ribbon (in the Home tab).
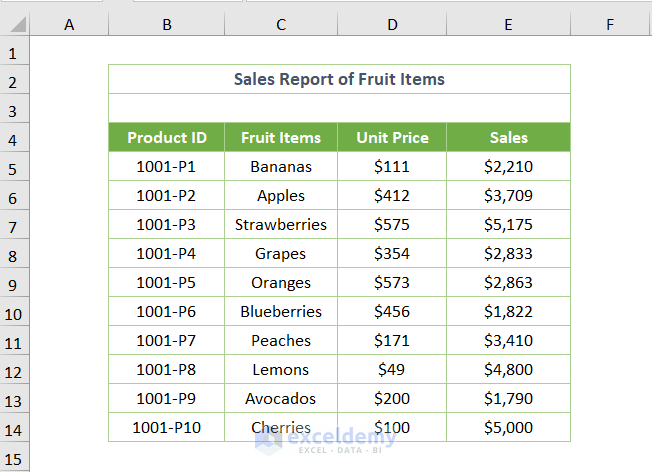
- You’ll get the following output.
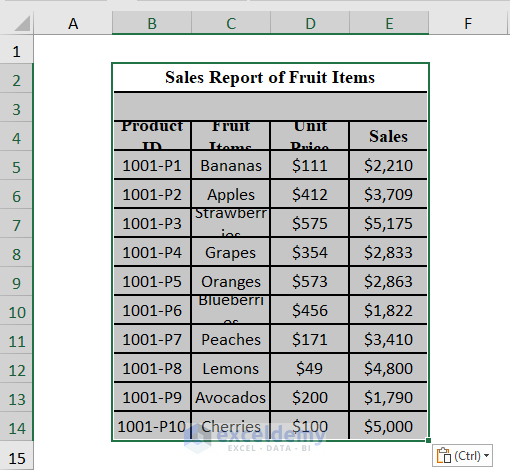
- Format as necessary and adjust the column width to produce a chart that looks like the one below.
Read More: How to Convert Word to Excel with Columns
Method 2 – Using a Keyboard Shortcut to Convert a Word Table into an Excel Spreadsheet
- Click on the upper-left arrow of the table on Word and press CTRL + C to copy the entire table.
- Go to the Excel spreadsheet and press CTRL + V to paste the copied table.
- You’ll get the following output.
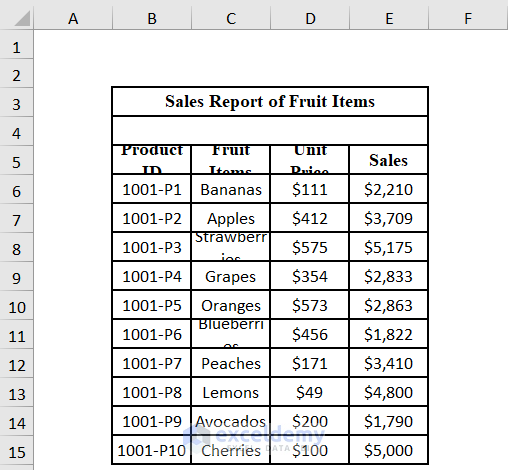
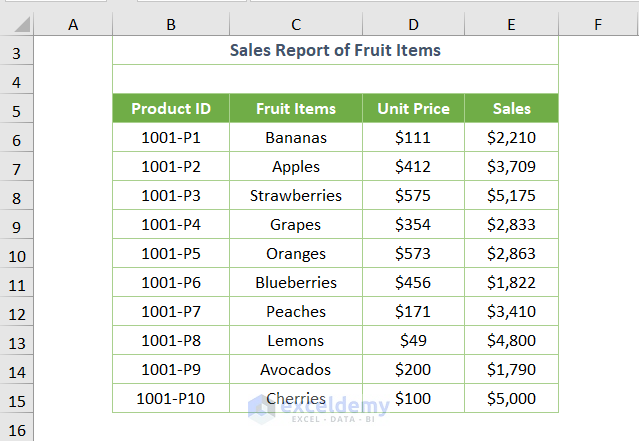
Method 3 – Using Drag and Drop to Convert a Word Table into an Excel Spreadsheet
- Open Word and Excel side by side.
- Drag the Word table and drop it into any specific cell within the Excel spreadsheet.
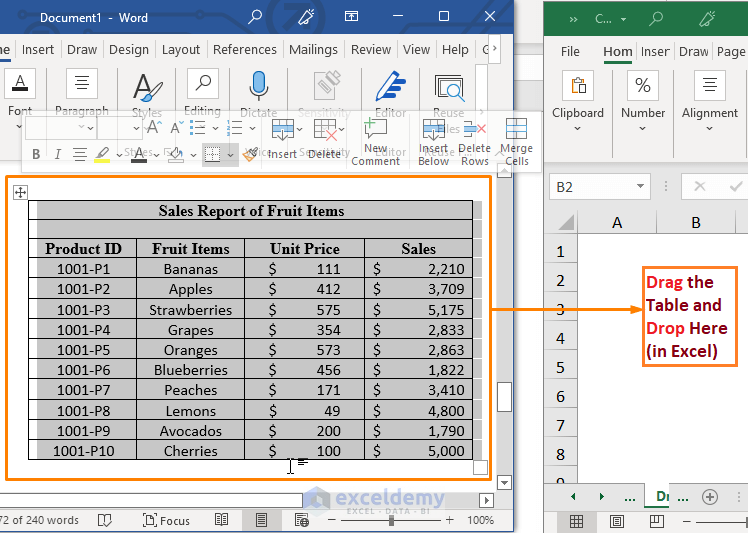
- You’ll get the following output.
- Apply the necessary formatting, and the output will look as follows.
Method 4 – Converting a Word Table to an Excel Spreadsheet, Keeping Excel Formatting
- Copy the Word table (pressing CTRL + C).
- Choose the Match Destination Formatting paste option.
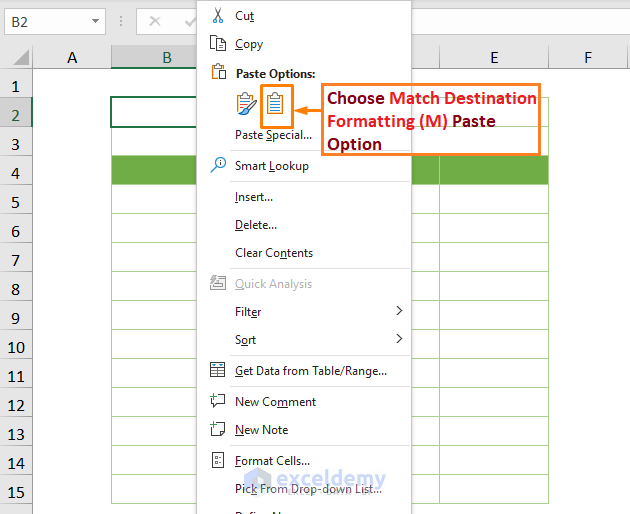
- You’ll see the output as follows
Read More: How to Convert Word to Excel but Keep Formatting
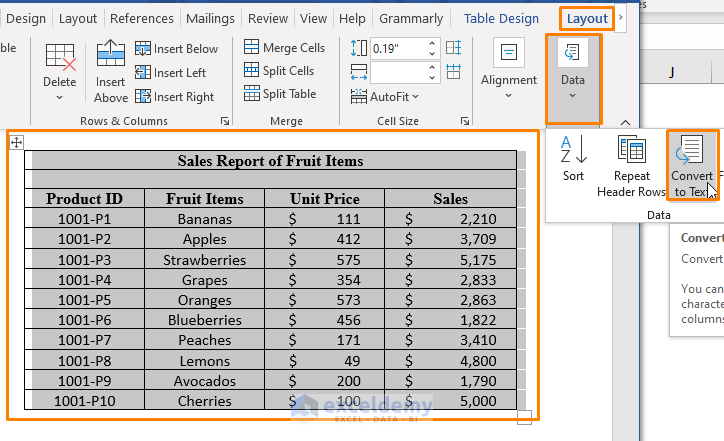
Method 5 – Applying Convert to Text and Text to Columns Features When Converting a Word Table to an Excel Spreadsheet
- Select the table and click on the drop-down list of the Data option in the Layout tab.
- Select the Convert to Text option.
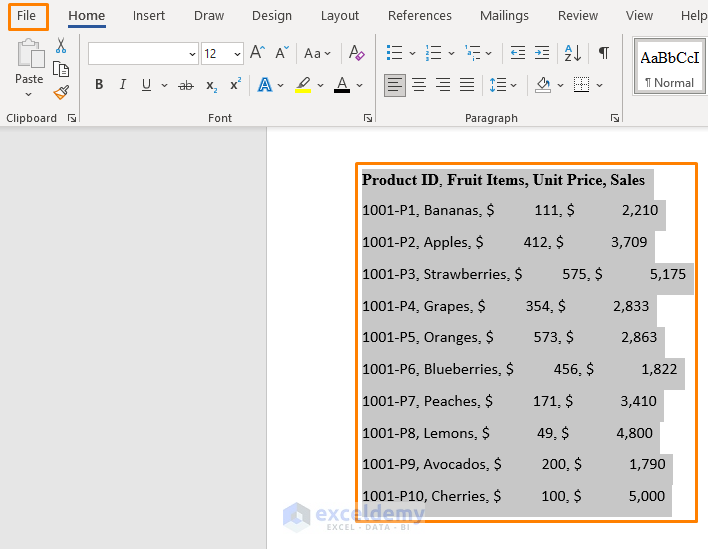
- You’ll see a dialog box named Convert Table To Text. Choose any delimiter (e.g. Commas) and press OK.

- You’ll get the following output.
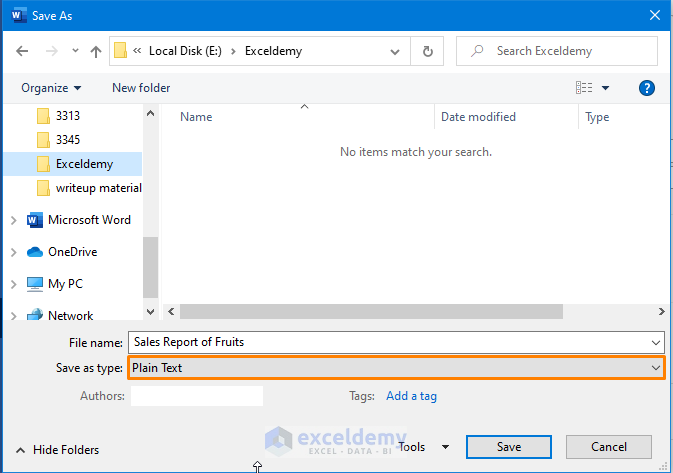
- Save this output as a .txt file. To do this, go to File > Save As.
- Specify the format as Plain Text and click on the Save button.
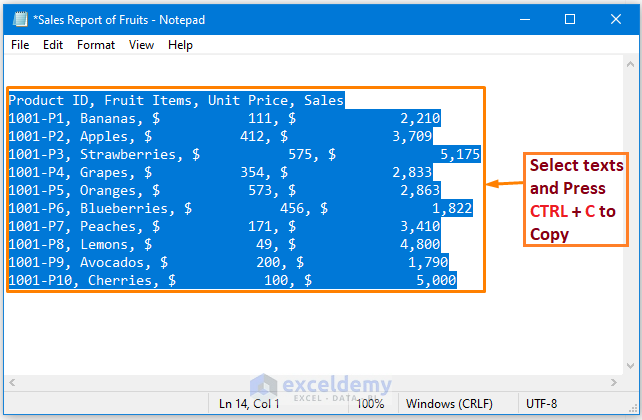
- Open the text file using Notepad, and you’ll see the following output.
- Select the text and copy it by pressing CTRL + C.
- In Excel, go to the Data tab > pick the Text to Columns option from the Data Tools tab.
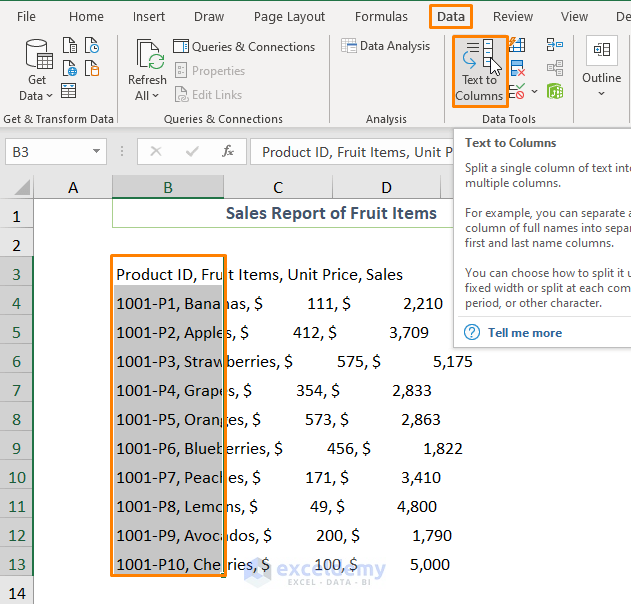
- Convert text to Excel with columns.
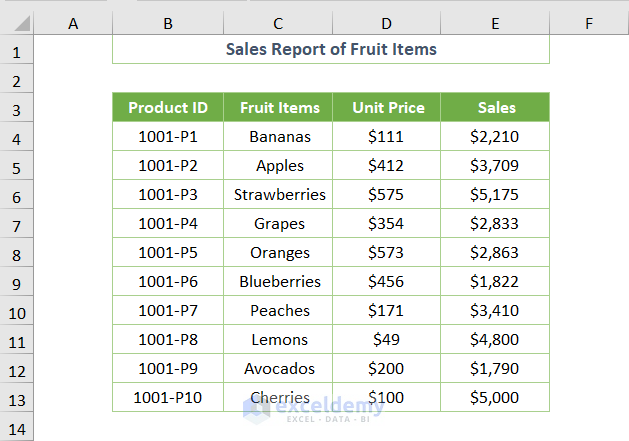
- You’ll get the following output.
Method 6 – Converting a Word Table to Excel without Splitting Cells
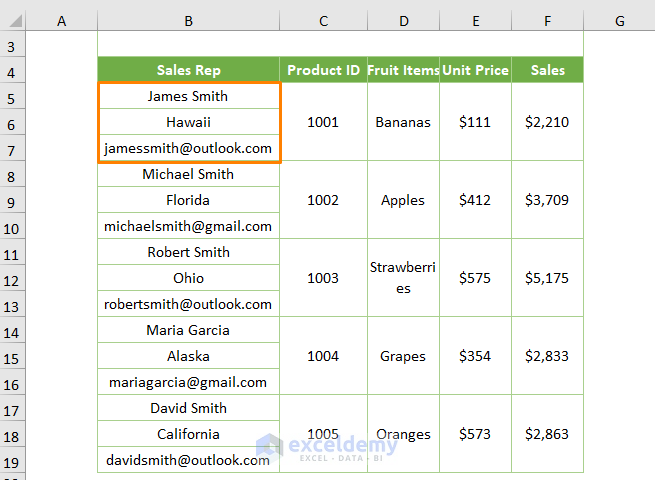
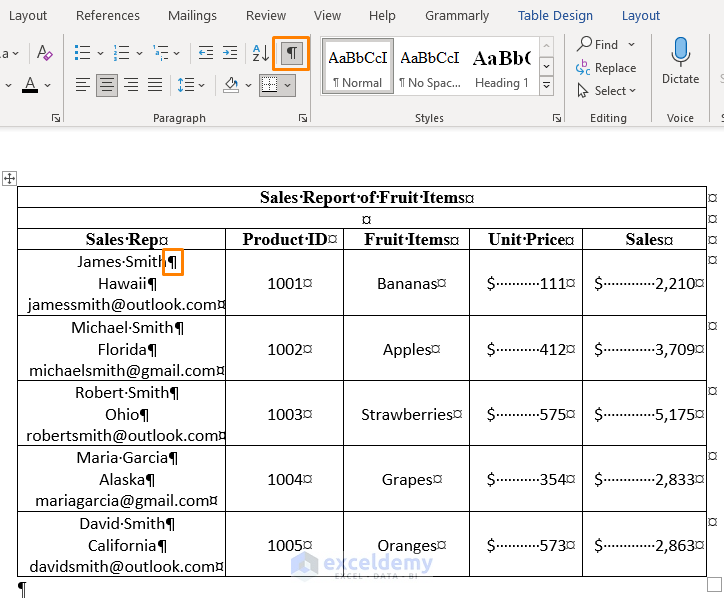
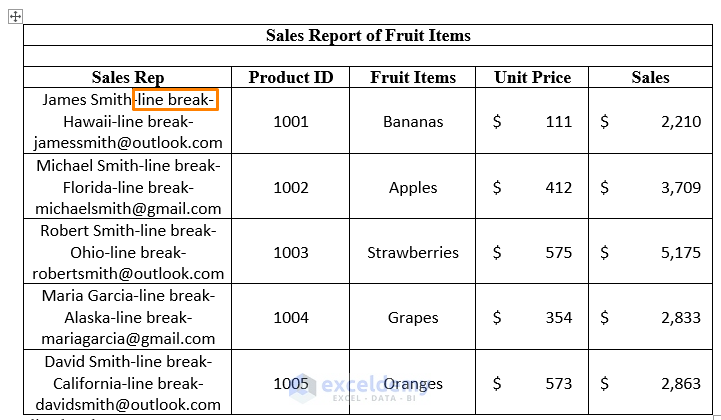
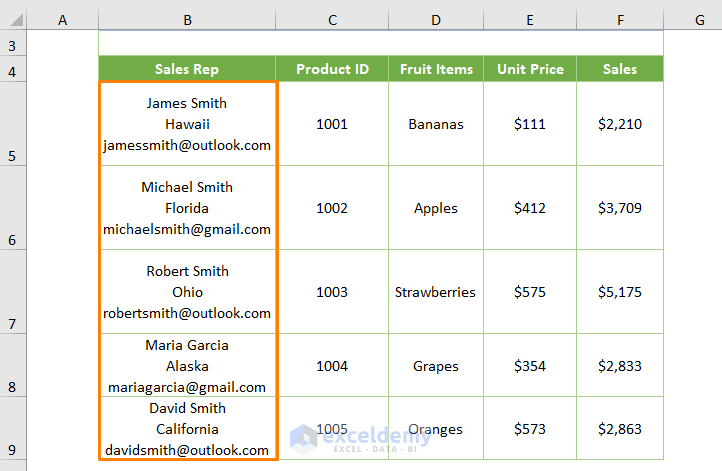
If you have line breaks in your Word table, you can’t convert that type of table to an Excel spreadsheet using the methods discussed above. For example, the relevant information (i.e. Full Name, State, and Email) of Sales Reps is given as shown in the table below.

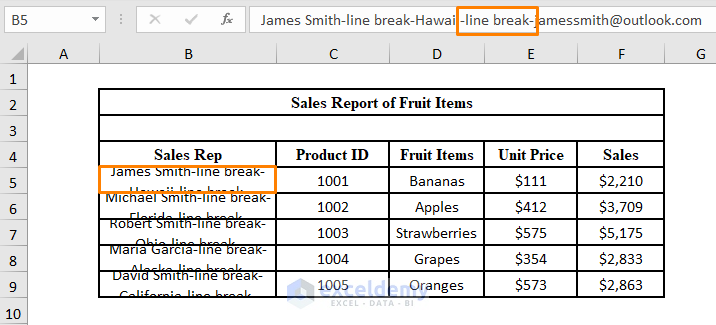
If you use the copy and paste option, you’ll get the following output where the cells are split.
Let’s explore why the cells are splitting. If you turn on the Show/Hide ¶ (Pilcrow character) feature from the Home tab in the Word document, you’ll see the Pilcrow character for every line break.
However, you might want to convert the table into Excel without splitting.
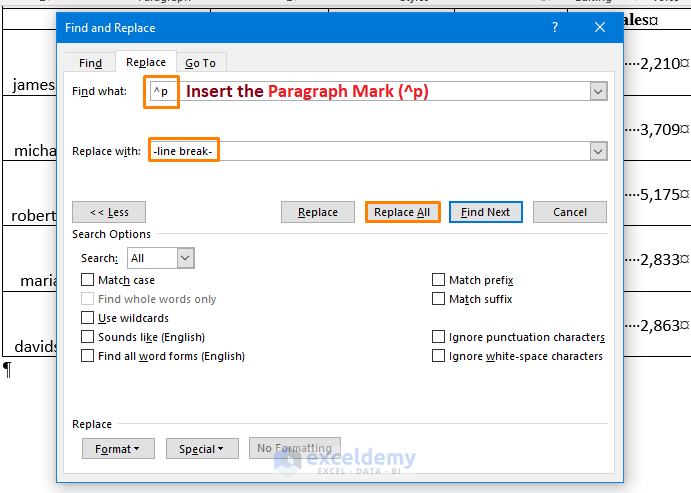
- While working in the Word document, press CTRL + H first to open the Find and Replace dialog box. Alternatively, you can open the dialog box from the Home tab > Replace option (from the Editing ribbon).
- Insert the Paragraph mark (^p) in the box after the Find what option and -line break- after the Replace with option.
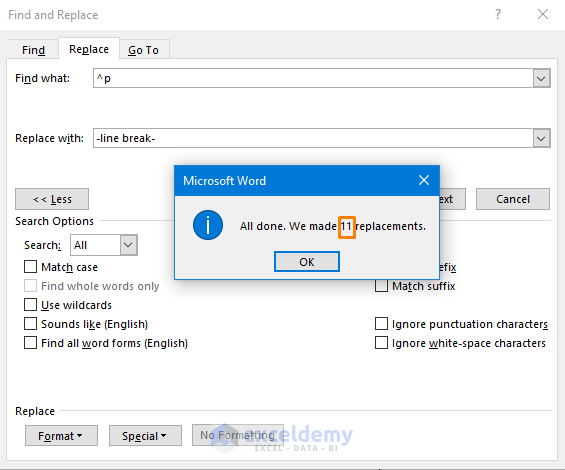
- Press the Replace All button.
- You’ll see the following message.
- The output will be as follows.
- Copy the entire table and paste it into any cell within the Excel spreadsheet.
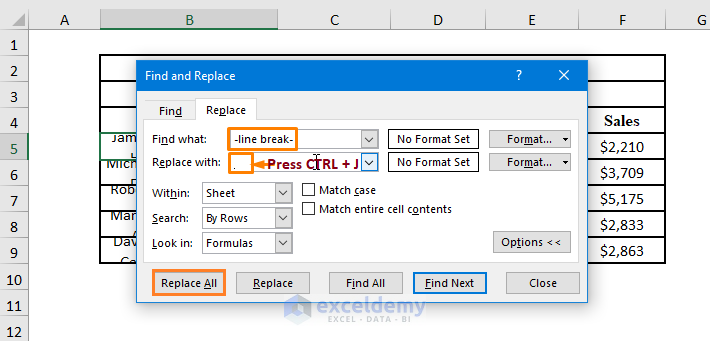
- Again, open the Find and Replace dialog box tool in Excel (simply you can press CTRL + H).
- Insert -line break- after the Find what option and press CTRL + J to insert a line break in the space after the Replace with option.
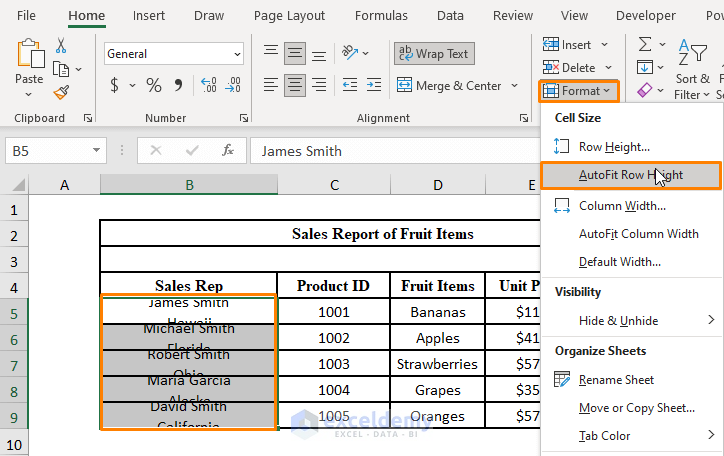
- Select the B5:B9 cells and choose the AutoFit Row Height from the Format option.
- You will get the following output.
Read More: How to Copy from Word to Excel into Multiple Cells
Things to Remember
- While pasting the Word table in Excel, make sure that the destination cells are empty because the copied table will replace any existing data.
- While using the Text Import Wizard, remove the unnecessary space inside the text file.
Download Practice Workbook
Related Articles
<< Go Back to Import Word to Excel | Importing Data in Excel | Learn Excel
Get FREE Advanced Excel Exercises with Solutions!

Really helped me out to convert a large Word table full of paragraph breaks, the sixth method really did a neat job. Thanks a lot.
You’re welcome, RAAA1987! Best regards!
Really hepful. Thank you
Dear Ven Upekkha,
Thanks for your appreciation.
Regards
Shamima Sultana | Project Manager | ExcelDemy
I have Word text sections that are linked. I want to retain the links in Excel. But they are gone!
This applies when a word text contains two links (separated by a tab). If it has one link, then the link also appears in Excel
Dear GRAHAM,
I am using Office365 and I am getting my links retained from word to Excel. You can send us your file to have more clear solution.
Regards,
Naimul Hasan Arif
Thank you so much! Saved me hours of copying and pasting!
Hello KT,
You are most welcome. Thanks for your feedback and appreciation. Glad to hear that our article saved your hours of copy and pasting.
Regards
ExcelDemy