This is an overview.
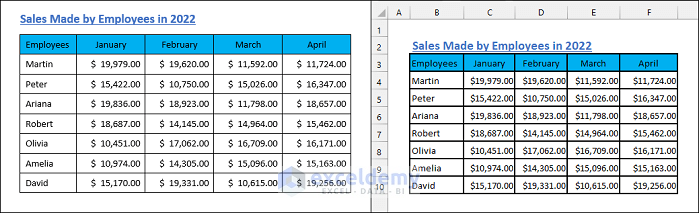
You have the following Word document. To convert it to an Excel spreadsheet:
Method 1 – Convert Word to Excel with Copy-Paste
Steps
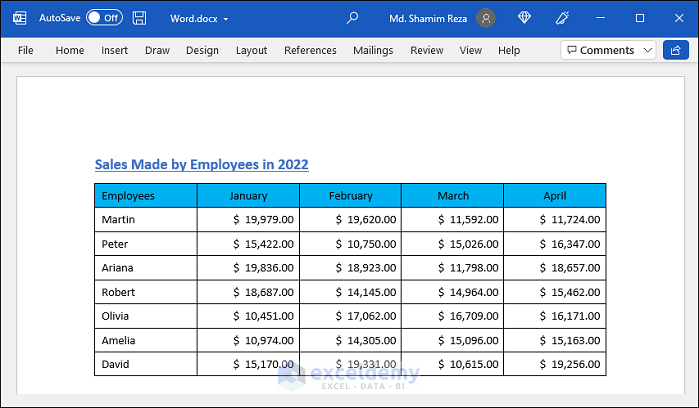
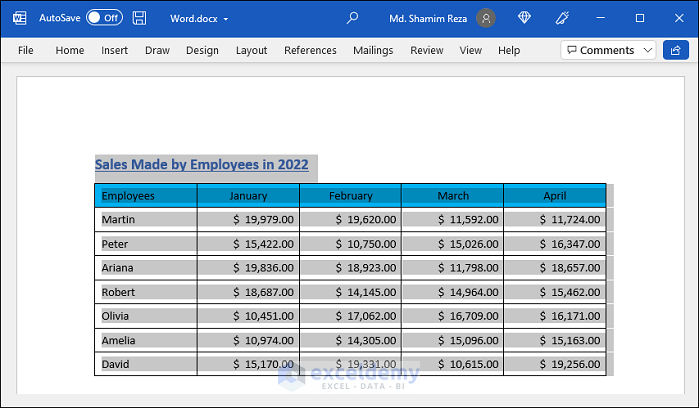
- Go to the Word file. Press CTRL+A to select the entire document.
- Press CTRL+C to copy the data.
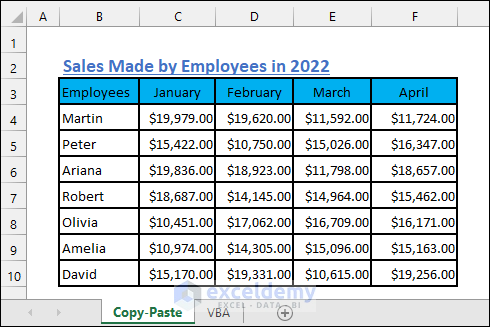
- Go to the Excel spreadsheet. Select the upper-left cell of the range.
- Press CTRL+V to paste the data. Alternatively, you can right-click that cell and select Keep Source Formatting (K) in Paste Options.
This is the output.
Read More: How to Copy from Word to Excel into Multiple Cells
Method 2 – Convert Word to Excel with VBA
Steps
- Add a new worksheet. Save the workbook as a macro-enabled workbook.
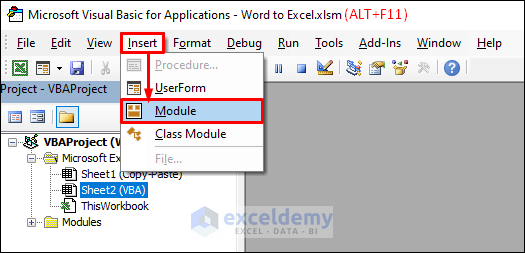
- Press ALT+F11 to open the VBA window.
- Select Insert >> Module to create a new module.
- Copy the following code.
Sub WordToExcelWithFormatting()
Dim Document, Word As Object
Dim File As Variant
Dim PG, Range
Application.ScreenUpdating = False
File = Application.GetOpenFilename _
("Word file(*.doc;*.docx) ,*.doc;*.docx", , "ExcelDemy.Com - Please Select")
If File = False Then Exit Sub
Set Word = CreateObject("Word.Application")
Set Document = Word.Documents.Open(Filename:=File, ReadOnly:=True)
Document.Activate
PG = Document.Paragraphs.Count
Set Range = Document.Range(Start:=Document.Paragraphs(1).Range.Start, _
End:=Document.Paragraphs(PG).Range.End)
Range.Select
On Error Resume Next
Word.Selection.Copy
ActiveSheet.Range("B2").Select
ActiveSheet.Paste
Document.Close
Word.Quit (wdDoNotSaveChanges)
Application.ScreenUpdating = True
End Sub- Paste the code in the module window.

- Press F5 to run the code. You can also click Run.
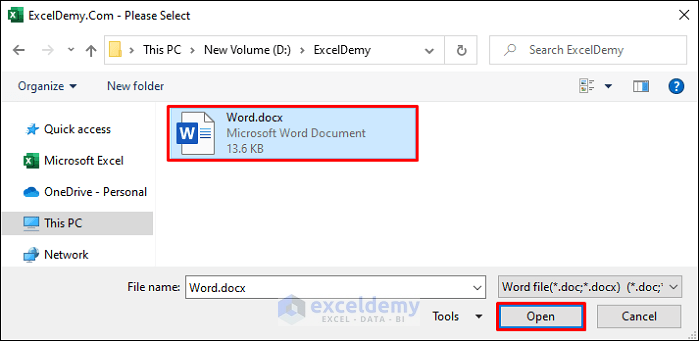
- Select the Word file that you want to convert.
- Browse to the location of the Word document.
- Select the file and click Open.
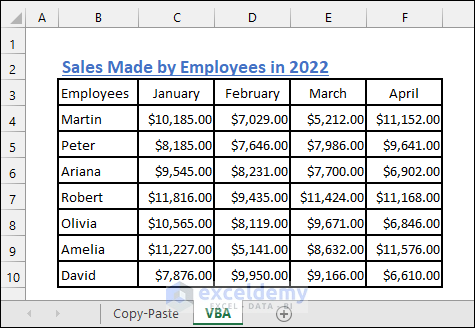
This is the output.
How Does the Code Work?
Sub WordToExcelWithFormatting()
is the subject procedure to write the code.
Dim Document, Word As Object
Dim File As Variant
Dim PG, Range
Declares necessary variables.
Application.ScreenUpdating = False
makes VBA work on the background.
File = Application.GetOpenFilename _
(“Word file(*.doc;*.docx) ,*.doc;*.docx”, , “ExcelDemy.Com – Please Select”)
allows the user to input the Word document to convert.
If File = False Then Exit Sub
The subject procedure ends if no input is given.
Set Word = CreateObject(“Word.Application”)
sets the Word variable as a Word document.
Set Document = Word.Documents.Open(Filename:=File, ReadOnly:=True)
assigns the Document variable to the object or file referred to.
Document.Activate
The referred document is activated.
PG = Document.Paragraphs.Count
assigns the PG variable to the number of paragraphs in the Word document
Set Range = Document.Range(Start:=Document.Paragraphs(1).Range.Start, _ End:=Document.Paragraphs(PG).Range.End)
detects the entire range of the Word document
Range.Select
selects the data range in the Word document.
On Error Resume Next
ignores errors and executes the next code line.
Word.Selection.Copy
copies the selection in the Word file.
ActiveSheet.Range(“B2”).Select
selects the cell to store data.
ActiveSheet.Paste
pastes data from the Word document into the Excel worksheet.
Document.Close
Word.Quit (wdDoNotSaveChanges)
closes the Word file without saving.
Application.ScreenUpdating = True
resets screen updating to its default value.
End Sub
exits the subject procedure.
Read More: How to Convert Word Table to Excel Spreadsheet
Things to Remember
- You can also save the Word file as a PDF. Use your PDF editor to convert it to an Excel Spreadsheet.
- Don’t forget to save the workbook as .xlsm, Otherwise, you will lose the code.
Download Practice Workbook
Download the practice workbook.
Related Articles
- How to Convert Word to Excel with Columns
- How to Import Data from Word to Excel
- How to Link Word Document to Excel
<< Go Back to Import Word to Excel | Importing Data in Excel | Learn Excel
Get FREE Advanced Excel Exercises with Solutions!

Does not work properly. All lineshifts in the Word document table converts to separate lines in the Excel – making it difficult and manual reformatting again required.
Hello Espen,
First of all, thanks for commenting. it’s unfortunate that we don’t explain the line-shifting issues in this article. If I am not wrong, I think you are talking about the case like the image below.
For resolving the issue you can follow the procedure described in the method of Converting Word to Excel without splitting cells.You will get the result like the image below.
Hopefully, you will understand the steps mentioned in the link and solve your issue.
Have a nice day!
Regards
Fahim Shahriyar Dipto
Excel & VBA Content Developer