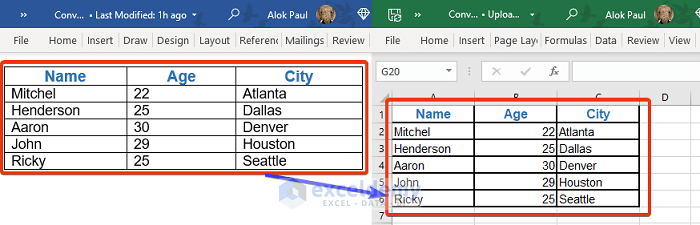
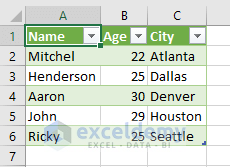
We’ll use a simple dataset to showcase converting Word tables to Excel datasets.
Convert Word to Excel with Columns: 2 Easy Methods
We will consider the following Word file as our dataset.
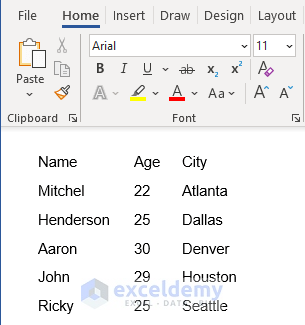
We have used tab characters to create a table-like dataset in Word.
Method 1 – Convert Word to Text and Then to Excel by Combining ‘Save a Copy’ and ‘From Text/CSV’ Commands
Steps:
- Press File.
- Click on the Save a Copy button.

- Save the file in the desired location of the File Explorer.
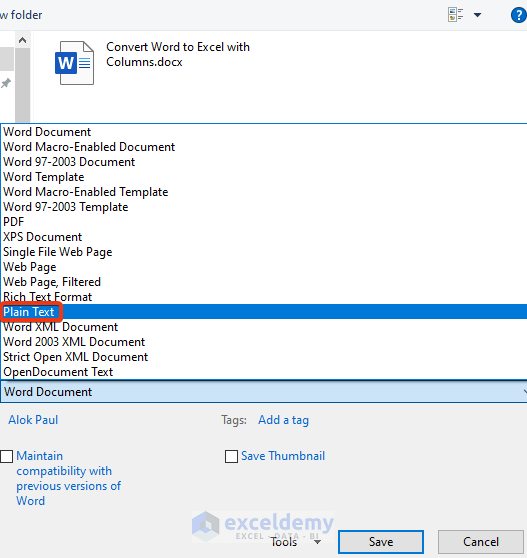
- Choose the File type as Plain Text.
- Click on the Save button.
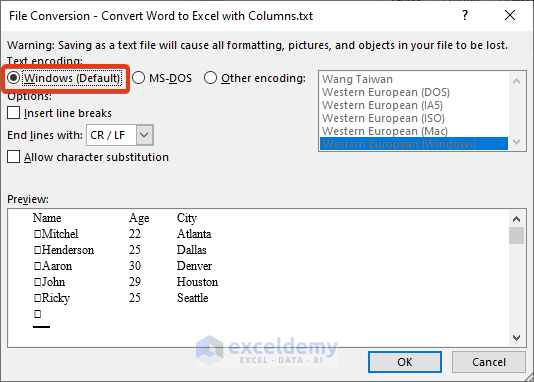
- The File Conversion window will appear.
- Select the Windows (Default) option and press OK.
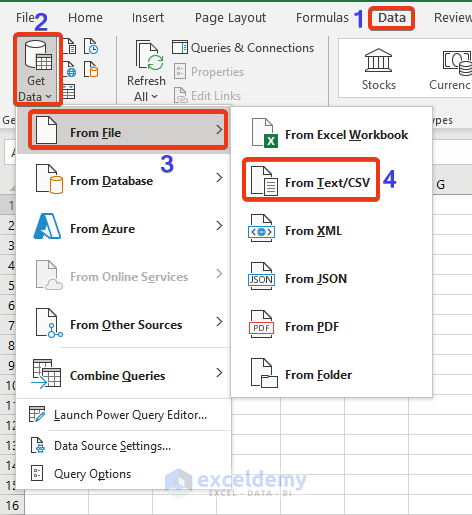
- Open your Excel file. Choose the Data tab.
- Go to the Get Data group.
- Select From Text/CSV of the From File drop-down.
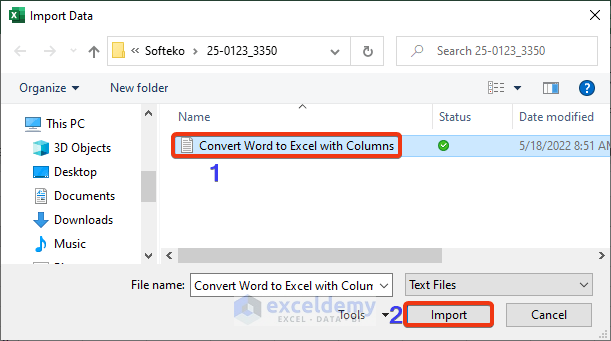
- Choose the converted text file from the File Explorer.
- Press the Import button.
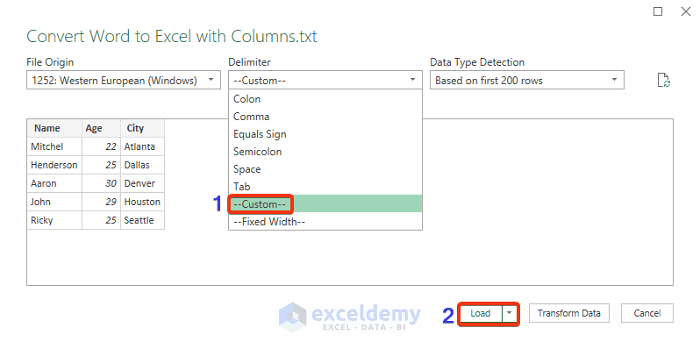
- The File Origin window appears.
- Choose Custom as Delimiter.
- Press the Load option.
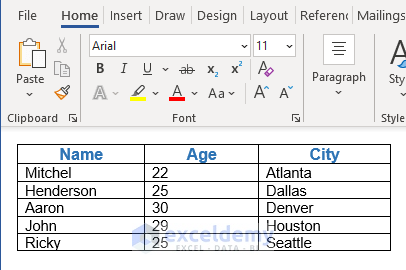
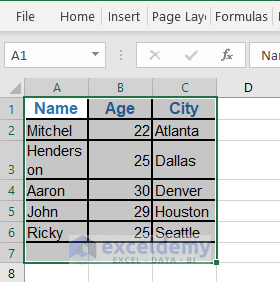
- Here’s the Excel sheet.
Read More: How to Import Data from Word to Excel
Method 2 – Use VBA Code to Convert Word to Excel
Steps:
- We put the data in Word in a table.
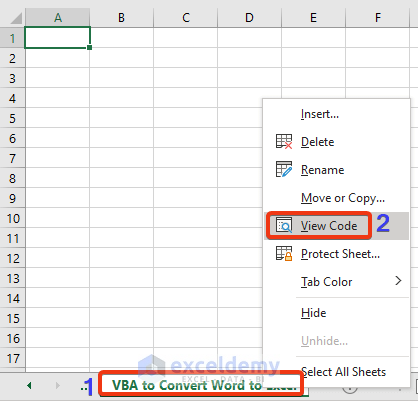
- Go to the bottom part of the Excel file where you can see the sheet names.
- Right-click on the sheet where you want to import data from the Word file.
- Choose the View Code option from the Context menu.
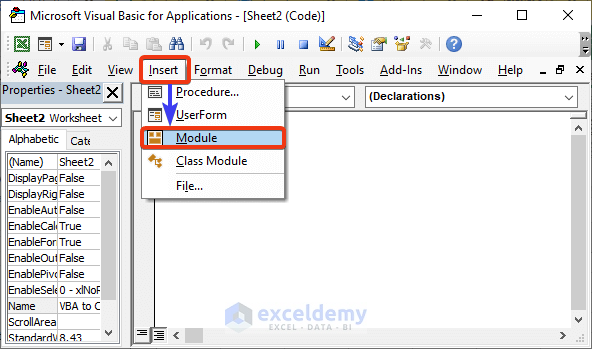
- A VBA window appears.
- Choose the Module option from the Insert tab.
- The Module appears now. We will write the VBA code here.
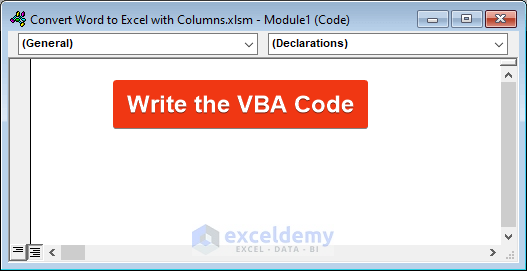
- Copy and paste the following VBA code on the VBA module, then Save it.
Sub convert_Word_to_Excel()
Dim object_doc, Word_App As Object
Dim Word_Name As Variant
Dim xWork_Book As Workbook
Dim xWork_Sheet As Worksheet
Dim Name_1 As String
Dim PC_x, RPP_x
Application.ScreenUpdating = False
Application.DisplayAlerts = False
Word_Name = Application.GetOpenFilename("Word file(*.doc;*.docx) ,*.doc;*.docx", , "Select now")
If Word_Name = False Then Exit Sub
Application.ScreenUpdating = False
Set xWork_Book = Application.ActiveWorkbook
Set xWork_Sheet = xWork_Book.Worksheets.Add
Set Word_App = CreateObject("Word.Application")
Word_App.ScreenUpdating = False
Word_App.DisplayAlerts = False
Set object_doc = Word_App.Documents.Open(Filename:=Word_Name, ReadOnly:=True)
object_doc.Activate
PC_x = object_doc.Paragraphs.Count
Set RPP_x = object_doc.Range(Start:=object_doc.Paragraphs(1).Range.Start, End:=object_doc.Paragraphs(PC_x).Range.End)
RPP_x.Select
On Error Resume Next
Word_App.Selection.Copy
Name_1 = object_doc.Name
Name_1 = Replace(Name_1, ":", "_")
Name_1 = Replace(Name_1, "\", "_")
Name_1 = Replace(Name_1, "/", "_")
Name_1 = Replace(Name_1, "?", "_")
Name_1 = Replace(Name_1, "*", "_")
Name_1 = Replace(Name_1, "[", "_")
Name_1 = Replace(Name_1, "]", "_")
If Len(Name_1) > 31 Then
    Name_1 = Left(Name_1, 31)
End If
xWork_Sheet.Name = Name_1
xWork_Sheet.Range("A1").Select
xWork_Sheet.Paste
object_doc.Close
Set object_doc = Nothing
Word_App.DisplayAlerts = True
Word_App.ScreenUpdating = True
Word_App.Quit (wdDoNotSaveChanges)
Application.DisplayAlerts = True
Application.ScreenUpdating = True
End Sub- Press the F5 button to run the code.
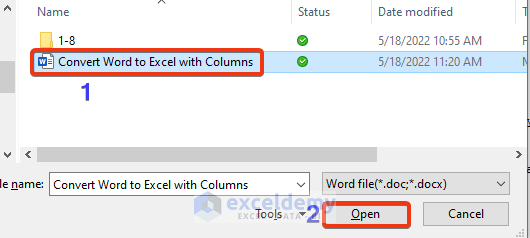
- Choose the Word file from the File Explorer, then click the Open button.
- Here’s the Excel sheet.
Code Explanation:
Dim object_doc, Word_App As Object
Dim Word_Name As Variant
Dim xWork_Book As Workbook
Dim xWork_Sheet As Worksheet
Dim Name_1 As String
Dim PC_x, RPP_x
This declares different variables.
Application.ScreenUpdating = FalseTurns off the Screen update feature.
application.displayalerts = falseTurns off the alerts and messages while a macro is running.
Set xWork_Book = Application.ActiveWorkbook
Set xWork_Sheet = xWork_Book.Worksheets.Add
Set the workbook and worksheet correspondingly.
Set object_doc = Word_App.Documents.Open(Filename:=Word_Name, ReadOnly:=True)
object_doc.Activate
Sets the object document.
Set RPP_x = object_doc.Range(Start:=object_doc.Paragraphs(1).Range.StartSets another object RPP_x.
On Error Resume NextIf an error is found enter the go to the next section.
Word_App.Selection.CopyCopy the selected portion of the Word.app.
If Len(Name_1) > 31 Then
    Name_1 = Left(Name_1, 31)
End If
An If condition is applied.
Word_App.DisplayAlerts = True
Word_App.ScreenUpdating = True
Turn on the display alert and screen updating.
Read More: How to Convert Word Table to Excel Spreadsheet
Download the Practice Workbook
Related Articles
- How to Convert Word to Excel but Keep Formatting
- Copy from Word to Excel into Multiple Cells
- How to Link Word Document to Excel
<< Go Back to Import Word to Excel | Importing Data in Excel | Learn Excel
Get FREE Advanced Excel Exercises with Solutions!
