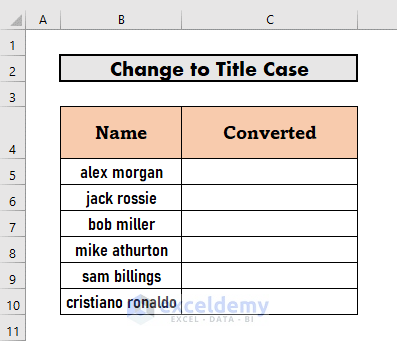
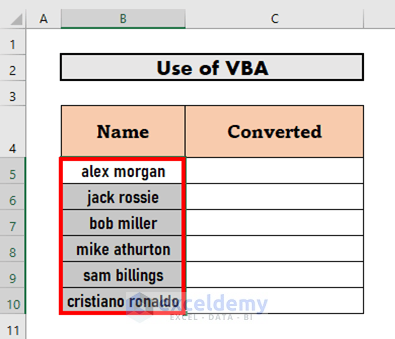
Dataset Overview
We’ll use the data set below to demonstrate the methods.
Method 1 – Using the PROPER Function
The PROPER function is a handy tool for converting text to title case. It capitalizes the first letter of each word while keeping the rest in lowercase. Follow these steps:
- Open your Excel workbook.
- Go to cell C5 (where you want the title case output).
- Enter the following formula:
=PROPER(B5)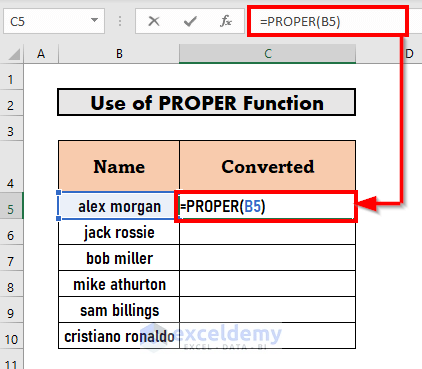
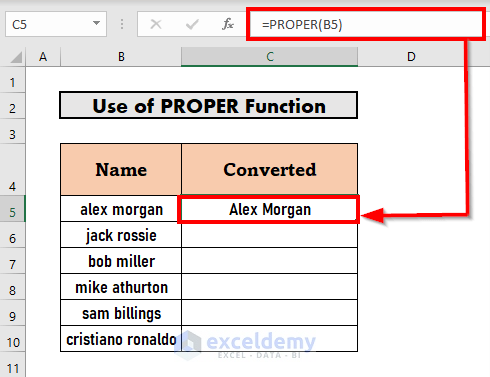
- Press ENTER to display the output.
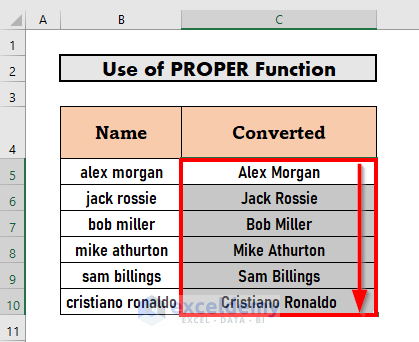
- Use Fill Handle to AutoFill the formula down to cell C10.
Read More: How to Capitalize First Letter of Each Word in Excel
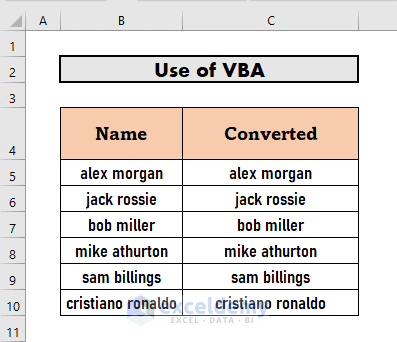
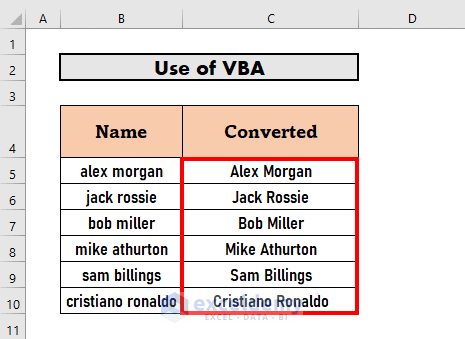
Method 2 – Applying Excel VBA Macro
For more advanced users, you can use a Visual Basic for Applications (VBA) macro to achieve title case conversion. VBA is the programming language for Microsoft Excel. Here’s how:
- Copy the values from cells B5 to B10 (CTRL+C).
- Paste them into cells C5 to C10 (CTRL+V).
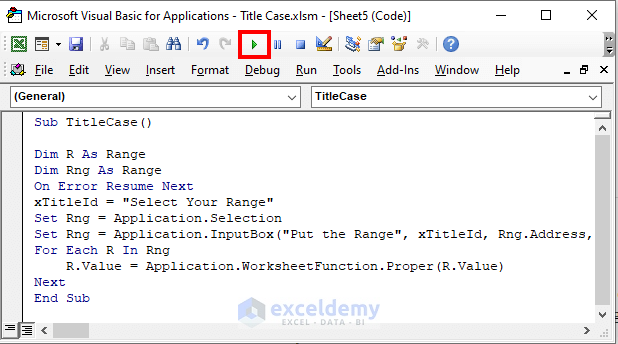
- Press ALT + F11 to open the VBA editor.
- Insert a new module (go to Insert and select Module).

- Enter the following VBA code in the module:
VBA Code:
Sub TitleCase()
Dim R As Range
Dim Rng As Range
On Error Resume Next
xTitleId = "Select Your Range"
Set Rng = Application.Selection
Set Rng = Application.InputBox("Put the Range", xTitleId, Rng.Address, Type:=8)
For Each R In Rng
    R.Value = Application.WorksheetFunction.Proper(R.Value)
Next
End Sub- Press F5 to run the program or use the ribbon to run the subroutine.
- An input box will appear; select the range (e.g., C5:C10) and click OK.
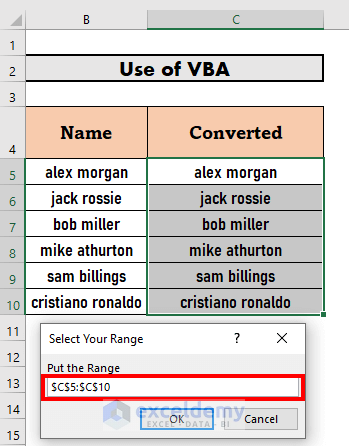
- Excel will convert the text to title case.
VBA Code Explanation
In the provided VBA code:
- We create a subroutine called TitleCase.
- Define two variables: R (for iterating through the range) and Rng (to store the selected range).
- Use the WorksheetFunction.Proper property to convert each value to title case.
Read More: Excel VBA to Capitalize First Letter of Each Word
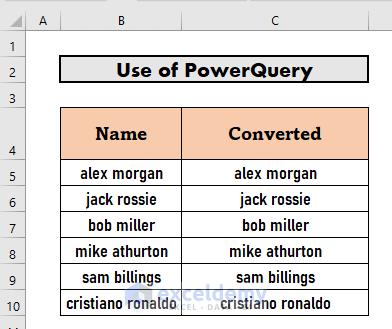
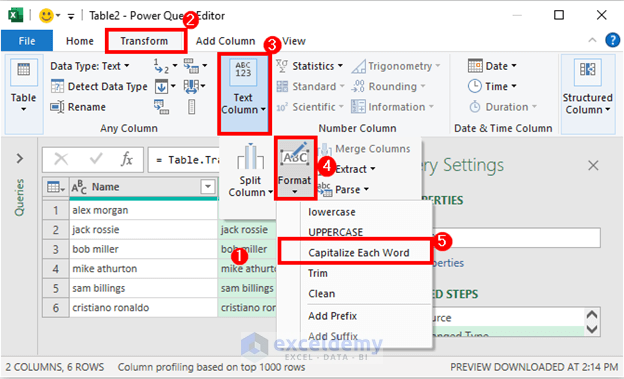
Method 3 – Using PowerQuery
PowerQuery is a powerful tool in Excel that allows you to import, connect to external data sources, and transform your data. Follow these steps to change text to title case using PowerQuery:
- Copy the names you want to convert (from B5 to B10) and paste them into cells C5 to C10 (following the method from step 2).
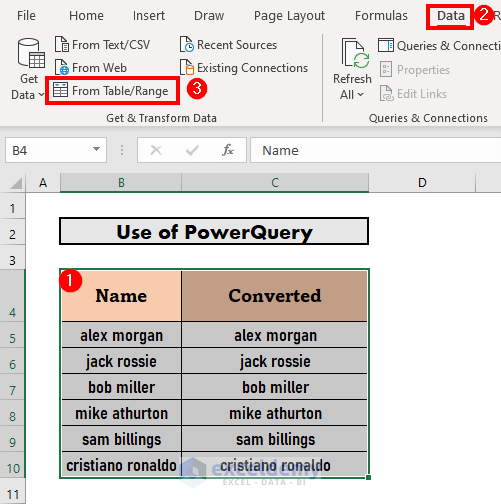
- Select the entire table.
- Go to the Data tab.
- Click From Table/Range.
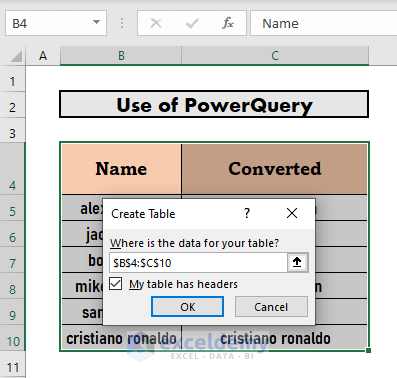
- The Create Table dialog will appear. Check the box if your table has headers, then click OK.
- Excel will open the PowerQuery Editor.
- In the PowerQuery Editor, select the column containing the names (e.g., converted).
- Go to the Transform tab.
- Under Text Column, choose Format and select Capitalize Each Word.
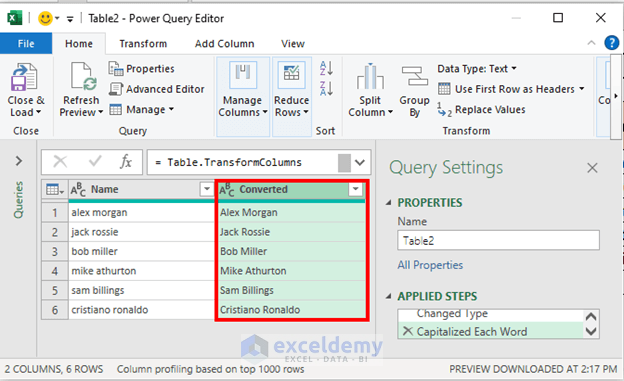
- You’ll see that Excel has changed the case.
- Go to the Home tab.
- Click Close & Load.
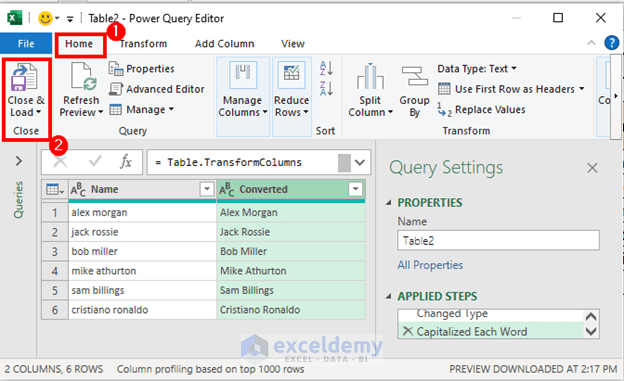
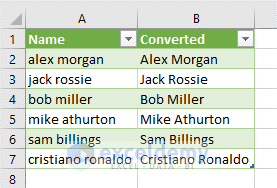
- Excel will create a new table in a new worksheet.
Read More: How to Change Case in Excel Without a Formula
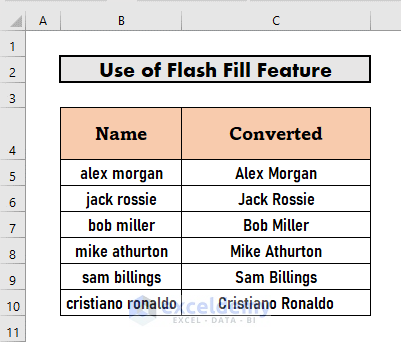
Method 4 – Using Excel Flash Fill
Flash Fill is an easy way to automatically fill datasets based on patterns. Follow these steps:
- Enter the 1st name in title case manually in cell C5.
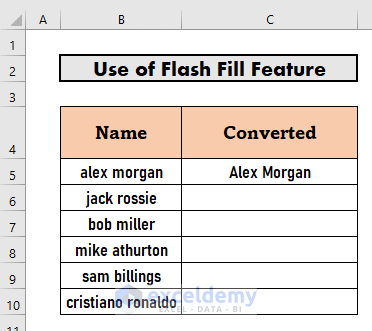
- As you start typing the 2nd name (e.g., in cell C6), Excel will show suggestions based on the pattern.

- Press ENTER to let Excel Flash Fill the remaining names.
Things to Remember
- Save your file as a Macro-Enabled Workbook with the extension .xlsm
- Flash Fill may not work in older versions of Excel.
Download Practice Workbook
You can download the practice workbook from here:
Related Articles
- How to Capitalize All Letters Without Formula in Excel
- How to Stop Auto Capitalization in Excel
- How to Use VBA in Excel to Capitalize All Letters
- Automatic Uppercase in Excel VBA
<< Go Back to Change Case | Text Formatting | Learn Excel
Get FREE Advanced Excel Exercises with Solutions!
