When you have to work with a lot of Excel sheets, it’s a better practice to organize all the sheets well. Excel sheets can be organized into a folder as well as in a workbook. In this article, I will show you 2 effective methods to arrange an Excel sheet in ascending order with ease. First, I will show you sort Excel sheets within a workbook. Then, you will learn to arrange Excel sheets into a folder in ascending order. So, without having any further discussion, let’s get started.
Excel sheets can be arranged either in Ascending Order or Descending Order. Arranging Excel sheets in ascending order means sorting Excel sheets from A to Z by their names. Now I’m going to discuss how to arrange Excel sheets in ascending order first within a workbook. Second, within a folder one by one.
1. Arranging Excel Sheet in Ascending Order in a Workbook
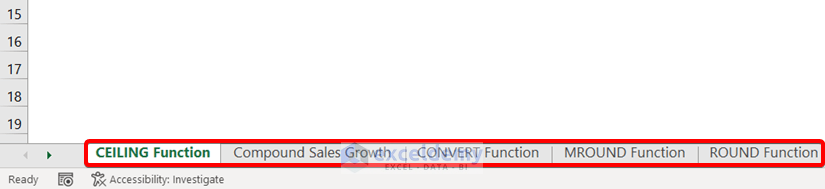
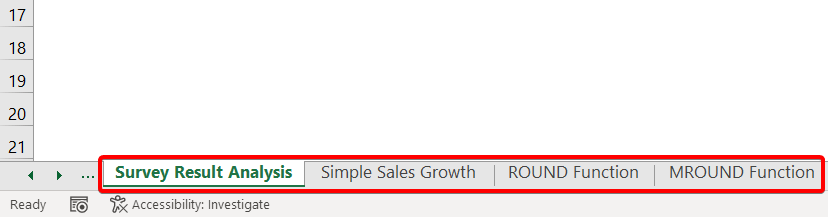
In the following picture, you can see a bunch of Excel sheets arranged randomly. However, I’m going to use a VBA code to arrange all these sheets in ascending order in seconds.

To use the VBA code,
- Press ALT + F11 to open the VBA Editor.
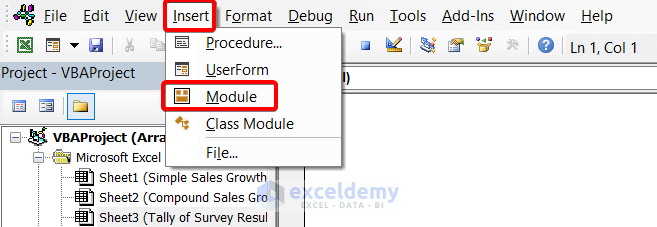
- After that, go to Insert ➤ Module to open a new module to insert the VBA.
Now copy the following piece of code and insert it inside the new module that you’ve opened.
Option Explicit

Sub Sort_Excel_Sheets()

Dim x As Integer
Dim y As Integer
Dim zAnswer As VbMsgBoxResult

   zAnswer = MsgBox("Click yes to sort in ascending order." & Chr(10) _
     & "Click no to sort in descending order.", _
     vbYesNoCancel + vbQuestion + vbDefaultButton1, "Sort Excel Sheets")

   For x = 1 To Sheets.Count
      For y = 1 To Sheets.Count - 1

         If zAnswer = vbYes Then
            If UCase$(Sheets(y).Name) > UCase$(Sheets(y + 1).Name) Then
               Sheets(y).Move After:=Sheets(y + 1)
            End If

         ElseIf zAnswer = vbNo Then
            If UCase$(Sheets(y).Name) < UCase$(Sheets(y + 1).Name) Then
               Sheets(y).Move After:=Sheets(y + 1)
            End If
         End If
      Next y
   Next x

End Sub
Breakdown of the Code
- This code creates a subroutine called Sort_Excel_Sheets.
- At first, I declared 3 variables called x, y, and zAnswer.
- Then I used a message box to collect responses from the user. The message box display “Click yes to sort in ascending order.” and “Click no to sort in descending order.”.
- The response is stored in the 3rd variable called zAnswer.
- Then I used two nested For loops to sort.
- Inside the For loops, I used If…Elseif
- When a user press Yes, the system executes the IF Otherwise, the system executes the ElseIf statement.
- Inside both the IF and ElseIf statements, there are two IF
- To sort, I used the UCase property to convert all the letters of the sheets’ names into Upper
- After converting, I compared the sheet names to sort.
- Then I used the Move After property to reposition all the sheets according to their names.
Now go back to your Excel sheets.
- Press ALT + F8 to open the Macro dialog box.
- Select the subroutine Sort_Excel_Sheets and click Run in the Macro dialog box.
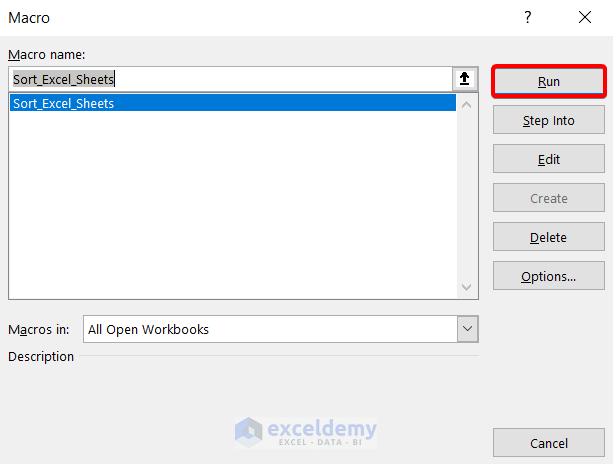
A small dialog box called ‘Sort Excel Sheets’ will appear.
It has two commands:
- Click yes to sort in ascending order.
- Click no to sort in descending order.
If you want to sort in ascending order, click on the Yes button.

The code to start to execute. Thus, all the Excel sheets will be arranged in ascending order.
2. Arranging Excel Sheet in Ascending Order into a Folder
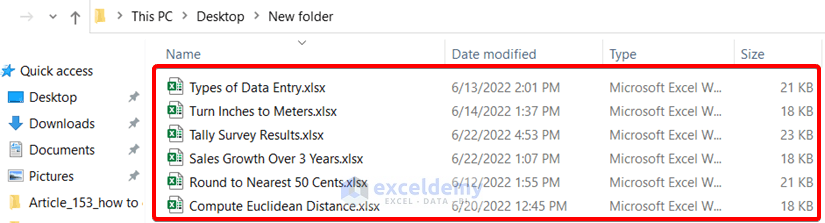
Here, I have a list of Excel sheets in a folder called New Folder. Currently, all the sheets are in descending order. However, by default, you will find the sheets in ascending order.
When you find your Excel sheets are not saved in ascending order, you can follow these steps. These steps will guide you to arrange Excel sheets in ascending order into a folder.
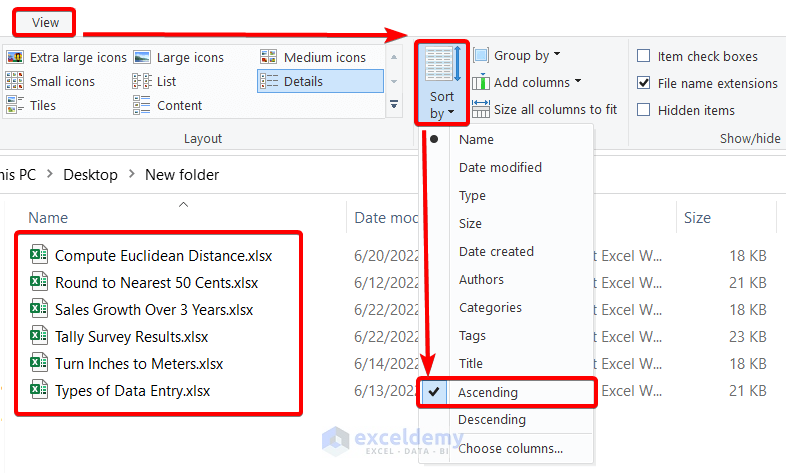
- First, open the folder.
- Now go to the View tab in your Windows Operating System.
- Click on the Sort by drop-down icon.
- From the list, select the Ascending
After clicking on the Ascending command, you will notice that all the sheets are now in Ascending Order.
Practice Section
You can download the practice workbook for practice. The workbook contains a few worksheets arranged in a random manner. You can use this workbook to practice the first method.
Download Practice Workbook
You can download the Excel file from the following link and practice along with it.
Conclusion
To sum up, we have discussed 2 methods to arrange Excel sheets in ascending order. Please don’t hesitate to ask any questions in the comment section below. We will try to respond to all the relevant queries ASAP.
Related Articles
<< Go Back to Organize Sheets in Excel | Excel Worksheets | Learn Excel
Get FREE Advanced Excel Exercises with Solutions!
