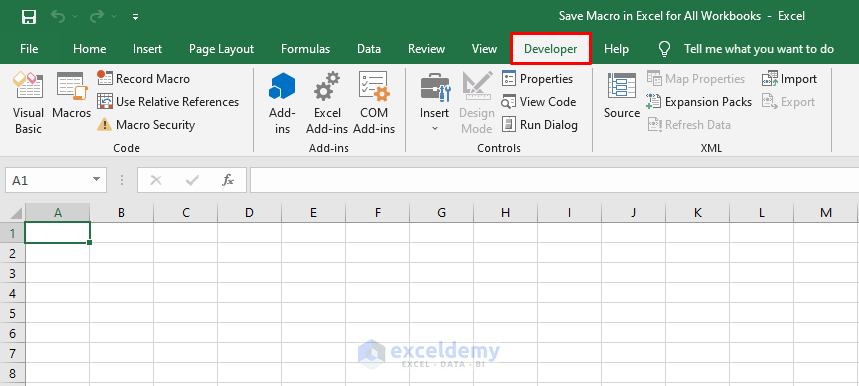
Step 1 – Open the Developer Tab in Excel
- Open an Excel workbook.
- Go to the Developer tab. If it’s hidden, follow these steps to unhide it.
Read More: How to Save Macros in Excel Permanently (2 Suitable Ways)
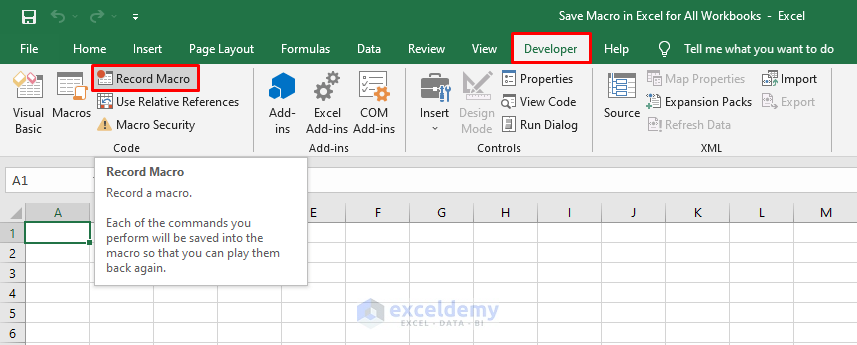
Step 2 – Start the Macro Recording
- Click the Record Macro button in the Developer tab.
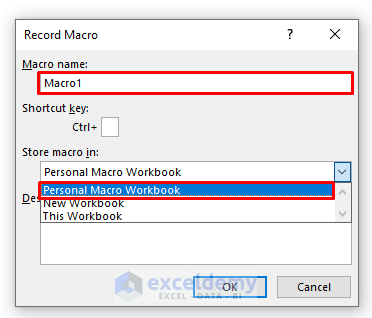
- In the Record Macro dialog, name your macro (default is Macro1).
- Choose Personal Macro Workbook from the Store macro in checkbox and click OK.
Read More: Excel VBA to Save File with Variable Name (5 Examples)
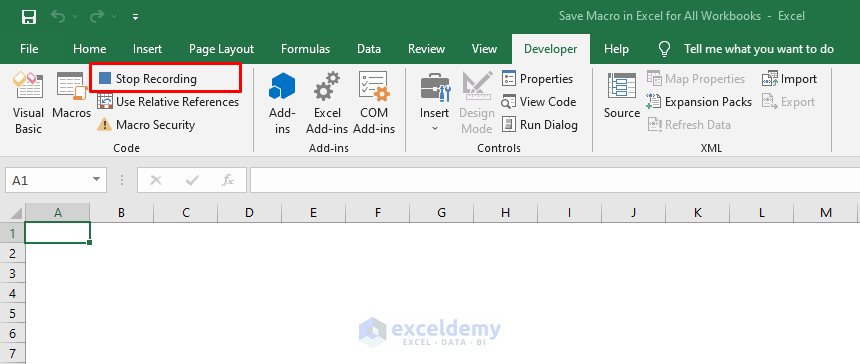
Step 3 – Stop the Macro Recording
- Once you click OK, the macro recording starts.
- Click the Stop Recording button (same position as Record Macro) to stop recording.
Similar Readings
- Fix Excel Not Responding and Save Your Work
- How to Undo Changes in Excel after Save and Close (2 Easy Methods)
- [Fix]: Microsoft Excel Cannot Open or Save Any More Documents Because There Is Not Enough Available Memory
- Excel VBA: Create Invoice and Save PDF Format (with Quick Steps)
- Save Excel Files as Text Without Quotes (4 Methods)
Step 4 – Open Visual Basic Editor to View the Macro
- Press ALT + F11 to open the Visual Basic window.
- In the right pane, find the Module1 macro under VBAProject (PERSONAL.xlsb).

Read More: Excel VBA: Save Sheet as New Workbook without Opening
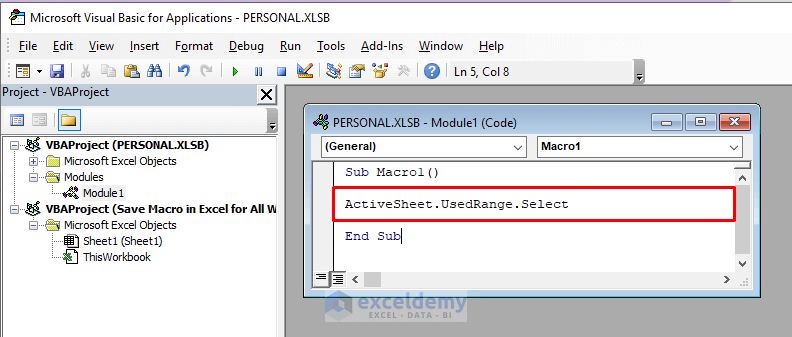
Step 5 – Insert the Necessary Code
- The inside of the macro is empty.
- Insert your VBA code within it (between Sub Macro1 and End Sub).
Read More: Excel VBA: Save Workbook in Specific Folder (4 Suitable Examples)
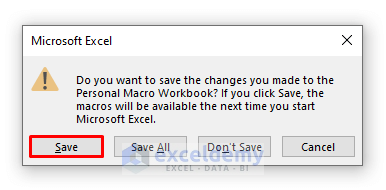
Step 6 – Close and Save the Macro
- Close the workbook.
- When prompted, save the PERSONAL.xlsb file.
You have saved the Macro successfully for all the workbooks on your computer.
Read More: Excel VBA: Save and Close Workbook (5 Suitable Examples)
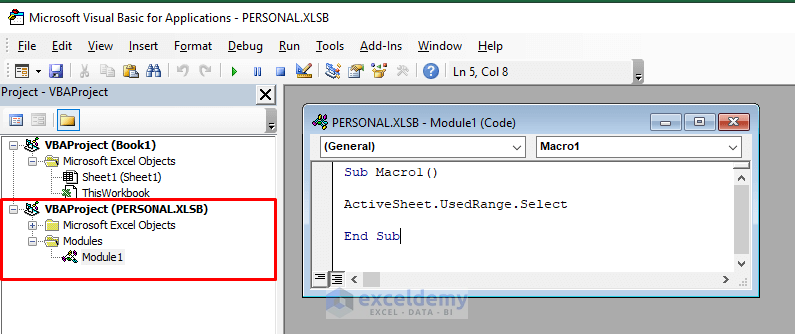
Step 7 – Save the Macro for All Workbooks in Excel
- Open any Excel file on your computer, whether it’s an existing workbook or a new one.
- Press ALT + F11 on your keyboard to open the Visual Basic window.
- Look for the Macro under the VBAProject (PERSONAL.xlsb) section in the right pane. It will be available in all the workbooks on your computer.
Read More: Excel Macro Enabled Workbook (5 Easy Ways to Open)
Things to Note
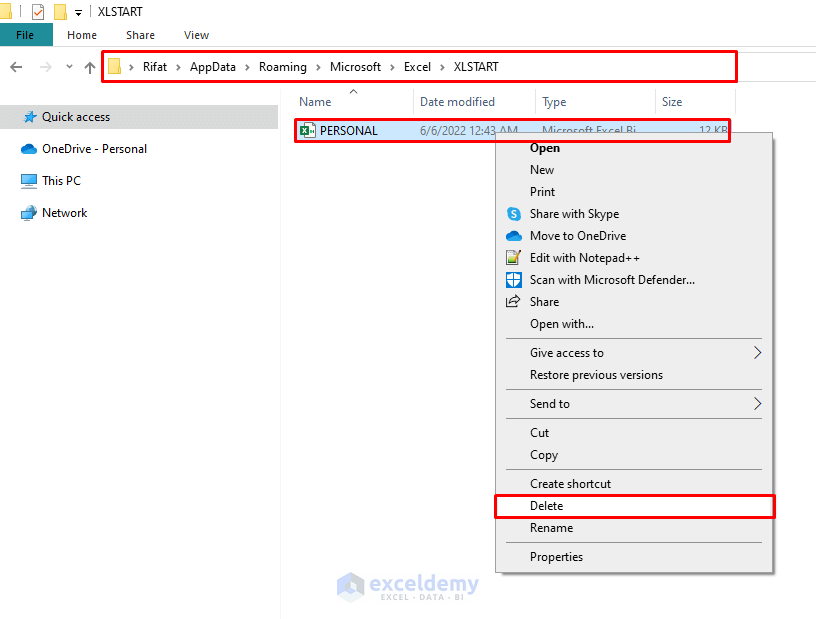
What you’ve actually done is create a new Microsoft Excel Binary File called PERSONAL.xlsb on your computer. If you want to remove it from the Visual Basic pane, simply locate the file on your computer and delete it. Most of the time, you’ll find it in the directory C:\Users\ABFA Computers\AppData\Roaming\Microsoft\Excel\XLSTART.
Download Practice Workbook
You can download the practice workbook from here:
Related Articles
- [Fixed!] Excel CSV File Not Saving Changes (6 Possible Solutions)
- Excel VBA Macro to Save PDF in Specific Folder (7 Ideal Examples)
- VBA Code for Save Button in Excel (4 Variants)
- How to Save Multiple Sheets in Excel (6 Ideal Methods)
- Excel VBA to Print As PDF and Save with Automatic File Name

