How to Insert a Macro Button and Assign a Macro
Before creating a VBA-Enabled Save Button, users must insert a Command Button and assign a Macro to it.
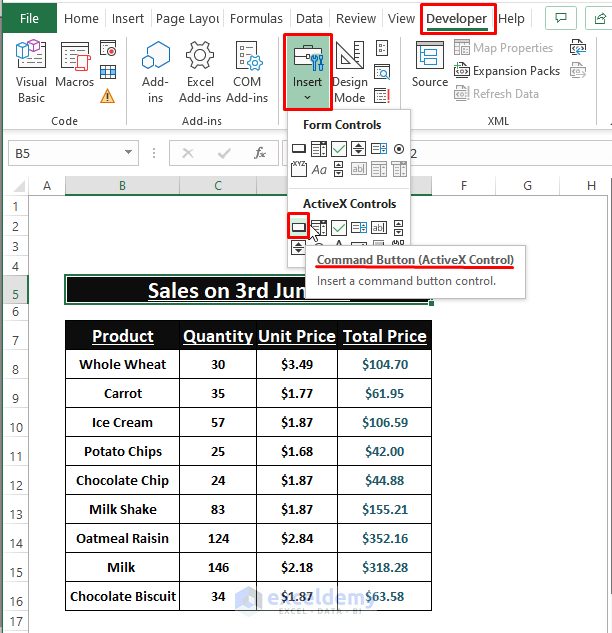
Inserting a Command Button
- Go to the Developer tab > Click on Insert (in the Controls section) > Click on a Command Button (under Active X Controls).
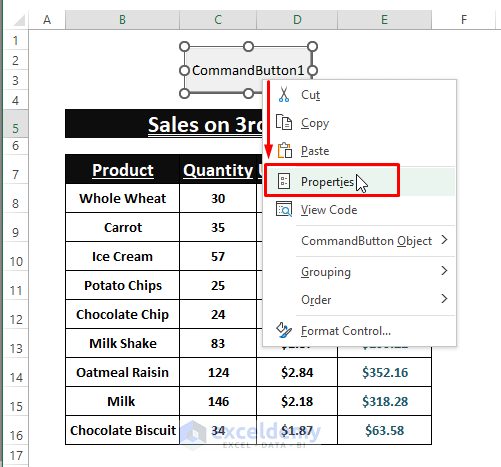
- Right-click on the inserted Command Button. The Context Menu appears. From the Context Menu, select Properties.
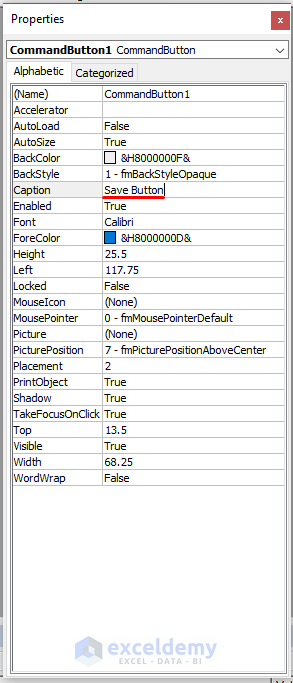
- In the Properties window, edit necessary items as needed, as depicted in the below image.
Assigning a Macro to the Command Button
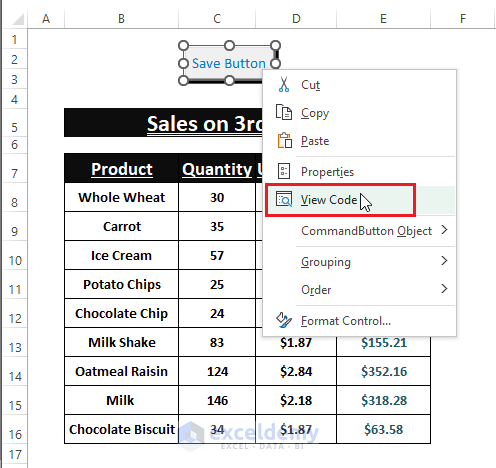
- After inserting the Command Button and modifying its properties, right-click on it. Select the View Code option from the Context Menu.
- Excel opens the Microsoft Visual Basic Window with the Command Button code space.
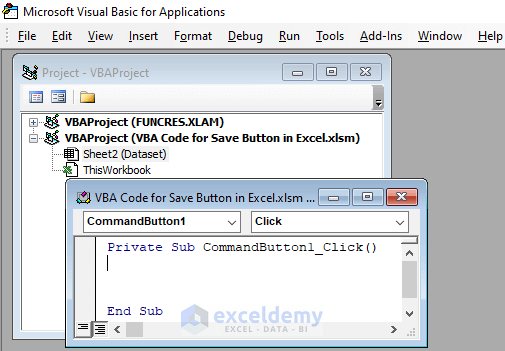
- Enter the preferred macro in the offered space, and click the Save Button to run it.
Method 1 – VBA Code for File Saving, Then Quitting Excel
Steps:
- Enter the following macro under the Command Button:
Private Sub CommandButton1_Click()
Application.Quit
ThisWorkbook.Save
End Sub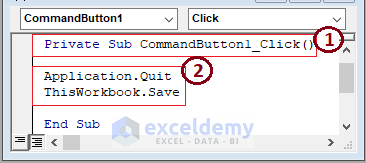
- In the code, start the macro procedure by declaring the Sub name. And it’s a Command Button.
- Save the workbook content. Quit the application.
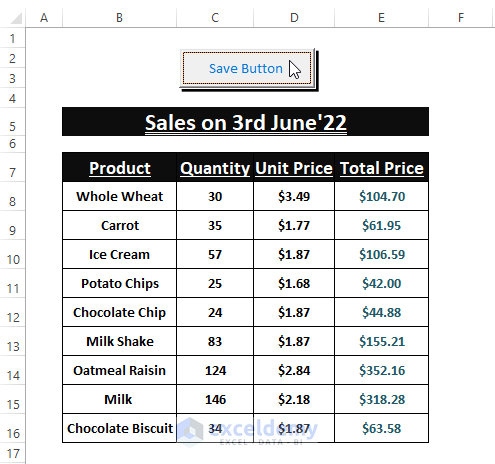
- Click on the inserted Save Button.
Excel saves the modified content and then terminates the active Excel window.
Method 2 – Macro Code for a ‘Save As’ Button
Steps:
- Enter the below code in the Command Button:
Private Sub CommandButton1_Click()
With Application.FileDialog(msoFileDialogSaveAs)
.Title = ("Provide a File Name then Select File Type & Location")
.ButtonName = "Save As"
.Show
End With
End Sub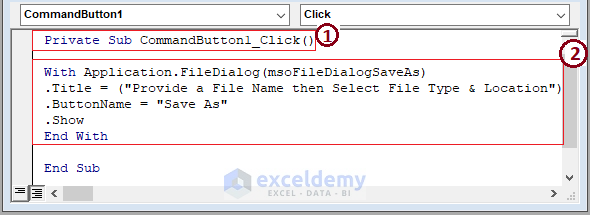
The code’s sections,
- Initiate the macro procedure declaring the Sub name.
- Open the Save As dialog box using the Application With statement.
- Return to the worksheet then click on the Save Button.

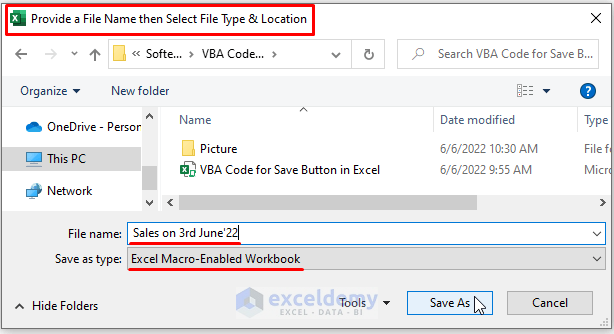
- Excel opens the Save As dialog box saying, “Provide a File Name then Select File Type & Location”.
- Click Save As to save the file in the desired location with a preferred name.
Method 3 – Code for Saving a File with a Custom Name in a Fixed Location
Steps:
- Enter the below macro under the Command Button:
Private Sub CommandButton1_Click()
Dim mFileName As String
mFileName = Range("B5").Value
ActiveWorkbook.SaveAs (mFileName)
End Sub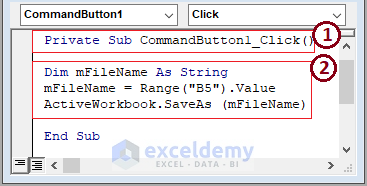
From the above image, the code’s sections,
- Set the Sub name.
- Declare the variable as String.
- Assign the variable name to the B5 cell entry.
- Save the entire workbook.
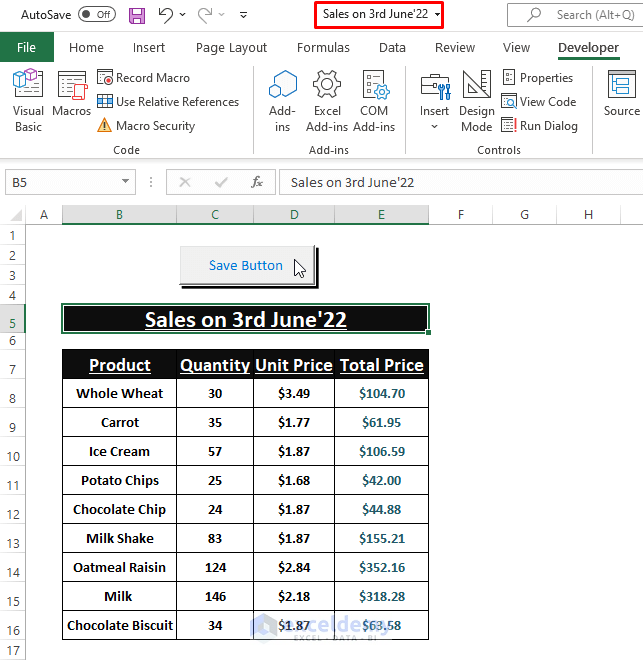
- Click on the Save Button. Excel changes the file name to the value of the B5 cell (i.e., Sales on 3rd June’22).
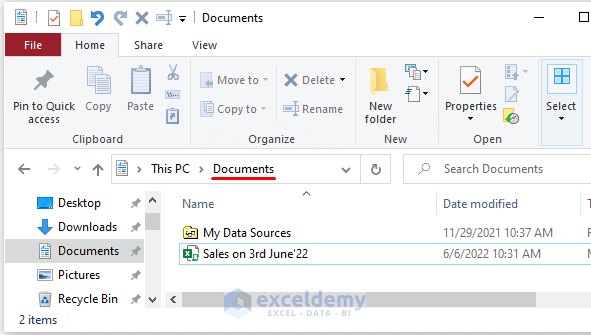
This macro automatically saves the Excel file in the Device’s Document directory. Go through the directory, and you find the saved file as shown below.
Method 4: Saving a File with a Given Name and Location Using a Button
Steps:
- Enter the below code in the Command Button:
Private Sub CommandButton1_Click()
ActiveWorkbook.SaveAs _
FileName:="C:\Users\maruf\Desktop\Softeko\New folder\Save Button"
End Sub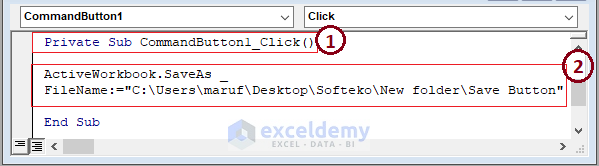 The above image has code sections,
- Set the Sub name.
- Save the Excel file in the given directory.
- Click on the Save Button to execute the macro.

Execution of the macro saves the file in the specified directory, as depicted in the below screenshot.
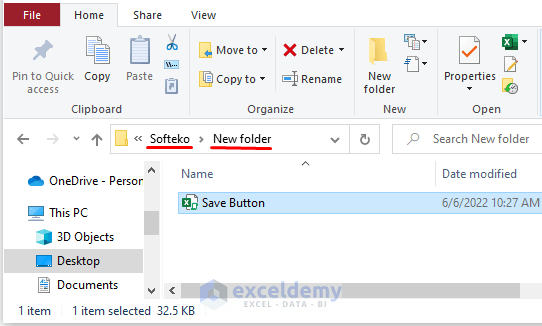
You can change the directory used in the macro to save wherever you wish to save the file.
Download the Excel Workbook
Related Articles
- Text Alignment with VBA Command Button in Excel
- How to Use VBA Code for Submit Button in Excel
- How to Make a Calculate Button in Excel
- How to Create a Stopwatch in Excel

