The article will show you how to maintain accounts in Excel sheet format. It’s important to know how your expenses are going in a month so that you can mitigate your expenses when it’s needed. There are many sectors where we require this application. Here I’m going to show you four templates for maintaining account statements in Excel sheet format. Even though these templates do not match your criteria, you can make a new one on your own just by following the procedure and changing the transaction description. Because the formula we will be using here won’t change a bit for other templates.
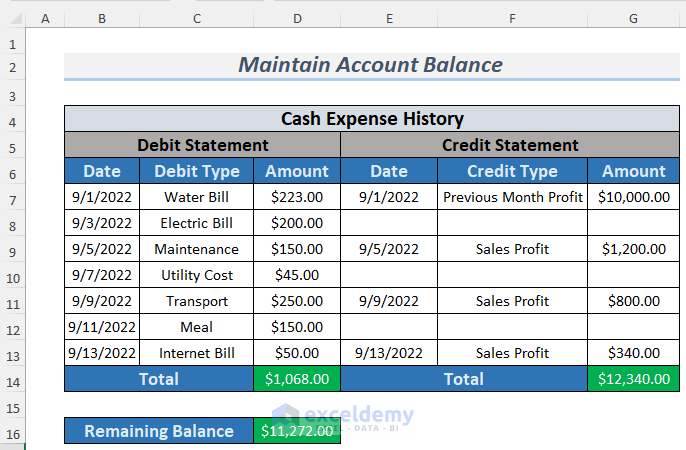
Here, I’m going to show you a sample of what an account-maintaining template will look like. You see the transaction history of a shop in the following screenshot.
1. Maintaining Expense Accounts for a Shop in Excel Sheet
Suppose, you work in a shop and you have a duty to monitor the expenses and credits of that shop. Let’s help you on this matter and see the process below.
Steps:
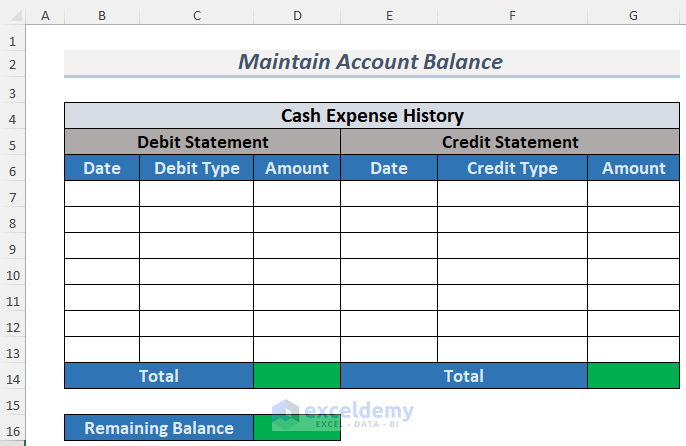
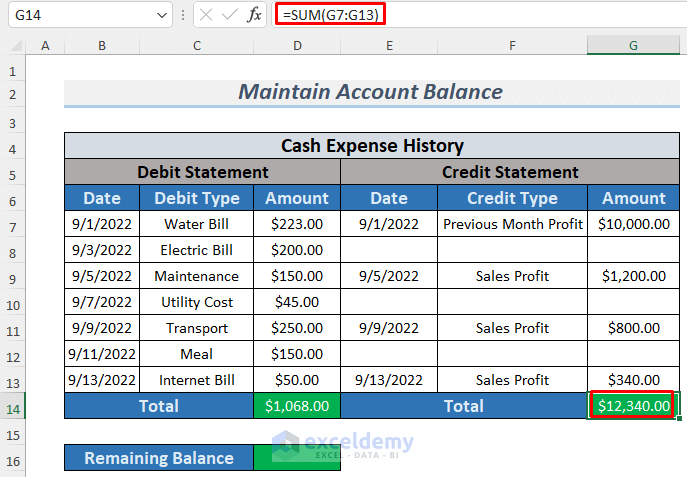
- First, simply just make a chart like the following picture. If you need to, add some more criteria to it.
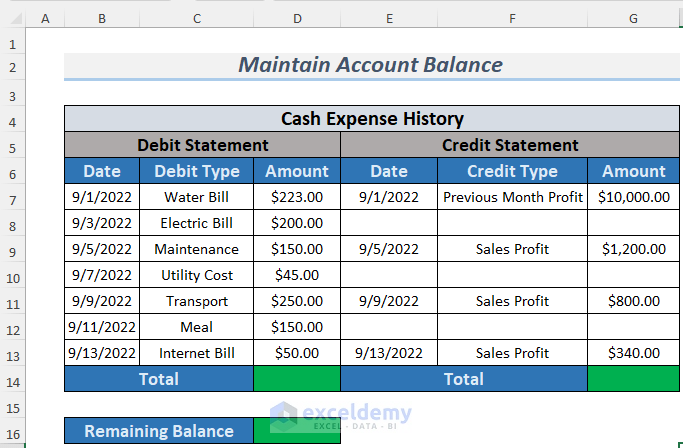
- After that, enter the necessary account data in the chart.
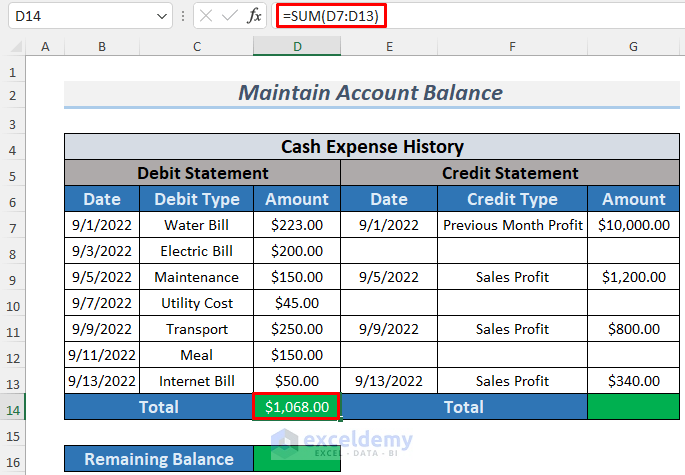
- Thereafter, use the following formula to calculate the total debit amount.
=SUM(D7:D13)
The formula uses the SUM function to calculate the total debit amount of the shop.
- Similarly, you can calculate the credit amount using the exact function.
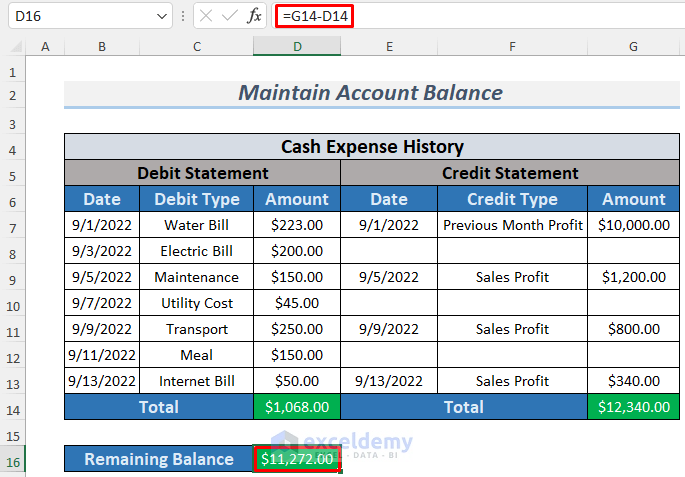
- After that, write down the formula below to determine the remaining balance.
=G14-D14
Thus you can easily maintain accounts in Excel sheet format.
2. Format for Maintaining a Simple Daily Life Accounts
You can also use Excel sheets to maintain your daily life accounts. Let’s go through the procedure below for a better understanding.
Steps:
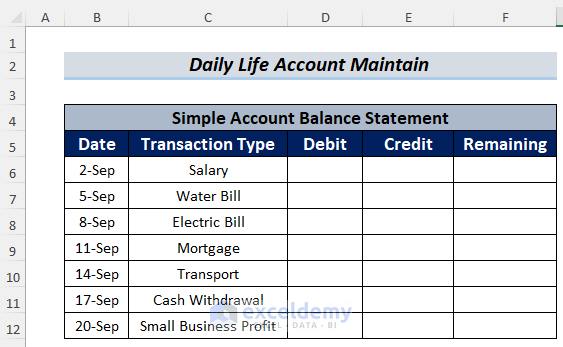
- First, create a chart similar to the following image.
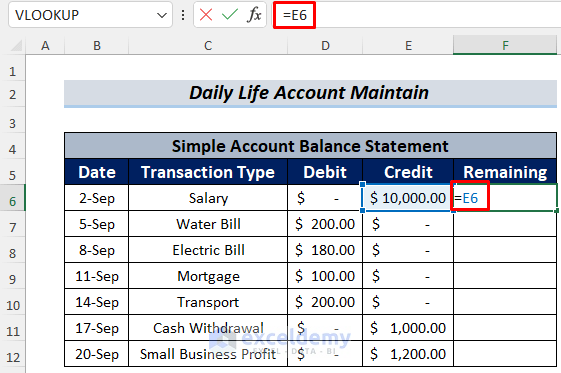
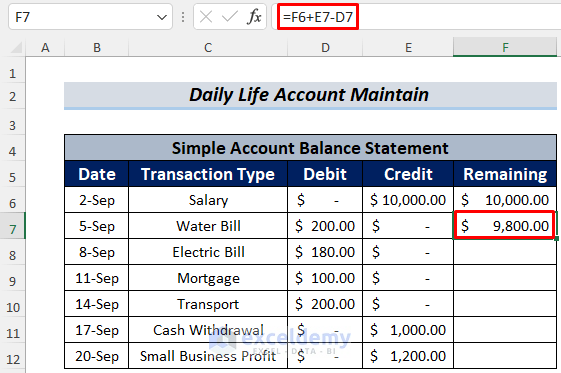
- Next, insert the transaction data and store the value of E6 in F6 by writing the following formula.
=E6
- Next, press the ENTER button and type another formula in F7.
=F6+E7-D7
The formula will show you the remaining balance.
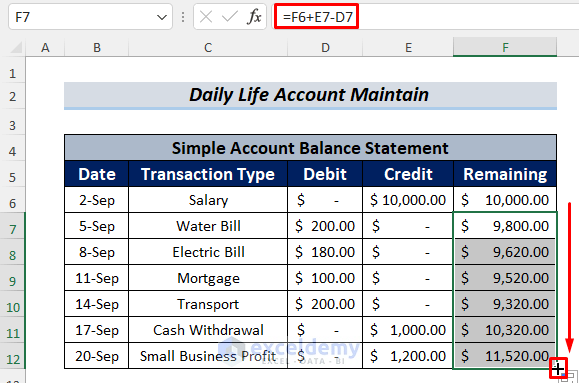
- Thereafter, drag the Fill Icon downwards to AutoFill the lower cells.
Thus you can also maintain your daily life accounts in Excel sheet format.
3. Managing Multiple Accounts in Excel Sheet
The above templates are for single-individual account maintenance. But if you want to maintain multiple accounts history, you should follow this method carefully.
Steps:
- Here, we will need at least two Excel sheets. One is for the selection of a shop and the other is for storing account history.
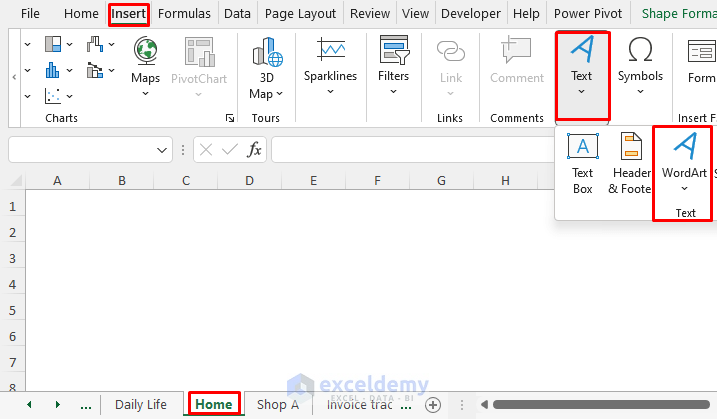
- So first, insert a new sheet and then go to Insert >> Text >> WordArt. Here the sheet name is Home and we will maintain the account data of Shop A.
- You may use Buttons or Shapes in this case.
- Create as many WordArts as you need. Here I made two and I’ll link one of them to show how to use WordArt in this case.
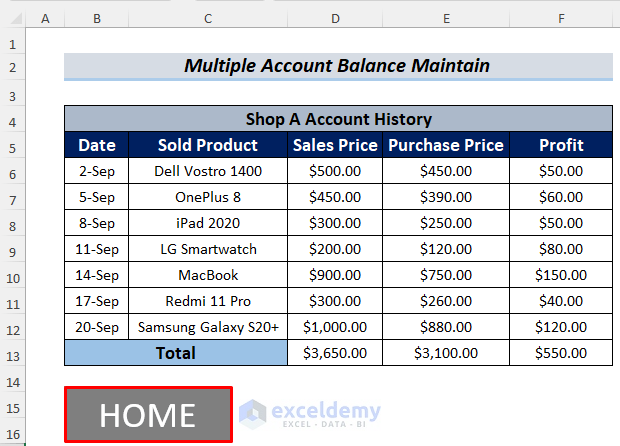
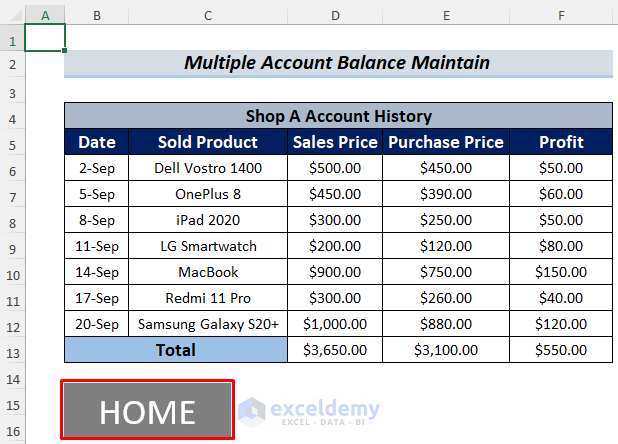
- Next, create your Excel chart for account maintenance in a new sheet. In my case, the sheet name is Shop A. Use the SUM function as we did in the previous method to calculate the total amounts.
- Also, create another WordArt named HOME which we will link with the Home sheet.
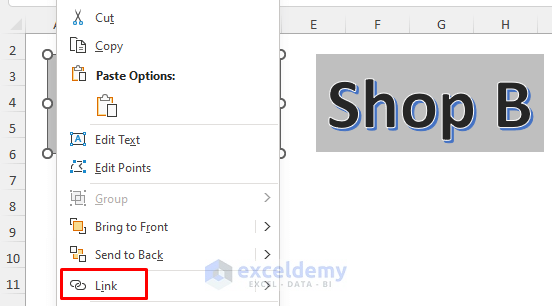
- Thereafter, go back to the Home sheet and right-click on the Shop A WordArt.
- After that, select Link.
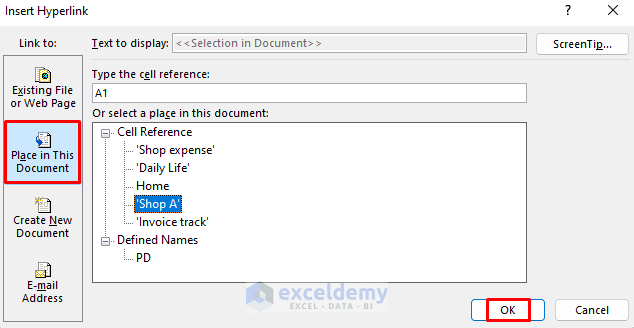
- Next, in the Insert Hyperlink window, select Place in This Document >> Cell Reference >> Shop A.
- Thereafter, click OK.
- After that, click on the Shop A WordArt and this operation will take you to the Shop A
- Similarly, link the HOME WordArt to the Home
Thus you can maintain multiple accounts in Excel sheet format.
4. Maintaining Accounts by Keeping Invoice History in Excel
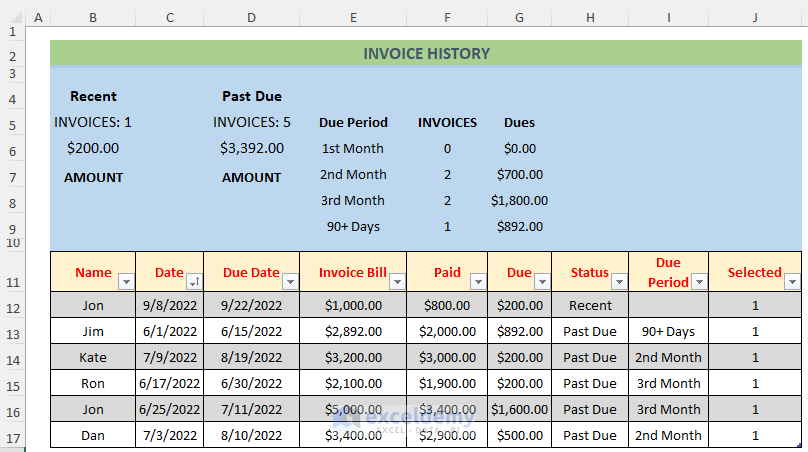
The following template could be a fine tool for you to maintain the detailed account history of your shop if the shop offers due payment for the customers. Just look at the template below.
I suggest you just download the template file of this article and start using it. I’ll give you a brief description of this template below.
The Due Period refers to the time duration between the Due Date and the Present Date. For example, Jim’s Due Date was 15th June, which is more than 90 days from the present date. So the Due Period will be +90 Days. If the Due Date is posted to the present date then the Due Status will be Recent, otherwise, it will be Past Due. The blue area shows a summary of the Invoice History.
Download Practice Workbook
Conclusion
In the end, we can conclude that you will get some valuable templates to maintain accounts in Excel sheet format from this article. If you have any better suggestions, questions, or feedback regarding this article, please share them in the comment box. This will help me enrich my upcoming articles.
How to Maintain Accounts in Excel: Knowledge Hub
<< Go Back to Excel for Accounting | Learn Excel
Get FREE Advanced Excel Exercises with Solutions!