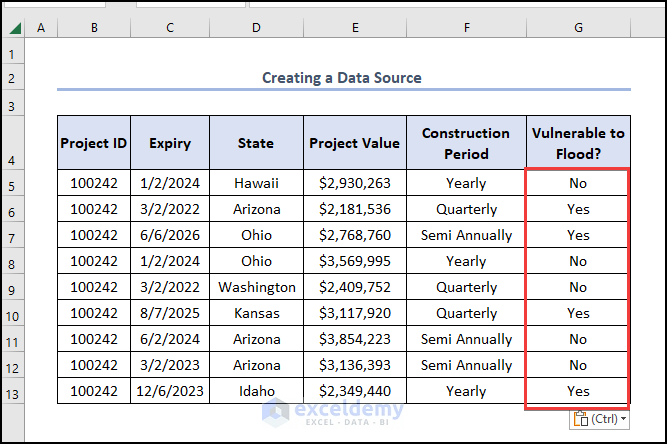
“Running Project of DPR Construction”is the sample dataset.
Recreate it: 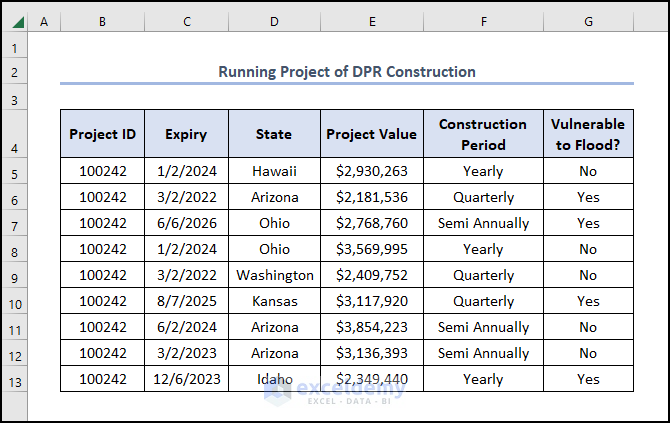
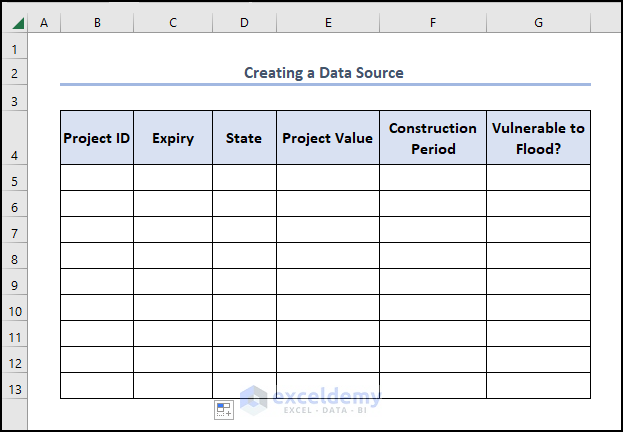
Step 1 – Create a Basic Outline
- Select a cell to create the borders.
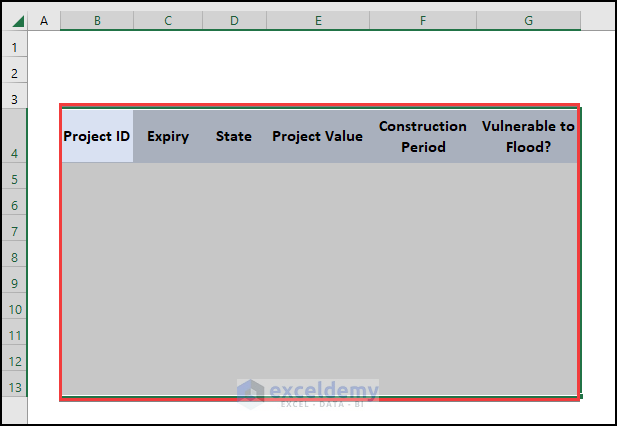
- Go to Borders > All Borders.
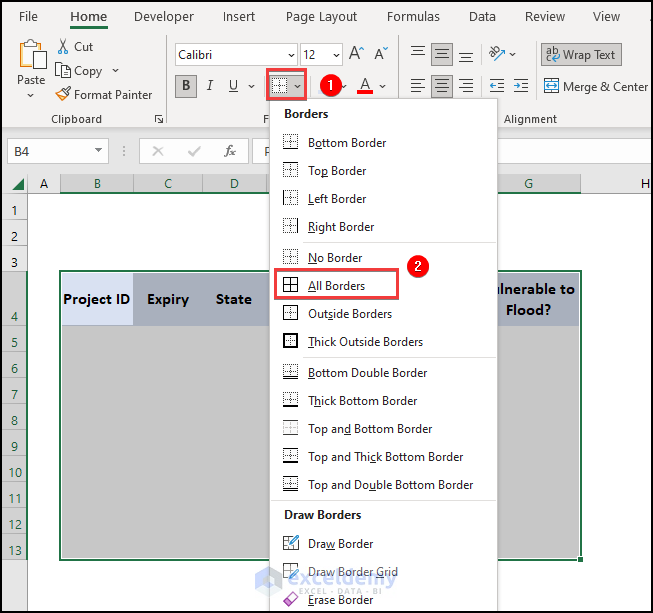
- Press Enter and see the output.
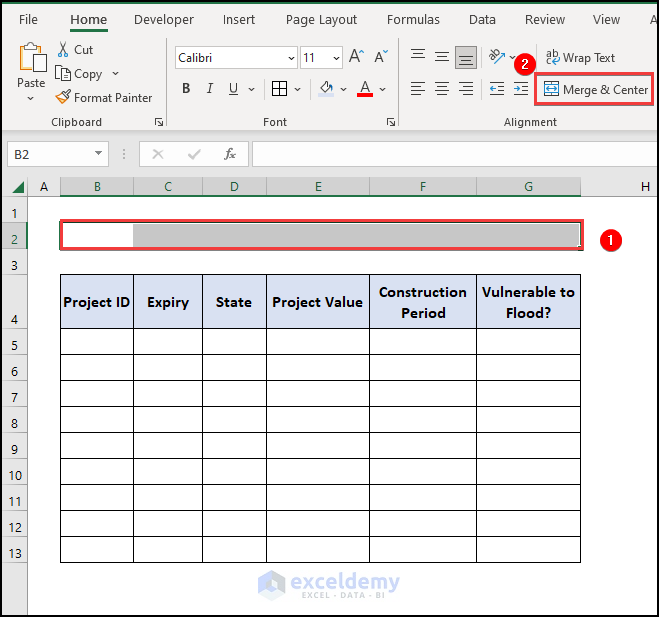
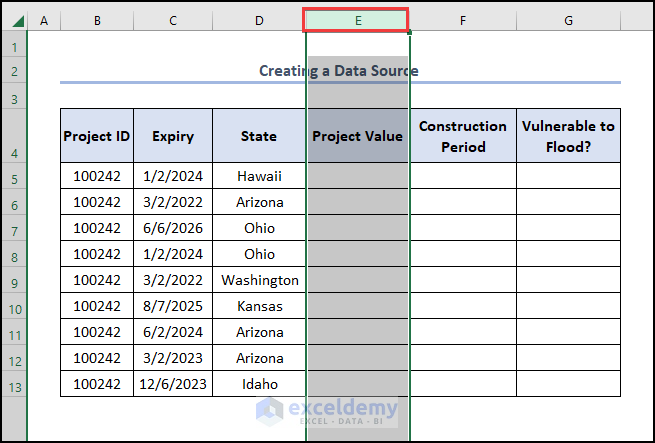
Merge cells to create a heading to the dataset.
- Select B2:G2 and go to Merge & Center.
This is the output.
- Enter the title “Creating Data Source”.
Step 2 – Enter Numerical Data
- Enter 100242 in B5.
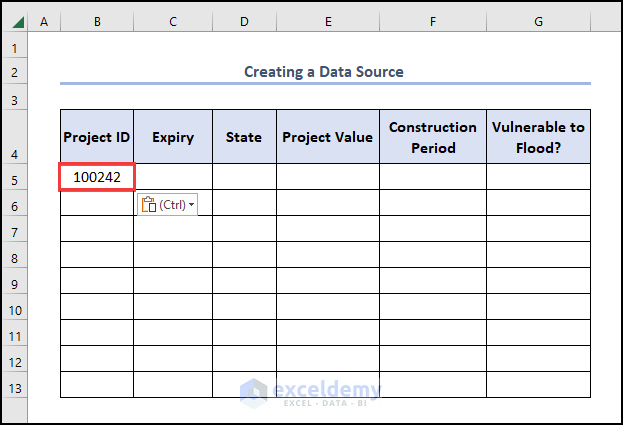
- All data in Project ID is tagged 100242. Drag down the Fill Handle to fill the rest of the cells.
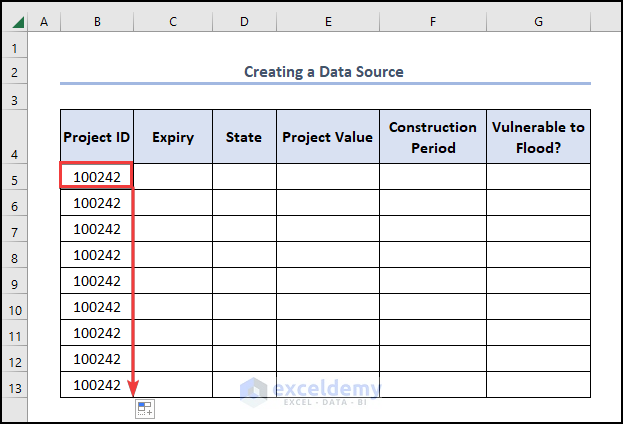
- If you want to increment the number by 1, enter 100242 and 100243 in the first two cells and drag the Fill Handle tool.
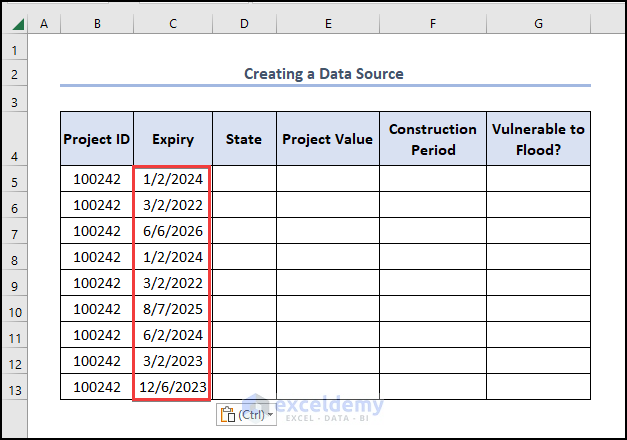
Step 3 – Enter Dates
- Enter 1/2/2024 in C5.
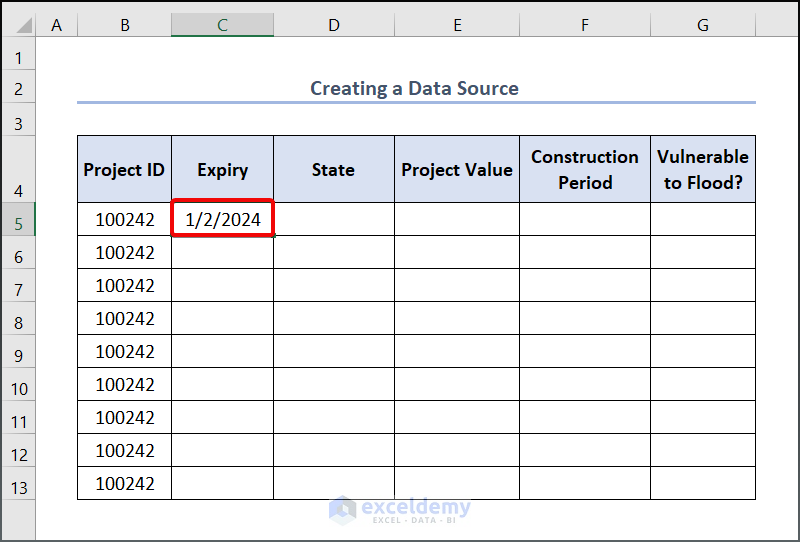
- Enter dates in C5:C13.
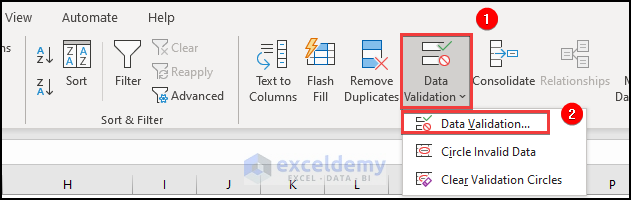
Step 4 – Create a Drop-Down List
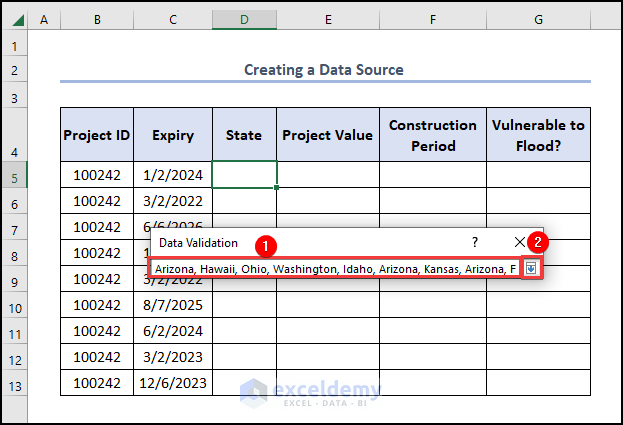
- Select Data > Data Validation.
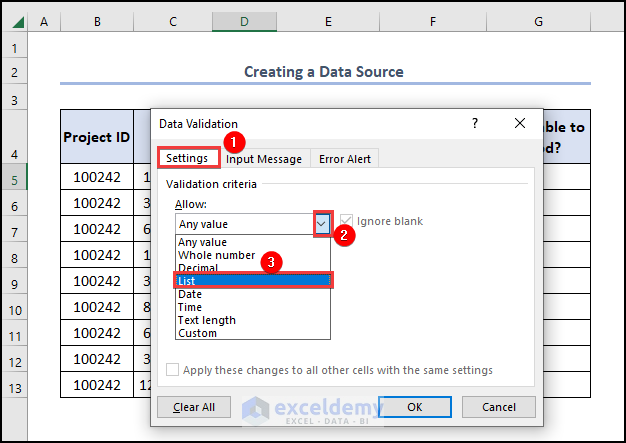
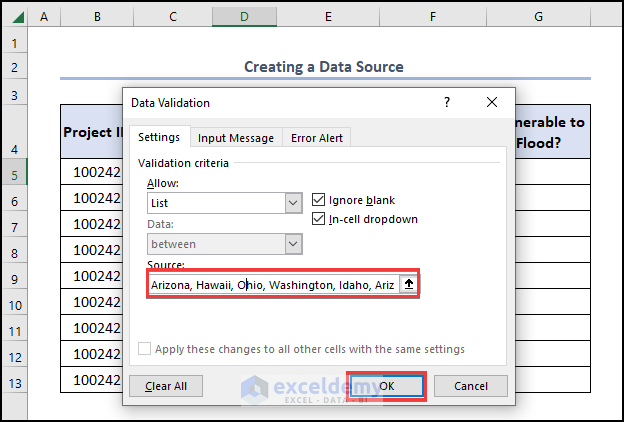
- In the dialog box, select Settings > choose List in Allow.
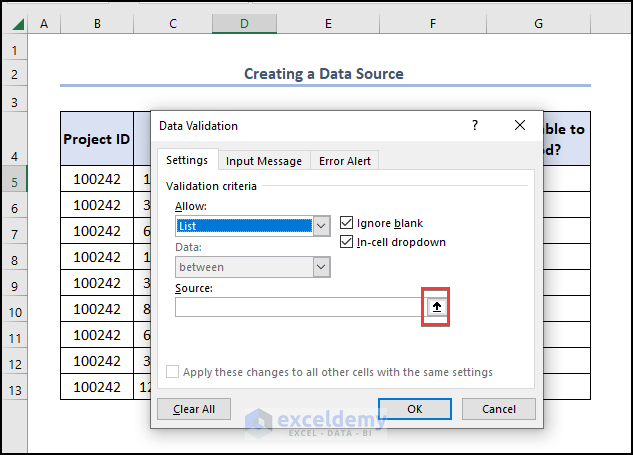
- In the Source dialog box, click the Upward arrow.
- Enter your drop-down list data in this box. Here, Arizona, Hawaii, Ohio, Washington, Idaho, Arizona, Kansas, Arizona, and Florida.
- Click OK.
This is the output.
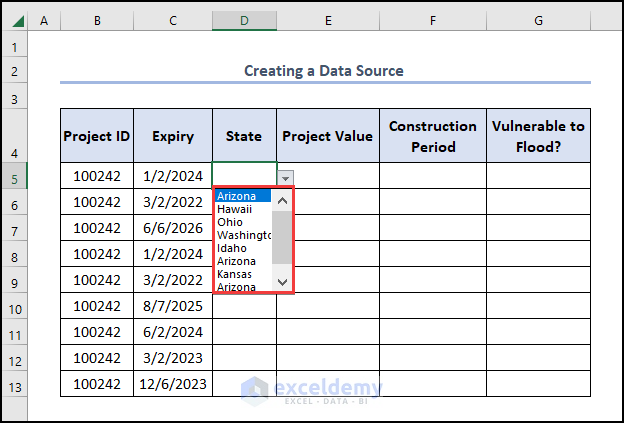
- Drag the Fill Handle tool from D5 to D13 to enable those cells with the drop-down feature created in D5.
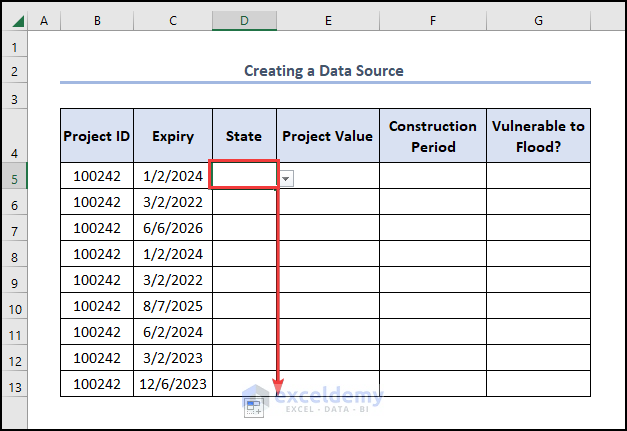
This is the output.

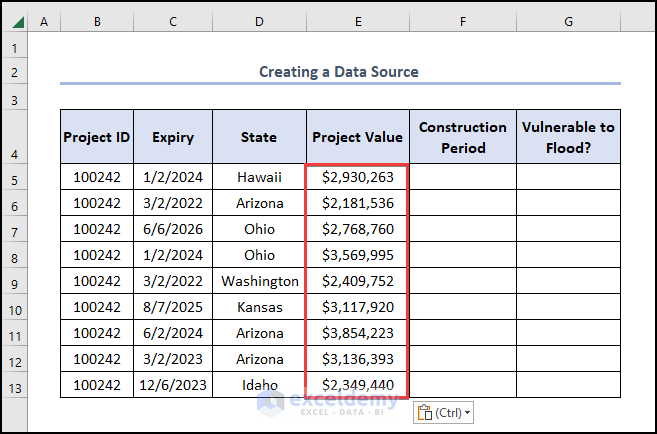
Step 5 – Enter Currency Data
- Select the column to add a dollar sign.
- Go to the Home tab and select Number Format > Currency.

- Enter data to see the output.
Step 6 – Format the Input Data
- Select the cells to enter text data.
- Select Middle Align and Center in Alignment.
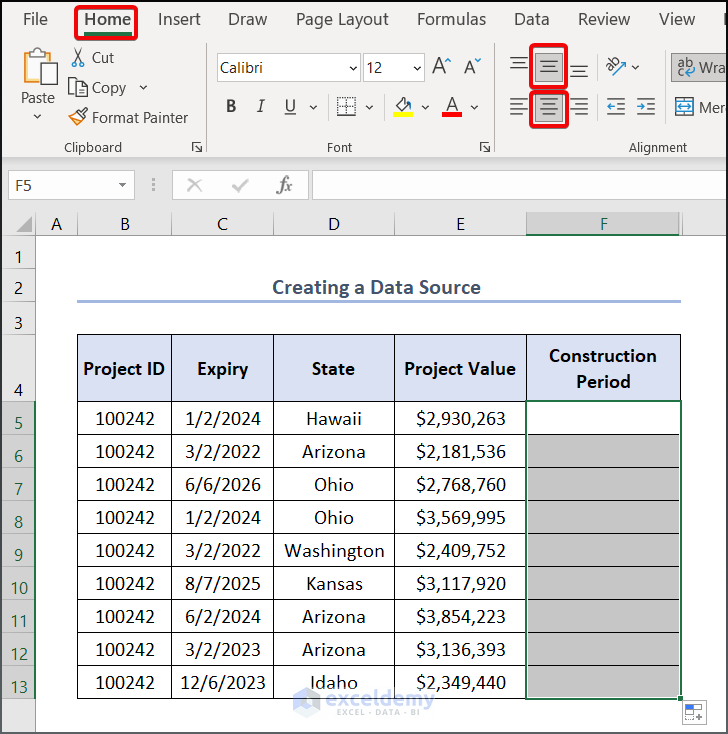
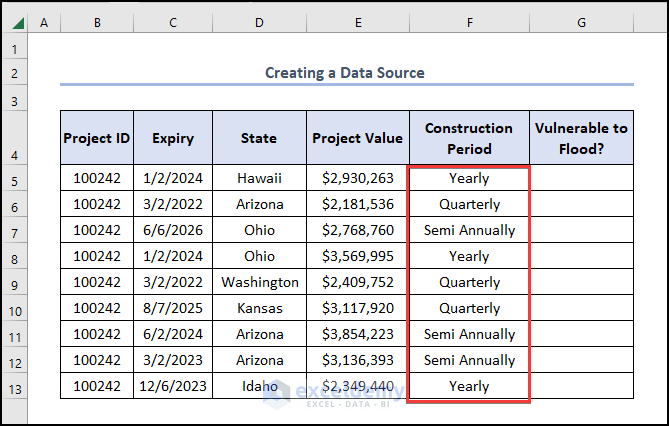
- Enter text data.
See the output below.
Add a column to enter “Yes” or “No”, indicating whether a region is prone to flooding.
- Select column G.
- Enter “Yes” or “No”.
Read More: How to Create Excel Data Connection to Another Excel File
Practice Section
Practice here.
Download Practice Workbook
Download the workbook and practice.
Related Articles
- Excel Connections vs. Queries
- [Fixed!] External Data Connections Have Been Disabled in Excel
- How to Refresh Data Connection in Excel Without Opening File
- Data Connection Not Refreshing in Excel
- Excel Queries and Connections Not Working
- Excel VBA: How to Refresh All Data Connections
<< Go Back to Excel Data Connections | Importing Data in Excel | Learn Excel
Get FREE Advanced Excel Exercises with Solutions!
