Method 1 – Embedding VBA to Create a Data Validation Drop-Down List
Steps:
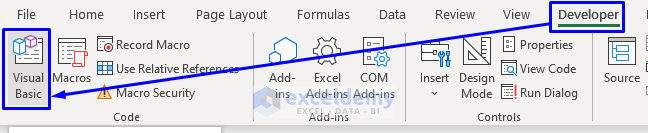
- Press Alt + F11 or go to the tab Developer -> Visual Basic to open Visual Basic Editor.
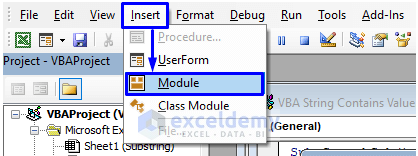
- In the pop-up code window, from the menu bar, click Insert -> Module.
- Enter the following code into the code window:
Sub CreateDropDownList()
Range("B5").Validation.Add Type:=xlValidateList, AlertStyle:=xlValidAlertStop, Formula1:="Grapes, Orange, Guava, Mango, Apple"
End Sub
Your code is now ready to run.

This piece of code will create a dropdown list in Cell B5. The dropdown list will have the values “Grapes, Orange, Guava, Mango, Apple.”
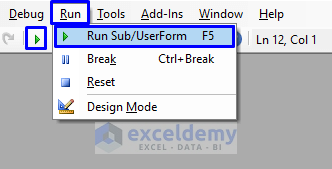
- Press F5 or from the menu bar, select Run -> Run Sub/UserForm. You can also just click on the small Run icon in the sub-menu bar to run the macro.
After the code execution, look at the image below for the result.
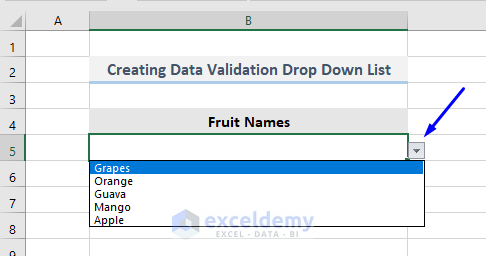
As we can see from the above image, a dropdown list with the values “Grapes, Orange, Guava, Mango, Apple” was created in Cell B5.
Read More: VBA to Select Value from Drop-Down List in Excel
Method 2 – Generating a Drop-Down List by Named Range with VBA
Steps:
- Select the range where the values of the dropdown list are present (in our case, the range is B5:B9).
- Right-click on the selected range.
- A list of options will appear. Select Define Name…
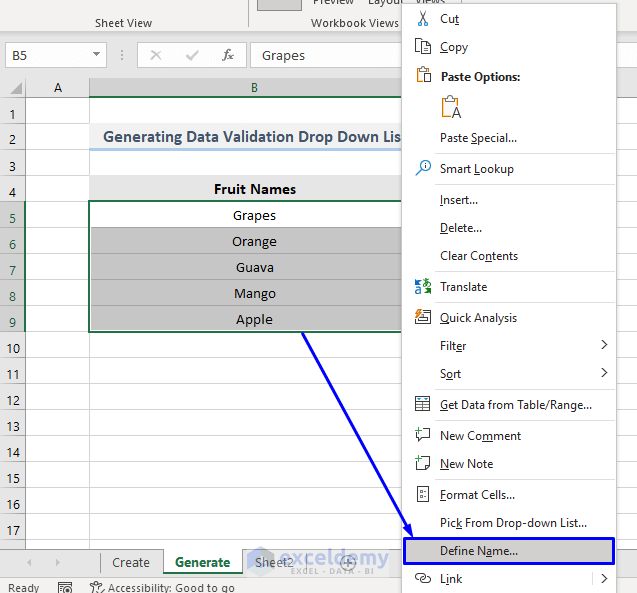
- A New Name pop-up box will appear. Enter any name that you like (we named our cell Fruits).
- Click OK.
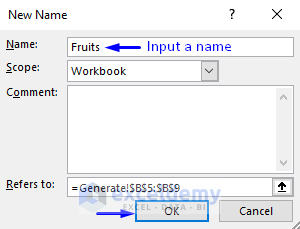
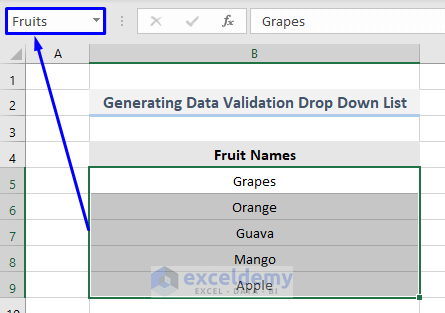
- We have successfully named the range B5:B9 Fruits (shown in the picture below).
Use this defined name in our VBA code. The steps to take are shown below.
- Open Visual Basic Editor from the Developer tab and Insert a Module in the code window.
- In the code window, enter the following code:
Sub GenerateDropDownList()
Range("B12").Validation.Add Type:=xlValidateList, AlertStyle:=xlValidAlertStop, Formula1:="=Fruits"
End Sub
Your code is now ready to run.

This code will create a dropdown list in Cell B12 with the values “Grapes, Orange, Guava, Mango, Apple” defined in the name Fruits.
- Run the macro. The result is shown in the image below.
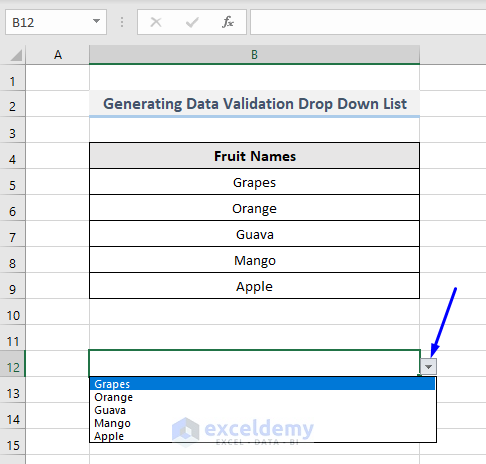
As a result, the above image shows a dropdown list created in Cell B12 with the values “Grapes, Orange, Guava, Mango, Apple.”
Read More: How to Use Named Range for Data Validation List with VBA in Excel
Method 3 – Producing a Data Validation Drop-Down Box from a Given List with Macro
Steps:
- Open Visual Basic Editor from the Developer tab and Insert a Module in the code window.
- Enter the following code into the code window:
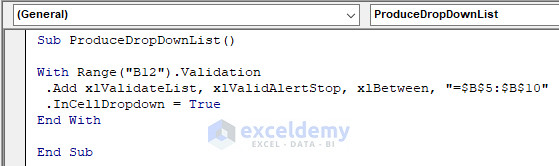
Sub ProduceDropDownList()
With Range("B12").Validation
 .Add xlValidateList, xlValidAlertStop, xlBetween, "=$B$5:$B$10"
 .InCellDropdown = True
End With
End Sub
Your code is now ready to run.
This code will produce a dropdown list in Cell B12 with the values present in the range B5:B9.
- Run the macro and look at the following image to see the output.
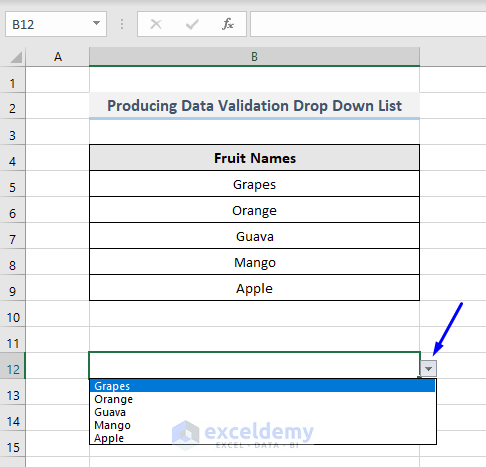
As a result, we can see from the above image that a dropdown list with the values “Grapes, Orange, Guava, Mango, Apple” was created in Cell B12, which we stored in Cells B5 to B9 in the worksheet.
Method 4 – Implementing VBA to Create Multiple Drop-Down Lists
Steps:
- Open Visual Basic Editor from the Developer tab and Insert a Module in the code window.
- In the code window, enter the following code:
Sub MultipleDropDownList(iTarget As Range, iSource As Range)
    'to delete and add validation in the target range
    With iTarget.Validation
        .Delete
        .Add Type:=xlValidateList, AlertStyle:=xlValidAlertStop, Operator:= _
        xlBetween, Formula1:="=" & iSource.Address
        .IgnoreBlank = True
        .InCellDropdown = True
        .InputTitle = ""
        .ErrorTitle = ""
        .InputMessage = ""
        .ErrorMessage = ""
        .ShowInput = True
        .ShowError = True
    End With
End Sub

Sub DropDownRange()
    MultipleDropDownList Sheet7.Range("B5:B10"), Sheet7.Range("A1:A3")
End Sub
Your code is ready to run.

This code will generate a dropdown list in every cell from range B5 to B9.
- Run the macro. Look at the gif below to see the result.
Each cell from range B5 to B9 now holds a dropdown list.
Method 5 – Applying VBA to Create a Drop-Down List with User-Defined Function
Steps:
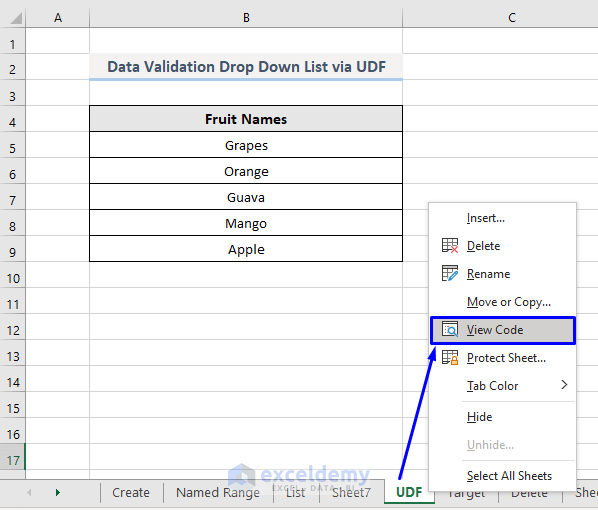
- Right-click on the sheet where you want to implement the UDF to create a dropdown list.
- Select View Code from the appeared list. As shown below, we right-clicked on the sheet named UDF, where our dataset is stored, and selected View Code from the options.
- Enter the following code into the auto-generated code window:
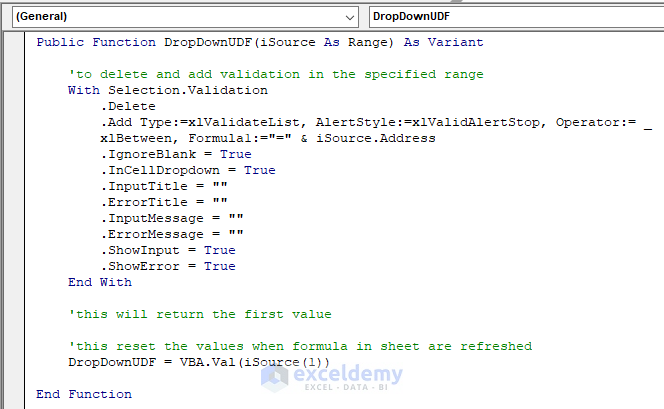
Public Function DropDownUDF(iSource As Range) As Variant
    'to delete and add validation in the specified range
    With Selection.Validation
        .Delete
        .Add Type:=xlValidateList, AlertStyle:=xlValidAlertStop, Operator:= _
        xlBetween, Formula1:="=" & iSource.Address
        .IgnoreBlank = True
        .InCellDropdown = True
        .InputTitle = ""
        .ErrorTitle = ""
        .InputMessage = ""
        .ErrorMessage = ""
        .ShowInput = True
        .ShowError = True
    End With
    'this will return the first value
    'this reset the values when formula in sheet are refreshed
    DropDownUDF = VBA.Val(iSource(1))
End Function- Don’t run this code. Save it.
- Go back to the worksheet of interest.
- Pick any cell where you want to create the dropdown list (in our case, Cell B11).
- Enter the newly created function – DropDownUDF – how you write any other function. First, put an equal sign (=), write the function name, DropDownUDF, and pass the cell references (B5:B9) inside the parentheses.
The formula in Cell B11 will be like this:
=DropDownUDF(B5:B9)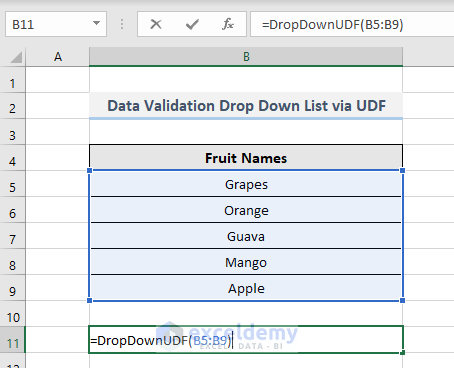
- Press Enter.
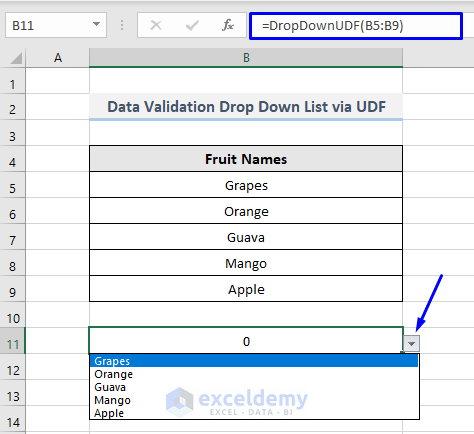
You will get a dropdown list created by UDF in Cell B11 with the values “Grapes, Orange, Guava, Mango, Apple” that are stored in range B5:B9 and which we passed inside the function.
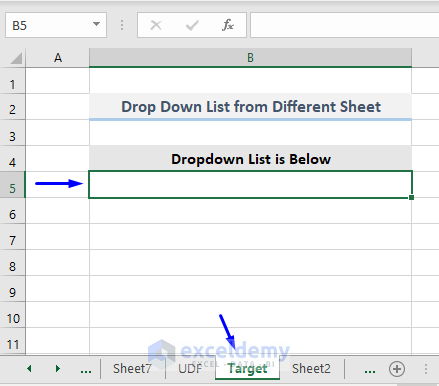
Method 6 – Extracting Data from a Different Sheet in a Drop-Down List with VBA
Look at the following image. We have a dataset in the sheet named List.
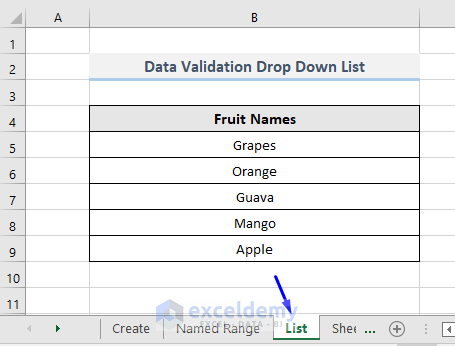
We are going to create a dropdown list in Cell B5 of the sheet named Target (shown in the picture below). The values in that dropdown list will be those from the range B5:B9 of the List sheet.
Steps:
- Open Visual Basic Editor from the Developer tab and Insert a Module in the code window.
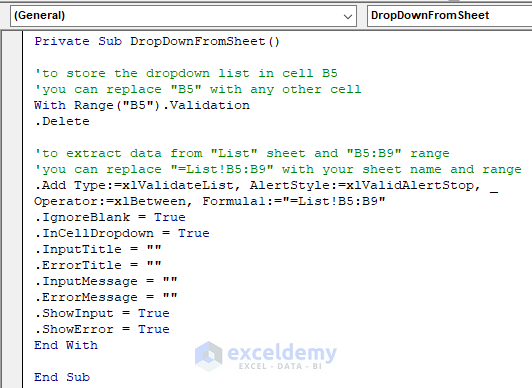
- Enter the following code into the code window:
Private Sub DropDownFromSheet()
'to store the dropdown list in cell B5
'you can replace "B5" with any other cell
With Range("B5").Validation
.Delete
'to extract data from "List" sheet and "B5:B9" range
'you can replace "=List!B5:B9" with your sheet name and range
.Add Type:=xlValidateList, AlertStyle:=xlValidAlertStop, _
Operator:=xlBetween, Formula1:="=List!B5:B9"
.IgnoreBlank = True
.InCellDropdown = True
.InputTitle = ""
.ErrorTitle = ""
.InputMessage = ""
.ErrorMessage = ""
.ShowInput = True
.ShowError = True
End With
End Sub
Your code is now ready to run.
- Run the macro and look at the following image to see the output.
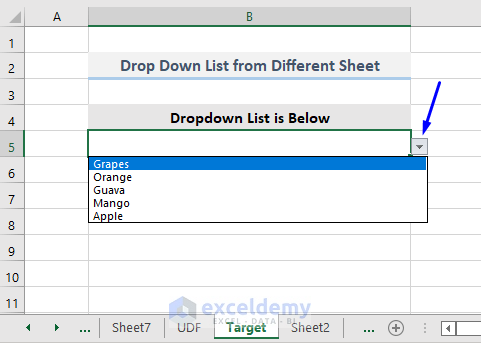
A dropdown list with the values “Grapes, Orange, Guava, Mango, Apple” was created in Cell B5 of the Target worksheet. The list is stored in range B5:B9 of the List spreadsheet.
Read More: How to Make a Dynamic Data Validation List Using VBA in Excel
Method 7 – Deleting a Data Validation Drop-Down List with VBA Macro
Steps:
- Open Visual Basic Editor from the Developer tab and Insert a Module in the code window.
- In the code window, enter the following code:
Sub DeleteDropDownList()
Range("B5").Validation.Delete
End Sub
Your code is now ready to run.
- Run the macro and look at the following image.
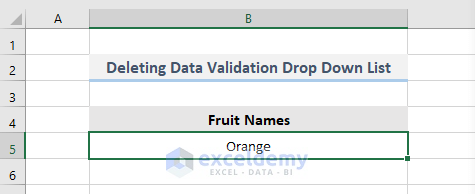
There is no dropdown list in Cell B5. We have learned how to delete an existing dropdown list from a spreadsheet with VBA.
Related Articles
- Excel VBA to Create Data Validation List from Array
- Unique Values in a Drop Down List with VBA in Excel
- How to Create Dynamic Drop Down List Using VBA in Excel


How to I integrate these 2 codes so I can use drop down lists to enter new data from the top of a table and once all data is entered have the new data move down the table so I can keep entering data from the top? This would be used in a row with 5 active columns to which only 3 will have coded drop down menus and the other 2 have manually input data.
Private Sub Worksheet_Change(ByVal Target As Excel.Range)
On Error GoTo enditall
Application.EnableEvents = False
If Target.Cells.Column = 4 Then
If Target.Cells.Row = 2 Then
N = Target.Cells.Row
If Range(“D” & N).Value “” Then
Range(“D2”).EntireRow.Insert
Range(“A2”).Select
End If
End If
End If
enditall:
Application.EnableEvents = True
End Sub
Sub CreateDropDownList()
Range(“B5″).Validation.Add Type:=xlValidateList, AlertStyle:=xlValidAlertStop, Formula1:=”Grapes, Orange, Guava, Mango, Apple”
End Sub
Hello, MAC!
Thanks for sharing your problem with us!
To integrate these 2 codes, all you need to do is just define the first sub-procedure name in the second part of the code and add the sheet name there before the range-bounded combination. “Worksheet_Change Sheet1.Range(“B5”).Validation…….” like this.
The code should look like this.
Hope this will help you!
Good Luck!
Regards,
Sabrina Ayon
Author, ExcelDemy.
Great post! I found the step-by-step methods really helpful, especially the VBA tips you shared. I can’t wait to try these techniques in my projects. Thanks for the clear explanations!
Hello,
You are most welcome. Thanks for your appreciation. Glad to hear our step-by-step explanation is helpful to you. Try these in your projects and let us know how it works.
Keep exploring Excel with ExcelDemy!
Regards
ExcelDemy
Hello,
How can I adjust the code to
1. Color the cells specifically for each option?
2. Get the Dropdown not only for one, but for multiple (all?)
tables/sheets?
3. Define multiple Ranges –> C12 to C16, C19 to C35 ….
Option Explicit
Sub MultipleDropDownList(iTarget As Range, iSource As Range)
‘to delete and add validation in the target range
With iTarget.Validation
.Delete
.Add Type:=xlValidateList, AlertStyle:=xlValidAlertStop, Operator:= _
xlBetween, Formula1:=”Offen, In Bearbeitung, Warten auf Rückmeldung, Erledigt”
.IgnoreBlank = True
.InCellDropdown = True
.InputTitle = “”
.ErrorTitle = “”
.InputMessage = “”
.ErrorMessage = “”
.ShowInput = True
.ShowError = True
End With
End Sub
Sub DropDownRange()
MultipleDropDownList Tabelle3.Range(“C12:C94”), Tabelle3.Range(“A1:A3”)
End Sub
Thank you
Hello Luisa ,
Great questions! Here’s how you can address each of your points:
Color the cells based on selected option:
You can use Conditional Formatting instead of VBA to color the cells dynamically based on selection. However, if you want to use VBA, you’ll need to handle the Worksheet_Change event. Here’s a simple example:
Apply dropdowns across multiple tables/sheets:
You’ll need to run the MultipleDropDownList sub for each sheet and range combination. You can loop through sheets or define specific ones like this:
Define multiple non-contiguous ranges:
You can call the function separately for each range:
Regards
ExcelDemy