Excel features a variety of useful tools for automatically sorting tables. In this article, we’ll discuss how to use the SORT, SORTBY, VLOOKUP and LARGE Functions, and also VBA macros for this purpose.
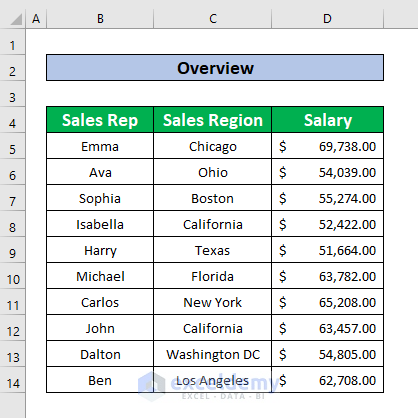
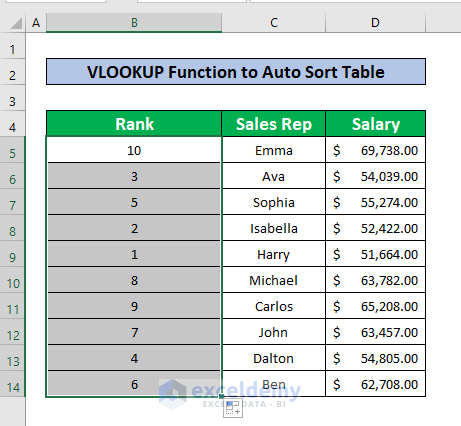
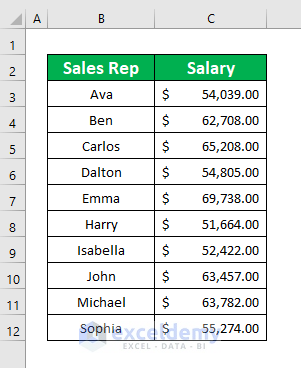
To illustrate the methods, we’ll use the following dataset where some Sales representatives’ names and salaries are given in columns B and C respectively.
Method 1 – Using the SORT Function
The SORT function can sort data tables in ascending or descending order and in multiple columns.
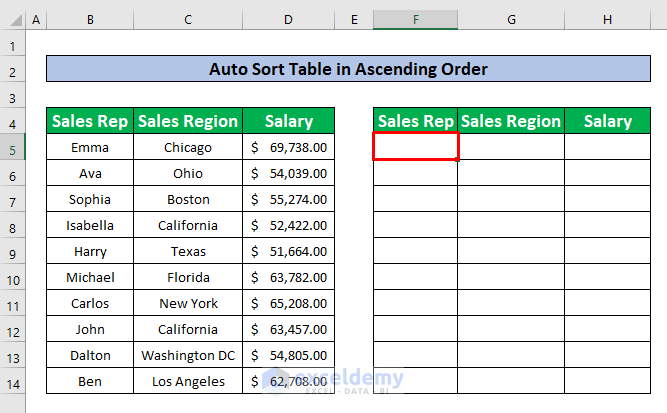
1.1 – Auto Sort Table in Ascending Order
Steps:
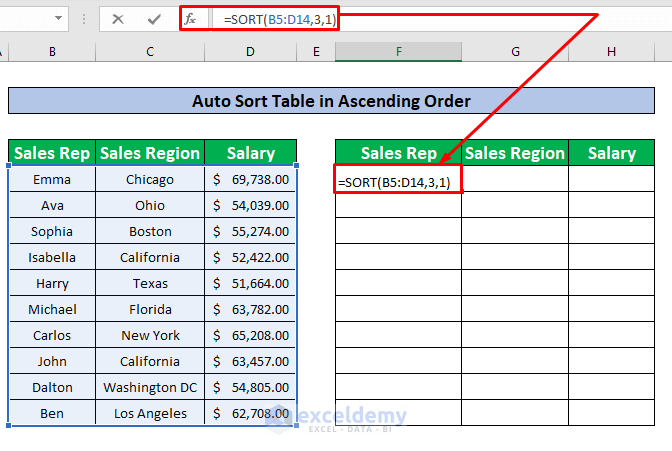
- Create a table with the same headings, and select cell F5.
- Enter this SORT function in the Formula Bar:
=SORT(B5:D14,3,1)Where B5:D14 is the array to be sorted, 3 is the [sort_index], which is the column number, and 1 is the [sort_order],which is ascending order.
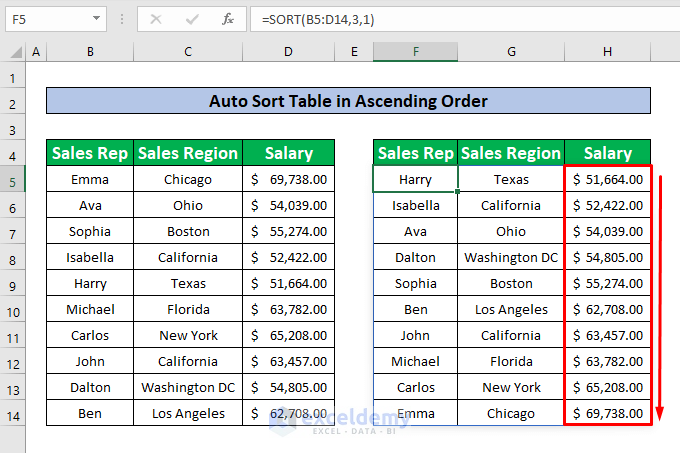
- Press Enter on your keyboard to return the result.
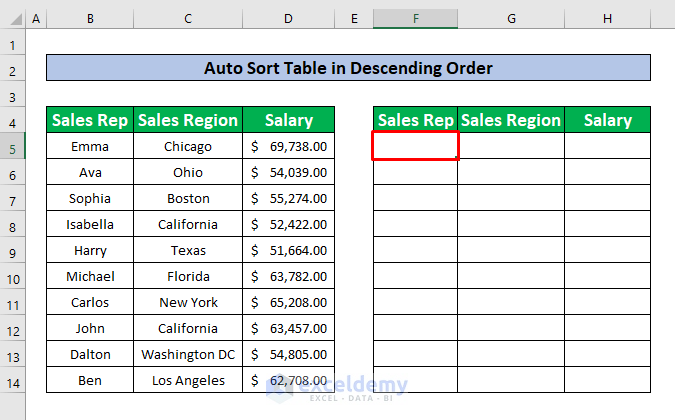
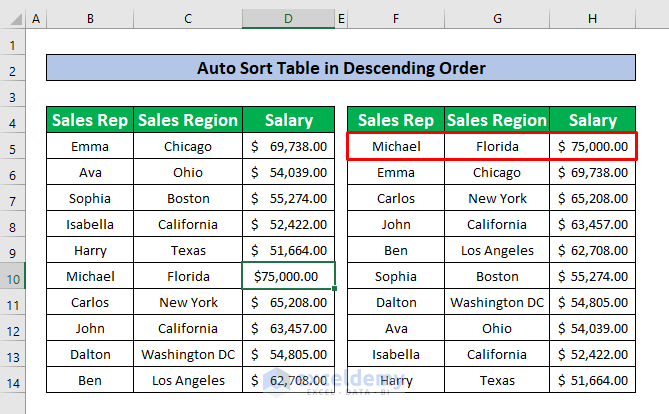
1.2 – Auto Sort Table in Descending Order
Steps:
- Make a similar table with the same headings, and select cell F5.
- Enter this SORT function in the Formula Bar:
=SORT(B5:D14,3, -1)Where B5:D14 is the array to be sorted, 3 is the [sort_index], which is the column number, and –1 is the [sort_order],which is descending order.
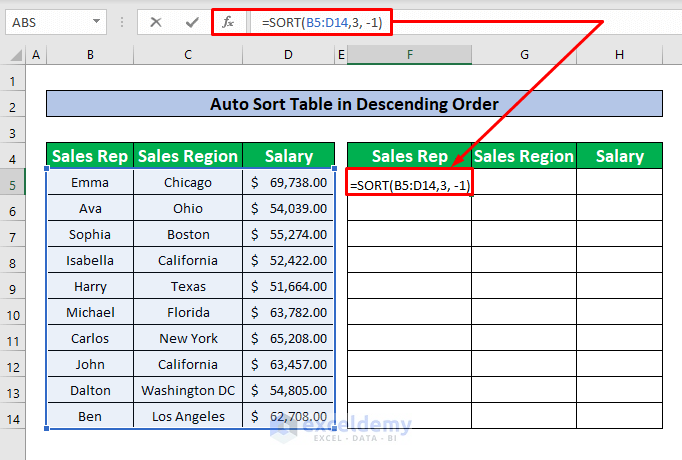
- Press Enter on your keyboard to return the result.
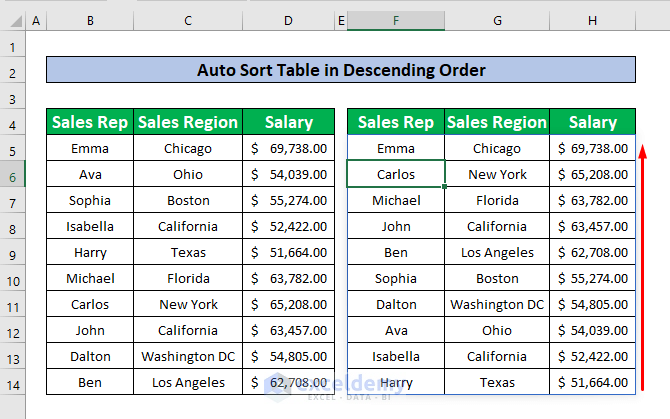
- To check whether the table is auto-sorted or not, change the salary of Michael from $63,782.00 to $75,000.00, and press Enter.
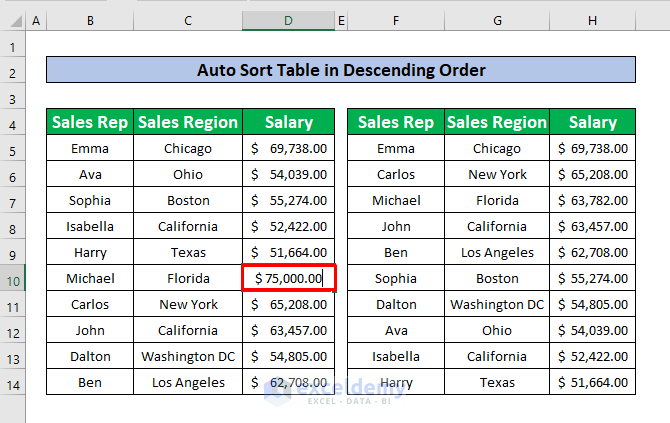
Our data table is automatically sorted.
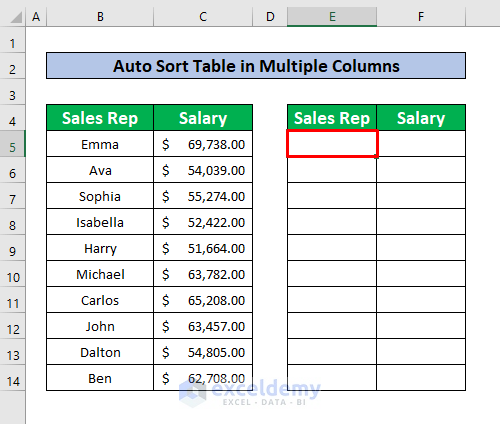
1.3 – Auto Sort Table in Multiple Columns
Steps:
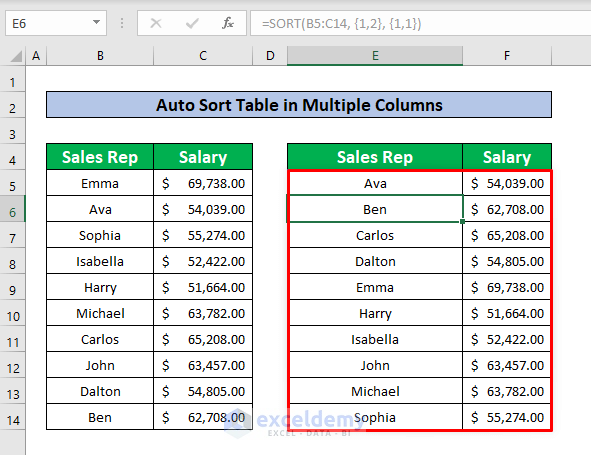
- Create a table with the same headings and select cell E5.
- Enter this SORT function in the Formula Bar:
=SORT(B5:C14, {1,2}, {1,1})Where {1,2} is the sort-index, 1 is first the column index number that we want to sort and 2 is the second. {1,1} is the sort_order where the 2nd 1 represents ascending order.
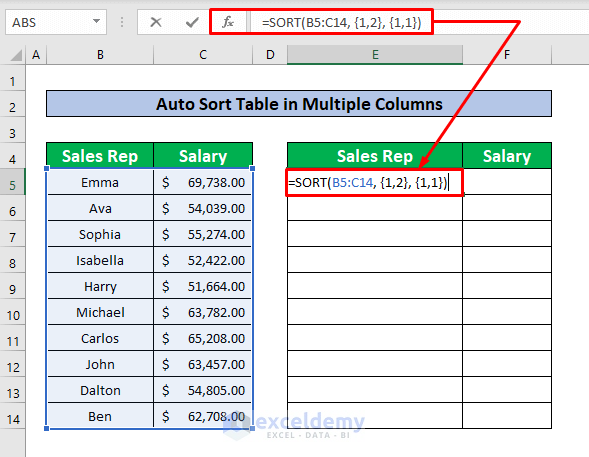
- Press Enter on your keyboard to return the result.
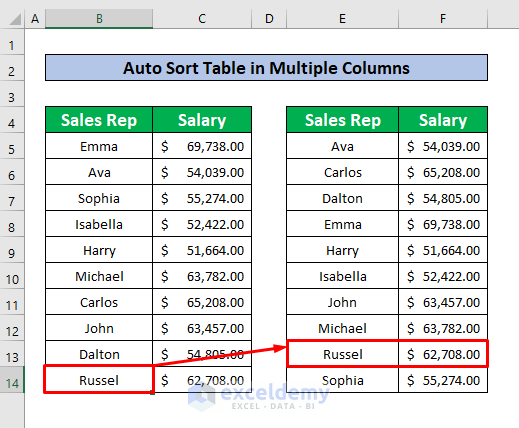
- To check if auto-sorted table is working properly, replace any data from the table and press Enter. For example, replace Ben with Russel.
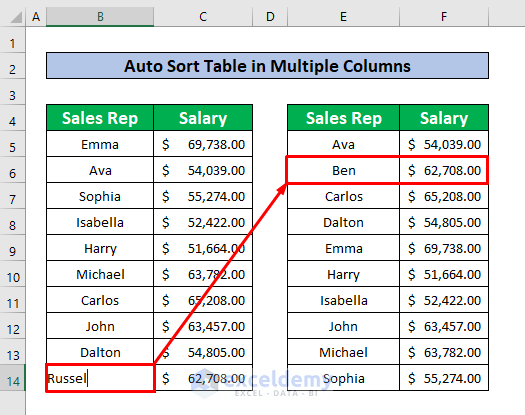
- Press Enter to Auto Sort the table.
Read More: How to Auto Sort Multiple Columns in Excel
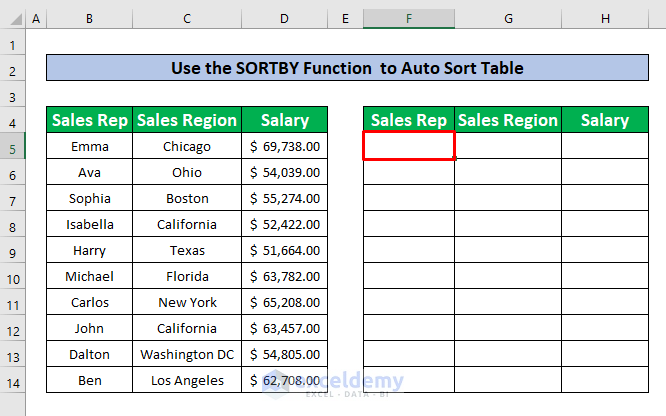
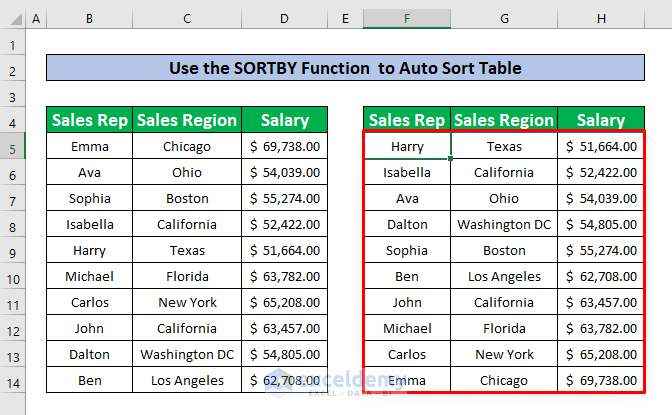
Method 2 – Using the SORTBY Function
This is the easiest way to Auto Sort tables in Excel.
Steps:
- Select cell F5.
- Enter the following SORTBY function in the Formula Bar:
=SORTBY(B5:D14, D5:D14)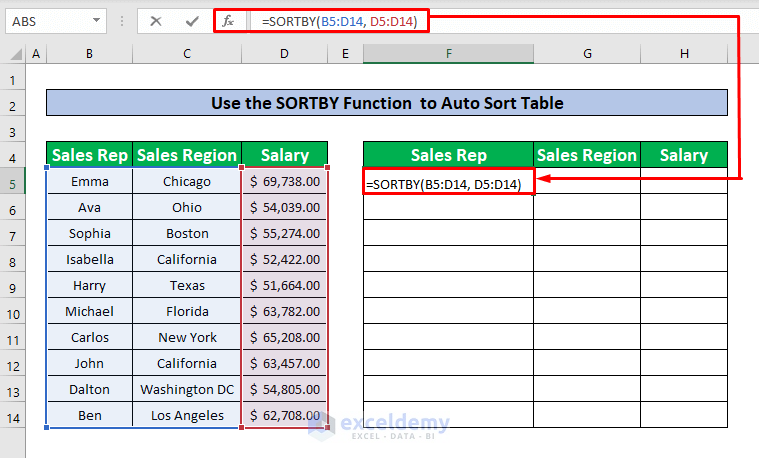
- Simply press Enter on your keyboard to return the result.
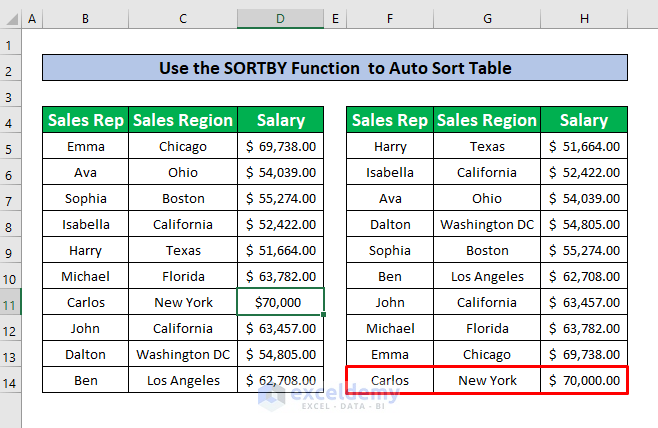
- To check whether the table auto-sorted or not, change the salary of Carlos from $65,208.00 to $70,000.00.
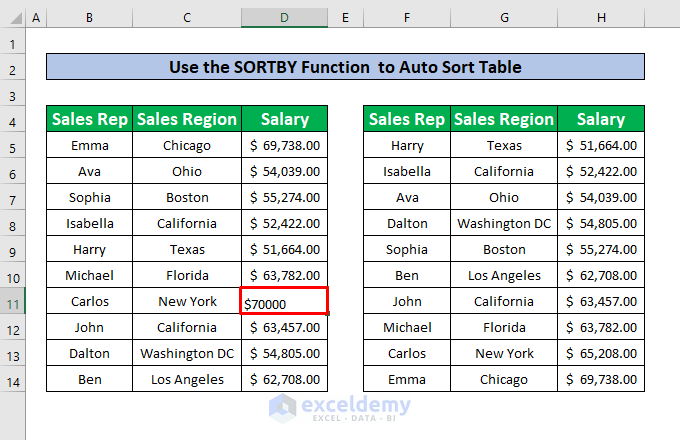
- Press Enter.
Our data table is automatically sorted.
Read More: Excel Auto Sort when Data is Entered
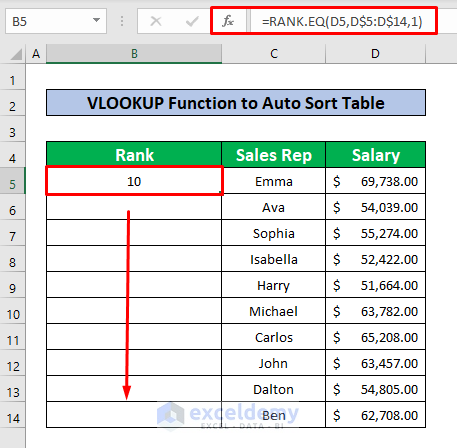
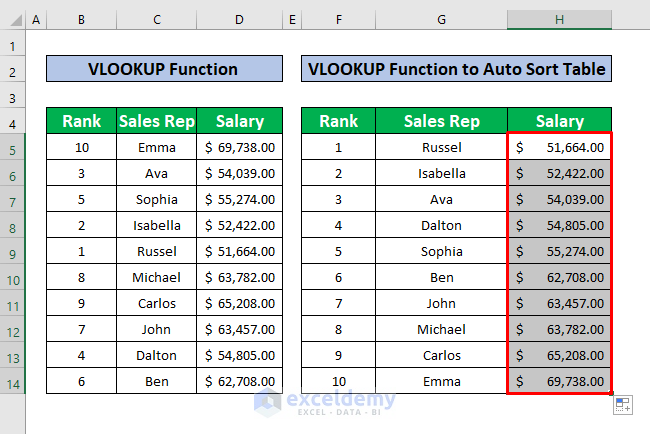
Method 3 – Using the VLOOKUP Function
Steps:
- Enter the following RANK function in cell B5:
=RANK.EQ(D5,D$5:D$14,1)
- Press Enter.
10 is returned.
- Autofill the RANK function to the entire column B.
- Apply the following VLOOKUP function in cell G5:
=VLOOKUP(F5,$B$5:$D$14,2, FALSE)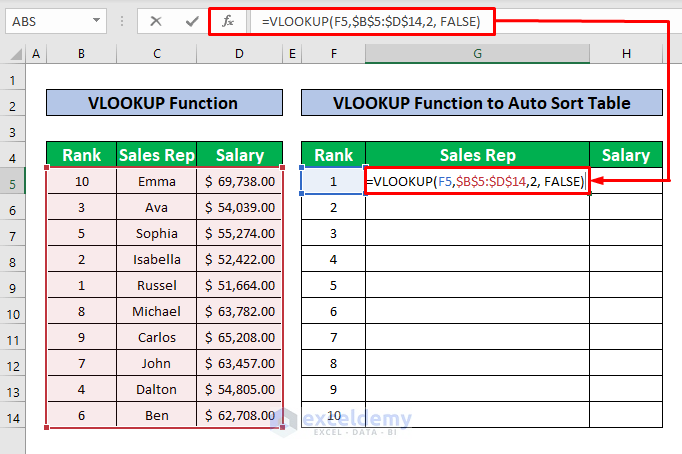
- Press Enter.
Russel is returned as the output.
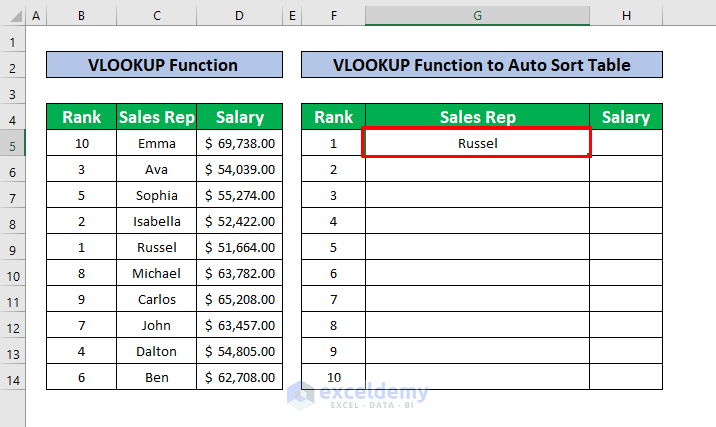
- AutoFill the VLOOKUP function to the entire column G.
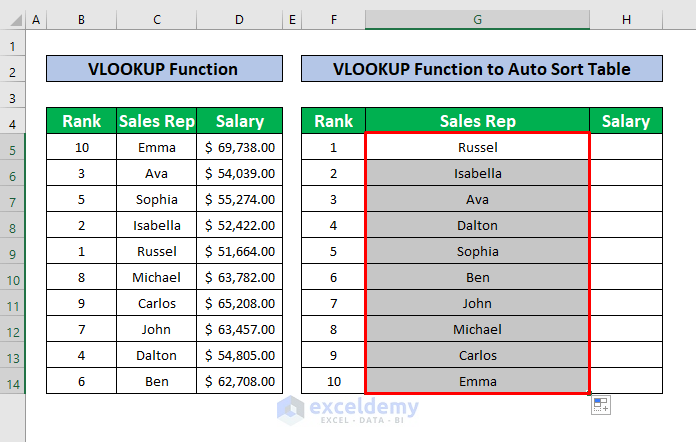
- Similarly, perform the VLOOKUP function in the entire column H.
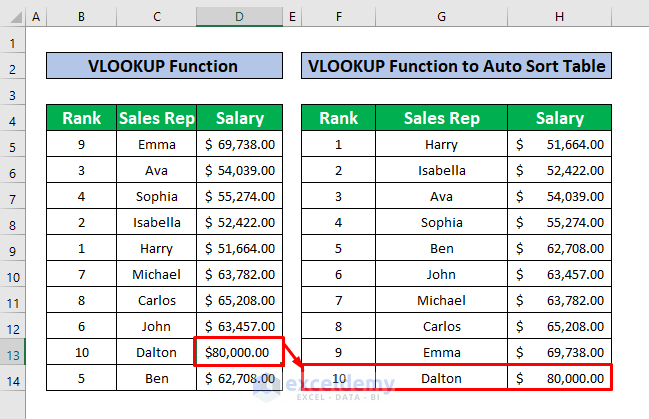
- To check whether the auto-sort was successful or not, change the salary of Dalton from $ 54,805.00 to $ 80,000.00, and press Enter.
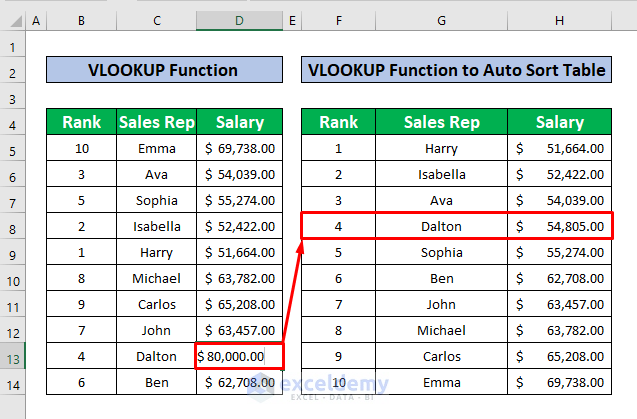
You will be able to auto-sort the table returned.
Method 4 – Using the LARGE Function
The LARGE function can auto-sort data tables in descending order only.
Steps:
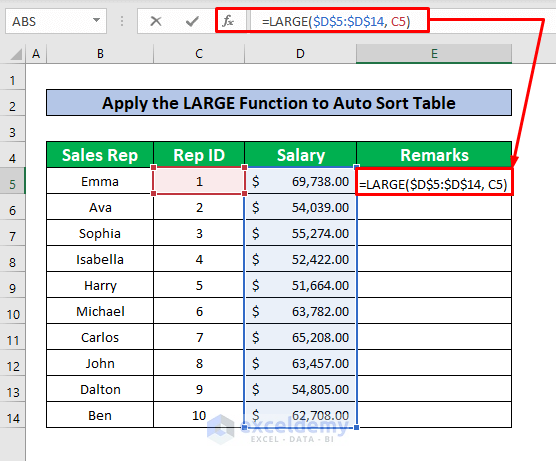
- Select cell E5 to apply the LARGE function.
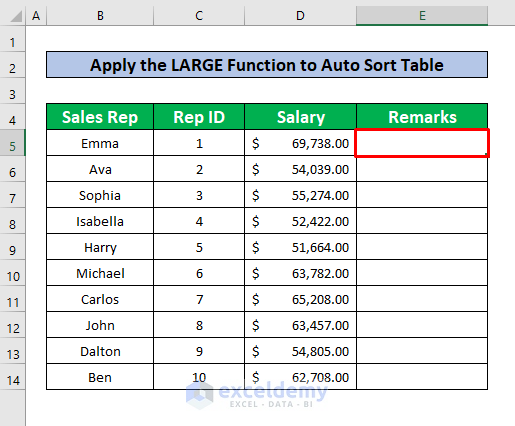
- Enter the following LARGE function in the selected cell:
=LARGE($D$5:$D$14, C5)We use the dollar sign to fix the cell’s reference so that the selection does not change when moving the function from cell D5 to cell D6.
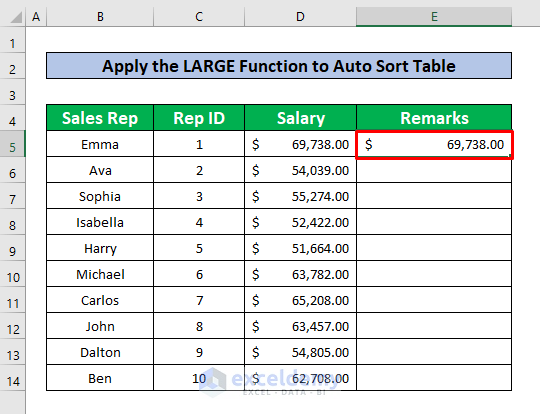
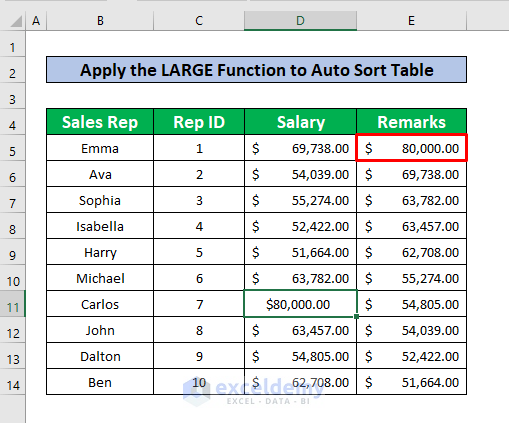
- Press Enter, and you will get $69,738.00 as the result of the LARGE function.
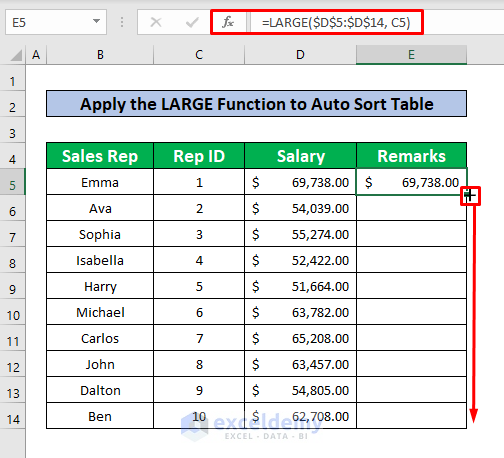
- AutoFill the LARGE function to the entire column E.
You will now be able to auto-sort data tables in descending order.
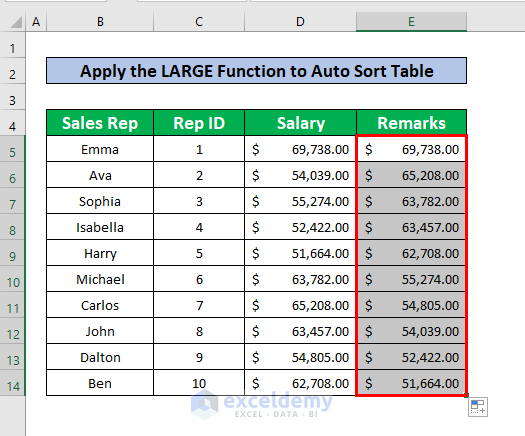
- To check that the table is auto-sorted correctly, change Carlos’s Salary from $65,208.00 to $ 80,000.00, and press Enter.
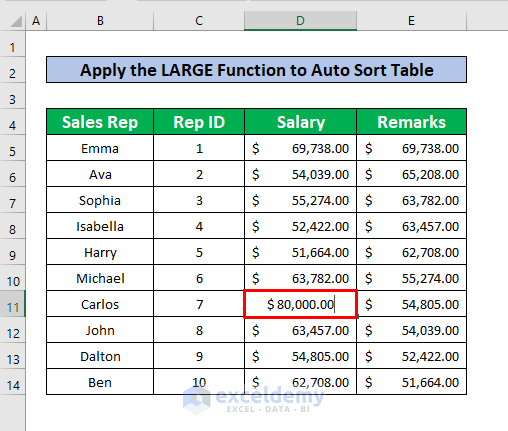
Carlos goes to the top, as it is the maximum value.
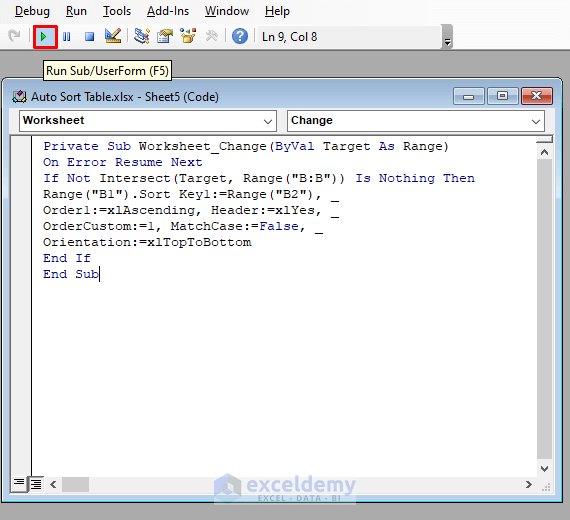
Method 5 – Using VBA Code
Steps:
- Right-click your mouse on the worksheet named VBA from our dataset.
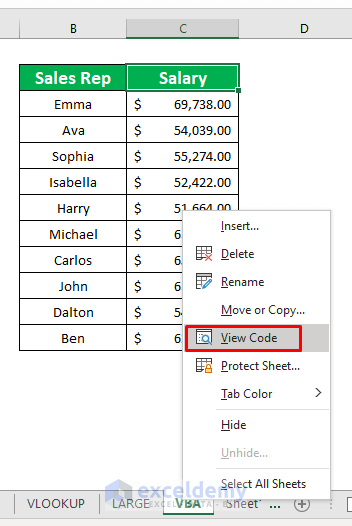
A window named Auto Sort Table pops up.
- Enter the below VBA Code.
- Change the “Red-marked” area according to your column value.
The VBA Code is:
Private Sub Worksheet_Change(ByVal Target As Range)
On Error Resume Next
If Not Intersect(Target, Range("B:B")) Is Nothing Then
Range("B1").Sort Key1:=Range("B2"), _
Order1:=xlAscending, Header:=xlYes, _
OrderCustom:=1, MatchCase:=False, _
Orientation:=xlTopToBottom
End If
End Sub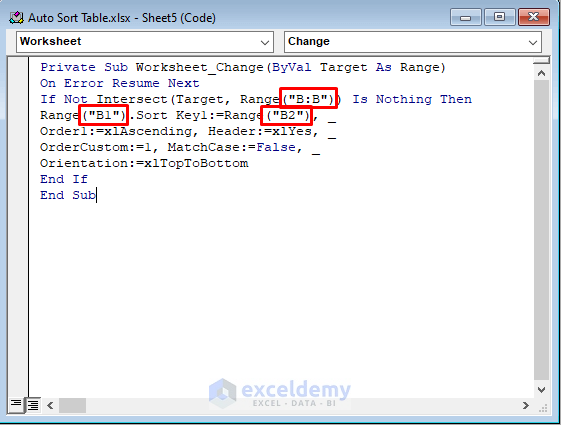
- Press F5 to run the VBA Code.
After running the VBA code, you can auto-sort the table that is returned.
Things to Remember
While using the SORT function to auto-sort multiple columns, the first column will auto-sort first. The second column will be sorted after the previous column is sorted.
When using the VBA code, you need to insert your own worksheet value in the code.
Download Practice Workbook
Related Articles
<< Go Back to Auto Sort in Excel | Sort in Excel | Learn Excel
Get FREE Advanced Excel Exercises with Solutions!
