Method 1 – Using Excel Pivot Table
Steps
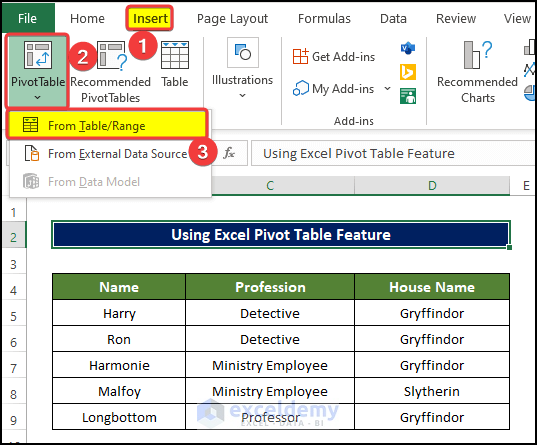
- Select the range of cells B5:B9.
- Insert tab, select the drop-down arrow of the PivotTable > From Table/ Range option from the Tables group.
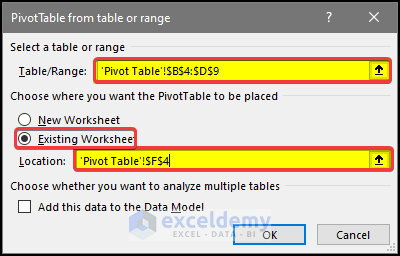
- A small dialog box called PivotTable from table or range will appear.
- Change the output display location of the pivot table from New Worksheet to Existing Worksheet and select the cell in the Location field. For our dataset, we selected cell F4 to show the pivot table.
- Click OK.
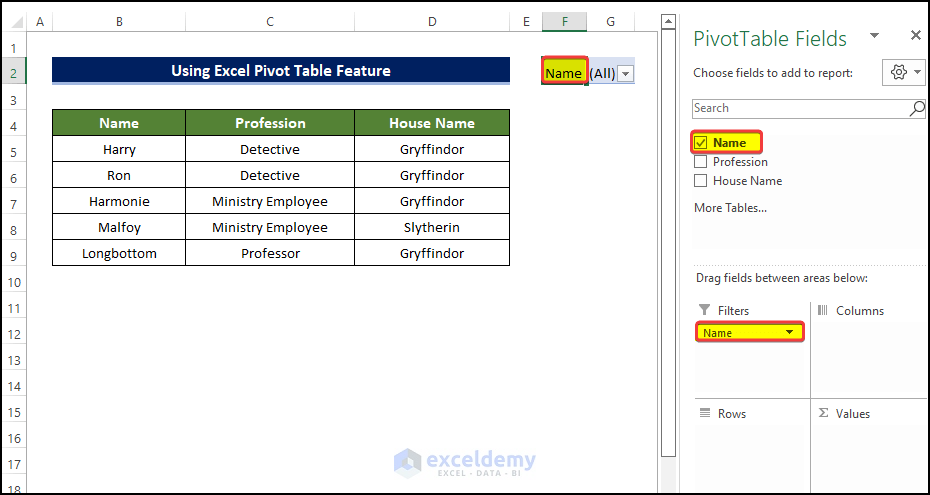
- The pivot table will be created, and a side window called PivotTable Field will appear.
- The Name range in this window.
- Drag the Name range with your mouse and place it inside the Filter field. The pivot table in the worksheet will also show you the Name range.
- In the PivotTable Analyze tab, click the drop-down arrow of the Options and select the Show Report Filter Pages option from the PivotTable group.
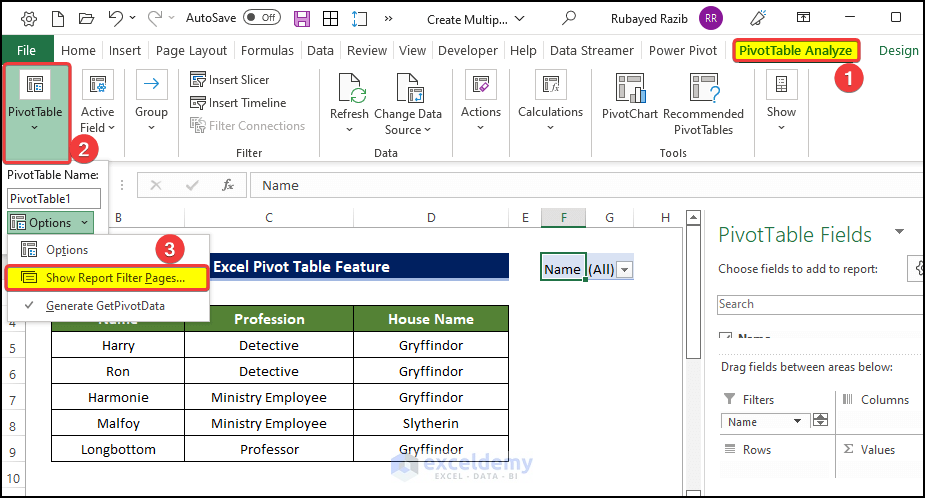
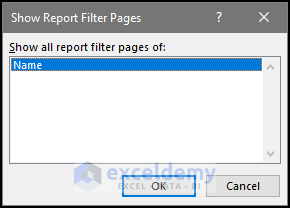
- Another small dialog box called Show Report Filter Pages will appear.
- Select the Name option and click OK.
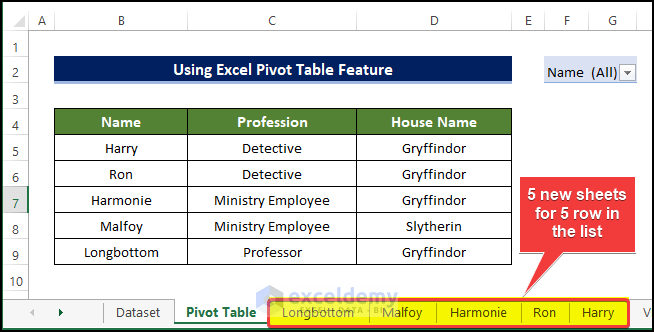
- New sheets will be created in the Sheet Name Bar with the name of each row.
Method 2 – Applying VBA Trim Function
Steps
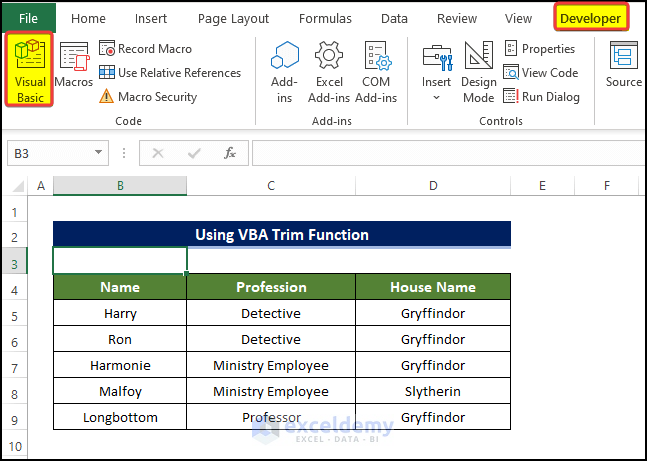
- Initiate a VBA, go to the Developer tab, click on Visual Basic from the Code group.
- A new dialog box, in that dialog box, click the Insert > Module.
- In the Module editor window, type the following code:
Sub Trim_Function()
Dim Present_Sheet As Worksheet
Dim Cell_Range As Range
Dim x As Range
Set Present_Sheet = ActiveSheet
Set Cell_Range = Selection.Cells
Application.ScreenUpdating = False
For Each x In Cell_Range
sName = Trim(x.Text)
If Len(sName) > 0 Then
Worksheets.Add after:=Worksheets(Worksheets.Count)
ActiveSheet.Name = sName
End If
Next x
Present_Sheet.Activate
Application.ScreenUpdating = True
End Sub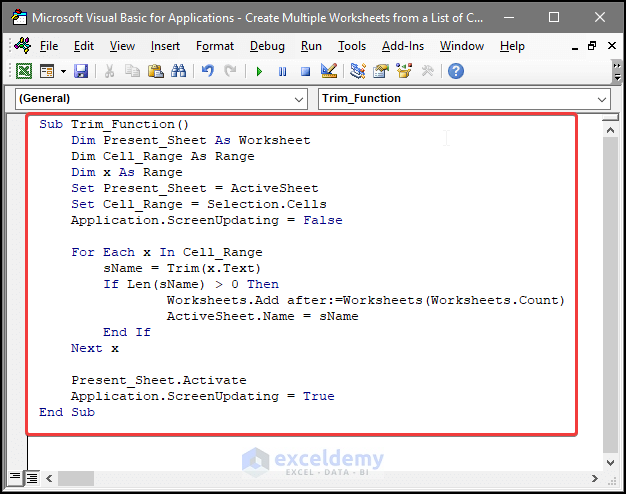
- Close the Module window.
- Go to View tab > Macros (double click).
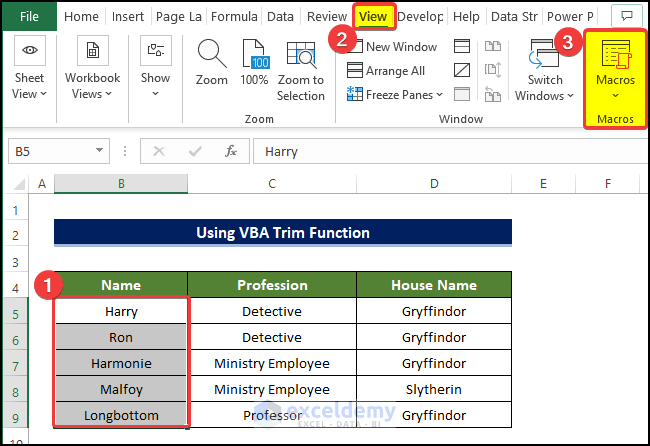
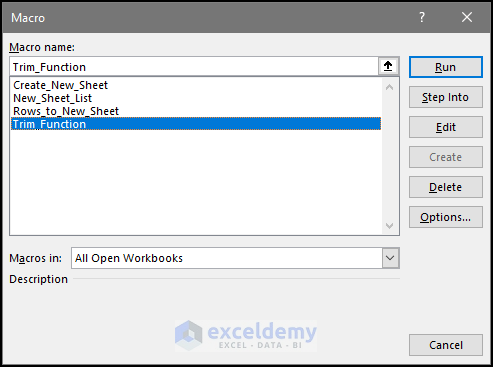
- After clicking View Macros, select the macros that you created just now. The name here is Trim_Function. Then click Run.
- You will notice that 5 new sheets will be created in the Sheet Name Bar with the name of each row.
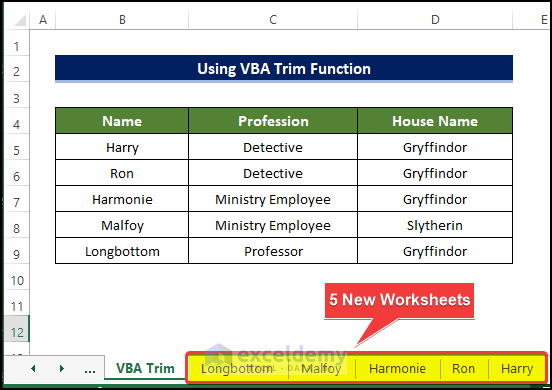
- Our VBA code worked perfectly, and we were able to create new sheets for each row in Excel.
Method 3 – Utilizing VBA Debug Print
Steps
- Go to the Developer tab and click Visual Basic. You have to enable the Developer tab or You can also press ‘Alt+F11’for opening the Visual Basic Editor.
- A new dialog box, in that dialog box, click the Insert > Module.
- The Module editor window, type the following code:
Sub Debug_Function()
Dim yRg As Excel.Range
Dim wSt As Excel.Worksheet
Dim wBo As Excel.Woarkbook
Set wSt = ActiveSheet
Set wBo = ActiveWorkbook
Application.ScreenUpdating = False
For Each yRg In wSt.Range("B5:B9")
With wBo
.Sheets.Add after:=.Sheets(.Sheets.Count)
On Error Resume Next
ActiveSheet.Name = yRg.Value
If Err.Number = 1004 Then
Debug.Print yRg.Value & " sheet name already exist"
End If
On Error GoTo 0
End With
Next yRg
Application.ScreenUpdating = True
End Sub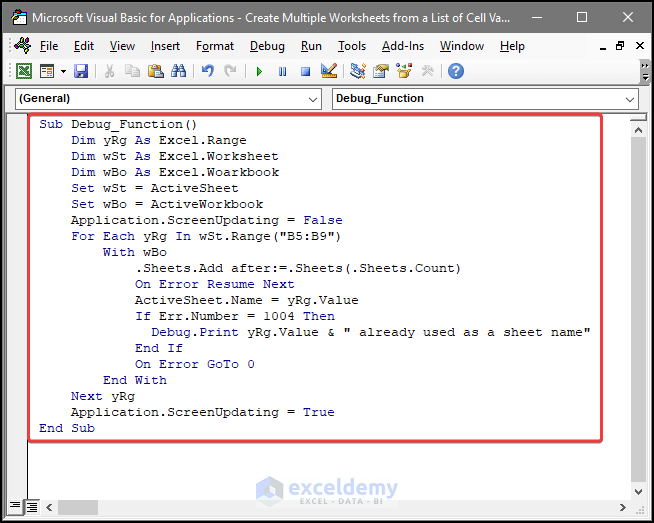
- Close the Module window.
- Go to View tab > Macros.
- Click View Macros.
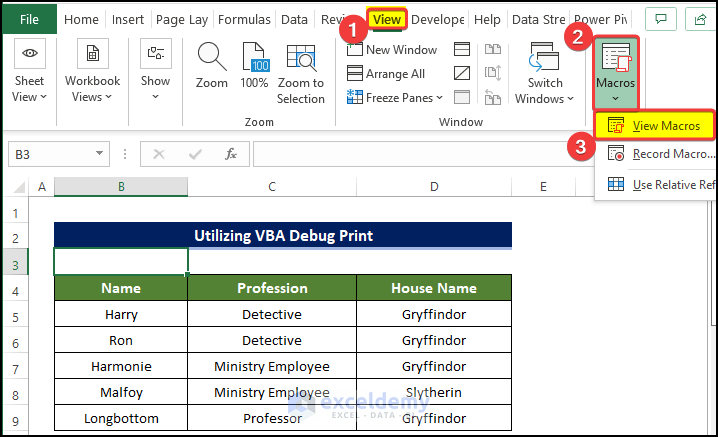
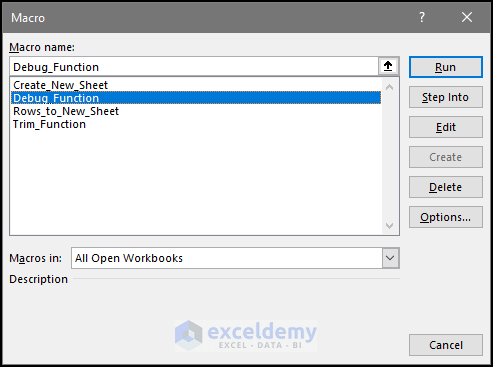
- Clicking View Macros, select the macros that you created just now. The name here is Debug_Function. Then click Run.
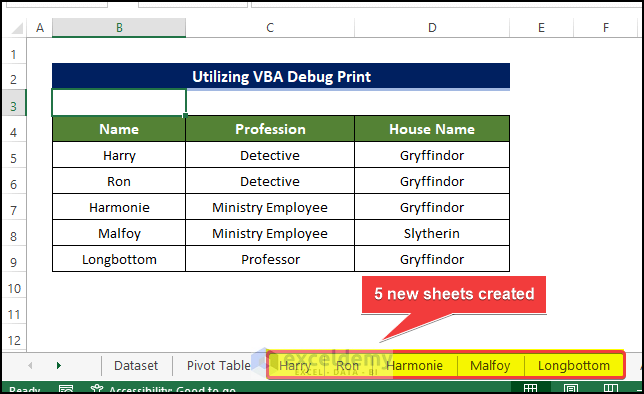
- Five new sheets will be created in the Sheet Name Bar with the name of each row of the list.
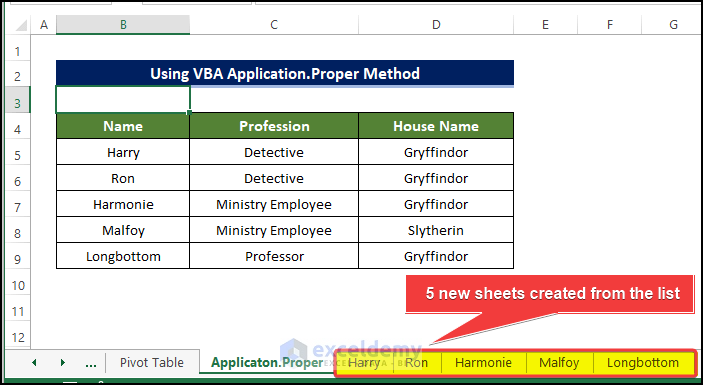
Method 4 – Using VBA Application.Proper Method
Steps
- Go to the Developer tab and click on Visual Basic. You have to enable the Developer tab, or you can also press ‘Alt+F11’for open the Visual Basic Editor.
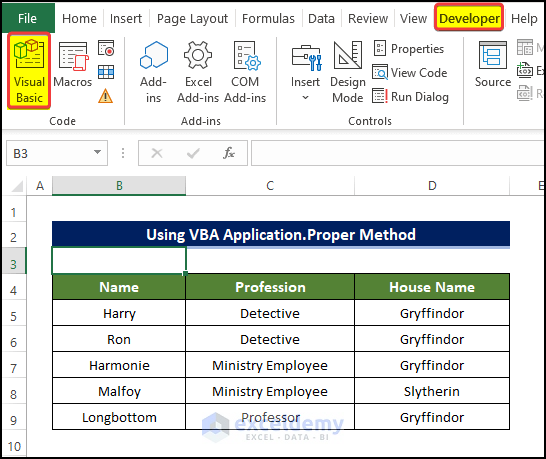
- Anew dialog box, in that dialog box, click on the Insert > Module.
- In the Module editor window, type the following code:
Sub Rows_to_New_Sheet()
Dim A, W_S As Worksheet, LastRow
On Error Resume Next
LastRow = Cells.SpecialCells(xlCellTypeLastCell).Row
For Each A In Range("B5:B" & LastRow)
If A.Value <> "" Then
Set W_S = Worksheets(A.Value)
If W_S Is Nothing Then
Sheets.Add after:=Sheets(Sheets.Count)
ActiveSheet.Name = Application.Proper(A.Value)
End If
End If
Next A
End Sub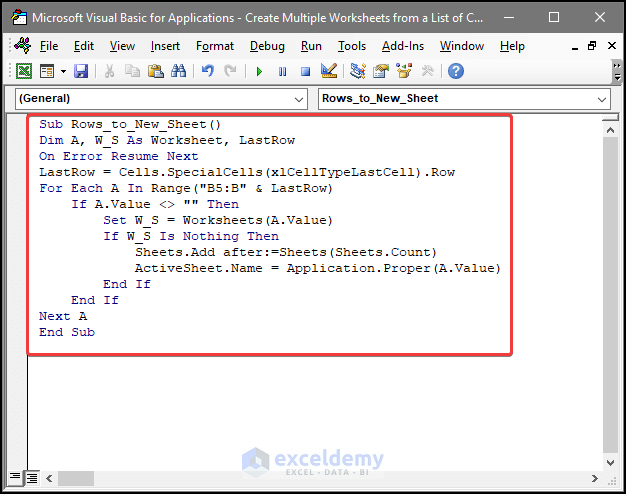
- Close the Module window.
- Go to View tab > Macros.
- Click View Macros.
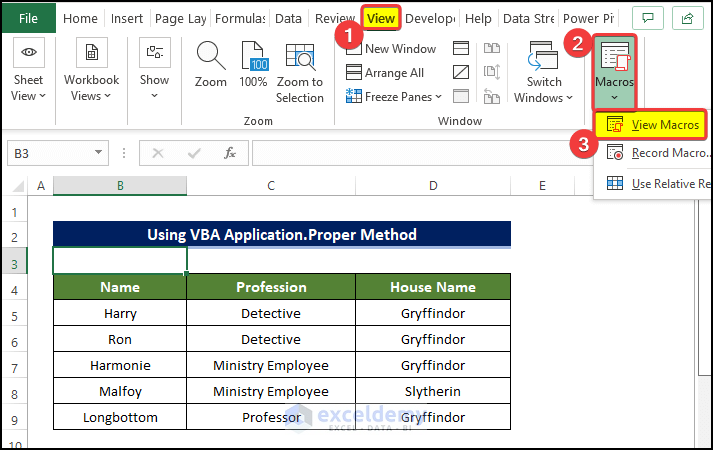
- After clicking View Macros, select the macros that you created just now. The name here is Rows_to_New_Sheet. Then click Run.
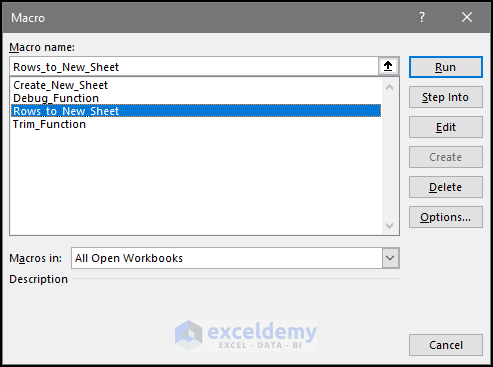
- Five new sheets will be created in the Sheet Name Bar with the name of each row.
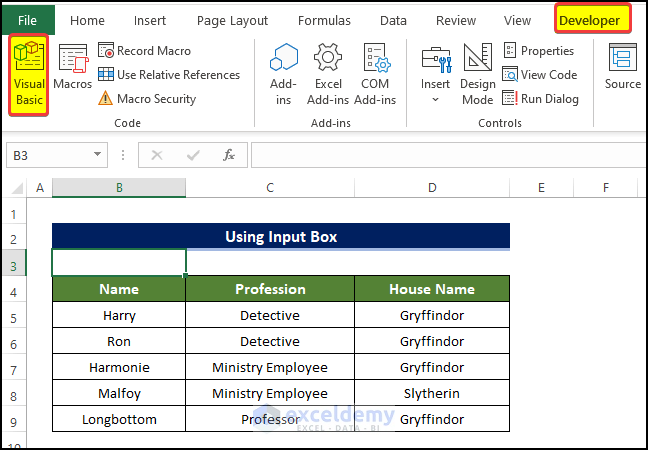
Method 5 – Utilizing Input Box
Steps
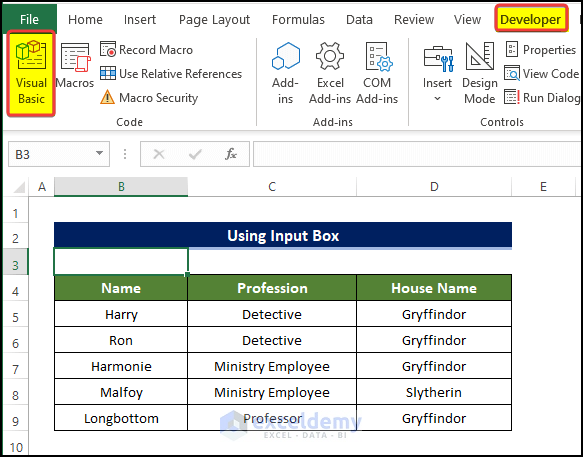
- Go to the Developer tab and click on Visual Basic. You have to enable the Developer tab, or You can also press ‘Alt+F11’for opening the Visual Basic Editor.
- A new dialog box, in that dialog box, click on the Insert > Module.
- In the Module editor window, type the following code:
Sub Create_New_Sheet()
Dim Range As Range
Dim Cell As Range
On Error GoTo Errorhandling
Set Range = Application.InputBox(Prompt:="Select Cell range:", _
Title:="Create Multiple Worksheets", _
Default:=Selection.Address, Type:=8)
For Each Cell In Range
If Cell <> "" Then
Sheets.Add.Name = Cell
End If
Next Cell
Errorhandling:
End Sub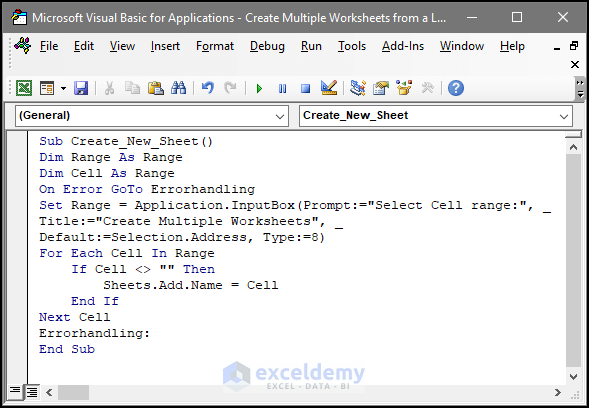
- Close the Module window.
- Go to View tab > Macros.
- Click View Macros.
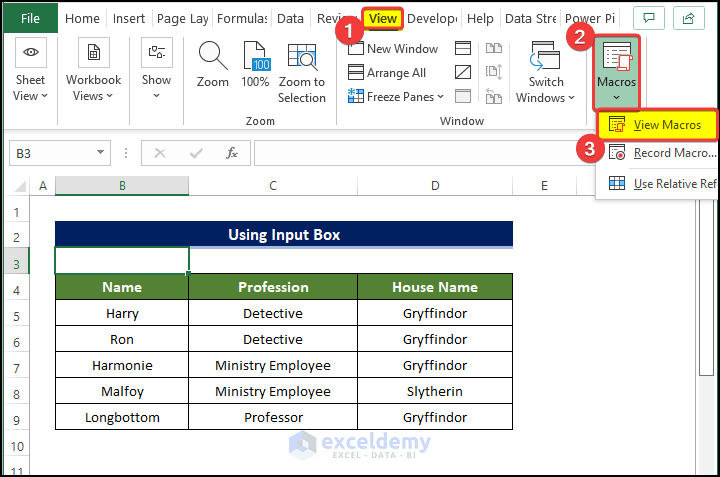
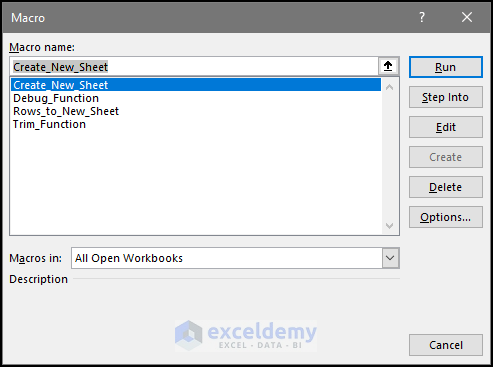
- After clicking View Macros, select the macros that you created just now. The name here is Create_New_Sheet. Click Run.
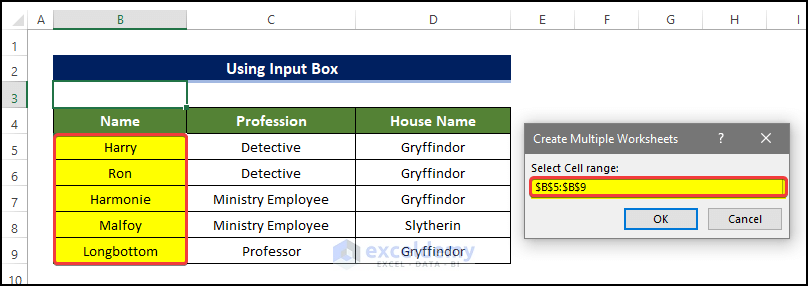
- After clicking Run, you will notice that there is a dialog box, asking for the range of cells of our intended list.
- Select the range of cell B5:B9 and click OK.
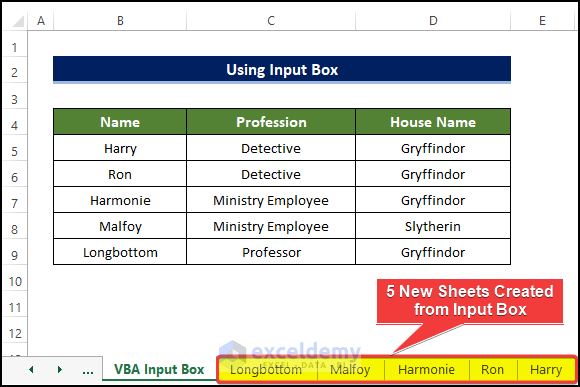
- Five new sheets will be created in the Sheet Name Bar with the name of each row in the list.
Download this practice workbook below.
Related Articles
- How to Create Multiple Sheets with Same Format in Excel
- How to Create New Sheets for Each Row in Excel
- How to Create Multiple Sheets in Excel with Different Names
- How to Create Multiple Sheets in Excel at Once
- Understanding Excel Spreadsheets
<< Go Back to Insert Sheet | Worksheets | Learn Excel
Get FREE Advanced Excel Exercises with Solutions!


HOW TO create EXCEL WORKBOOK from excel list
Hello PRACHI DABHADE
Greetings from our website! Thank you for posting your question on the platform. I can assist you with an Excel VBA code that creates new workbooks and allows you to specify names for those files. Furthermore, you can choose a location to store those files. Note that the user can cancel the folder selection dialogue. If they do, the code will end without making any new workbooks.
Download Workbook:
I am attaching the Workbook used to explore your issue. You can have it by clicking the link below.
https://www.exceldemy.com/wp-content/uploads/2023/03/PRACHI-DABHADE.xlsm
INPUT:
In the sheet named Sheet1, there is a list of names.
OUTPUT:
the desired workbooks are created utilizing the Excel VBA code mentioned below.
VBA CODE:
NOTE:
1) I am using the Application.FileDialog method, this code asks the user to choose a folder where the new workbooks will be saved. Then, it puts the path to the selected folder in the folderPath variable.
2) Using the folderPath variable and the Workbook’s name from the wbNames array, the code saves each new Workbook with its name in the chosen folder.
3) Lastly, remember to modify the VBA code when you want to work with the other ranges. Don’t hesitate to contact us if you face any other issues.
Regards
Lutfor Rahman Shimanto (ExcelDemy Team)