Watch Video – Create Multiple Sheets with Different Names in Excel
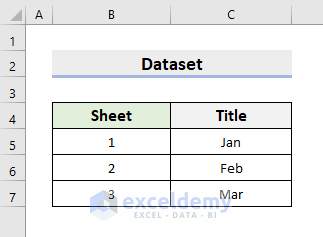
The sample dataset has 3 different titles for 3 sheets.
Method 1 – Applying Excel VBA to Create Multiple Sheets with Different Names
STEPS:
- Go to Developer ➤ Visual Basic.

- The VBA window will open.
- Click Insert ➤ Module.
- The Module window will appear.
- Enter the following code:
Sub CreateSheets()
    Dim p As Worksheet
    Dim rng As Range
    Dim r As Range
    Set p = ActiveSheet
    Set rng = Selection.Cells
    Application.ScreenUpdating = False
    For Each r In rng
        sName = Trim(r.Text)
        If Len(sName) > 0 Then
                Worksheets.Add After:=Worksheets(Worksheets.Count)
                ActiveSheet.Name = sName
        End If
    Next r
    p.Activate
    Application.ScreenUpdating = True
End Sub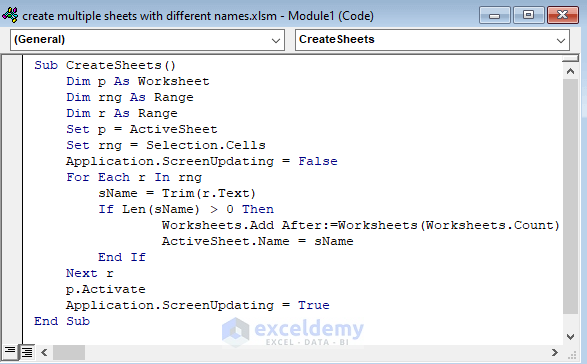
- Save the file and close the VBA window.
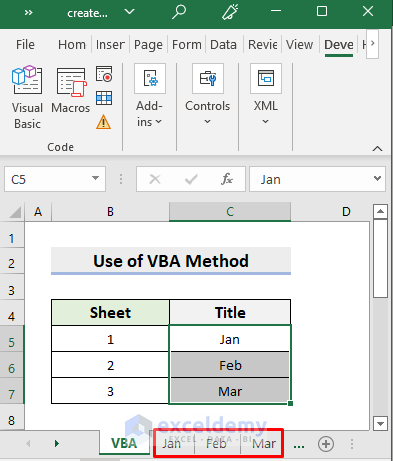
- Select the title range C5:C7.
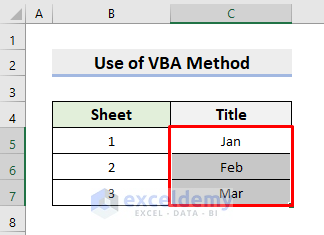
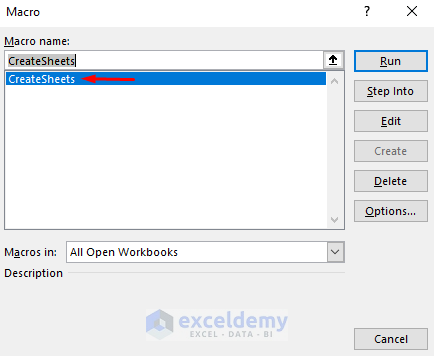
- Select Developer ➤ Macros.
- The Macro dialog box will open.
- Choose CreateSheets and press Run.
- You’ll see 3 newly formed sheets with the desired sheet names, as shown in the below picture.
Read More: How to Create Multiple Sheets in Excel at Once
Method 2 – Getting Multiple Sheets with Different Names Using the Pivot Table Feature
STEPS:
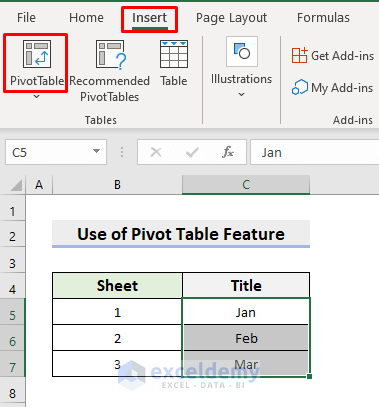
- Select the range C5:C7.
- Click Insert ➤ PivotTable.
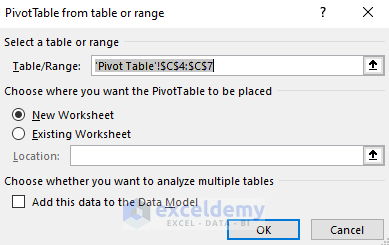
- You’ll see a dialog box.
- Press OK.
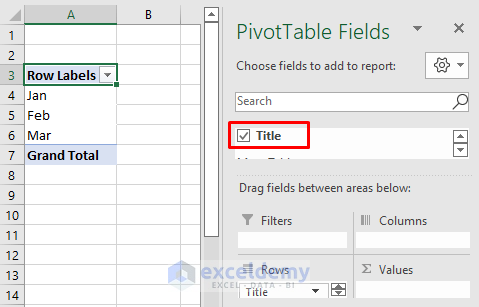
- It’ll return a new sheet.
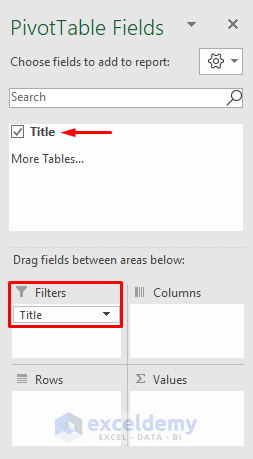
- Check the box for Title under the PivotTable Fields pane.
- Drag the Title and place it in the Filters section.
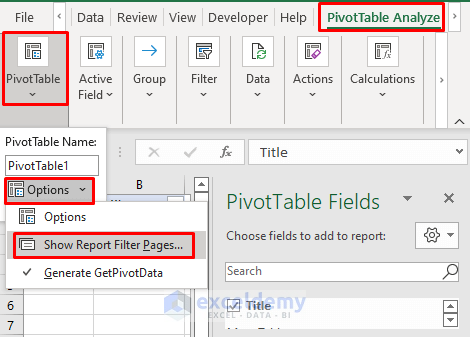
- Go to the PivotTable Analyze tab.
- Select PivotTable ➤ Options ➤ Show Report Filter Pages.
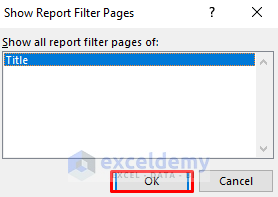
- A new dialog box will appear.
- Press OK.
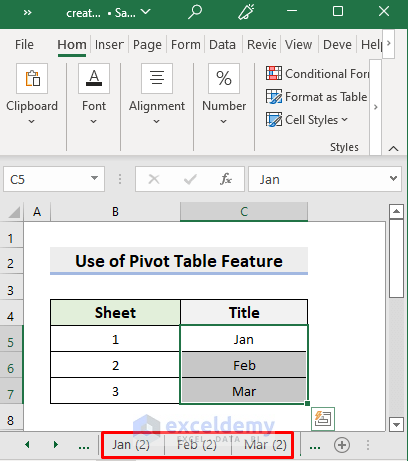
- It’ll return 3 new sheets with the chosen titles.
Read More: How to Create Multiple Worksheets from a List of Cell Values
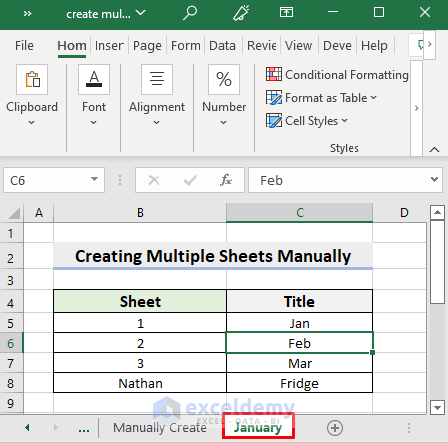
Method 3 – Manually Create Multiple Sheets with Different Titles in Excel
STEPS:
- Click the ‘+’ icon in the sheet tab at the bottom of Excel.
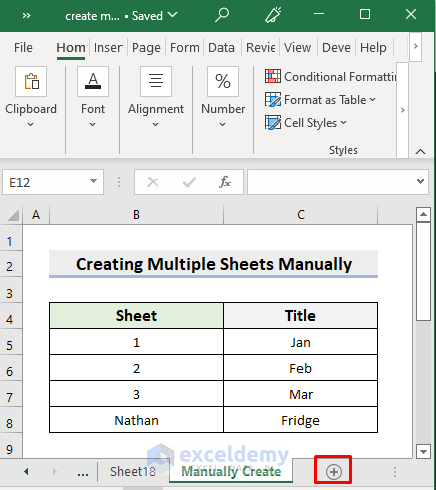
- That’ll create a new sheet.
- Double-click the sheet title and rename it to match your desired one.
- You’ll get a new sheet with a new title.
See the figure below, where we created a new sheet named January.
Download the Practice Workbook
Download the following workbook to practice.
Related Articles
- How to Create Multiple Sheets with Same Format in Excel
- Understanding Excel Spreadsheets
- How to Create New Sheets for Each Row in Excel
- How to Insert Sheet from Another File in Excel
<< Go Back to Insert Sheet | Worksheets | Learn Excel
Get FREE Advanced Excel Exercises with Solutions!
