Step 1 – Convert Excel to CSV File
- Open the Excel file which you want to convert into a CSV file.
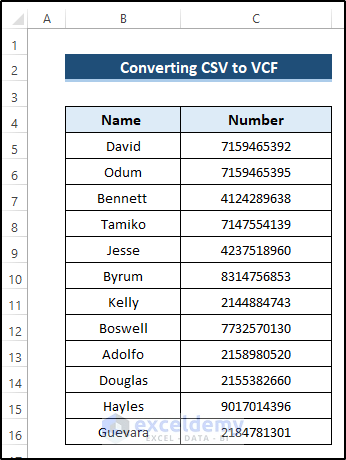
- Place a dataset that contains some names and their numbers.
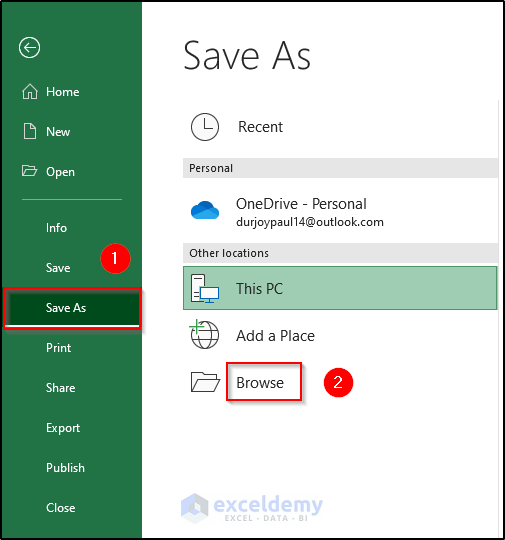
- Go to the File tab on the ribbon.
- Select Save As command.
- Select the Browse option.
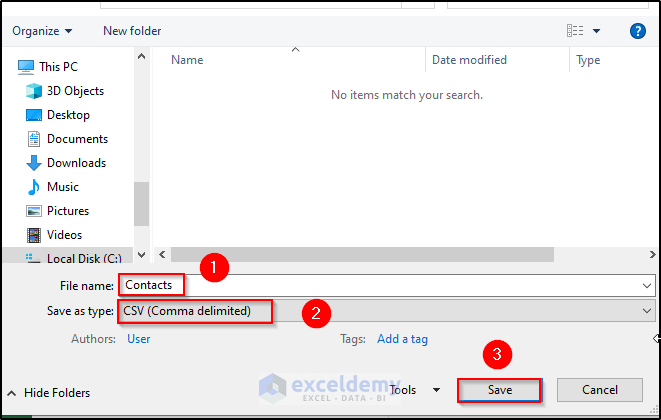
- In the new window, set the File name.
- From Save as type, select the CSV(comma delimited) file option.
- Click on Save.
- You will see the CSV file type from Excel.

Step 2 – Import Contacts from CSV File
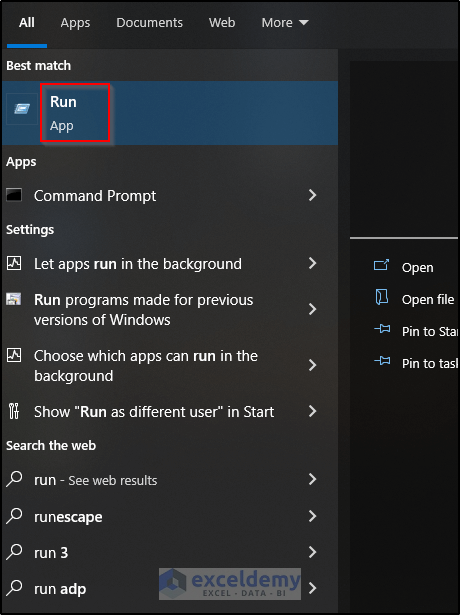
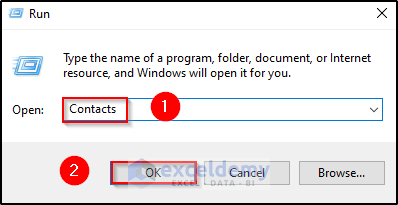
- Click on the Windows button.
- Search for the Run option.
- In the Run dialog box, write down Contacts.
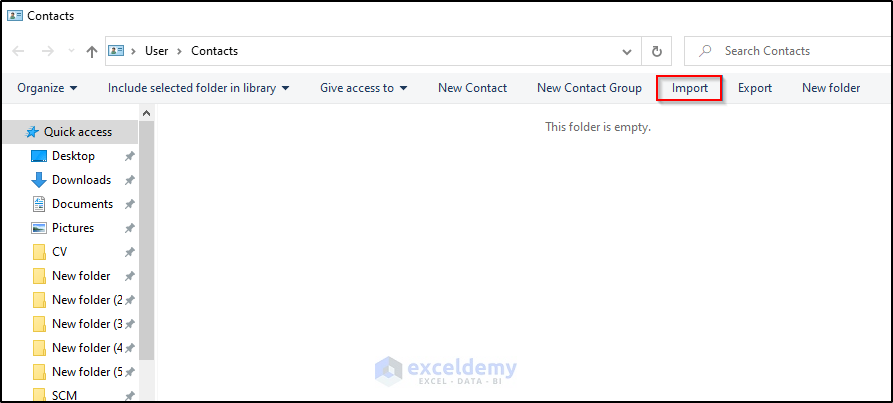
- Select Import from the Contacts pane.
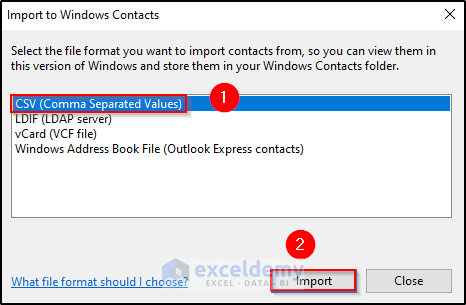
- Select CSV(Comma Separated Values) from Import to Windows Contacts.
- Hit Import.
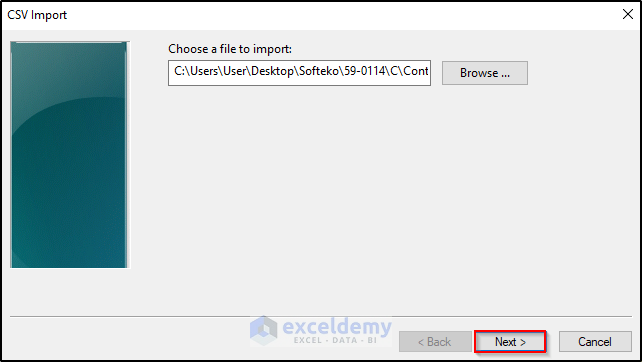
- Choose Browse from the CSV Import window.
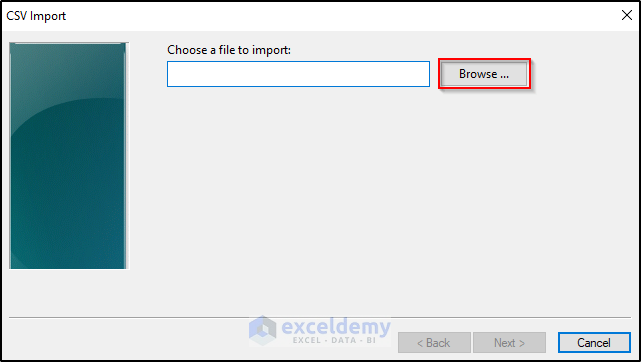
- Select the CSV file that you created from an Excel file previously.
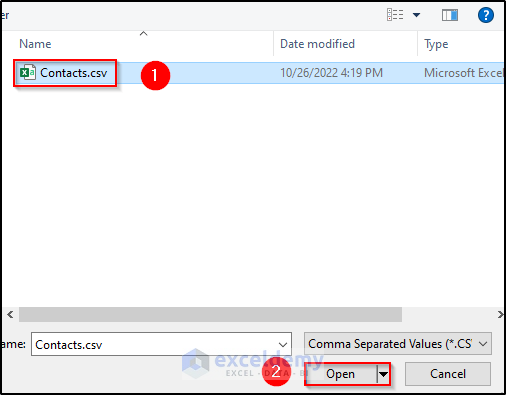
- Click on Next.
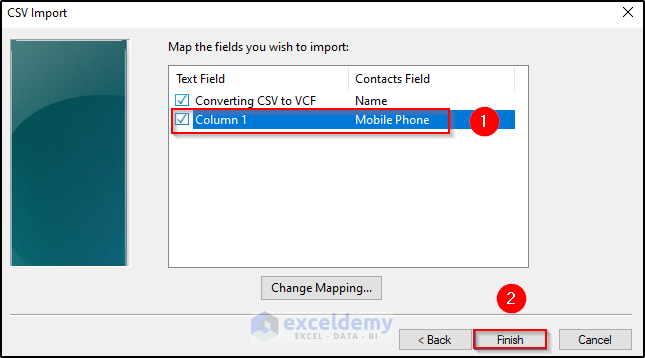
- Select the Converting CSV to VCF option.
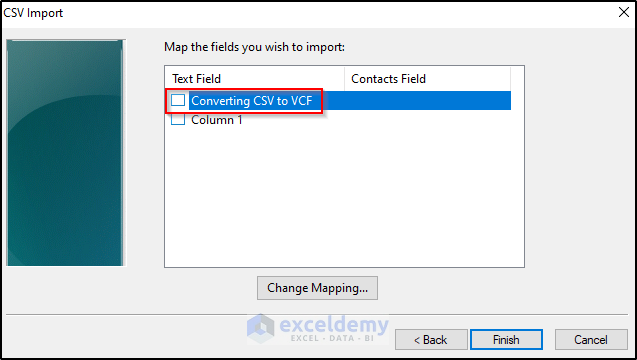
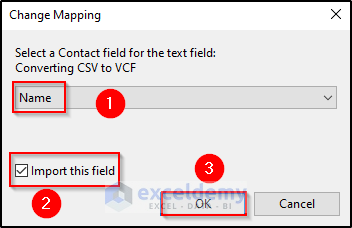
- The Change Mapping dialog box will appear.
- Select Name from the drop-down arrow.
- Check the Import this field option.
- Select OK.
- Follow a similar procedure and select Mobile Phone as Contacts Field from Column 1
- Click on Finish.
- The Import to Windows Contacts dialog box will open.
- Select Close.
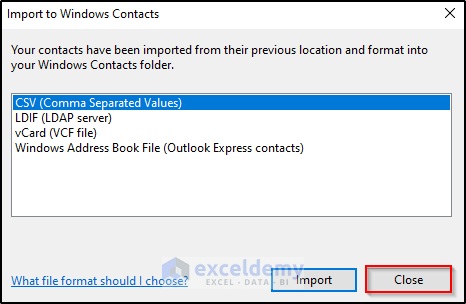
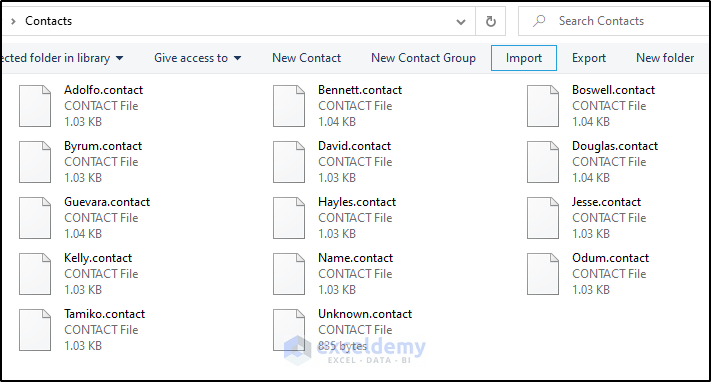
- You will see all the contacts will be saved as individual files.
Step 3 – Export Contacts to VCF
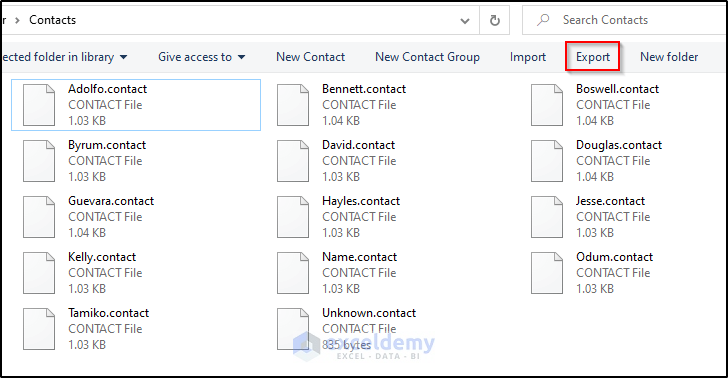
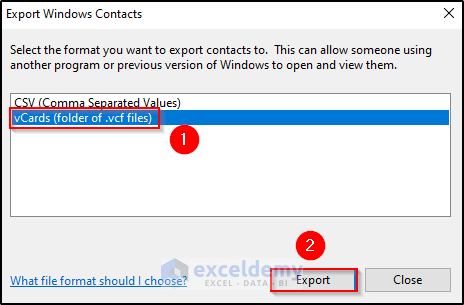
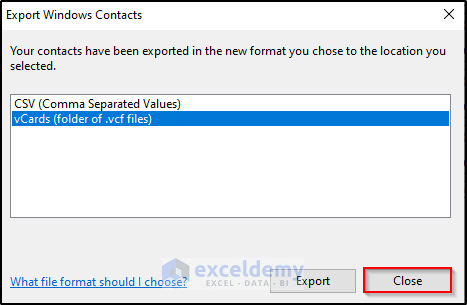
- Select the Export option.
- Choose vCards (folders of .vcf files) from the Export Windows Contacts dialog box.
- Select Export.
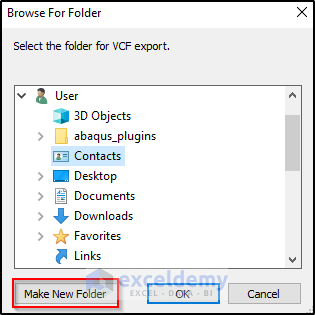
- The Browse For Folder window will appear.
- Select Make New Folder.
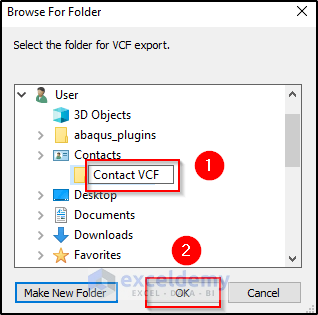
- Set the folder name as Contact VCF.
- Click on OK.
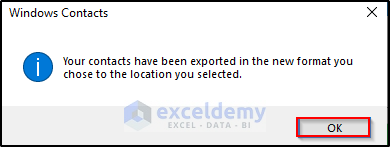
- Click on OK in the confirmation message box.
- In the Export Windows Contacts window, click on Close.
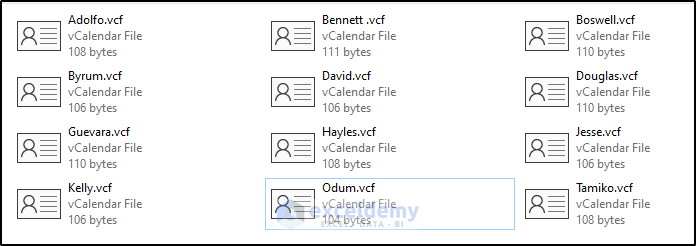
- This should give you the converted VCF in a folder.
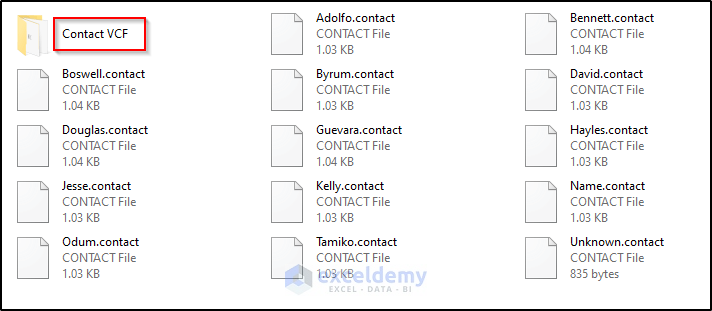
- When we enter the folder, we will see all the contacts in a VCF file.
Things to Remember
- This tutorial uses Excel 365 and Windows 10 to solve the problem. If you use other versions, then you may have to complete some other steps.
Download Practice Workbook
Download the practice workbook below.
Related Articles
- How to Create VCF File from Excel
- How to Open VCF File in Excel
- How to Edit VCF File in Excel
- How to Convert Excel to VCF Without Software
<< Go Back to Export Excel to vCard | Export Data from Excel | Learn Excel
Get FREE Advanced Excel Exercises with Solutions!

This was very helpful. Clearly explained with good screenshots. I was able to convert my CSF file without any difficulty. Thank you.
Dear CJvW,
Thanks for your appreciation. To get more helpful content be with ExcelDemy.
Regards
Shamima Sultana
Project Manager | ExcelDemy
Thank you, this was a big help. I had trouble with the contacts mysteriously disappearing on a sim card when transferring to a new phone. At least I was able to get them from a back up and type them into an excel spread sheet. Now they’re in a .vcf format I can safely back them up across the PC and email as well as put them on any phone or device now.
Dear Anon,
You are most welcome.
Regards
ExcelDemy