What Is a VCF File?
VCF (Virtual Contact File) is used to store virtual contact information. These files can be used as virtual business cards. VCF files can be shared easily. You can attach these files to emails. These files can be sent via MMS also. VCF files are also accepted universally.
How to Convert Excel to VCF Without Software: Step-by-Step Procedure
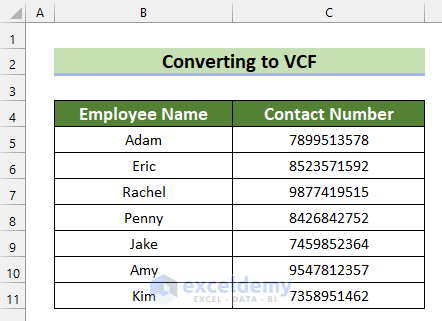
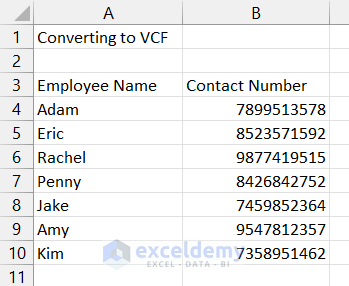
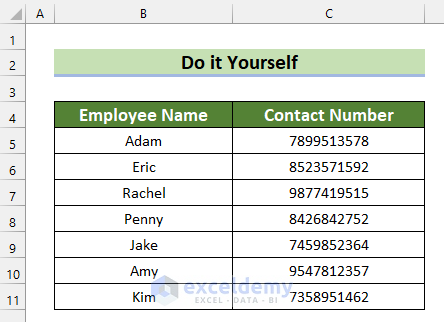
We have the following Excel sheet. It contains the Employee Name and Contact Number. We will convert this Excel sheet to VCF without software.
Step 1 – Save the Excel File in CSV Format
- Open the Excel file that you want to convert to VCF.
- Go to the File tab from the Ribbon.
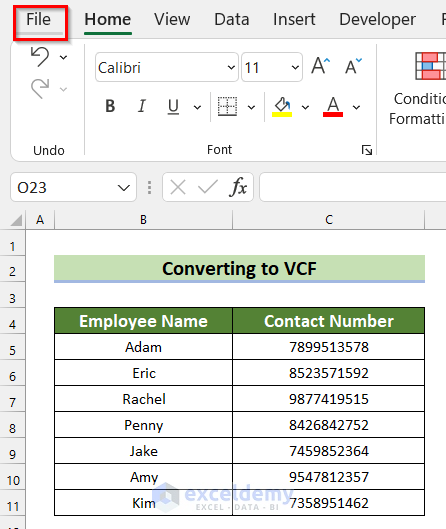
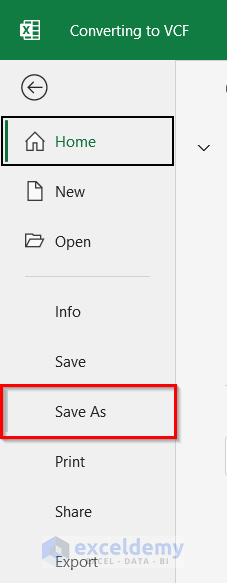
- Select Save As.
- Click on the drop-down button for the file type.
- Select CSV (Comma delimited)(*.csv).
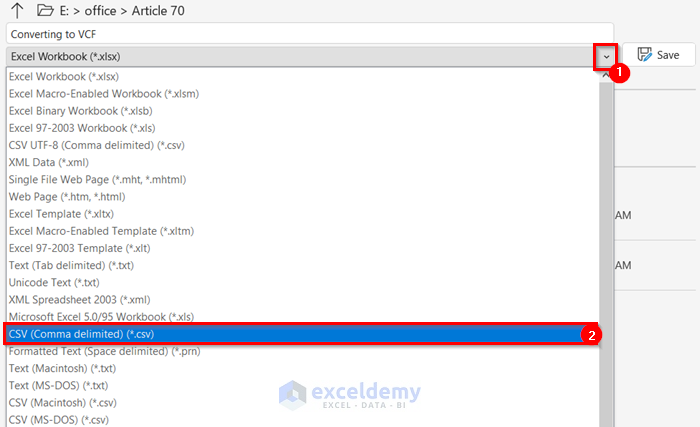
- Select Save, and your file will be saved as a CSV file.

- Here’s how the Excel file looks after converting it to CSV.
Step 2 – Import Contacts from the CSV File
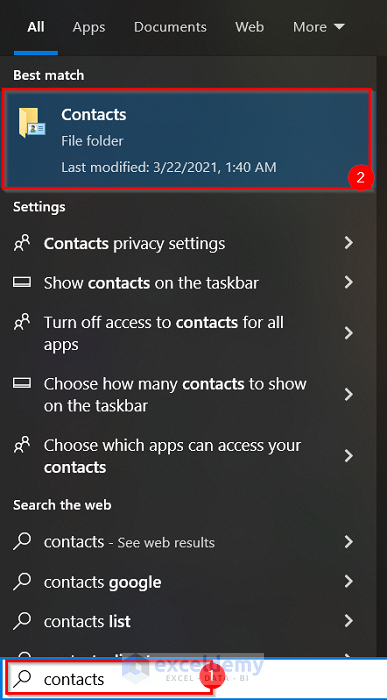
- Click on the Start button for windows.
- Write contacts.
- The Contacts folder will appear.
- Select the Contacts folder.
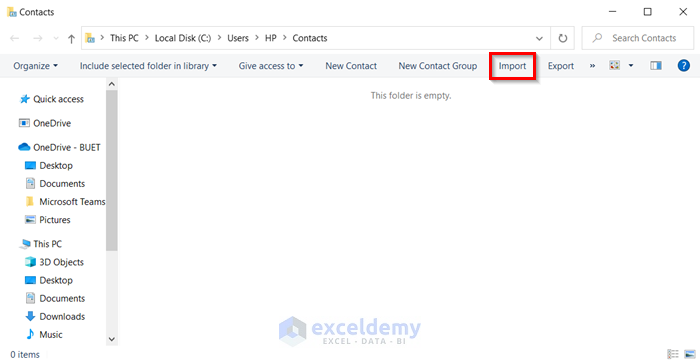
- The Contacts folder will open.
- Select Import.
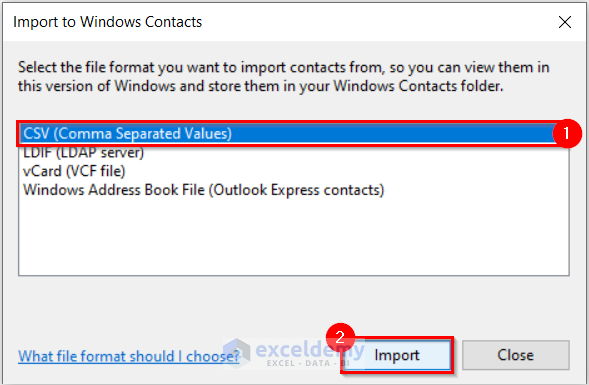
- The Import to Windows Contacts dialog box will appear.
- Select CSV (Comma Separated Values).
- Select Import.
- The CSV Import dialog box will appear.
- Select Browse.
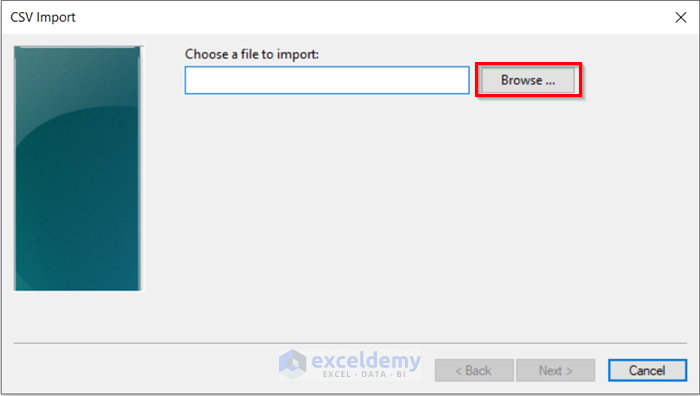
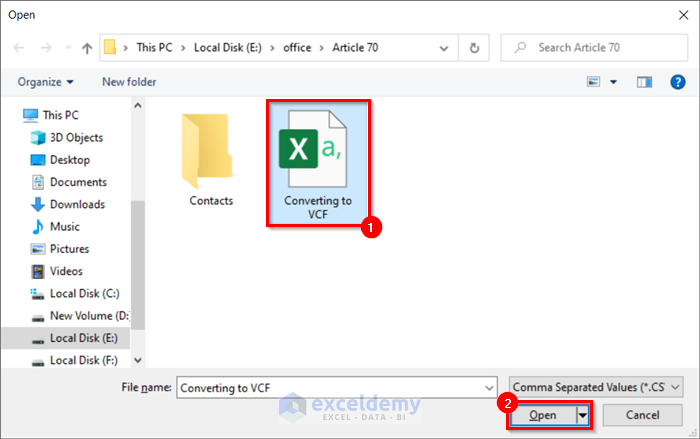
- Select the CSV file that you converted from Excel.
- Select Open.
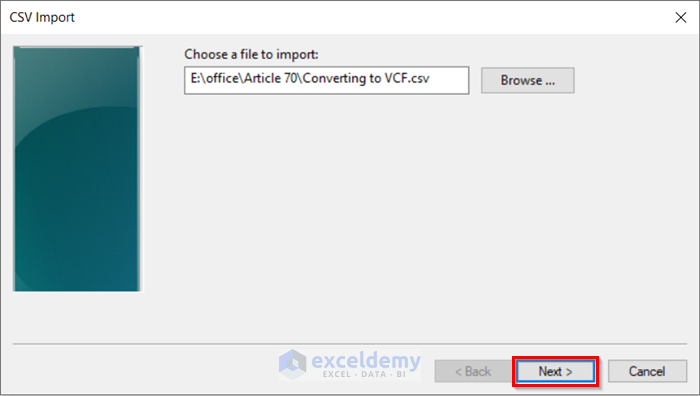
- The file is selected as Choose a file to import.
- Select Next.
- Check the field you want.
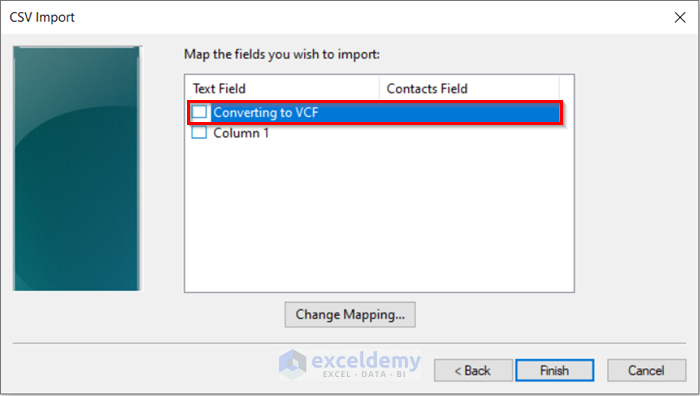
- Another dialog box named Change Mapping will appear.
- Select the Contact field. We selected the Name because this column contains names.
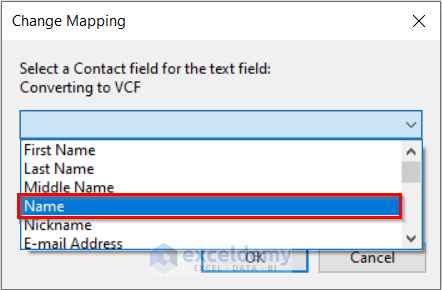
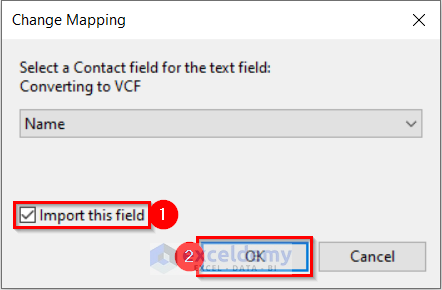
- Check the Import this field option.
- Select OK.
- Select the other column.
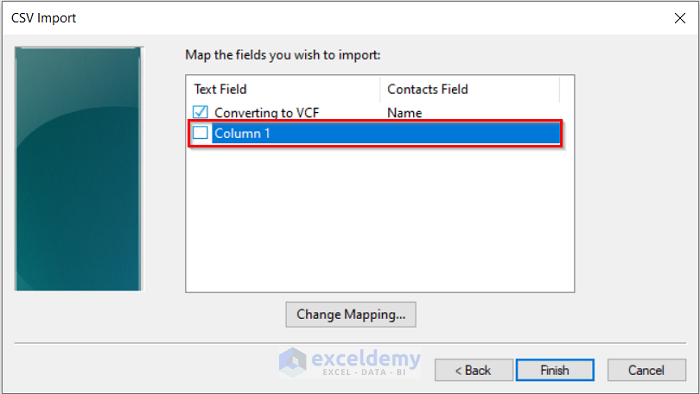
- The Change Mapping dialog box will appear again.
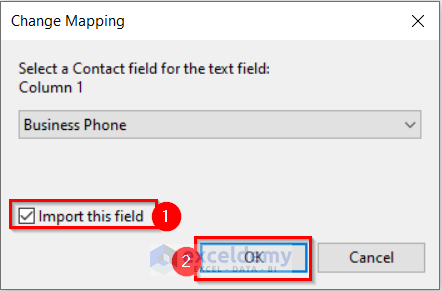
- Select the Contact field. We selected the Business Phone because this column contains the Contact Number.
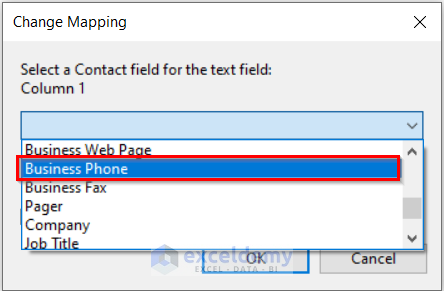
- Check the Import this field option.
- Select OK.
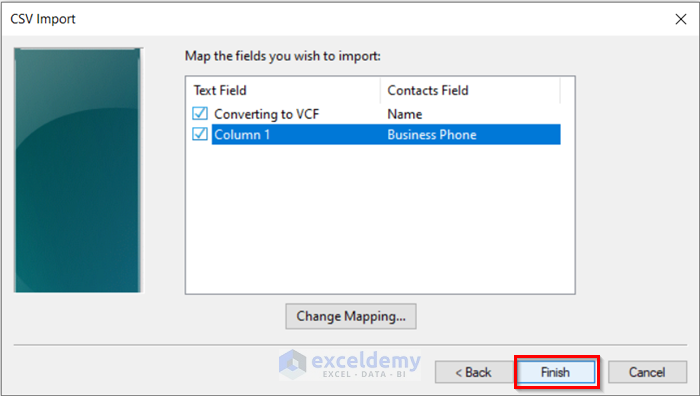
- Select Finish.
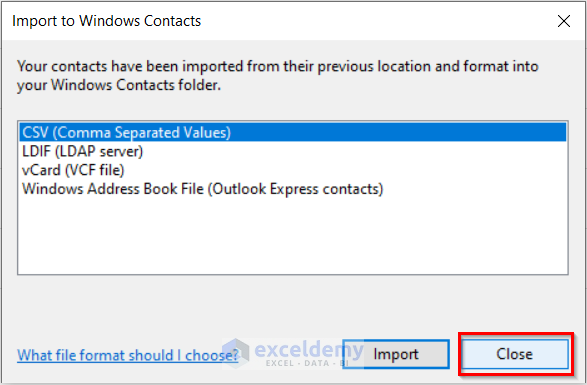
- Select Close in the Import to Windows Contacts dialog box.
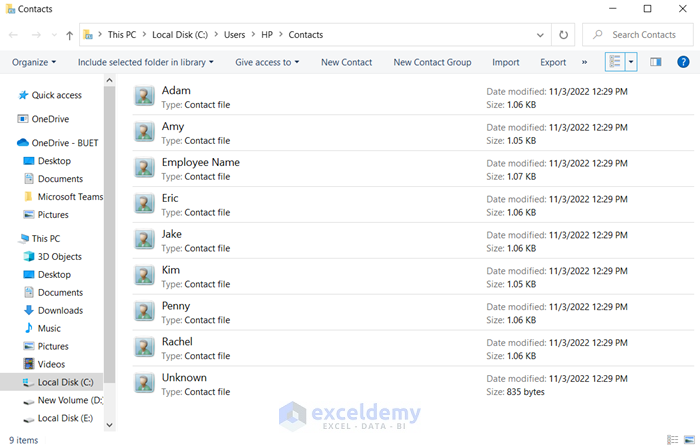
- We have imported the contacts from the CSV file as Contact File.
Step 3 – Export Contacts to Convert to VCF
- Select Export in the Contacts folder.

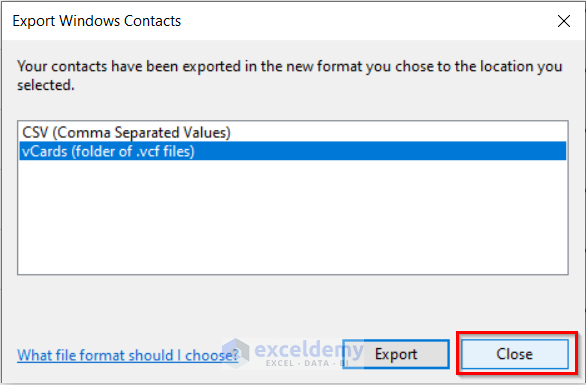
- The Export Windows Contact dialog box will appear.
- Select vCards (folder of .vcf files).
- Select Export.

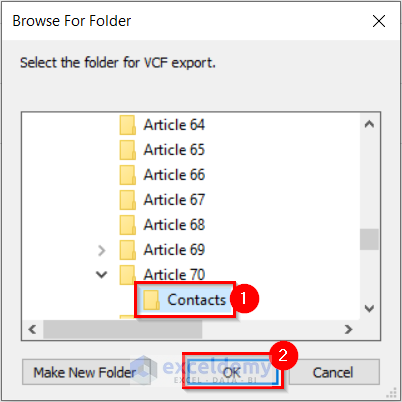
- The Browse for folder dialog box will appear.
- Select the folder where you want the VCF files.
- Select OK.
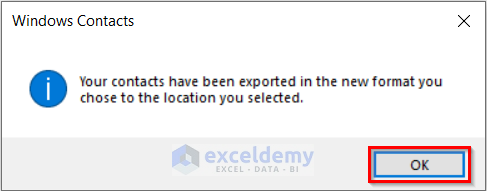
- Another dialog box will appear.
- Select OK.
- Click Close in the Export Windows Contacts dialog box.
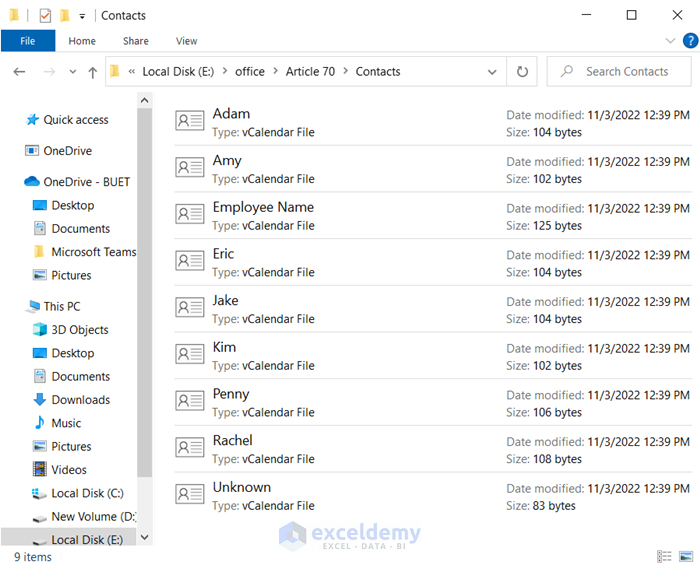
- We have converted the Excel file to VCF files without software.
Practice Section
We provided a practice sheet for you to practice how to convert Excel to VCF without software.
Download the Practice Workbook
Related Articles
- How to Create VCF File from Excel
- How to Open VCF File in Excel
- How to Edit VCF File in Excel
- How to Convert CSV File to VCF Using Excel
<< Go Back to Export Excel to vCard | Export Data from Excel | Learn Excel
Get FREE Advanced Excel Exercises with Solutions!
