Method 1 – Create Employee Database & Leave Structure
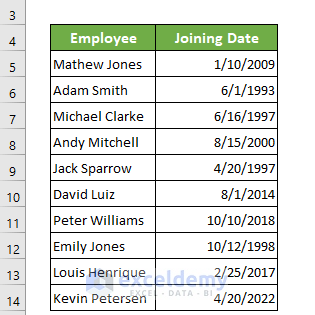
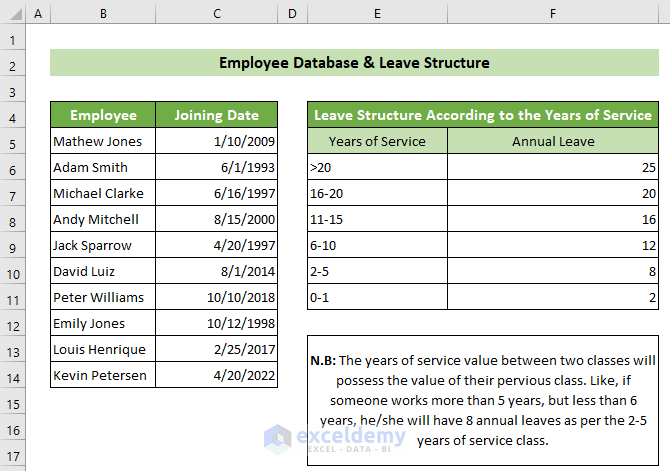
- Create a new sheet named Database, and on the left side, create two columns containing the employees’ names and joining dates.
- Record the leave structure according to the company policy on the right side of the sheet.
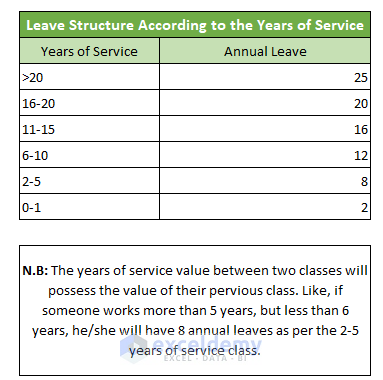
You will have the complete database containing employees’ required information and the leave structure.
Method 2 – Calculate Leave Balance for a Particular Employee
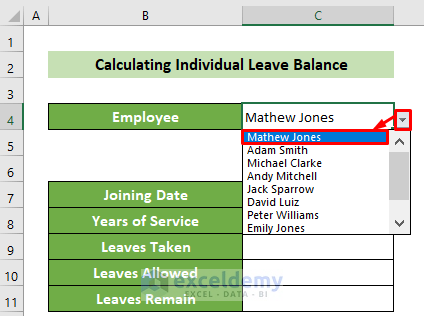
- Click on the C4 cell. Go to the Data tab >> Data Tools group >> Data Validation tool >> Data Validation option.

- The Data Validation dialogue box will appear. Choose the option List from the Allow: dropdown list. The Source: text box, refer to the B5:B14 cells of the How to Calculate Leave Balance sheet. Click OK.

- There is a down arrow on the C4 cell from where you can choose the employee’s name easily. We chose Mathew Jones to calculate his leave balance.
- Click on the C7 cell and insert the following formula using the VLOOKUP function. Press the Enter button.
=VLOOKUP($C$4,Database!$B$5:$C$14,2,FALSE)
Formula Explanation :
=VLOOKUP($C$4,Database!$B$5:$C$14,2,FALSE)
This will look for the value of the C4 cell at the Database worksheet’s B5:C14 range and return the second column value for the respective cell.
Result: 1/10/2009
- At the C8 cell, write the formula below containing the DATEDIF function and the NOW function. Press the Enter button.
=DATEDIF(C7,NOW(),"Y")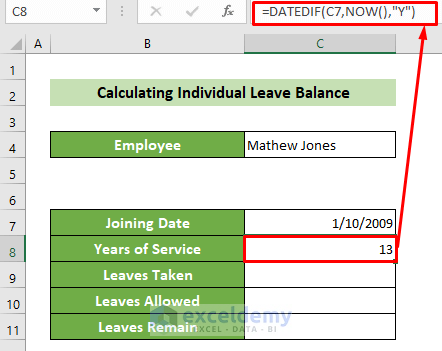
Formula Explanation:
=DATEDIF(C7,NOW(),”Y”)
This calculates the difference between the C7 cell’s date and today’s date in terms of years.
Result: 13
- Click on the C9 cell and insert the following formula. Press the Enter button.
=VLOOKUP($C$4,'How to Calculate Leave Balance'!$B$5:$D$14,3,FALSE)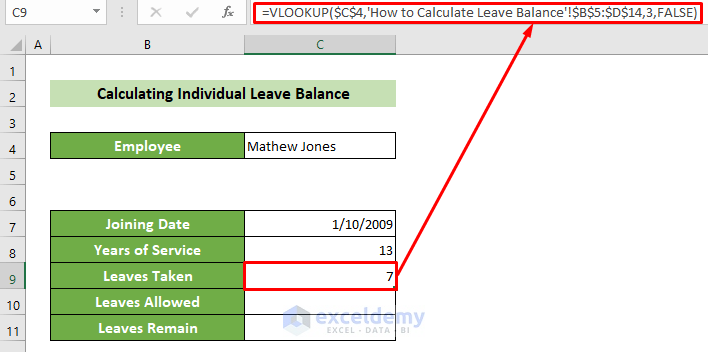
Formula Explanation:
=VLOOKUP($C$4,’How to Calculate Leave Balance’!$B$5:$D$14,3,FALSE)
This returns the third column value from the How to Calculate Leave Balance sheet’s B5:D14 range for the lookup value of the C4 cell of this worksheet.
Result: 7
- Click on the C10 cell. Following, insert the formula below using the IF function. Press the Enter button.
=IF(C8>20,25,IF(C8>15,20,IF(C8>10,16,IF(C8>5,12,IF(C8>1,8,2)))))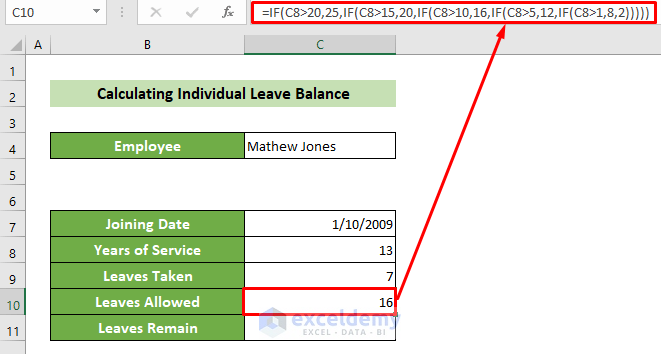
Formula Explanation:
=IF(C8>20,25,IF(C8>15,20,IF(C8>10,16,IF(C8>5,12,IF(C8>1,8,2)))))
This checks if the C8 cell’s value is greater than 20. If it is true, it returns the value 25. When it is not true, it checks if the value is greater than 15. If it is true now, it returns 20. When it is false again, it now checks if the value is greater than 10. If it is true now, it returns the value as 16. If it is false, too, it checks if the value is greater than 5. It returns 12 then. If it is false again, it checks if the value is greater than 1. It returns 8 then. When it is false too, it would return 2 as the C10 cell’s value.
Result: 16
- To calculate the leaves remaining, click on the C11 cell. Write the following formula which involves the subtraction of the C9 cell from the C10 cell.
=C10-C9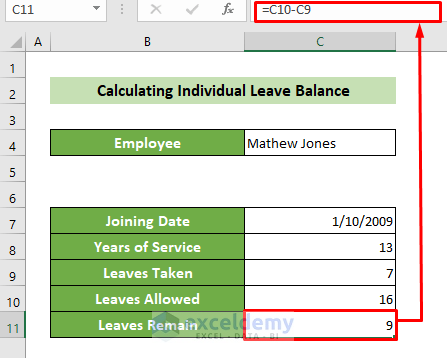
You have calculated the leave balance for a particular employee. You can calculate and print anyone’s leave balance individually by this. The outcome should look like this.

Method 3 – Calculate Leave Balance for All Employees
- Click on the D5 cell. Insert the following formula. Press the Enter button.
=DATEDIF(C5,NOW(),"Y")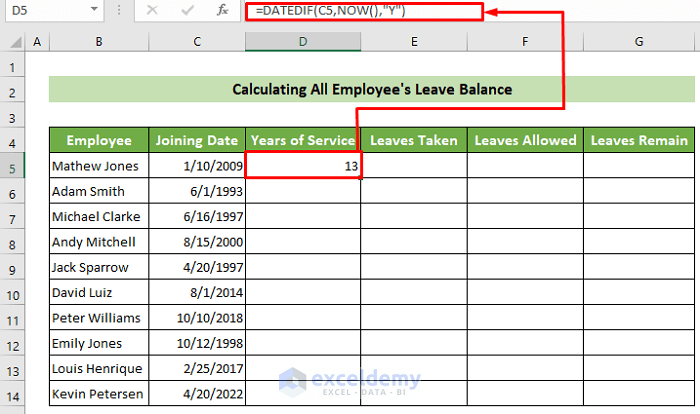
Formula Explanation:
=DATEDIF(C5,NOW(),”Y”)
This calculates the year difference between today and the C5 cell’s date.
Result: 13
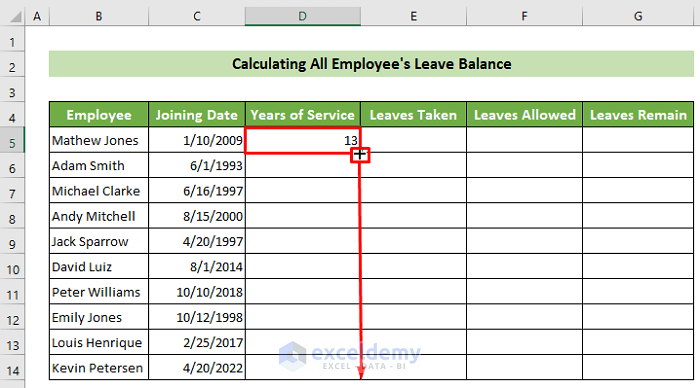
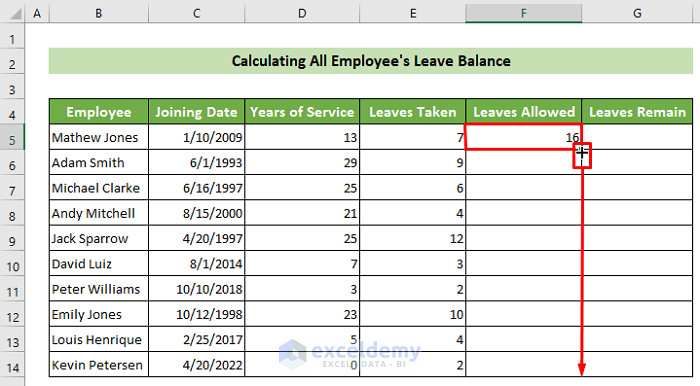
- Apply a similar formula for others, place your cursor on the bottom right position of the cell and drag it downward.
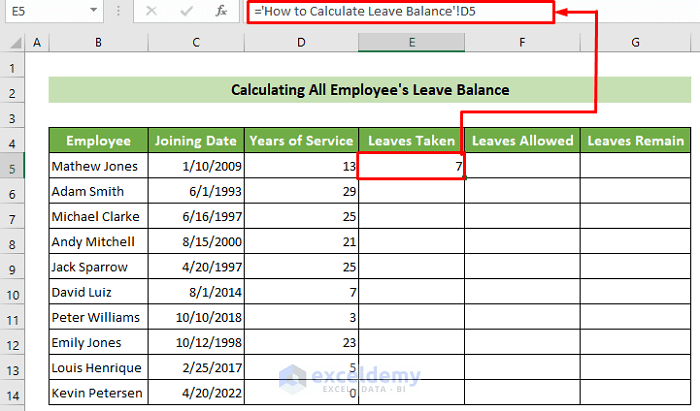
- Click on the E5 cell and refer to the How to Calculate Leave Balance worksheet’s D5 cell.
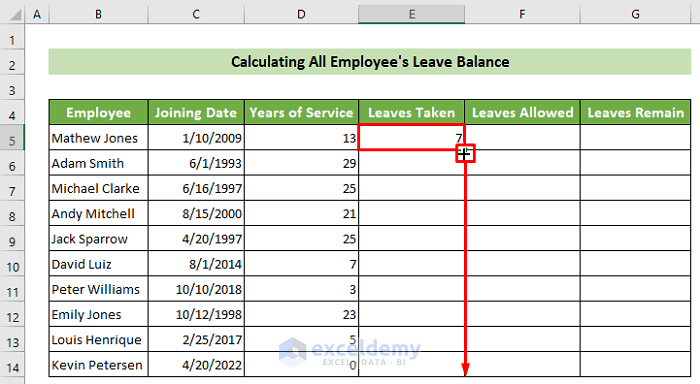
- Place your cursor in the bottom right position of your cell. When the black fill handle appears, drag it down to repeat the same formula for all the other cells below.
- Click on the F5 cell and write the following formula. Press the Enter button.
=IF(D5>20,25,IF(D5>15,20,IF(D5>10,16,IF(D5>5,12,IF(D5>1,8,2)))))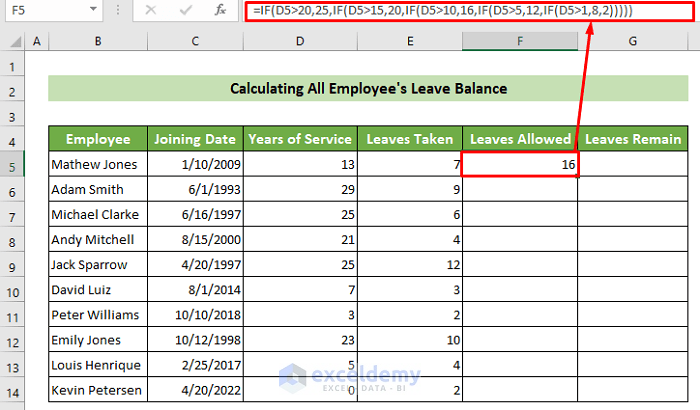
Formula Explanation:
=IF(D5>20,25,IF(D5>15,20,IF(D5>10,16,IF(D5>5,12,IF(D5>1,8,2)))))
It checks if the D5 cell is greater than 20 or 15 or 10 or 5 or 1. When greater than 20, it returns 25. If greater than 15, it returns 20. At the condition of greater than 10, it returns 16. When greater than 5, it returns 12. If greater than 1, it returns 8. It returns 2.
Result: 16
- Place your cursor in the bottom right position of your cell. Drag the fill handle downward upon its arrival.
- Click on the G5 cell and subtract the E5 cell from the F5 cell. Write the following formula and press the Enter button.
=F5-E5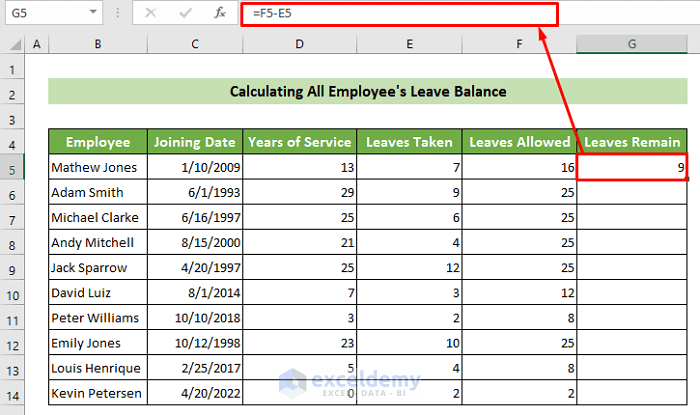
- Place your cursor on the bottom right position of the cell and drag the fill handle downward when it appears to copy the same formula below.
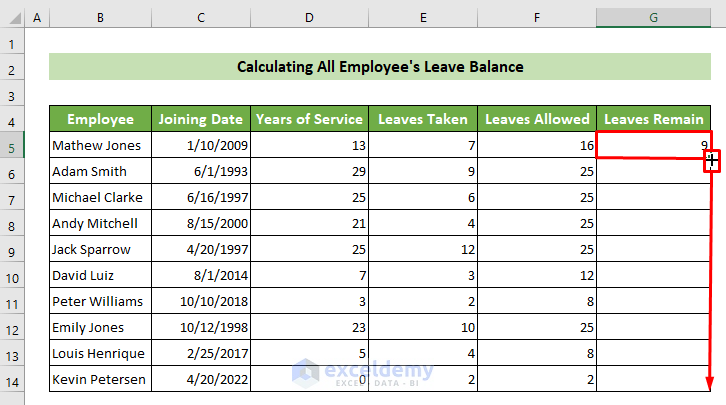
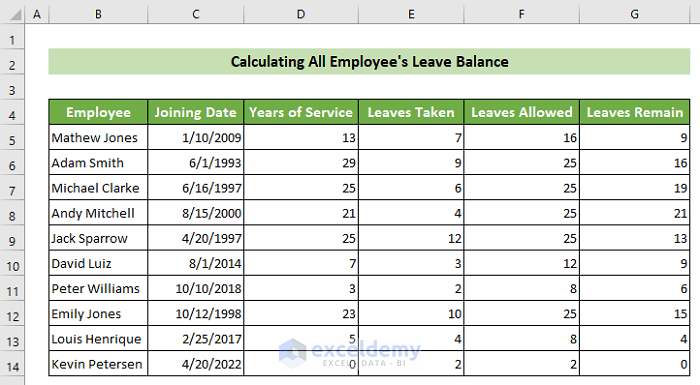
You can calculate all your employees’ leave balances together in a single table. The final outcome should look like this.
Download Sample Workbook
You can download our practice workbook from here for free.
<< Go Back to Leave Calculation | Formula List | Learn Excel
Get FREE Advanced Excel Exercises with Solutions!
