
Image by Editor
Microsoft Word macros can save significant time by automating repetitive tasks. If you frequently perform repetitive tasks in Microsoft Word, like formatting documents, inserting standard tables, or applying specific styles, then macros can save you time.
In this tutorial, we will show how to automate tasks with macros in Microsoft Word.
What Are Macros?
Macros are recorded sequences of instructions and actions written in VBA (Visual Basic for Applications) that automate tasks in Word. You can play back whenever needed. It can be triggered by a shortcut key, toolbar button, or directly from the Developer tab. They’re particularly useful for:
- Formatting text consistently.
- Inserting frequently used content.
- Automating multi-step processes.
- Customizing Word to fit your workflow.
Step 1: Enable the Developer Tab
To create or access macros, you need to enable the Developer tab.
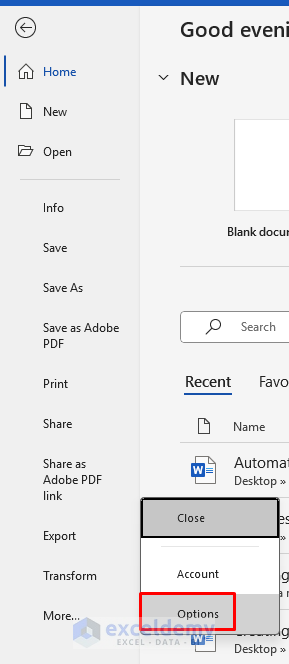
- Go to File tab >> select Options.
- In the Word Options box >> select Customize Ribbon.
- Check the box next to the Developer in the right panel.
- Click OK.

Now, you’ll see the Developer tab on the ribbon.

Step 2: Record Macro
Let’s create a simple macro that applies a heading, formats text as bold, increases font size, and sets alignment.
- Place your cursor where you want to apply the formatting.
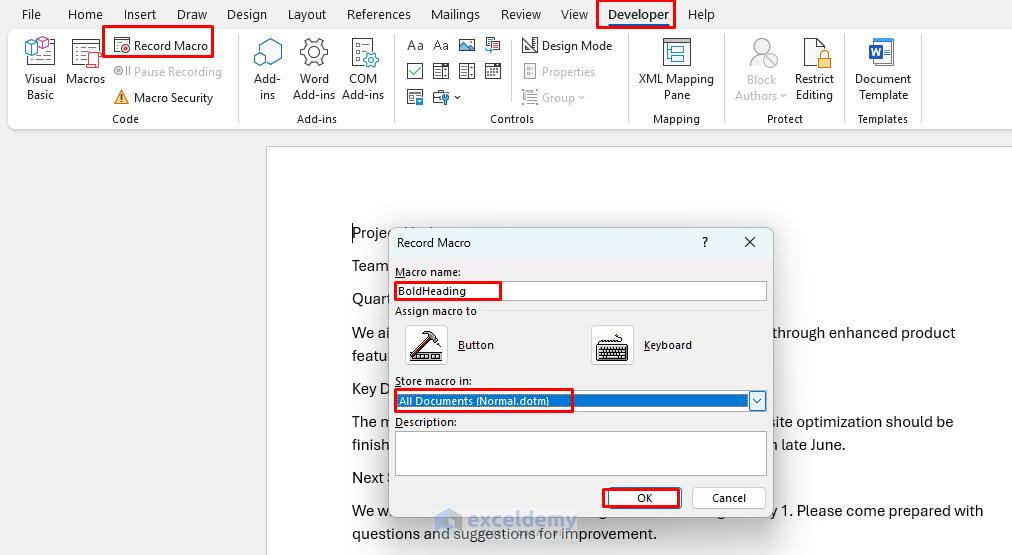
- Go to the Developer tab >> select Record Macro.
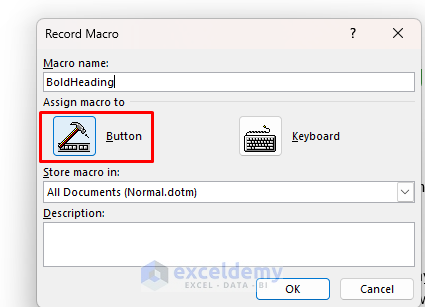
- In the Record Macro box;
- Insert Macro name: BoldHeading.
- Choose Store macro in: All Documents (Normal.dotm).
- Click OK.
- Start recording.
- Make your formatting changes.
- Apply Heading.
- Apply Bold format.
- Change Font.
- Change Alignment.
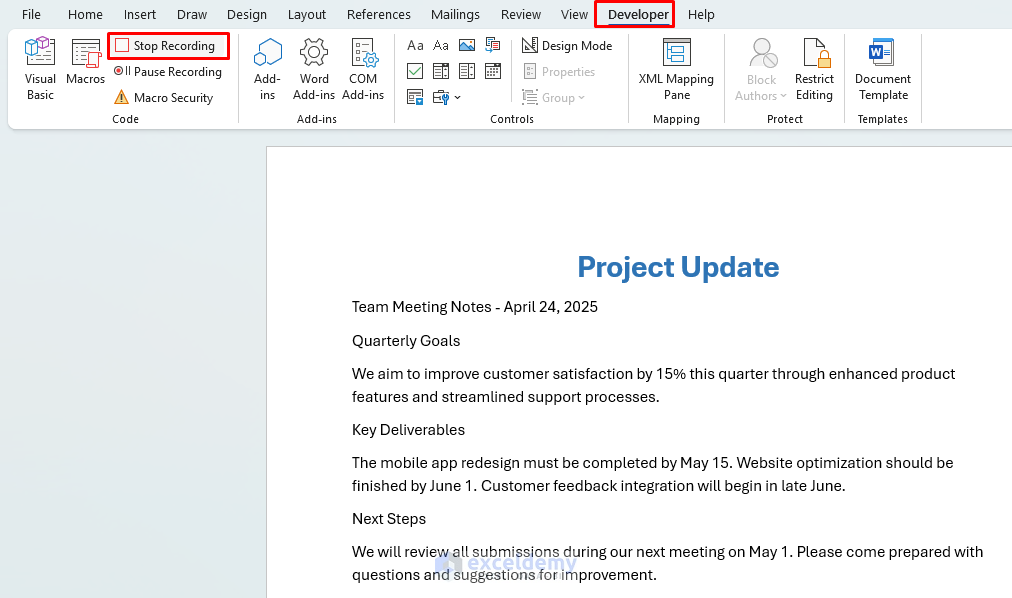
- Go to the Developer tab >> click Stop Recording.
Word allows you to record macros without writing code.
Step 3: Run the Macro
There are several ways to run a macro. You can directly run the macro, or you can assign keyboard shortcuts or buttons.
- Place your cursor where needed.
- Go to the Developer tab >> select Macros.
- In the Macros box;
- Select the macro BoldHeading.
- Click Run.

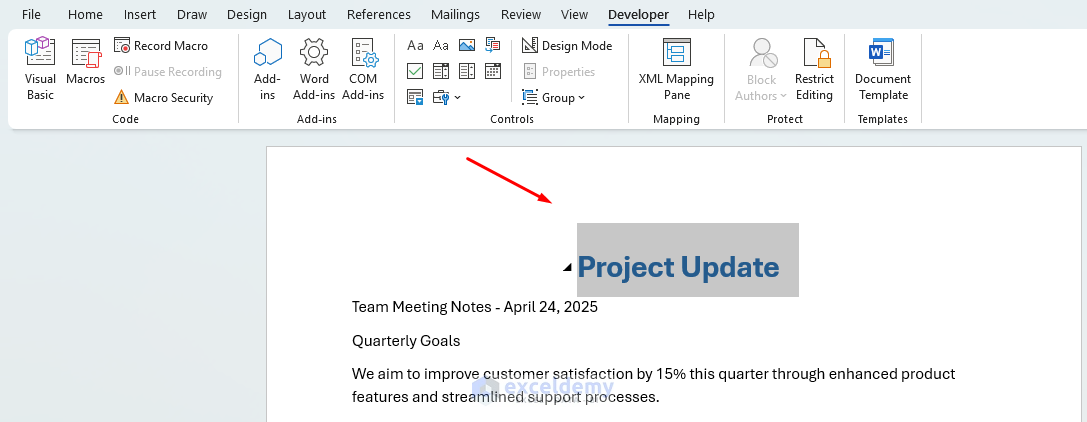
Output:
Step 4: Save Macros: Use .DOCM Format
When saving a document with macros, you will need to use the .docm format.
- Go to the File tab >> select Save As.
- Select Word Macro-Enabled Document (*.docm).
- Click Save.
- This format ensures your macros are preserved and executable.

Edit the Macro (Using VBA)
You can edit the macro to make changes or write advanced logic. Let’s add the color to the heading.
- Go to the Developer tab >> select Macros.
- In the Macros box;
- Select BoldHeading >> click Edit.

- This opens the VBA Editor, where you can edit the code.
Sub BoldHeading()
'
' BoldHeading Macro
'
'
    Selection.Style = ActiveDocument.Styles("Heading 1")
    Selection.Font.Size = 24
    Selection.Font.Bold = wdToggle
    Selection.Font.Color = RGB(0, 128, 0)  ' Add this line for green color
    Selection.ParagraphFormat.Alignment = wdAlignParagraphCenter
End Sub

You’ll need to edit the macro code directly rather than re-recording it to add color to the text.
- Go back to the word.
- Run the BoldHeading macro again.
- It will update the code and add green color to the formatting.

Add a Keyboard Shortcut
You can assign a button or keyboard shortcuts for frequently used macros.
Insert Button:
- Open the Record Macro dialog box,
- Select Button.
- It will open the Word Options box >>select Quick Access Toolbar.
- Select Normal.NewMacros.BoldHeading >> click Add >> click OK.
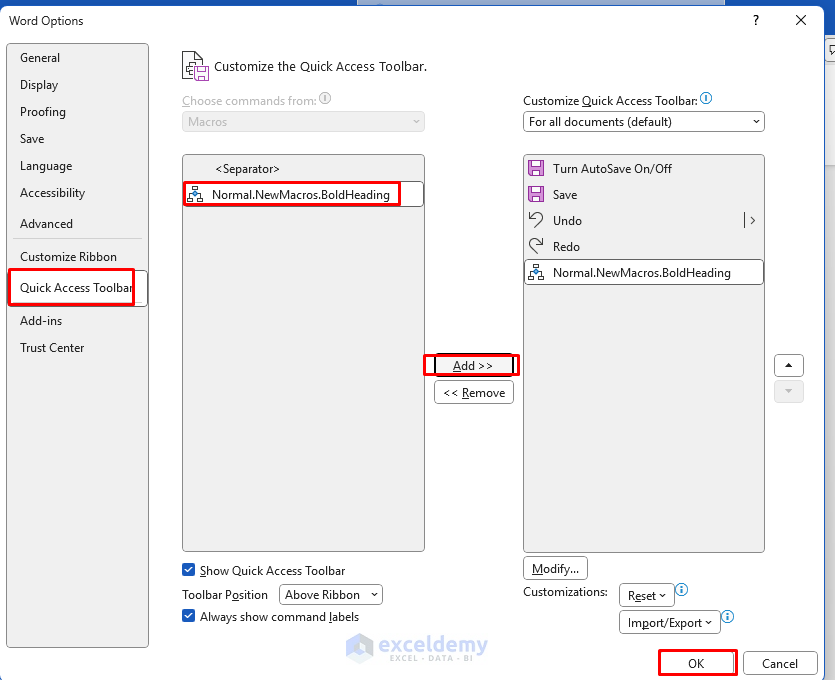
- A button will be assigned to the Quick Access Toolbar.
- Select any text >> click on the Button.
- It will apply the formatting to the text.

Keyboard Shortcut:
- Open the Record Macro dialog box,
- Select Keyboard.
- In the Customize Keyboard box;
- Press new shortcut key: Alt+Shift+H.
- Click Assign.
- Click Close.
- Now, press shortcuts to apply the formatting.

To apply keyboard shortcuts from the macros list:
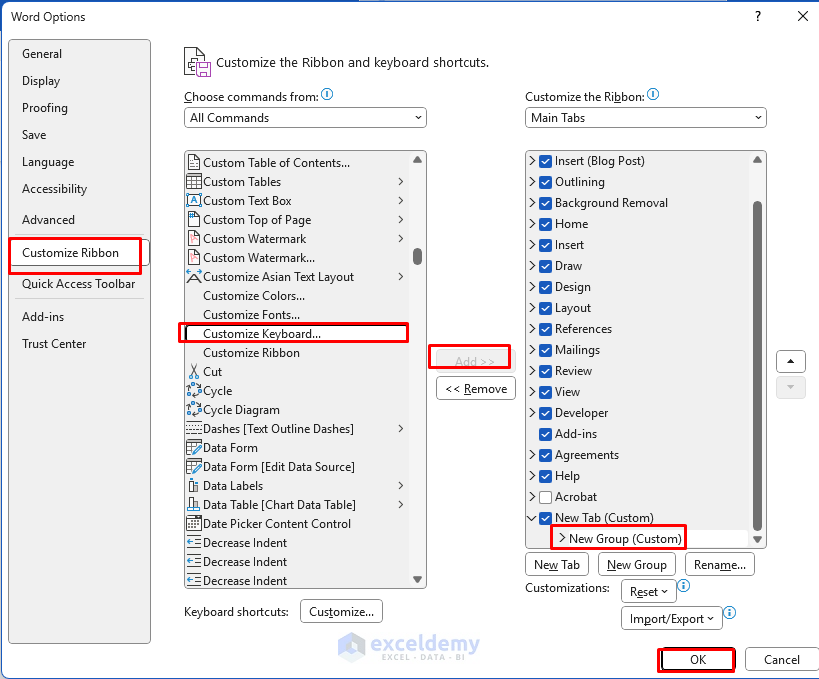
- Go to the File tab >> select Options >> select Customize Ribbon.
- Select New Group (Custom).
- Select Customize Keyboard >> click Add.
- Click OK.
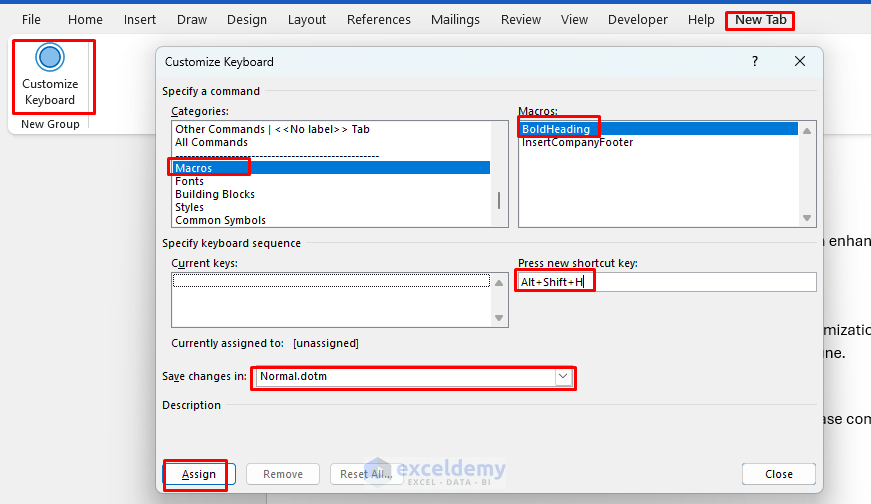
- Go to the New Tab >> select Customize Keyboard.
- Under Categories >> select Macros.
- From Macros >> select your macro.
- Click in the Press new shortcut key field.
- Press your desired key combination (e.g., Alt+Shift+H).
- Select Assign >> click Close.
Advanced Macros: Insert Company Footer
- Go to the Developer tab >> select Record Macro.
- In the Record Macro box;
- Insert Macro name: InsertCompanyFooter.
- Choose Store macro in: All Documents (Normal.dotm).
- Click OK.
- Go to the Insert tab >> click on Footer >> select Blank.

- Place your cursor in the footer area.
- Type:
© 2025 MyCompany Inc. | All Rights Reserved
- Press Esc twice to exit the footer area and return to the main document.

- Go back to the Developer tab >> click Stop Recording.

- Open a new document.
- Go to the Developer tab >> select Macros.
- In the Macro box;
- Select the InsertCompanyFooter macro.
- Click Run.
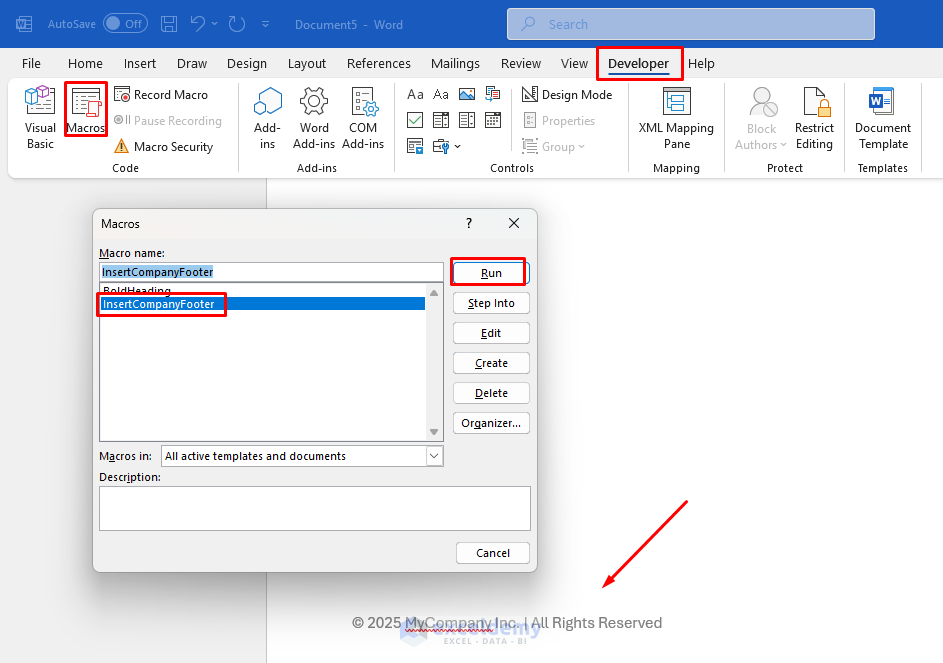
The footer is applied automatically in the new document. If you are not familiar with VBA, you can also create advanced macros to automate tasks just by recording macros.
Underlying VBA Code:
Sub InsertCompanyFooter()
'
' InsertCompanyFooter Macro
'
'
    If ActiveWindow.View.SplitSpecial <> wdPaneNone Then
        ActiveWindow.Panes(2).Close
    End If
    If ActiveWindow.ActivePane.View.Type = wdNormalView Or ActiveWindow. _
        ActivePane.View.Type = wdOutlineView Then
        ActiveWindow.ActivePane.View.Type = wdPrintView
    End If
    ActiveWindow.ActivePane.View.SeekView = wdSeekCurrentPageFooter
    Application.Templates( _
        "C:\Users\hemay\AppData\Roaming\Microsoft\Document Building Blocks\1033\16\Built-In Building Blocks.dotx" _
        ).BuildingBlockEntries(" Blank").Insert Where:=Selection.Range, RichText _
        :=True
    Selection.TypeBackspace
    Selection.PasteAndFormat (wdFormatPlainText)
    Selection.EscapeKey
    If ActiveWindow.View.SplitSpecial <> wdPaneNone Then
        ActiveWindow.Panes(2).Close
    End If
    If ActiveWindow.ActivePane.View.Type = wdNormalView Or ActiveWindow. _
        ActivePane.View.Type = wdOutlineView Then
        ActiveWindow.ActivePane.View.Type = wdPrintView
    End If
    ActiveWindow.ActivePane.View.SeekView = wdSeekCurrentPageHeader
    Selection.EscapeKey
End Sub
Troubleshoot: Macro Security
For security reasons, Word may disable macros in downloaded files.
To enable them:
- Go to the File tab >> select Info.
- Click Enable Content (only if you trust the source).
To manage settings:
- Go to the File tab >> select Options.
- Select Trust Center >> choose Trust Center Settings.
- In the Trust Center box;
- Select Macro Settings.
- Select Enable all macros.
- Click OK.
- Click OK.

- Macro Not Working: Try recording it again with careful attention to each step.
- Macro Too Complex: Break it down into smaller, simpler macros.
Tips and Best Practices
- Try to use descriptive names for macros.
- Assign shortcut keys for frequently used macros.
- Test macros on copies of important documents first.
- Keep backups of important macros.
- Use comments in your VBA code for clarity.
- Keep macro code simple and focused on specific tasks.
Conclusion
Macros are a powerful way to automate your work in Microsoft Word. By mastering macros in Microsoft Word, you can automate your regular tasks, which will improve your efficiency with document creation and formatting. Macros can save hours of manual effort. Start with recording simple actions and gradually explore custom VBA coding as you become more confident.
Get FREE Advanced Excel Exercises with Solutions!
