This is an overview:

3 variables in different data types were shown in a MsgBox.
The VBA MsgBox Function
- Objective:
The MsgBox function is used to create a message box.
- Syntax:
MsgBox(Prompt, [Button As VbMsgBoxStyle = vbOkOnly], [Title], [HelpFile], [Context]) As VbMsgBoxResult

- Arguments Explanation:
| Argument | Required/Optional | Explanation |
|---|---|---|
| Prompt | Required | A statement will be shown in the message box. |
| [Buttons] | Optional | Button and icon codes to display buttons and icons in the message box. |
| [Title] | Optional | Title or name of the message box. |
| [HelpFile] | Optional | Index or link which is assigned to the Help button in the message box. |
| [Context] | Optional | Index or specific topic number of the Help file. |
- Return Parameter:
The function returns a statement along with the defined buttons in the message box.
- Final Outcome:
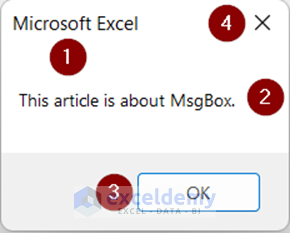
1 is the default Title, 2 is the prompt, 3 is the default button and 4 is the sign to close the Msgbox.
How to Launch VBA Editor in Excel
If you do not have the Developer tab on the ribbon, add it:
- Click the File tab.
- Click Options.

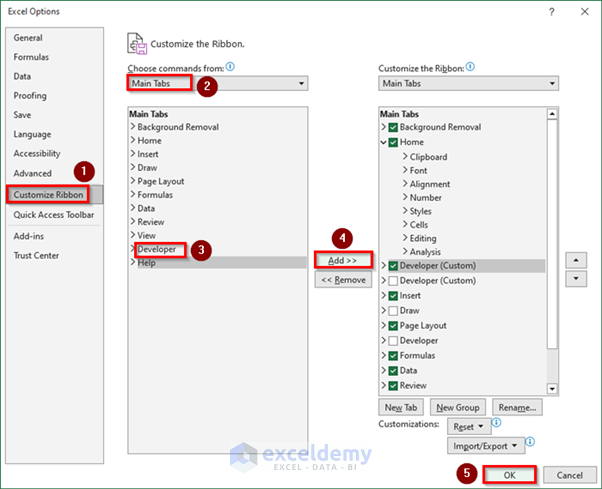
- Go to Customize Ribbon >> select Developer in Main Tabs >> click Add.
- Click OK.
The Developer tab will be added.
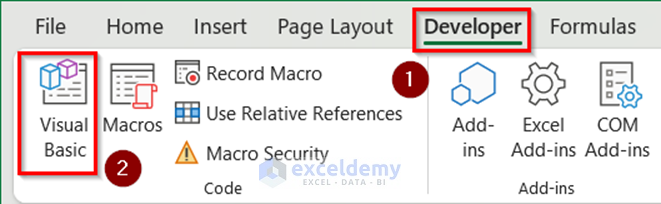
- Go to the Developer tab >> click Visual Basic.
- In the Microsoft Visual Basic Editor, click Insert >> select Module.

How to Create a MsgBox Using VBA in Excel

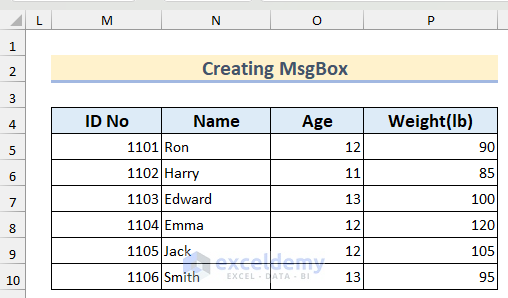
There are different sample worksheets. In the first worksheet, the dataset contains students’ ID No, Name, Age, and Weight.
Create a basic MsgBox showing the sheet name.
Add a prompt to the MsgBox Function. Here, the ActiveSheet.name property is used to show the name of the active sheet and assign that value as a variable. You can show other properties of a worksheet in a MsgBox.
Add a Title argument to add titles to the Msgbox. It will help identify the MsgBox.
- Enter the following code into the module:
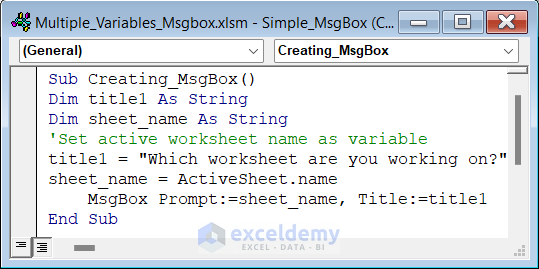
Sub Creating_MsgBox()
Dim title1 As String
Dim sheet_name As String
'Set active worksheet name as variable
title1 = "Which worksheet are you working on?"
sheet_name = ActiveSheet.name
MsgBox Prompt:=sheet_name, Title:=title1
End Sub
Code Breakdown
- The sub procedure Simple_Msgbox is declared.
- Declare sheet_name and title1 as string. Insert a string value as title1 and assign the value of the active worksheet name to sheet_name using the name property.
- The MsgBox is displayed using the MsgBox function, with the message prompt specified as the value of sheet_name. Title is specified as variable title1.
- Click run to see the MsgBox.
It is displayed. By default, it displays OK.
Read More: How to Use MsgBox and InputBox in VBA Excel
How to Display Values in a VBA MsgBox to show Variables in Excel
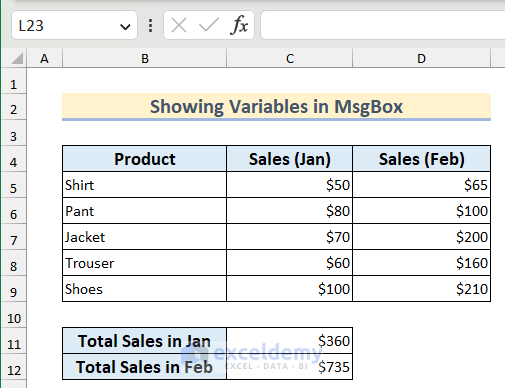
The dataset contains the Sales of January and February and Total Sales.
- Use the following code in the module.
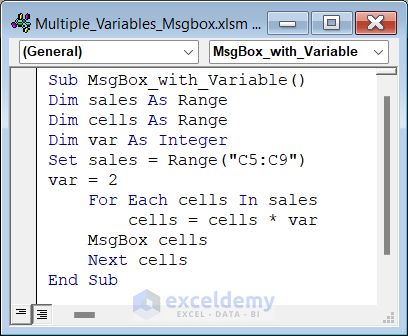
Sub MsgBox_with_Variable()
Dim sales As Range
Dim cells As Range
Dim var As Integer
Set sales = Range("C5:C9")
var = 2
For Each cells In sales
     cells = cells * var
MsgBox cells
Next cells
End Sub
Declare sales and cells as Range and var as Integer. Set the C5:C9 as sale variable and assign 2 as var. The For loop iterates through cells in the sales range. Within each iteration, the cells value will be doubled and shown in a MsgBox.
- Run the code.
- The value of each variable will be displayed.
Read More: Excel VBA: Work with Variable in MsgBox
How to Show Multiple Values with Variables in VBA MsgBox – 5 Examples
Example 1 – Adding the Ampersand Between Variables to Show Multiple Values in a VBA MsgBox

Show string and integer values as variables in the MsgBox.
- Enter the following code into the module.
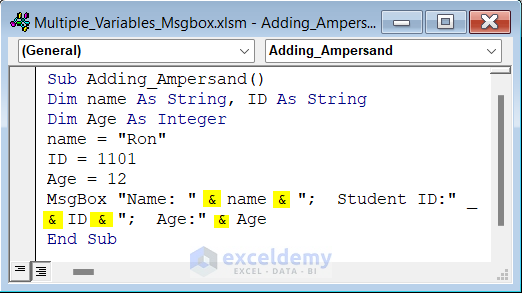
Sub Adding_Ampersand()
Dim name As String, ID As String
Dim Age As Integer
name = "Ron"
ID = 1101
Age = 12
MsgBox "Name: " & name & ";  Student ID:" _
& ID & ";  Age:" & Age
End Sub
Declare name as string and assign it the value “Ron”, ID as 1101 is also a string and Age as 12 an integer. Show them in the MsgBox adding the ampersand between them.
- Click run button to see the MsgBox.
Example 2 – Using the Addition Operator Between Variables to Show String Values Only in the VBA Msgbox
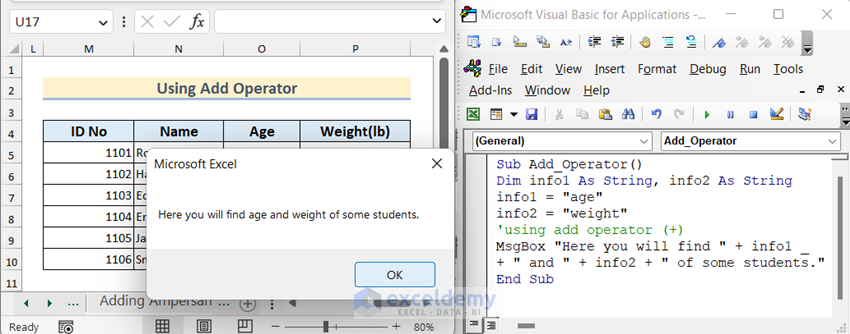
Convert integers to a string:
- Enter the following code into the module.
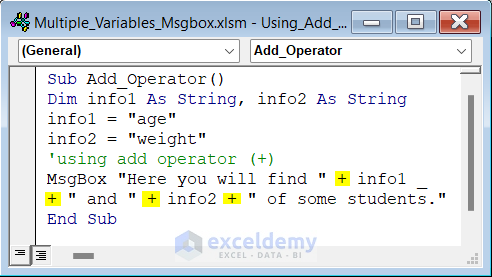
Sub Add_Operator()
Dim info1 As String, info2 As String
info1 = "age"
info2 = "weight"
'using add operator (+)
MsgBox "Here you will find " + info1 _
+ " and " + info2 + " of some students."
End Sub
Declare info1 and info2 as string values and assign “age” as the value of info1 and “weight” as the value of info2. Use the addition operator to show these variables in the MsgBox.
- Click run button to see the MsgBox.
Example 3 – Creating a VBA Msgbox with Multiple Variables in Multiple Lines
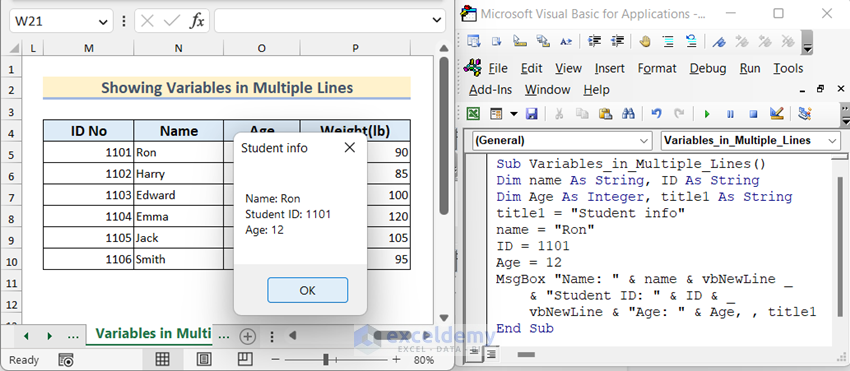
Create a line break.
- Use the following code in the module.
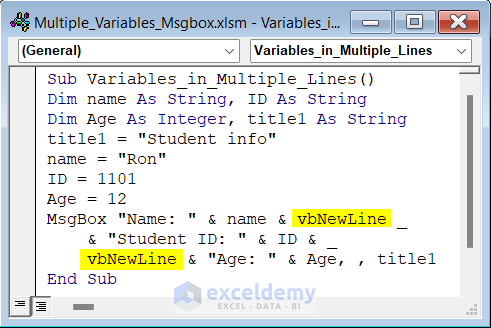
Sub Variables_in_Multiple_Lines()
Dim name As String, ID As String
Dim Age As Integer, title1 As String
title1 = "Student info"
name = "Ron"
ID = 1101
Age = 12
MsgBox "Name: " & name & vbNewLine _
& "Student ID: " & ID & _
vbNewLine & "Age: " & Age, , title1
End Sub
Declare variables as in the previous examples. To add new lines for each variable, use vbNewLine property after each variable.
- Click run button to see the MsgBox.
Example 4 – Returning Multiple Corresponding Values in a MsgBox Based on the User Input
Take an ID No as input value and check if that value is in the dataset:
- Use the following code in the module.
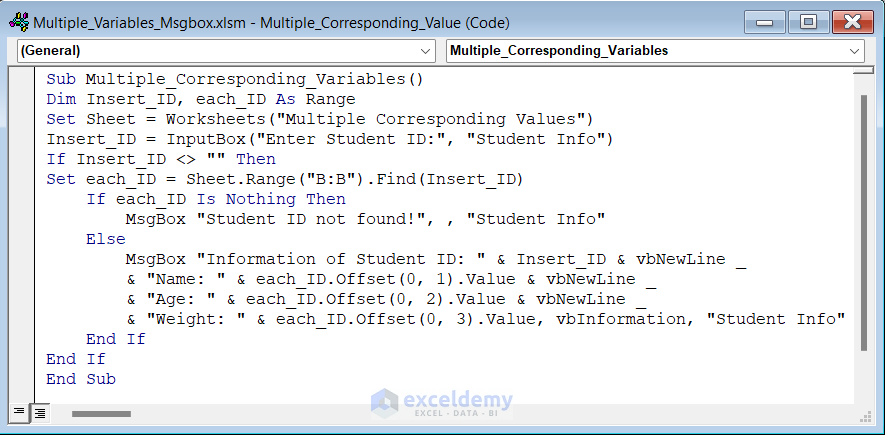
Sub Multiple_Corresponding_Variables()
Dim Insert_ID, each_ID As Range
Set Sheet = Worksheets("Multiple Corresponding Values")
Insert_ID = InputBox("Enter Student ID:", "Student Info")
If Insert_ID <> "" Then
Set each_ID = Sheet.Range("B:B").Find(Insert_ID)
If each_ID Is Nothing Then
     MsgBox "Student ID not found!", , "Student Info"
Else
     MsgBox "Information of Student ID: " & Insert_ID & vbNewLine _
     & "Name: " & each_ID.Offset(0, 1).Value & vbNewLine _
     & "Age: " & each_ID.Offset(0, 2).Value & vbNewLine _
     & "Weight: " & each_ID.Offset(0, 3).Value, vbInformation, "Student Info"
End If
End If
End Sub
Code Breakdown
- declares each_ID as a range.
- sets the worksheet “Multiple Corresponding Values” as Sheet.
- creates an InputBox to take any ID No as Input and assigns the value to Insert_ID.
- searches for the input value in Column B using the Find function
- the If-Else statement returns Student ID not Found! If the input value is not present in the range. Otherwise, it returns the value of the ID using the Offset Function
- Run the code and enter the ID No you are looking for. Here, 1102.
It is displayed in the Msgbox.
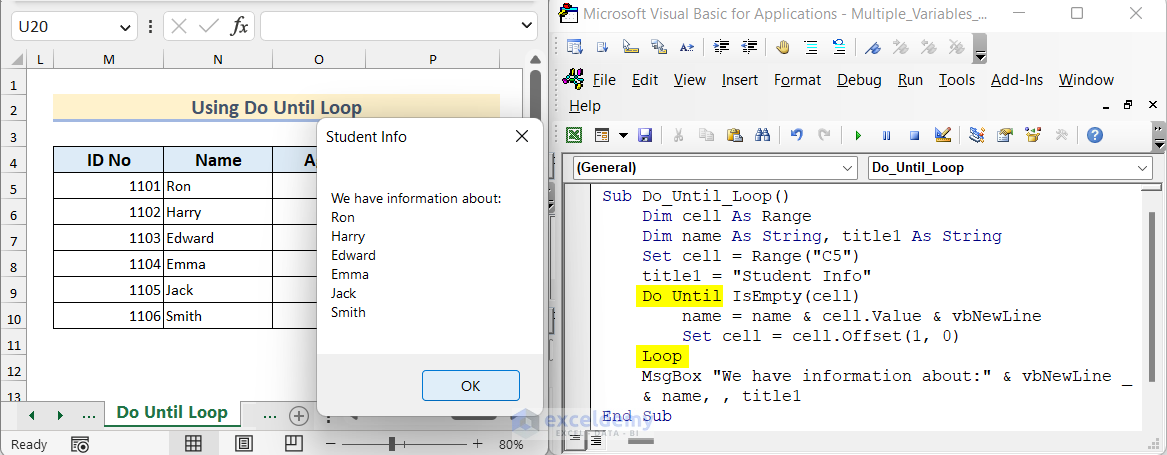
Example 5 – Showing Multiple Variables in a MsgBox Using the Do Until Loop
Find students’ names whose information is present in the worksheet.
- Enter this code in the module.
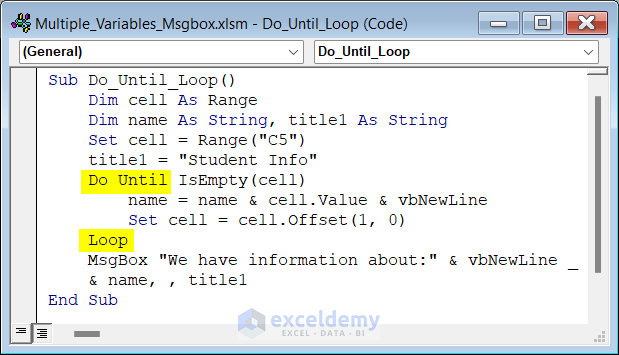
Sub Do_Until_Loop()
Dim cell As Range
Dim name As String, title1 As String
Set cell = Range("C5")
title1 = "Student Info"
Do Until IsEmpty(cell)
     name = name & cell.Value & vbNewLine
     Set cell = cell.Offset(1, 0)
Loop
MsgBox "We have information about:" & vbNewLine & name, , title1
End Sub
Code Breakdown
- declare cell as range and name and title1 as string.
- set the cell as the first cell of the range: C5 and let a string as title1.
- Use a Do Unit loop until the cell is empty using the IsEmpty
- each name will be added as a name keeping the previous value and adding a new line.
- use the offset property, so that the loop can continue to the next row.
- use the MsgBox function to show all the values stored as name
- Run the code.
Names present in the worksheet are displayed in the MsgBox.
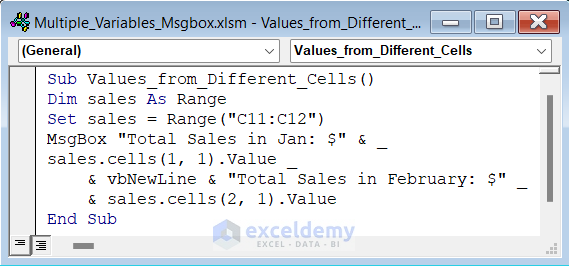
How to Display Two Values from Different Cells Using a VBA MsgBox in Excel
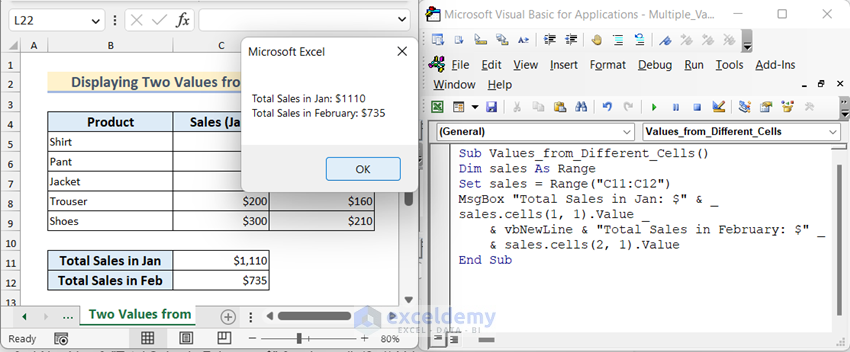
To show the Total Sales in January and February in a MsgBox :
- Enter the following code in the module.
Sub Values_from_Different_Cells()
Dim sales As Range
Set sales = Range("C11:C12")
MsgBox "Total Sales in Jan: $" & sales.cells(1, 1).Value _
& vbNewLine & "Total Sales in February: $" & sales.cells(2, 1).Value
End Sub
Declare sales as Range and assign the value of C11:C12 to it. Use the Range.Cells.Value property to show the value of the specific cell in the MsgBox. As the range is sales, use sales.cells. Here, cells(1,1) define the first row and first column of the defined range and cells (2,1) define the second row and first column of the defined range.
- Run the code to display the two values in the MsgBox
How to Create a MsgBox That Takes User Input Value & Assigns Value to a Variable in Excel
Use the return value of a MsgBox and assign it as a variable. For 2 different values of the variable, display another MsgBox showing 2 different messages.
- Enter the following code in the module.
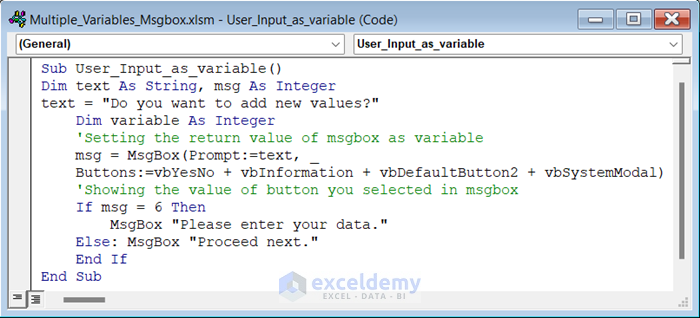
Sub User_Input_as_variable()
Dim text As String, msg As Integer
text = "Do you want to add new values?"
Dim variable As Integer
'Setting the return value of msgbox as variable
msg = MsgBox(Prompt:=text, _
Buttons:=vbYesNo + vbInformation + vbDefaultButton2 + vbSystemModal)
'Showing the value of button you selected in msgbox
If msg = 6 Then
     MsgBox "Please enter your data."
Else: MsgBox "Proceed next."
End If
End Sub
Code Breakdown
- Declare text as string and assign the value as “Do you want to add new values?” and msg and variable as Integer.
- Assign the return value of a MsgBox as msg variable. Set the text variable as prompt and use the Yes No button. When the user clicks Yes the value of msg is 6. For No, its value is 7.
- Use an If else statement to return “Please enter your data.” in a MsgBox if the value of msg is 6. Otherwise, to return “Next.”
- Click run button to display the first Msgbox. If you click Yes, another Msgbox will be displayed with the prompt “Please enter your data.” If you click No, it will show “Next.”
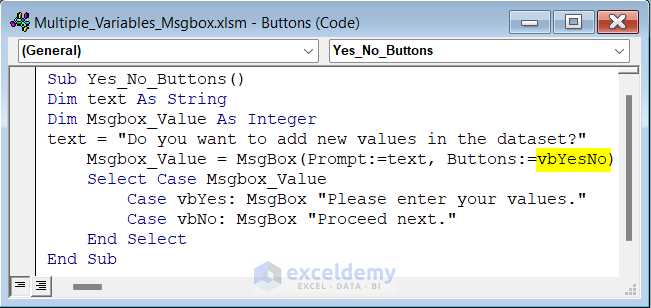
How to Create a MsgBox with Buttons in Excel
Add different types of buttons to the MsgBox and set a default. Different buttons have different button codes and return different values:
- Button Constants:
| Button Codes | Values | Description |
|---|---|---|
| vbOKOnly | 0 | Shows the Ok button only (Default). |
| vbOKCancel | 1 | Shows OK and Cancel buttons. |
| vbAbortRetryIgnore | 2 | Shows Abort, Retry and Ignore buttons. |
| vbYesNo | 3 | Shows Yes and No buttons. |
| vbYesNoCancel | 4 | Shows Yes, No and Cancel buttons. |
| vbRetryCancel | 5 | Shows Retry and Cancel buttons. |
| vbMsgBoxHelpButton | 16384 | Shows Help Button. |
| vbDefaultButton1 | 0 | Defines the first button default. |
| vbDefaultButton2 | 256 | Defines the second button default. |
| vbDefaultButton3 | 512 | Defines the third button default. |
| vbDefaultButton4 | 768 | Defines the fourth button default. |
| vbMsgBoxRight | 524288 | The alignment of the text is right. |
| vbMsgBoxRtlReading | 1048576 | Text reading from right to left like Arabic and Hebrew languages. |
- To create a Yes / No button, use the following code.
Sub Yes_No_Buttons()
Dim text As String
Dim Msgbox_Value As Integer
text = "Do you want to add new values in the dataset?"
Msgbox_Value = MsgBox(Prompt:=text, Buttons:=vbYesNo)
Select Case Msgbox_Value
     Case vbYes: MsgBox "Please enter your values."
     Case vbNo: MsgBox "Proceed next."
End Select
End Sub
Declare text as String and assign the value to show as prompt to the MsgBox. As Buttons, use vbYesNo to create a Yes No button. The Select Case statement returns two different values for each button.
- Run the code.
You will get a MsgBox with Yes / No buttons. If you select Yes, the MsgBox will show “Please enter your values.” Otherwise, it will display “Next.”
- Set a default button for this Msgbox. Use the following code in the module.
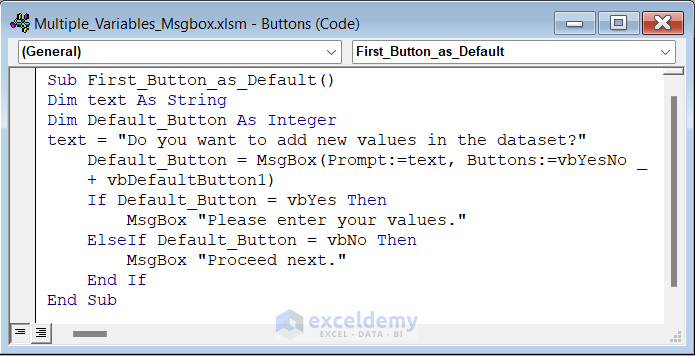
Sub First_Button_as_Default()
Dim text As String
Dim Default_Button As Integer
text = "Do you want to add new values in the dataset?"
Default_Button = MsgBox(Prompt:=text, Buttons:=vbYesNo + vbDefaultButton1)
If Default_Button = vbYes Then
     MsgBox "Please enter your values."
ElseIf Default_Button = vbNo Then
     MsgBox "Proceed next."
End If
End Sub
Add vbDefaultButton1 to the vbYesNo constant to set the first button as default.
- Run the code.
The Yes button will be selected by default.
You can set any button as default in a MsgBox.
Read More: Create VBA MsgBox Custom Buttons in Excel
How to Change the Icon Style of the MsgBox Using VBA in Excel
You can customize the style of a MsgBox using one of the available constants as the second argument of the “MsgBox” function:
- Icon Constants:
| Icon Codes | Values | Description |
|---|---|---|
| vbCritical | 16 | Displays the critical message icon- Thin white cross inside a red-filled circle. |
| vbQuestion | 32 | Displays the question message icon- White question mark inside a blue-filled circle. |
| vbExclamation | 48 | Displays the warning message icon- Black exclamatory symbol inside a yellow-filled triangle. |
| vbInformation | 64 | Displays information message icon- The letter ‘i’ in white inside a blue-filled circle. |
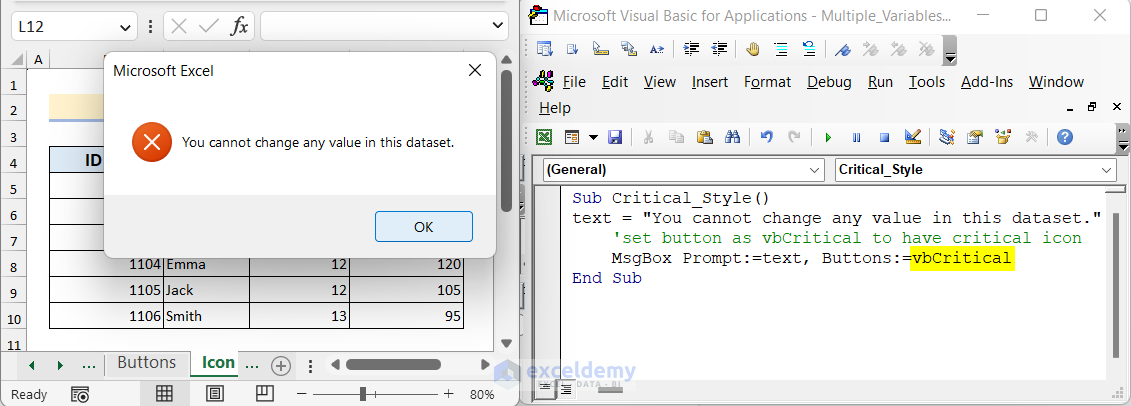
- To create a MsgBox with a Critical icon, use the following code in the module.
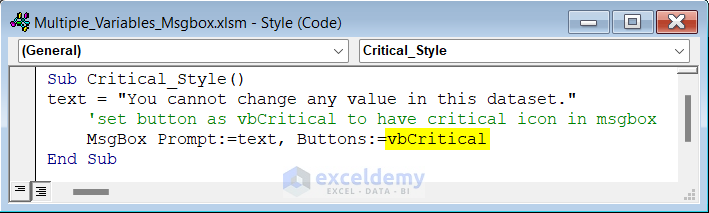
Sub Critical_Style()
text = "You cannot change any value in this dataset."
'set button as vbCritical to have critical icon in msgbox
MsgBox Prompt:=text, Buttons:=vbCritical
End Sub
Set vbCritical as Buttons in the MsgBox function.
- Run the code.
The Msgbox will have a Critical Icon.
Use other icon codes in the MsgBox.
How to Create an Application & System Modal MsgBox Using VBA in Excel
There are two types of modals in a VBA MsgBox: Application modal and System modal.
In the Application modal, the user must reply to the message box in order to use the application (Excel).
In the System modal, the user must reply to the message box in order to use all the applications in OS.
To set an application modal Msgbox, use vbApplicationModal as buttons and vbSystemModal as system modal MsgBox.
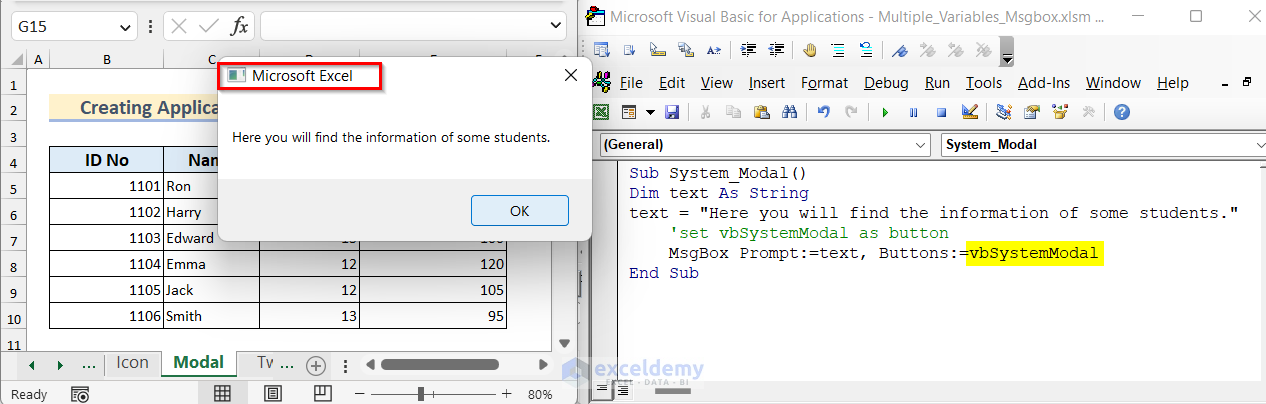
- To create a MsgBox as a System modal, use the following code in the module.
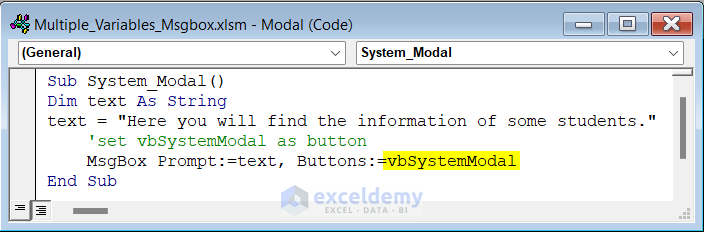
Sub System_Modal()
Dim text As String
text = "Here you will find the information of some students."
'set vbSystemModal as button
MsgBox Prompt:=text, Buttons:=vbSystemModal
End Sub
Use vbSystemModal as Buttons in the MsgBox function.
- Run the code to display the system modal VBA MsgBox.
Things to Remember
- You must add the variables as a prompt in the MsgBox.
- By default the title of any MsgBox is set as Microsoft Excel and the button as OK.
Frequently Asked Questions
1. Can I customize the size of a MsgBox?
No, you can not change or customize the size of a MsgBox.
2. Can I display a MsgBox without any buttons?
No, VBA MsgBox always has at least one button.
3. Can I display a MsgBox that requires the user to enter text?
No, you can not use a MsgBox for that purpose. Use an InputBox to enter text.
Download Practice Workbook
Download the workbook.

