Method 1 – Employ VBA Code in Module
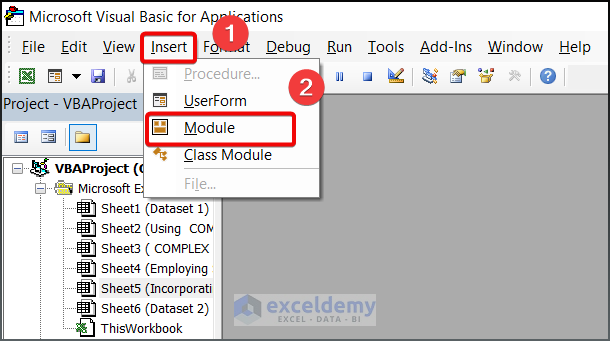
- Press Alt + F11 to open your Microsoft Visual Basic.
- Press Insert > Module to open a blank module.
- Write the following VBA code in your Module1.
Dim DigitalClock As Date
Sub MakingClock()
With Sheet1.Range("B4")
.Value = Format(Time, "hh:mm:ss AM/PM")
End With
Call SetTime
End Sub
Sub SetTime()
DigitalClock = Now + TimeValue("00:00:01")
Application.OnTime DigitalClock, "MakingClock"
End Sub
Sub Disable()
On Error Resume Next
Application.OnTime EarliestTime:=DigitalClock, Procedure:="MakingClock", Schedule:=False
End Sub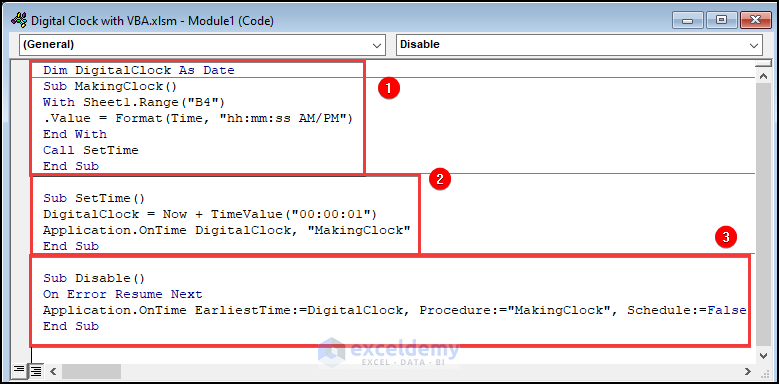
- Explain how the given VBA code works.
⚡ Code Breakdown: The code is divided into three steps.
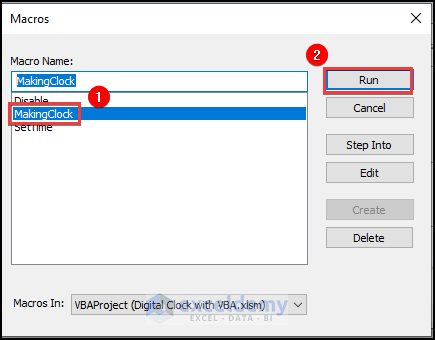
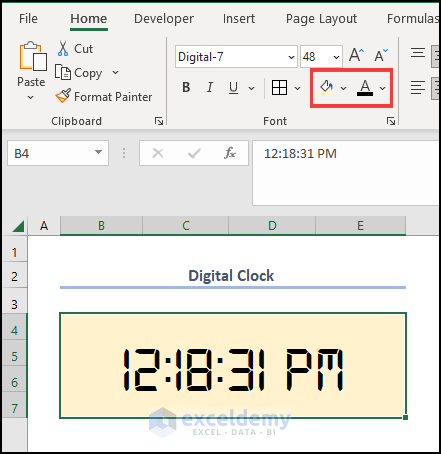
- Press F5 to run your VBA Code. The macro window will appear.
- Click on MakingClock > Run.
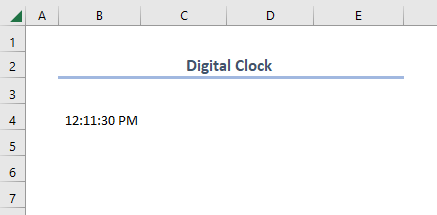
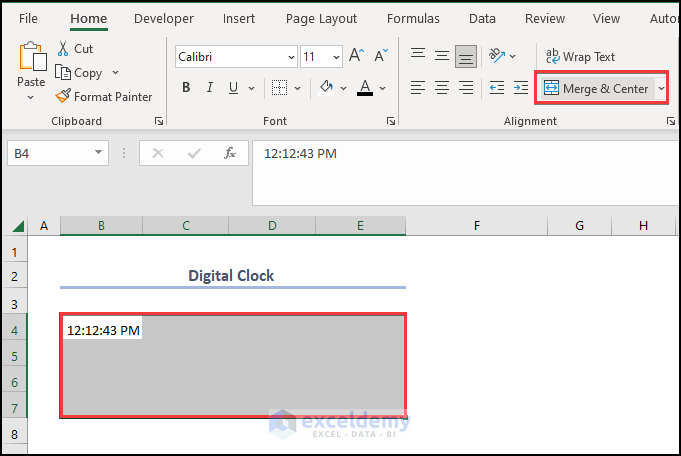
- The output of the code is given below.
Method 2 – Format Alignment and Color Grading
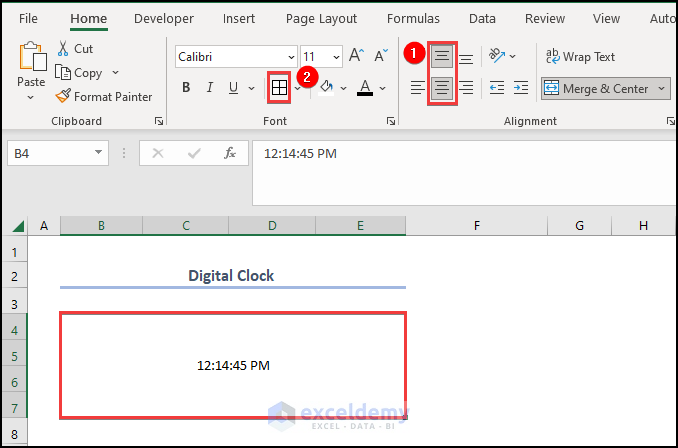
- Select the B4:E7 cells, then press Merge & Center.
- Move the clock in center alignment by clicking the feature as shown in box 1.
- Select All Borders from the borders option.
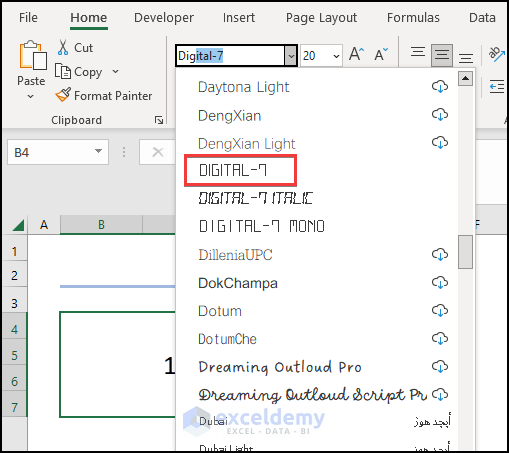
- Change the font to Digital 7.
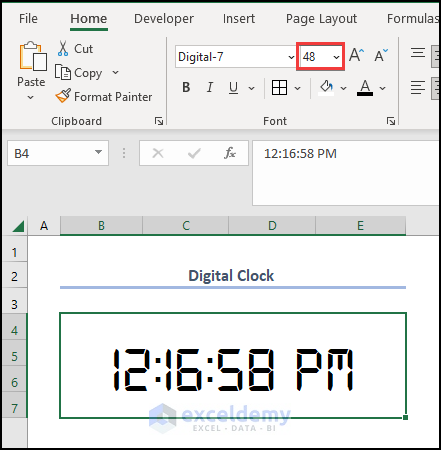
- Increase the font size to 48. You may choose the font size according to your own preference.
- We will change the Font Color as well as the background.
- Select the Font Color and Fill Color features as depicted below.
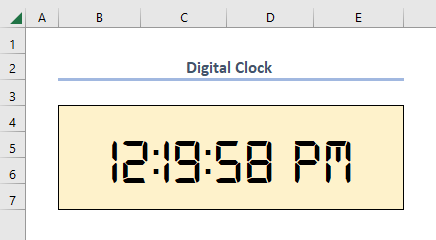
- The final result will appear below.
Download Practice Workbook


Dear Sir
I have to convert the MS formula into VBA code can you help me?
=IF(ISBLANK(E13),””,MAX(D$12:$D12)+1)
Thanks
Hello Imran,
Thanks for the query. What I understand from your comment is that you want to incorporate a VBA code for the formula instead of going to the formula editor. Here are my two cents which might help you in this regard. Look at the dataset attached below.
After pressing the ALT+F11 short key to open your VBA window, paste the following code in the Module box.
Save & Close your VBA window. Then, press F8 to open the Macro dialog box and click on Options.
Create a shortcut key to make the process fast, Crtl+W for instance.
Now see the output as given below.
Hope you have got your answer. Good Luck!
Regards
Miran
Excel & VBA Content Developer