Step 1 – Setting Up Format
To create test cases for Gmail in an Excel sheet, follow these steps:
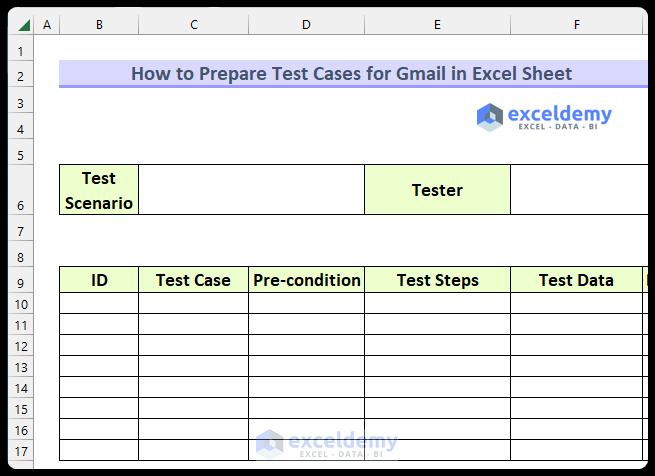
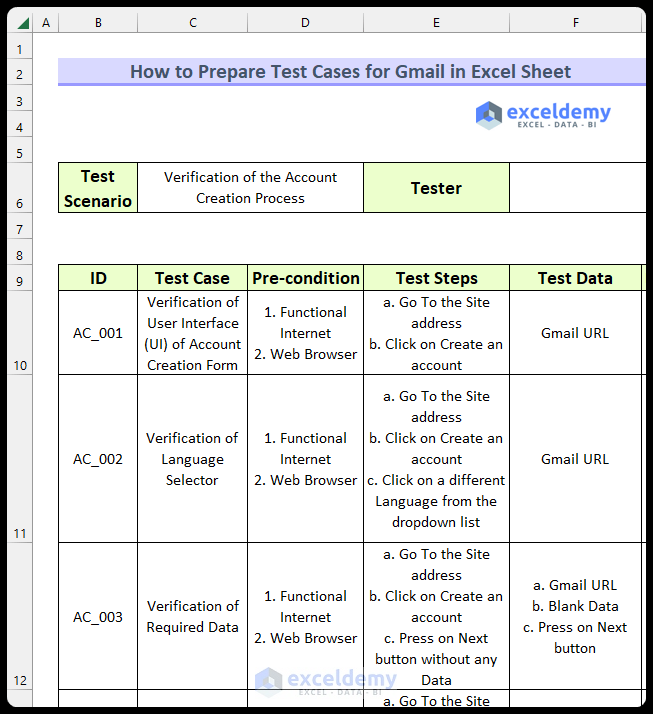
- Create the Template:
- Set up a format with nine columns.
- Divide the template into two parts for better visualization.
- The first part includes the following fields:
- Test Scenario: Describes the scenario for the test cases.
- Tester: Indicates the person responsible for the testing process.
-
- The second part includes the following columns:
- ID: Assign a unique identification number to each test case.
- Test Case: Specify the subject of the test procedure.
- Pre-condition: If there are any prerequisites for a test case, enter them here.
- Test Steps: List the required steps to carry out a test case.
- Test Data: Use this column to enter any necessary data.
- The second part includes the following columns:
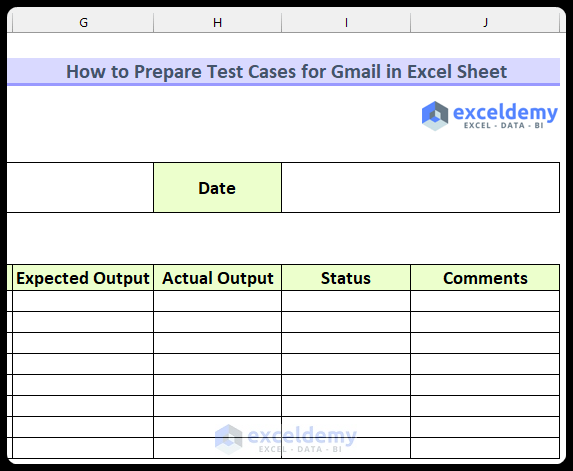
- Additional Columns:
- Add more columns:
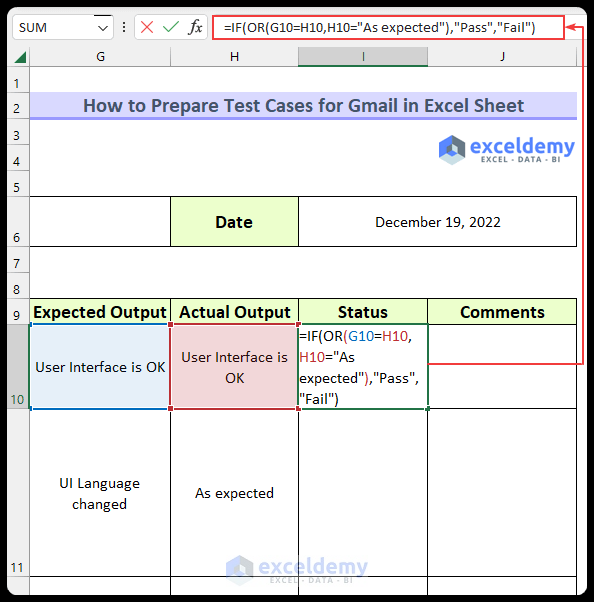
- Date: Record the date when the test is carried out.
- Expected Output: Describe the most likely output if everything works perfectly.
- Actual Output: Document the real output obtained from a test case.
- Status: Indicate whether the test case passed, was skipped, or failed.
- Comments: Use this column for any additional comments by testers.
- Add more columns:
Read More: Create Test Cases for Login Page in Excel Sheet
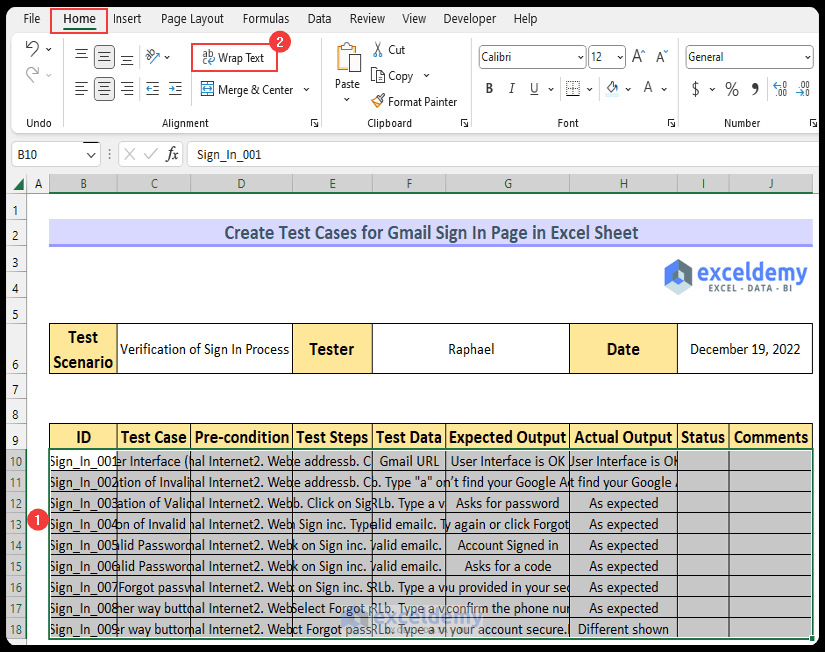
Step 2 – Entering Relevant Data
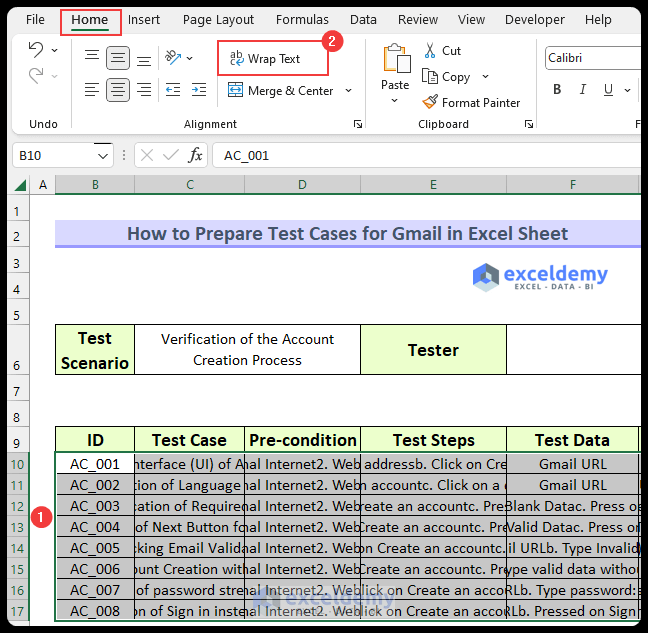
- Enter the relevant data into the empty cells.
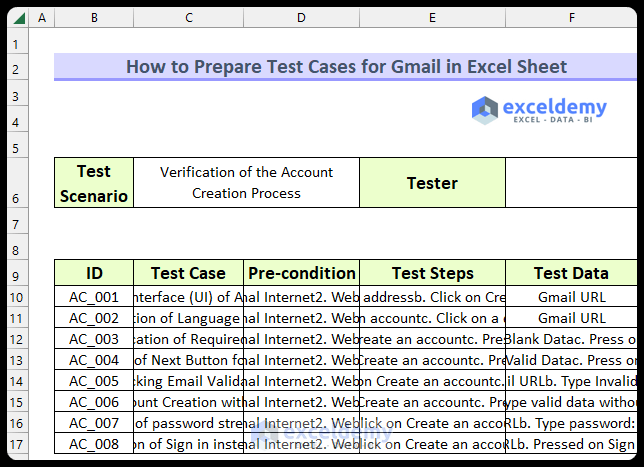
- To improve readability, apply the Wrap Text feature to format cell values.
- You may also need to adjust row heights using AutoFit.
Read More: Test Cases for E-Commerce Website in Excel
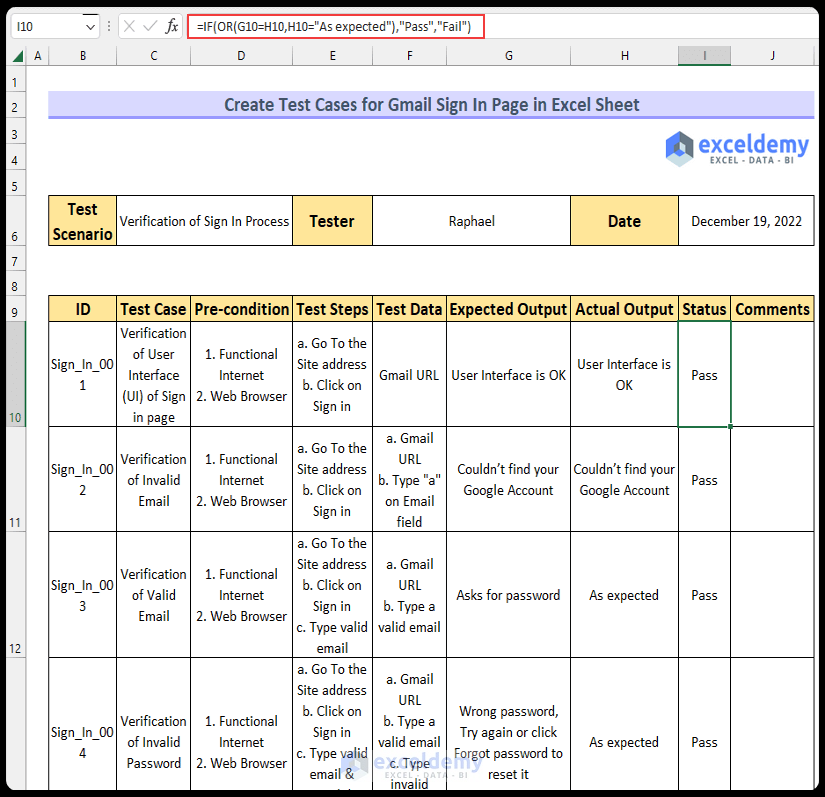
Step 3 – Determining Test Status
In this step, we’ll create a formula using the IF and OR functions to find the test case status for Gmail in the Excel sheet.
- Enter the following formula in cell I10:
=IF(OR(G10=H10,H10="As expected"),"Pass","Fail")
- Press Enter to apply the formula.
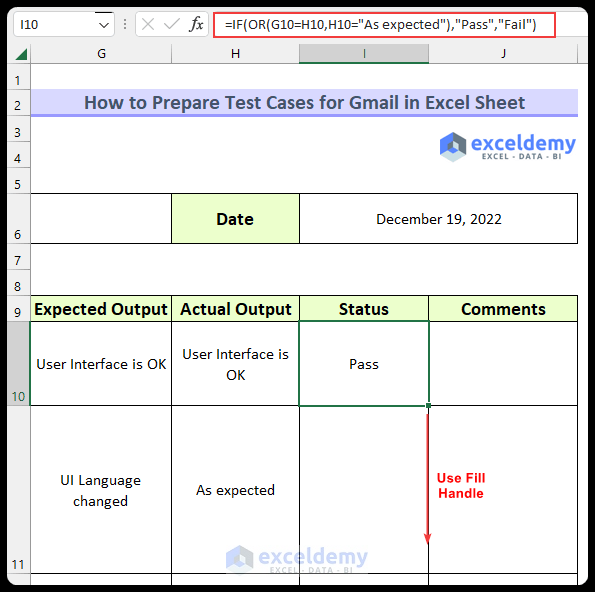
Formula Breakdown
- OR(G10=H10,H10=”As expected”) evaluates to True if either:
- The value of cell G10 equals the value of cell H10, or
- The value of cell H10 is “As expected.”
- The formula simplifies to -> IF(TRUE,”Pass”,”Fail”), resulting in “Pass” as the output.
- Use the Fill Handle to fill the formulas to the rest of the cells.

Read More: How to Create Test Cases for Registration Form in Excel Sheet
Step 4 – Creating Another Test Scenario
Follow these steps to create test cases for the Gmail sign-in page in an Excel sheet:
- Set up the format.
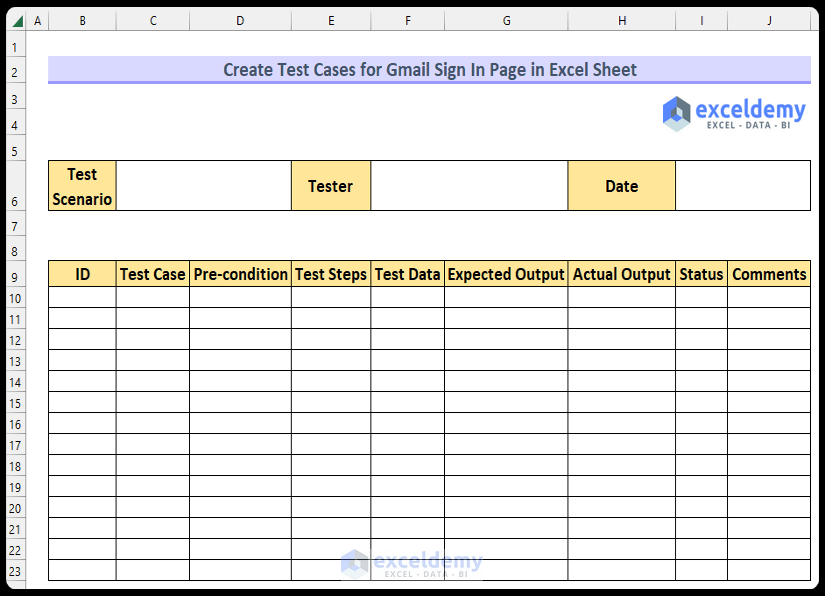
- Enter relevant data and apply Wrap Text.
- Use the same formula as in the account creation form to determine the test status:
=IF(OR(G10=H10,H10="As expected"),"Pass","Fail")
Read More: Test Cases for Banking Application in Excel Sheet
Download Practice Workbook
You can download the practice workbook from here:
Related Article
<< Go Back to Excel Test Cases Template | Excel Templates
Get FREE Advanced Excel Exercises with Solutions!
