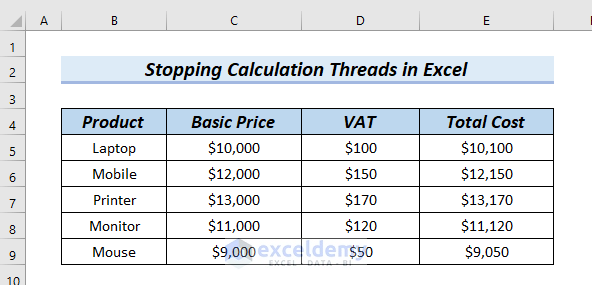
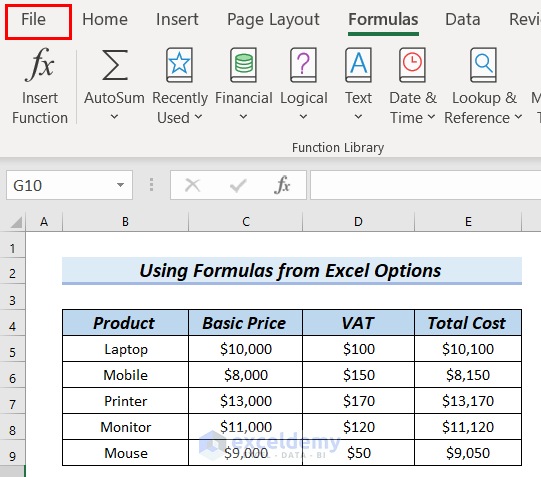
The following table has Product, Basic Price, VAT, and Total Cost columns. Using this table, we will show you how to stop calculating threads in Excel.
Why Do We Need to Stop Calculating Threads?
Calculation Threads are when Excel can recognize segments of the calculation cycle and recalculate simultaneously on different threads. These calculation threads run side by side and, therefore, create a problem. In addition, in many situations, we do not need recalculation. In these cases, stopping calculation threads is necessary.
Steps:
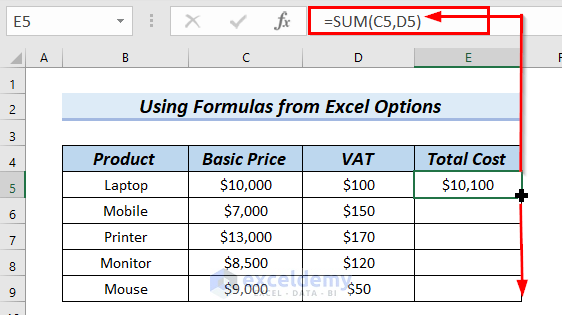
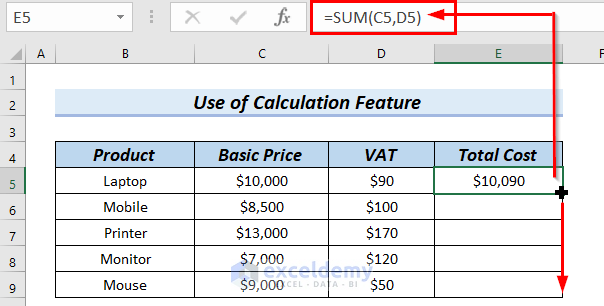
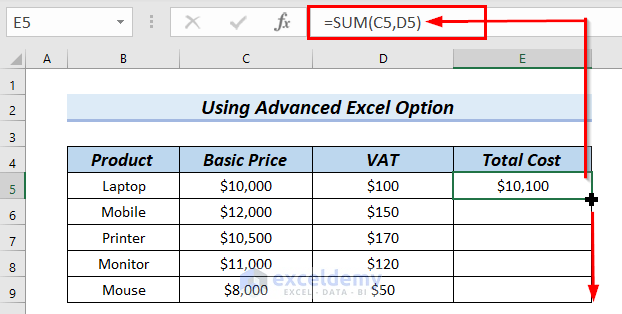
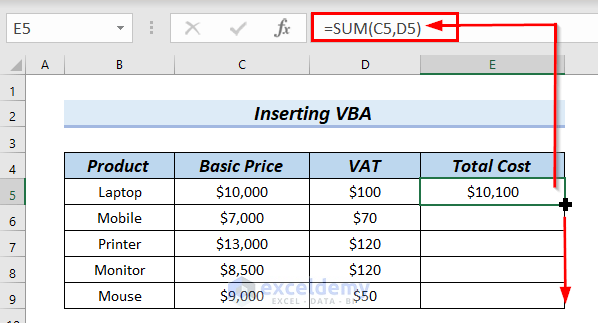
- Enter the following formula in cell E5:
=SUM(C5,D5)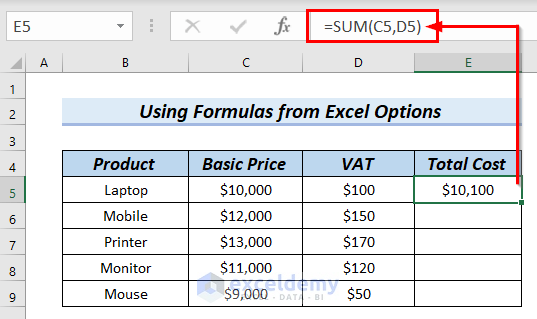
Formula Breakdown
- SUM(C5,D5) → adds cell C5 with cell D5.
- SUM(10000,100) → becomes
- Output: $10100
- Explanation: Here, $10100 is the Total Cost of a particular Product.
- Press ENTER. You can see the result in cell E5.
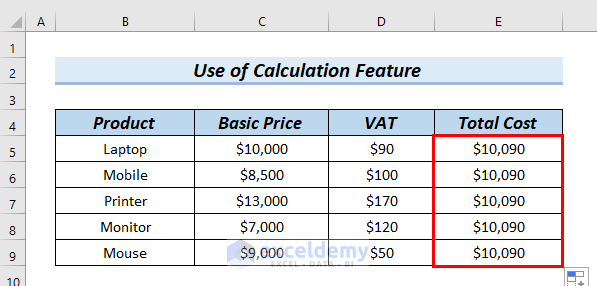
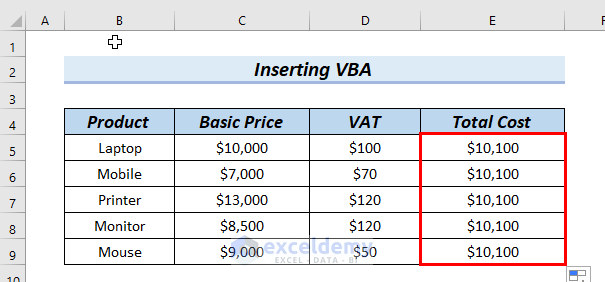
- Drag down the formula with the Fill Handle tool.
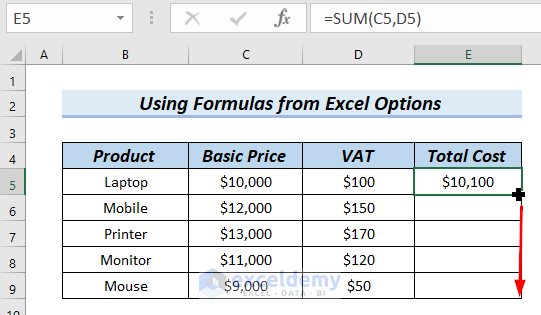
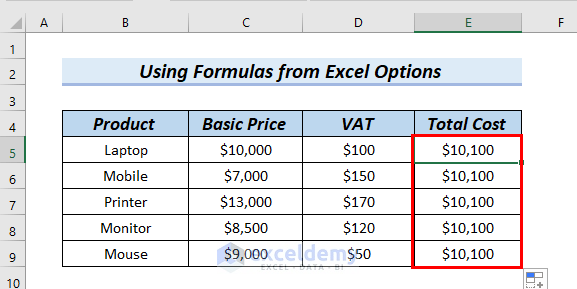
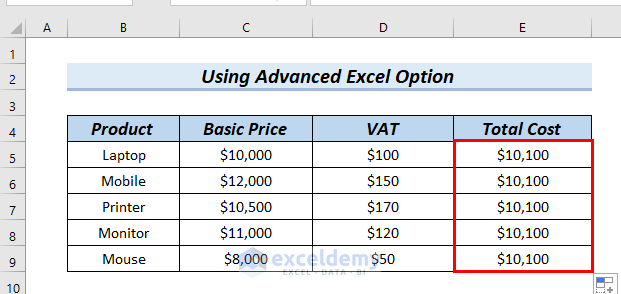
Here, you can see the formula is now automatically calculated in other cells of the Total Cost column.
- Change the value of cell C6, and we will notice that the Total Cost in cell E6 will change.
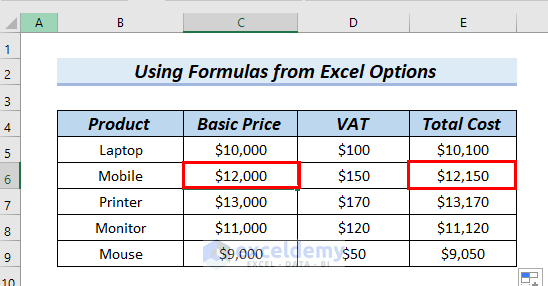
- Set the cell C6 value as $8000, and we can see that cell E6 changes automatically.
This is because of calculation threads. We often do not want calculation threads and AutoFill formulas in cells. To stop calculating threads in Excel, we will use the following four methods.

Method 1 – Using Formulas from Excel Options to Stop Calculating Threads in Excel
Steps:
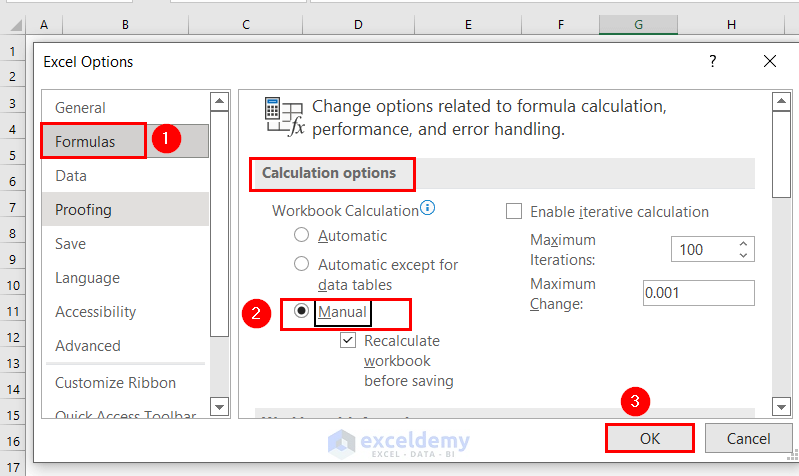
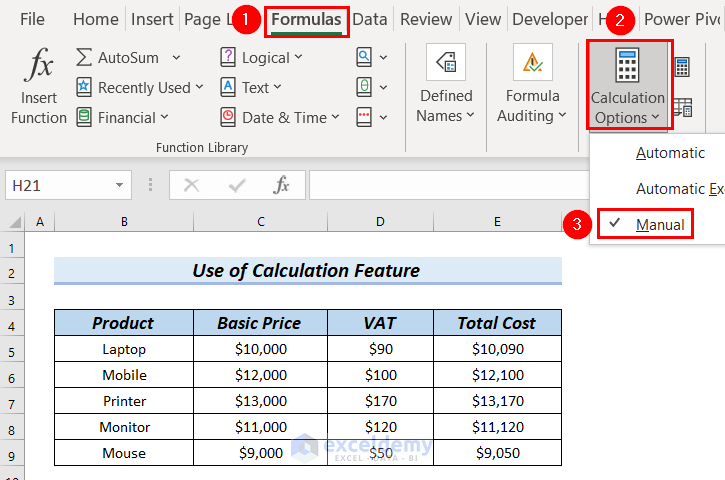
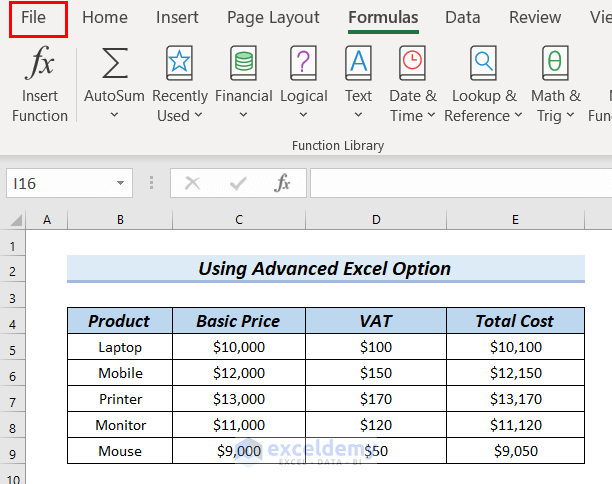
- Go to the File tab.
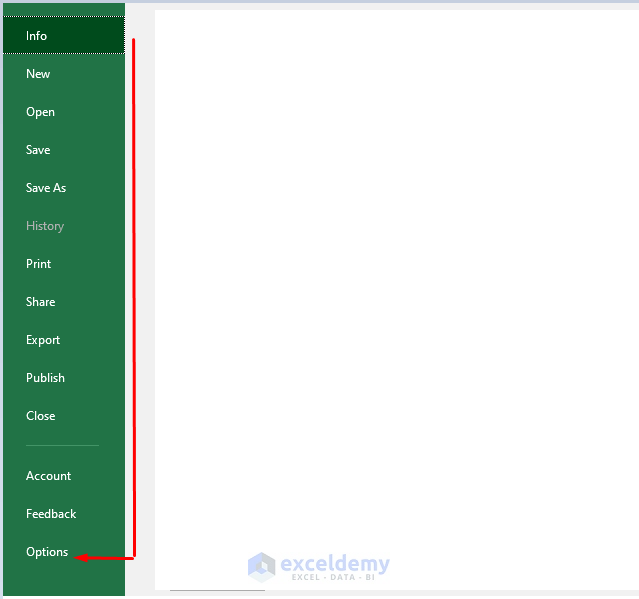
- Select Options.

An Excel Options dialog box will appear.
- Select Formulas >> Scroll down until we find Calculation options.
- From Calculation Options >> select Manual option.
- Click OK.
- Go to our worksheet.
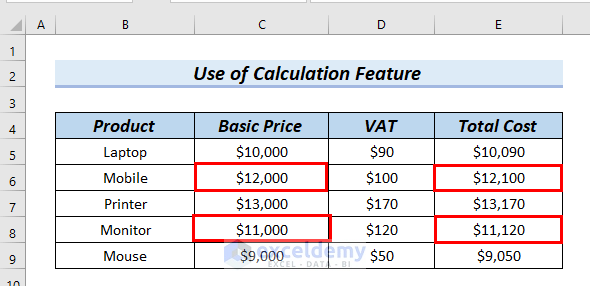
Here, we will change the value of cells C6 and C8. We will also notice whether there is a change in the Total Cost column’s cells E6 and E8.
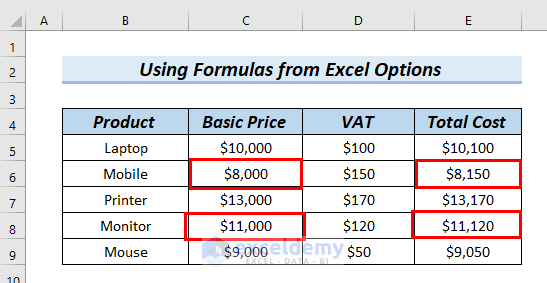
- Change the value of cells C6 and C8 to $7000 and $8500. We can specify that no change has occurred in the Total Cost column’s cells E6 and E8.
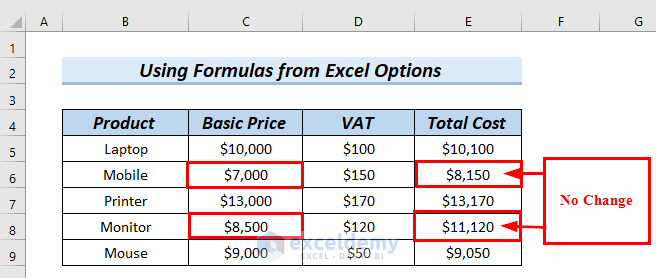
- Check whether the AutoFill feature works or not.
- The formula of cell E5 in the Formula Bar.
- Drag down the formula with the Fill Handle tool.
We can see that the formula of cell E5, not its value, has been copied in the other cells.
The calculating threads in Excel have stopped.
Method 2 – Using Calculation Options Feature to Stop Calculating Threads in Excel
Steps:
- Go to the Formulas tab >> from Calculation Options >> select Manual.
- Change the value of cells C6 and C8. We will notice whether there is a change in the Total Cost column’s cells E6 and E8.
- Change the value of cells C6 and C8 to $85000 and $7000. No change has occurred in the Total Cost column’s cells E6 and E8.

- Check whether the AutoFill feature works or not.
- The formula of cell E5 in the Formula Bar.
- Drag down the formula with the Fill Handle tool.
We can see that the formula of cell E5 and the value of cell E5 have been copied in the other cells.
The calculating threads in Excel have stopped.
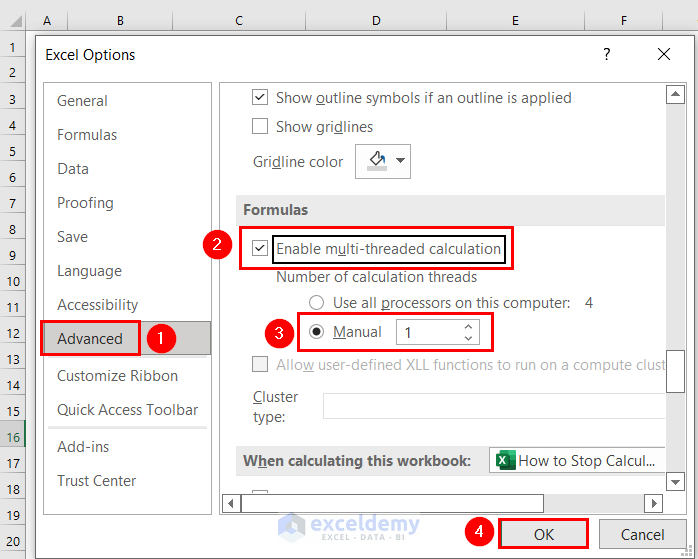
Method 3 – Using the Advanced Feature from Excel Options
Steps:
- Go to the File tab.
- Select Options.
An Excel Options dialog box will appear.
- Select Advanced >> scroll down until Formulas come along.
- Mark Enable multi-threaded calculation box >> select Manual option >> click OK.
- Go to our worksheet.
- We will change the value of cells C6 and C9. Notice whether there occurs a change in the Total Cost column’s cells E6 and E9.
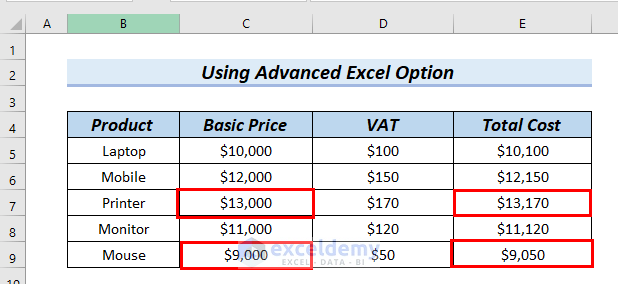
- We changed the value of cells C6 and C8 to $10500 and $8000. However, we can specify that no change has occurred in the Total Cost column’s cells E6 and E8.

- Check whether the AutoFill feature works or not.
- See the formula of cell E5 in the Formula Bar.
- Drag down the formula with the Fill Handle tool.
We can see that the formula of cell E5 and the value of cell E5 have been copied in the other cells.
The calculating threads in Excel have stopped.
Read More: How to Stop Calculating 8 Threads in Excel
Method 4 – Using VBA to Stop Calculating Threads in Excel
Steps:
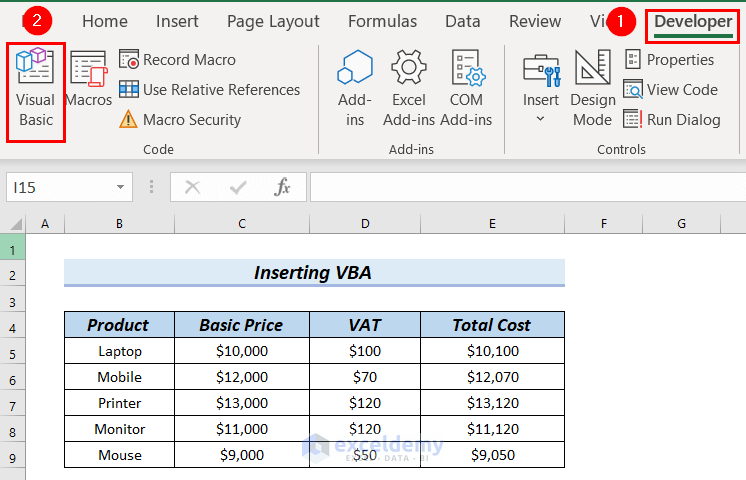
- Go to the Developer tab >> select Visual Basic to bring out the VBA editor window.
You can also press the keyboard shortcut ALT+F11 to bring out the VBA editor window.
AVBA editor window will appear.
- From the Insert tab >> select Module.
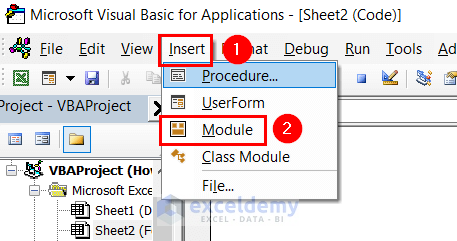
- Enter the following code in the Module:
Sub Stop_Calculating_Threads()
Application.Calculation = XlCalculation.xlCalculationManual
End Sub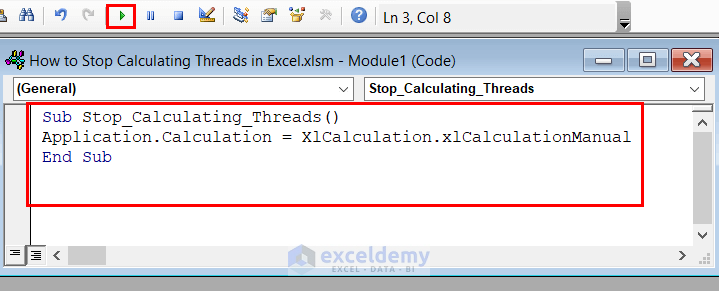
Code Breakdown
- We’ve created Sub procedure as Stop_Calculating_Threads()
- Then, I changed the Calculation mode and set it to XlCalculation.xlCalculationManual.
- So, the calculation options will be changed to manual.
- Press the Run button marked with a red box to run the code.
In contrast, you can press the F5 key to run the code.
- Next, we will go to our worksheet.
- Change the value of cells C6 and C8. Also, we will notice whether a change occurs in the Total Cost column’s cells E6 and E8.
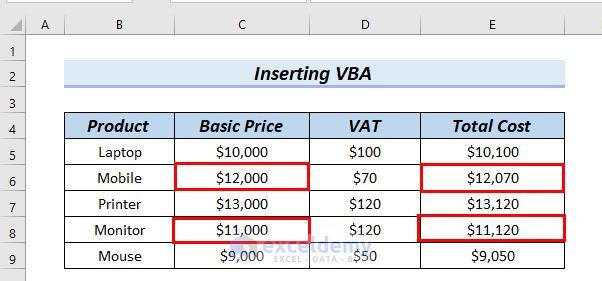
- We changed the value of cells C6 and C8 to $7000 and $8500, but we can see that no change has occurred in the Total Cost column’s cells E6 and E8.
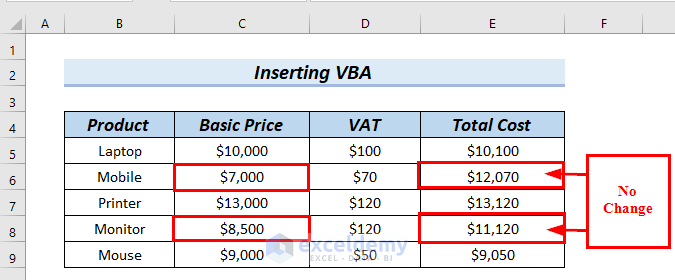
- Check whether the AutoFill feature works or not.
- See the formula of cell E5 in the Formula Bar.
- Drag down the formula with the Fill Handle tool.
We can see that not the formula of cell E5 but rather the value of cell E5 has been copied in the other cells.
The calculating threads in Excel have stopped.
Read More: How to Make VBA Code Run Faster
Practice Section
You can download the above Excel file to practice the explained methods.
Download the Practice Workbook
Related Articles
- How to Make Excel Open Faster
- How to Improve Excel Performance with Large Files
- How to Make Excel Faster on Windows 10
- How to Make Excel Run Faster with Lots of Data
- How to Open Large Excel Files Without Crashing
- How to Make Excel Calculate Faster
- How to Speed up Excel Calculating 4 Processors
<< Go Back to Excel Files | Learn Excel
Get FREE Advanced Excel Exercises with Solutions!
