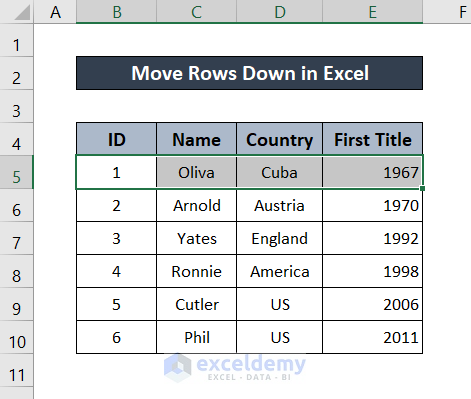
Method 1 – Move Rows Down Using Mouse
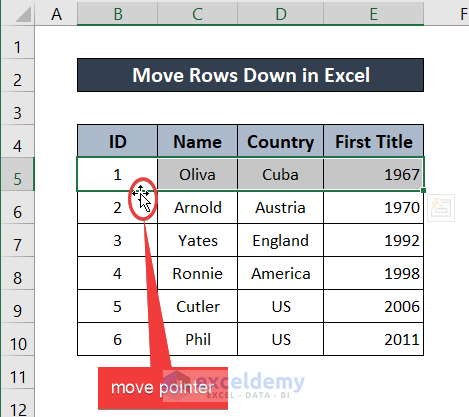
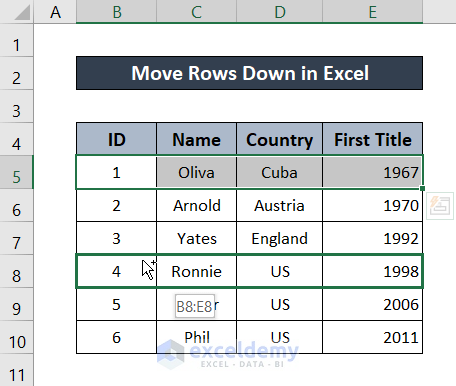
- Select the entire row (row 5) from the dataset.
- Move your mouse cursor to the boundary of your selection where your cursor icon will transition into Move Pointer.
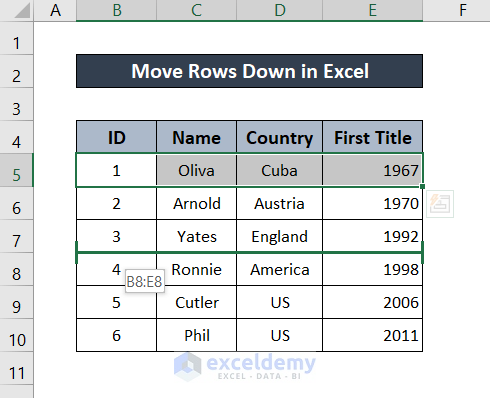
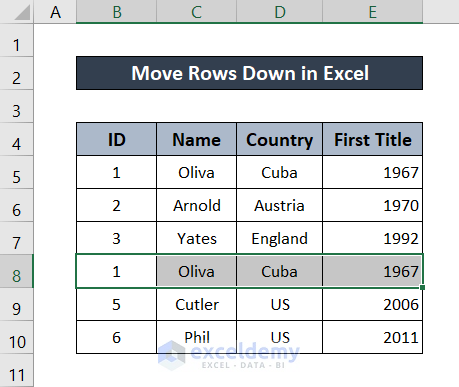
- Press Shift on your keyboard, left-click and drag the cell to the position where you want to move it to.
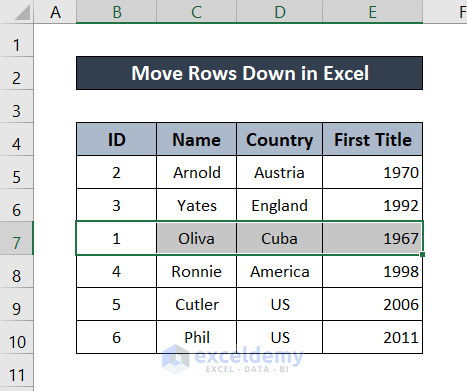
- After you have it in your desired location, release the button. The selected row will be moved to the row after the line.
Method 2 – Utilizing Context Menu
You can cut the row and instead of pasting, insert the row in the new position. Since pasting replaces the previous values with the new ones, inserting a new row is a better option if you just want to move the row down without altering the dataset.
Steps:
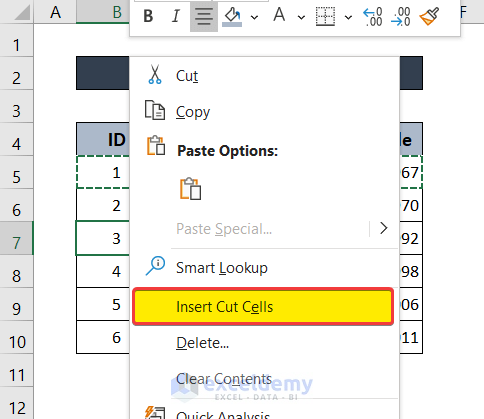
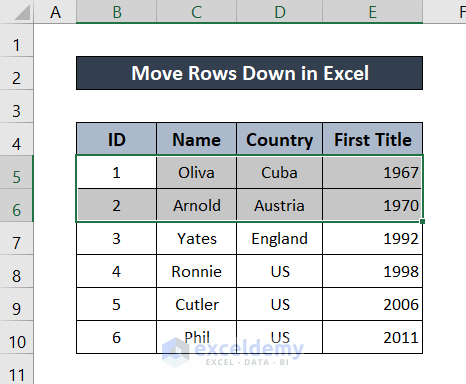
- Select the row you want to move.
- Cut the row by pressing ‘Ctrl+X’ on your keyboard.
- Right-click on the row before where you want to insert the row.
- In the context menu, select Insert Cut Cells.
The row will be moved to the new location.
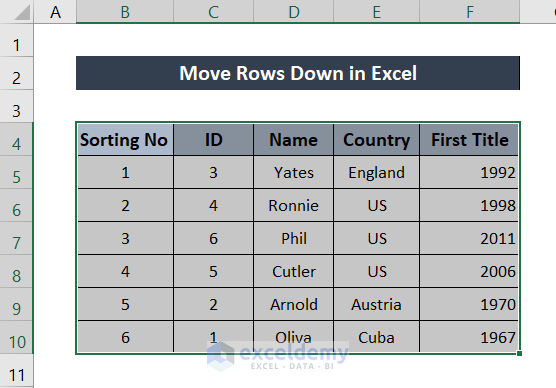
Method 3 – Custom Sort Command to Move Rows Down
This method is especially useful if you want to rearrange all the rows in the dataset. It can still be used for moving rows down in a table or a dataset. But before sorting, you first need to assign a specific number to each row and then sort the rows according to the numbers.
Steps:
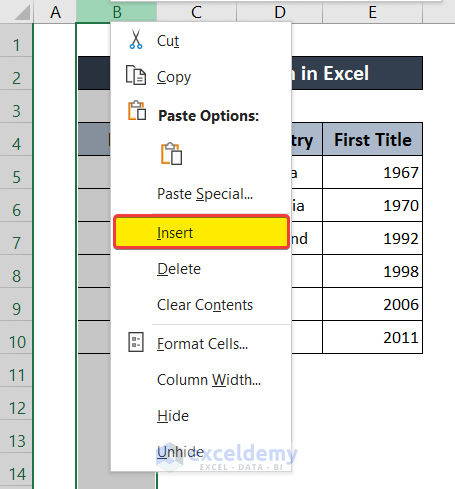
- Insert a new column before the dataset by right-clicking on the column number and selecting Insert from the context menu.
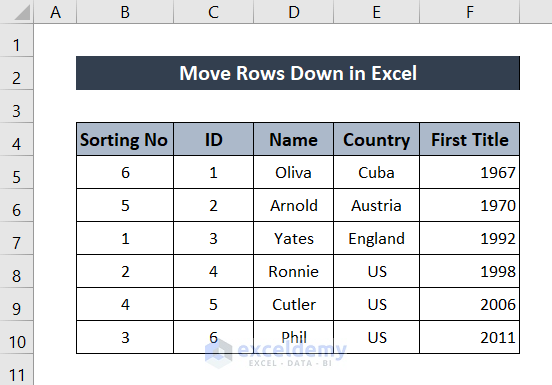
- In the new column, assign a number to each column. The order of the numbers should represent the order of the rearranged rows.
- Select the whole dataset.
- From the ribbon, go to the Home tab, and from the Editing group, select Sort & Filter.
- Select Custom Sort from the drop-down menu.

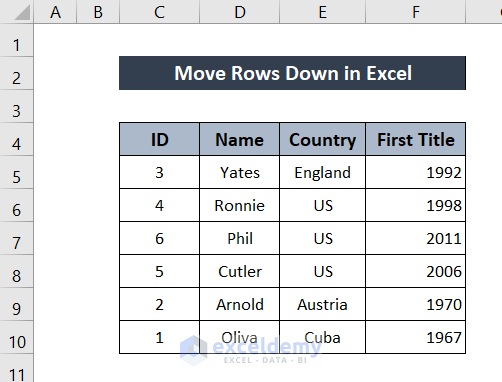
- A new Sort dialog box will pop up. In the Column field, select Sorting No. And in the Order field, select Smallest to Largest.
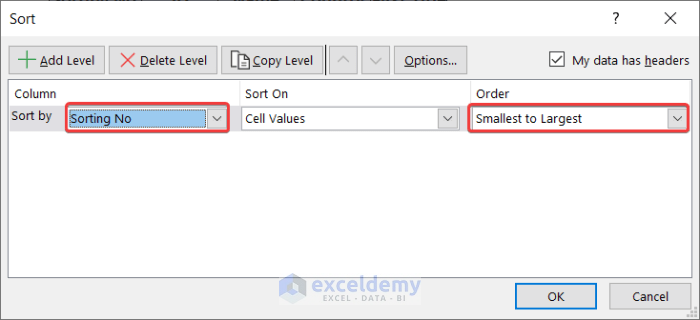
- Click on OK. The selected rows will move down.
- Delete the extra column added in the first step to get the original dataset back.
Method 4 – Move Rows Down by Dragging
Instead of pressing Shift and dragging, you can click and drag to move rows down in Excel. But this works the same as cutting and pasting the row in the new position. It will replace the previous row with the pasted one.
Steps:
- Select the row you want to move down.
- Move the mouse cursor to the edge of the boundary of your selection where it will transform into a Move Pointer.
- Hold down the left mouse button and drag the row to your new position.

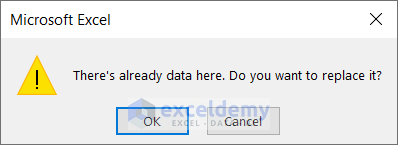
- Release the button. A warning box will pop up, click on OK.
Your row will be moved down.
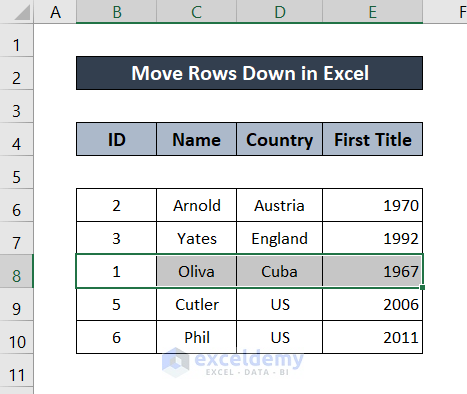
Notice that this method leaves the previous position of the selected row empty and completely replaces the previous values in that row.
Read More: How to Move Rows in Excel Without Replacing
Method 5 – Using Ctrl Key
Steps:
- Select the row you want to move.
- Move your mouse cursor to the boundary of your selection until the move pointer appears in place of the cursor.
- Press Ctrl on your keyboard. Click and drag the row boundary to your new position.
- When you release the button, the values in the row will be moved to the new location as well as the values in the selected row will remain intact.
Note: This method will remove the previous values in that row with the selected row values.
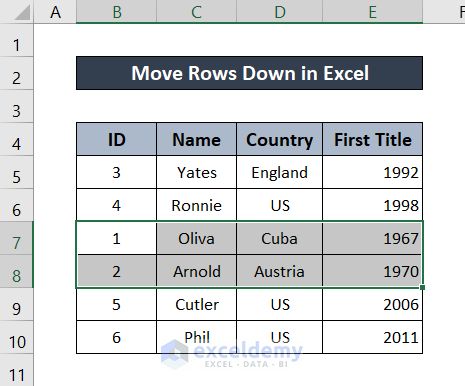
Method 6 – Move Multiple Rows Down
You can use the dragging method for multiple rows too. But this can only be done if the rows are consecutive.
Steps:
- Select the rows you want to move.
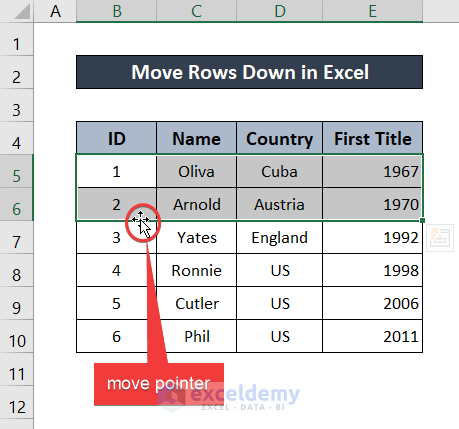
- Move your mouse cursor to the edge of the selection where it will turn into a Move Pointer.
- While pressing Shift on your keyboard, click and drag the rows to your new positions.
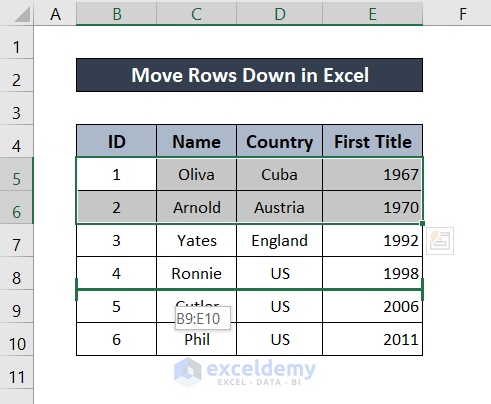
- Upon releasing the mouse, the selected rows will be moved down to their new positions.
Read More: How to Rearrange Rows in Excel
Download Practice Workbook
Related Articles
- How to Move Rows Up in Excel
- How to Move Rows in Excel to Columns
- How to Move Every Other Row to Column in Excel
- Move Row to Bottom in Excel If Cell Contains a Value
- How to Move Row to Another Sheet Based on Cell Value in Excel
<< Go Back to Move Rows | Rows in Excel | Learn Excel
Get FREE Advanced Excel Exercises with Solutions!
