This is an overview.
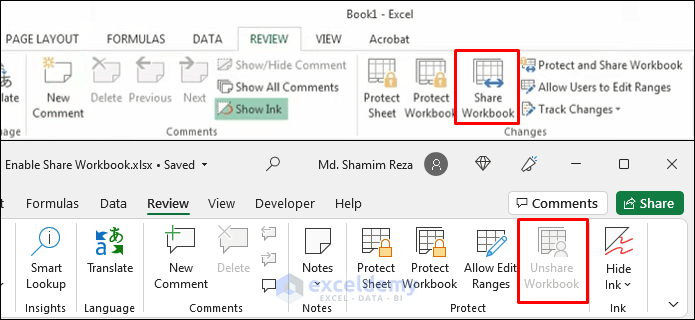
Method 1 – Enabling the Share Workbook Button in Excel
Steps
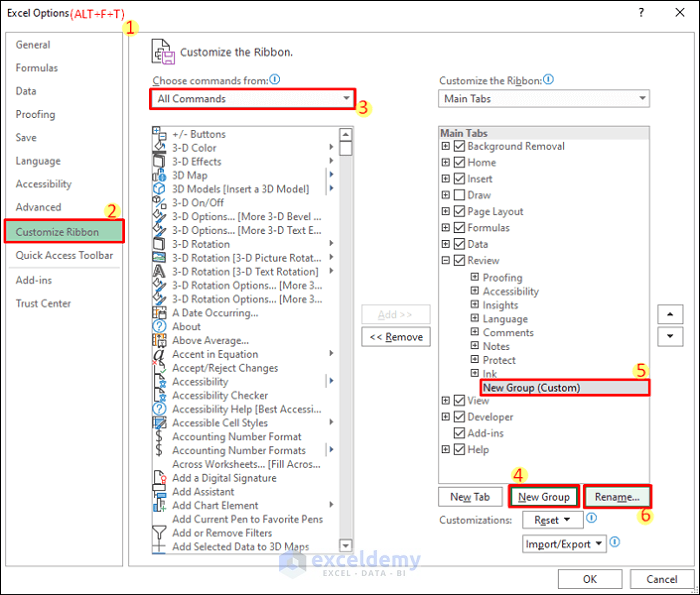
- Press ALT+F+T to open Excel Options.
- Choose All Commands.
- Click the Review tab in Main Tabs.
- Select New Group to add a Custom Group.
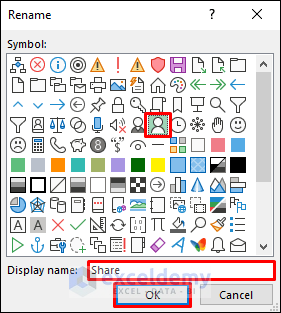
- Select Rename.
- Change Display Name and select a Symbol for the commands of the group.
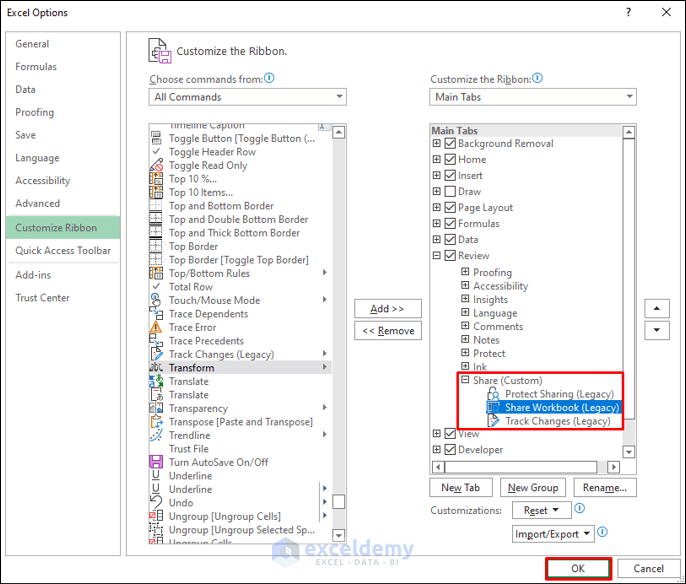
- Click OK.
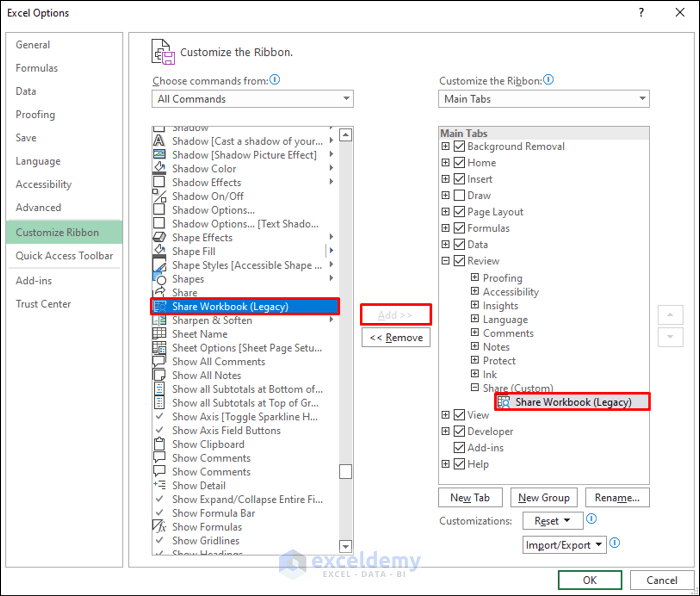
- In All Commands select Share Workbook (Legacy).
- Click the Add button. Here, it is grayed out because it was already added to the group.
- Add Protect Sharing (Legacy) and Track Changes (Legacy).
- Click OK.
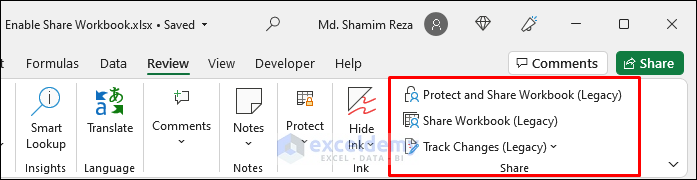
The commands are visible in the Review tab.
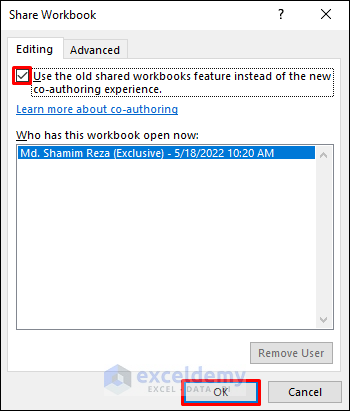
- Select Share Workbook (Legacy).
- Check Use the old shared workbooks feature instead of the new co-authoring experience.
- Click OK.
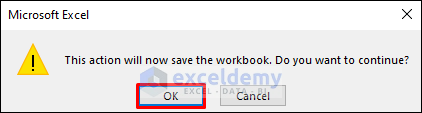
- In the warning window, click OK.
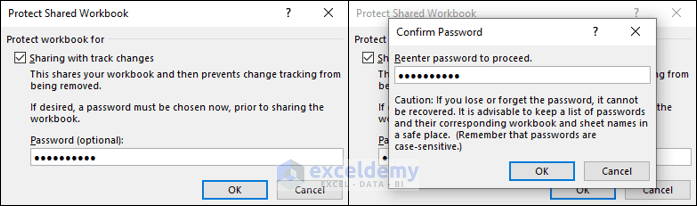
- You can also share your workbook by selecting the Protect and Share Workbook (Legacy) button. This will prevent other users from unsharing the workbook: use a password.
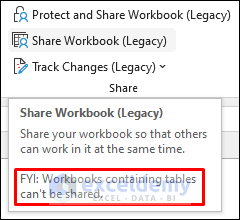
- To use the added buttons, keep the cursor on the Share Workbook (Legacy) button. Excel will display a message saying that workbooks containing tables can’t be shared.
- If the workbook contains tables, Excel will display the following error. You need to convert the tables to ranges and remove any XML maps.

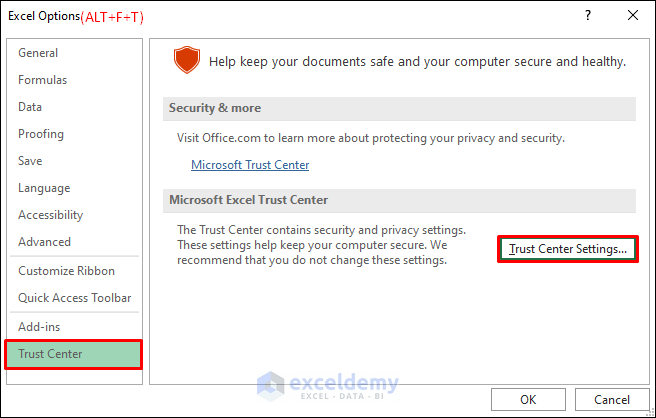
- You shouldn’t share workbooks containing personal information. To remove it, press ALT+F+T to open Excel Options.
- Select Trust Center Settings in Trust Center.
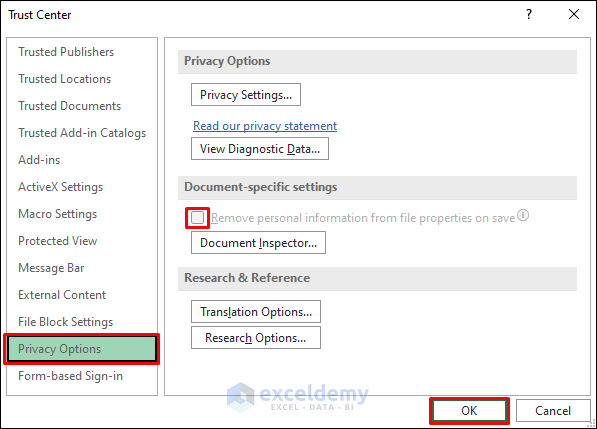
- Check Remove personal information from file properties on save in Privacy Options.
- Click OK.
- Click OK again.
You’ll be able the share the workbook.
Read More: Setting Permissions for a Shared File in Excel
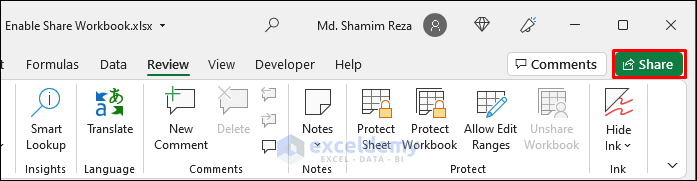
Method 2 – Sharing a Workbook in Excel 2016 | 2019 | 365
Steps
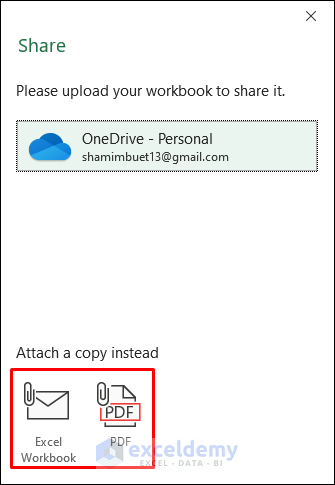
- Click Share or select File >> Share.
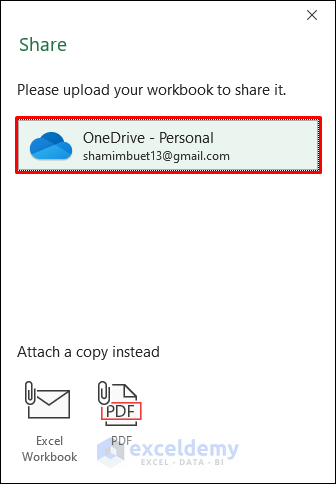
- Upload your workbook to OneDrive.
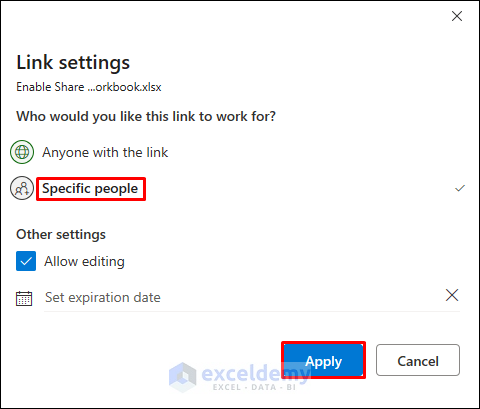
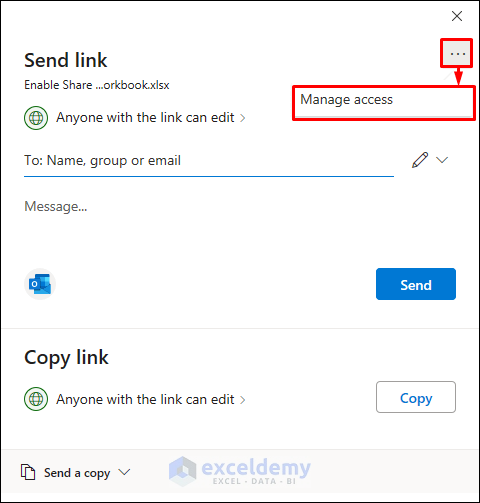
- Click Anyone with the link can edit.
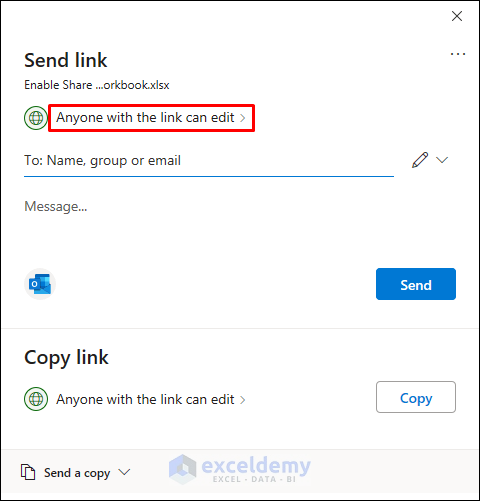
- Choose Specific people.
- Enter the email addresses of the users you want to share the workbook with.
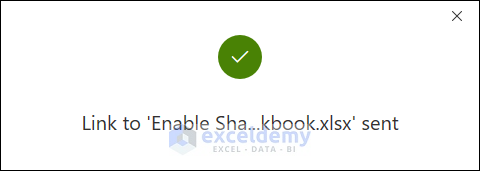
- Click Send.

You will see a confirmation message:
- Alternatively, you can send the file as an Excel workbook or a PDF via email.
- To change the sharing permissions, click Share.
- Click the dotted menu at the upper right corner.
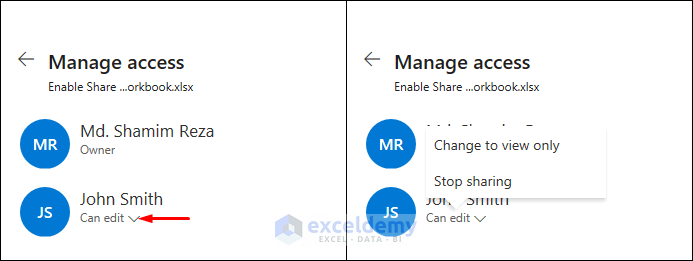
- Select Manage access.
- Click the permission type below the names.
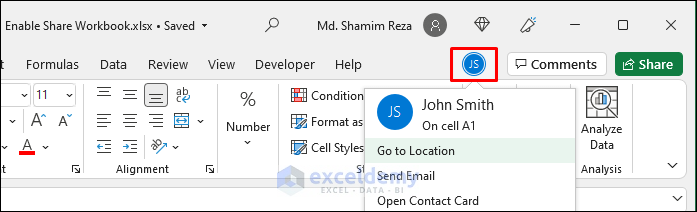
You can see who is editing the workbook on the Ribbon. Click the names to go to the cells they are editing.
Read More: How to Share Excel File for Multiple Users
Method 3 – Sharing a Workbook in Excel 2007 | 2013
Steps
- Select Review >> Share Workbook.
- Check Allow changes by more than one user at the same time in Editing.
- Click OK.
- Save the workbook on a network server.
Method 4 – Sharing a Workbook in Excel 2003 and Earlier Versions
Steps
- Go to Tools and click Share Workbook.
- Go to Editing and check Allow changes by more than one user at the same time.
- Click OK. Select File >> Save As.
- Save the workbook on a network server.
Related Articles
<< Go Back to Share Workbook | Workbook in Excel | Learn Excel
Get FREE Advanced Excel Exercises with Solutions!

Thank you so much for your detailed explanation. I followed the steps, and it worked perfectly!
Regards
Wendy
Thank you so much for your detailed and intuitive instructions. I tried some of the changes, and they worked perfectly!
Regards
Wendy