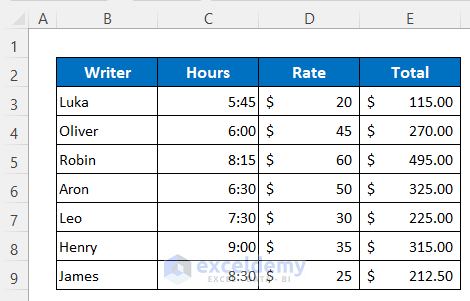
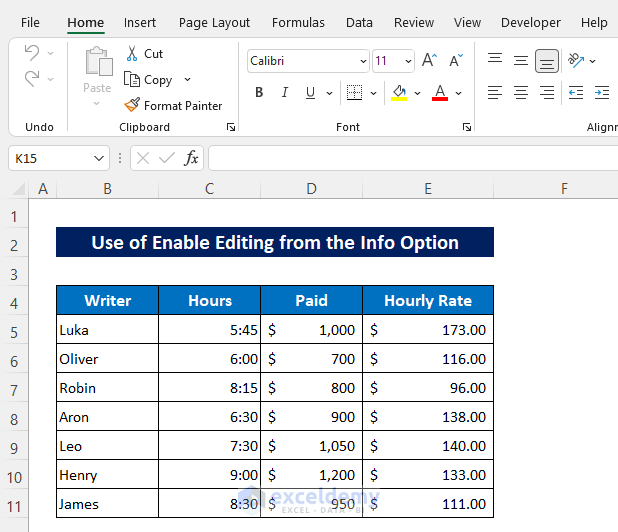
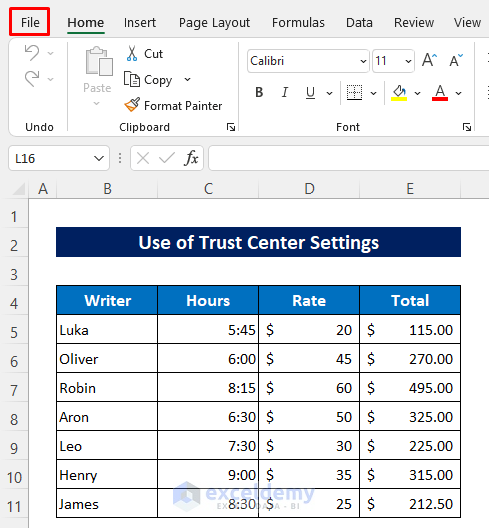
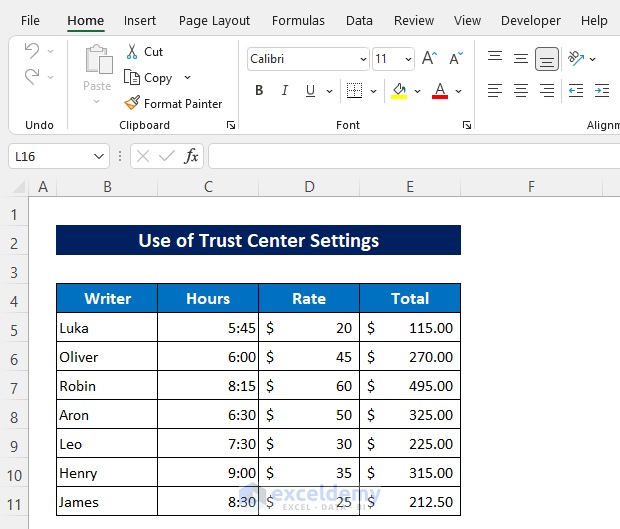
To explore the methods, we’ll use the following dataset representing the hourly rate of some ExcelDemy content writers.
Method 1 – Remove Protected View by Clicking Enable Editing Button in Excel
Note – this is not a permanent solution, ie the method will need to be applied individually to each Excel file where removal of Protected View is required.
STEPS
- Click the Enable Editing Button under the ribbon.
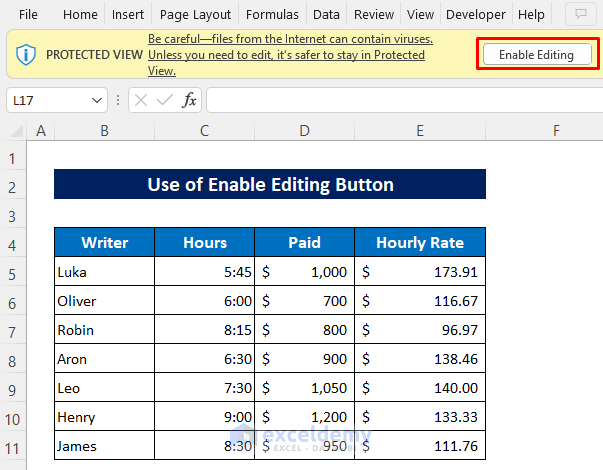
Protected View mode is removed.
Read More: Cannot Edit Excel File in Protected View
Method 2 – Clear Protected View Using the Info Option
This is the same impermanent command used in Method 1, just accessed from a different location.
STEPS
- Click the File tab.
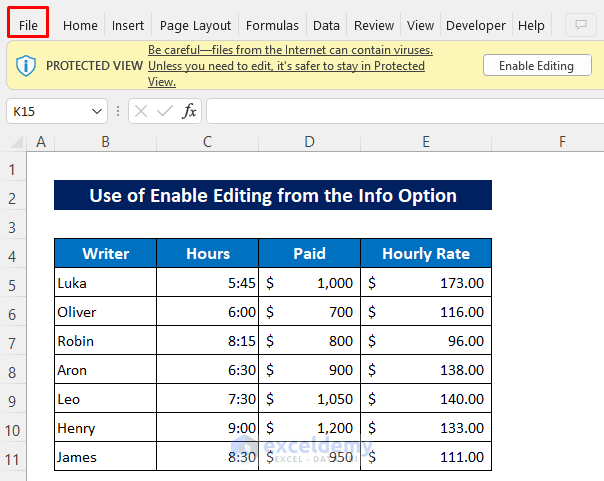
- Select Info ➤ Enable Editing.
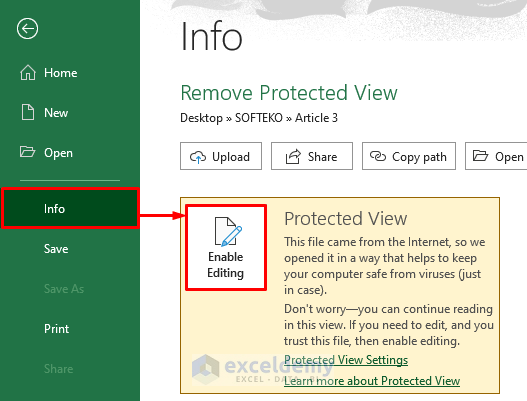
Protected View mode is removed.
Read More: [Fixed] Excel Protected View Editing This File Type Is Not Allowed
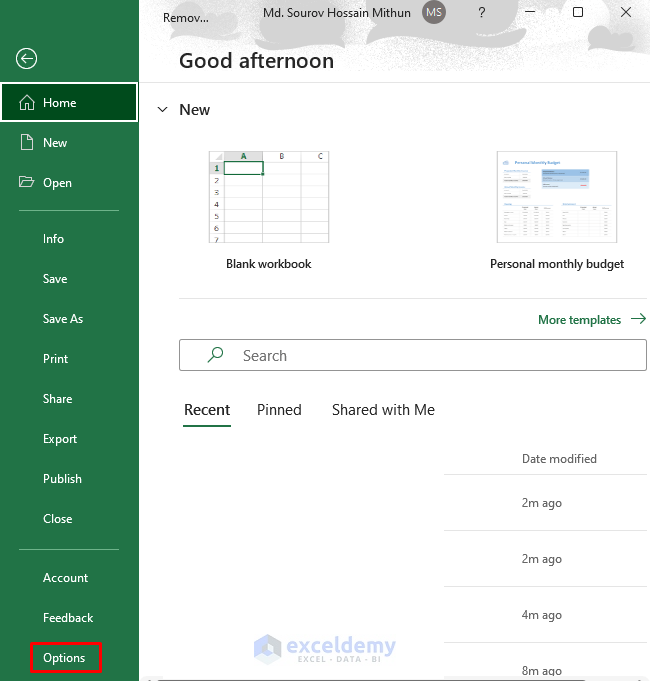
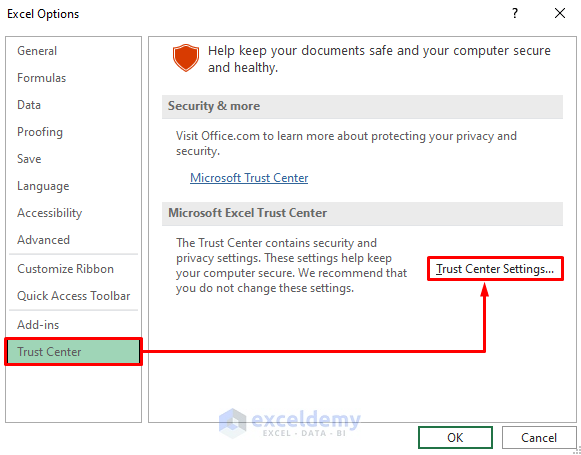
Method 3 – Permanently Remove Protected View via Trust Center Settings in Excel
This method is particularly useful when opening files downloaded from a trusted source using an AntiVirus.
STEPS
- Click on the File tab.
- Select Options from the menu.
- The Excel Options dialog box will open.
- Select Trust Center > Trust Center Settings.
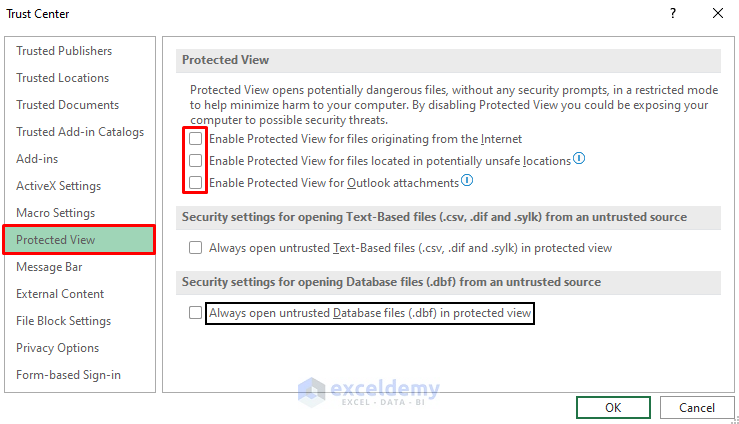
- Another dialog box opens.
- Click Protected View on the left menu.
- Unmark all options in the Protected View section.
- Click OK to return to the previous dialog box.
- Click OK.
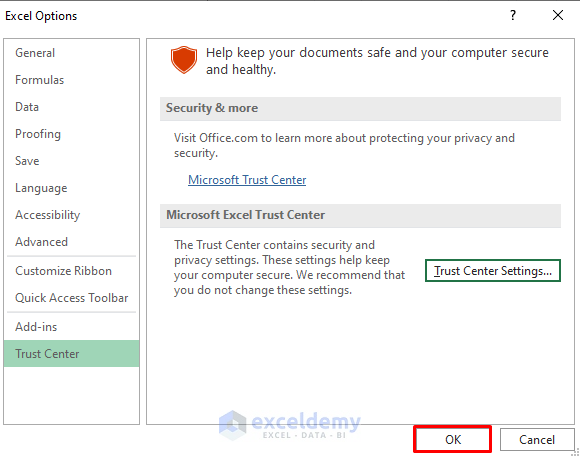
Protected View will be permanently disabled, and all Excel files will now open in Edit Mode by default.
Read More: [Solved]: Excel Protected View Office Has Detected a Problem with This File
Download Practice Workbook
Related Articles
- How to Enable Editing in Excel Protected View
- [Solved]: Excel Opening in Protected View Stuck
- [Fixed] Excel Cannot Open in Protected View
<< Go Back to Excel Files | Learn Excel
Get FREE Advanced Excel Exercises with Solutions!
