This article is part of a series: Excel VBA & Macros – A Step by Step Complete Guide.
Download Practice Workbook
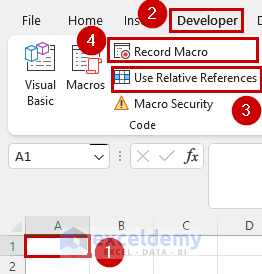
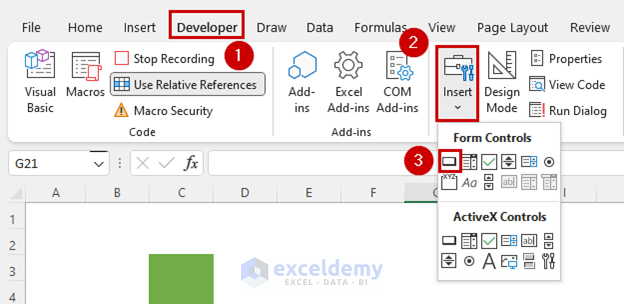
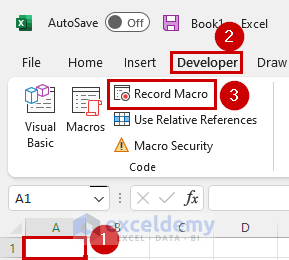
Step 1 – Activate Macro Recording Feature
- Select cell A1.
- Go to the Developer tab.
- Select Use Relative References.
- Select Record Macro.
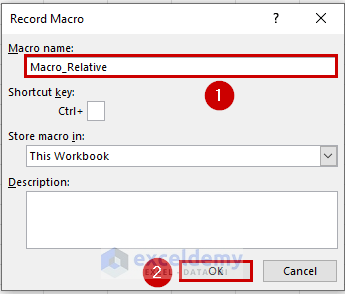
- The Record Macro box will open.
- Give a Macro Name.
- Click OK.
Excel will record the operations you perform.
Read More: Recording Macro in Excel – Learn with an Example
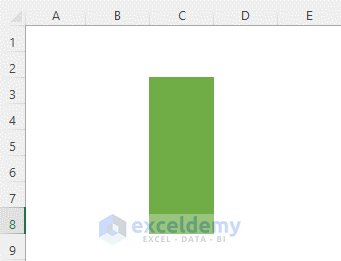
Step 2 – Perform Operation
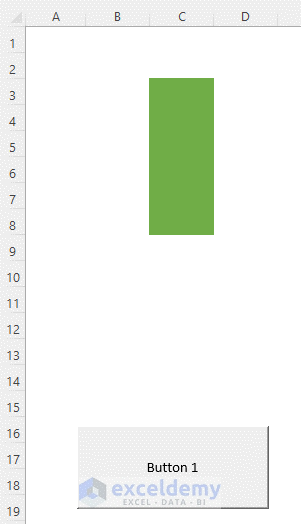
You can perform the operations you wish. We will change the Fill Color of C3:C8.
- Select C3:C8.
- Go to the Home tab.
- Select the drop-down icon of theme colors.
- Choose a color.

- Excel will change the Fill Color.
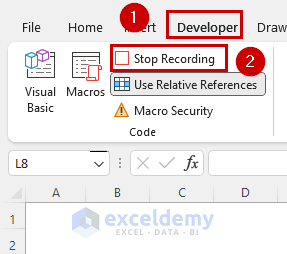
Step 3 – Stop Macro Recording
After performing operations, you need to stop macro recording.
- Go to Developer.
- Select Stop Recording.
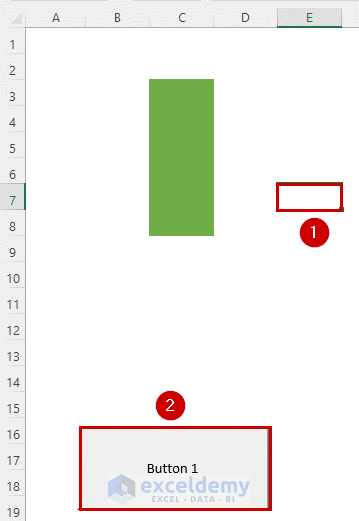
Step 4 – Run Recorded Macro
- Go to Developer.
- Select Insert.
- Choose a button box.
- Draw the box.
- Excel will by default name it Button 1.
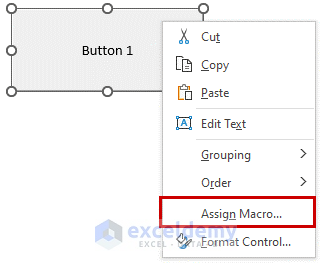
- Right-click your mouse on the button box.
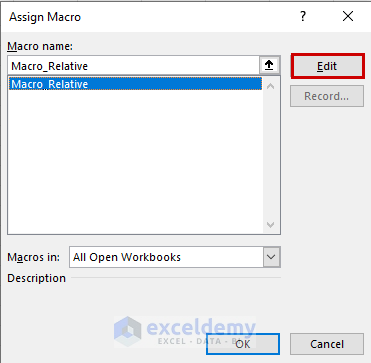
- Select Assign Macro.
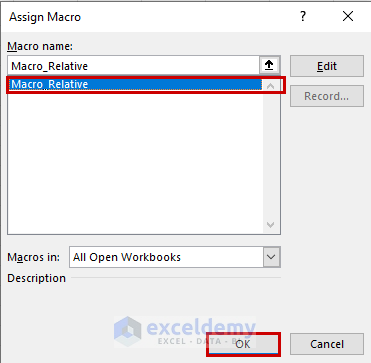
- The Assign Macro box will open.
- Select Macro_Relative. This is the name of the code we gave earlier.
- Click OK.
- Excel will assign the macro to Button 1.
- To run the macro, choose any cell.
- Click on Button 1.
- Excel will run the recorded macro.
- Rename the button.
The Code:
- You will find the code from the Assign Macro box.
- Select Edit in that box.
- Excel will show you the following code.
Sub Macro_Relative()
'
' Macro_Relative Macro
'
'
    ActiveCell.Offset(2, 2).Range("A1:A6").Select
    With Selection.Interior
      .Pattern = xlSolid
      .PatternColorIndex = xlAutomatic
      .ThemeColor = xlThemeColorAccent6
      .TintAndShade = 0
      .PatternTintAndShade = 0

    End With
End Sub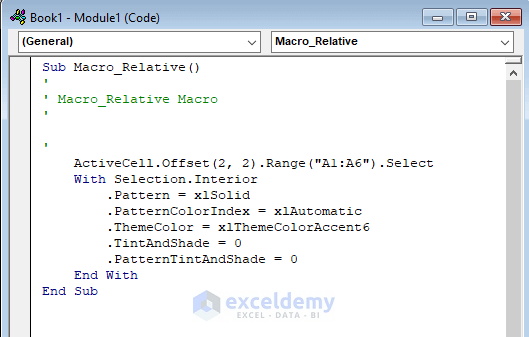
Read More: How to Assign a Macro to a Button in Excel
Use Absolute Referencing in Excel Macro
- Select A1.
- Go to Developer.
- Select Record Macro.
- The rest is similar to the previous method.
- The new button box is named Absolute Referencing.
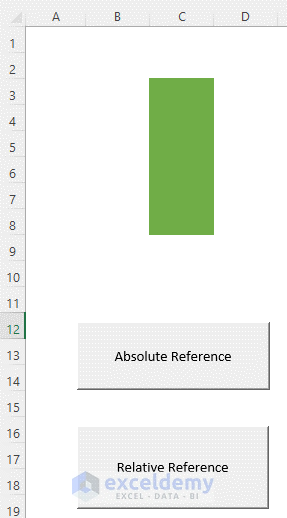
- We will see how Absolute Referencing works.
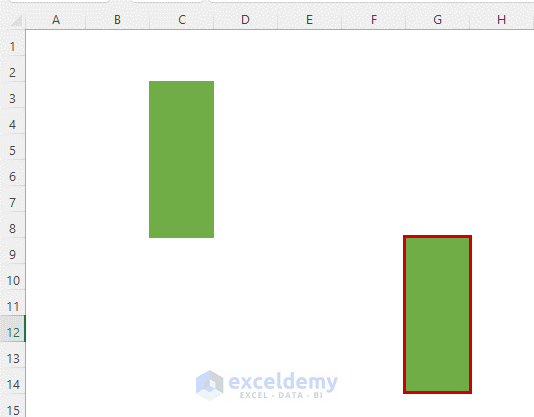
- Select E7.
- Click on Absolute Reference.
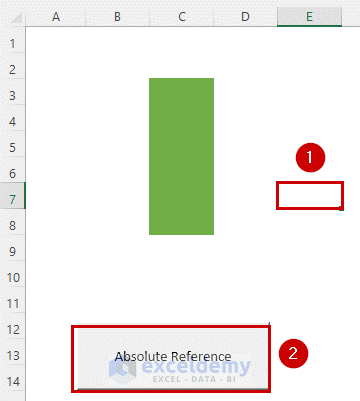
- Excel will keep modifying C3:C8 in Absolute Referencing.

Note: That’s the difference between Absolute Referencing and Relative Referencing in Excel Macro. In Relative Referencing, the position changes upon changing references.
- When you set the reference A1, it will modify C3:C8.
- When you set the reference E7, it will modify G9:G14.
But in Absolute Reference, Excel always modifies C3:C8.
- The code for Absolute Reference is,
Sub Macro_Absolute()
'
' Macro_Absolute Macro
'
'
    Range("C3:C8").Select
    With Selection.Interior
      .Pattern = xlSolid
      .PatternColorIndex = xlAutomatic
      .ThemeColor = xlThemeColorAccent6
      .TintAndShade = 0
      .PatternTintAndShade = 0
    End With
End Sub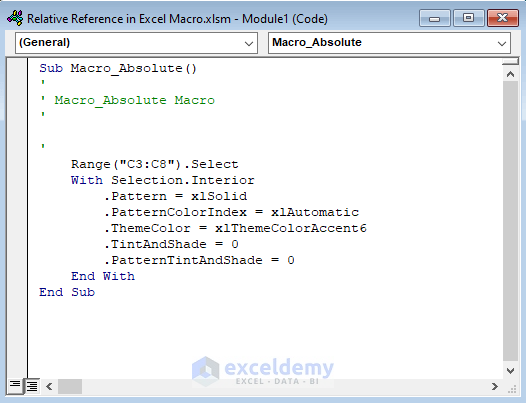
Reasons for Relative Reference Not Working
Sometimes the Relative Referencing does not work in Excel. One possible reason is that the “Use Relative References” feature is inactive.
The solution is to activate the button from the Developer tab before performing operations.

Get FREE Advanced Excel Exercises with Solutions!


As a trainer, I often teach the concept of macros. Some of my delegates really struggle with the concept of relative and absolute. I love this example. For those who are new to macros, it’s a great simple way of explaining the differences. Thanks!