Introduction to Macros in Excel
A macro is a piece of VBA code that runs each time it is assigned. While recording a macro, Excel monitors the user actions and records them in VBA (a language that Excel understands). After the recording has been stopped, saved, and executed, Excel translates those actions to the VBA code and performs the identical actions.
How to Record a Macro in Excel (With Detailed Steps)
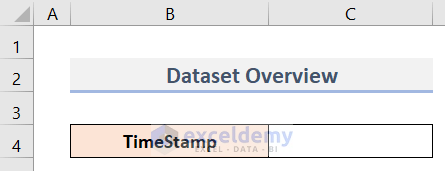
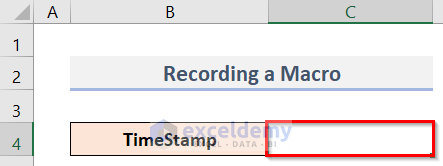
We have a dataset (B4:C4) in Excel. We’ll record a time-stamp macro that inserts the current date and time into the active cell (C4). We will use the NOW function at the time of recording the macro for inserting the date and time.
Step 1 – Inserting the Developer Tab in the Ribbon
If you already have the Developer tab in the ribbon, skip this step.
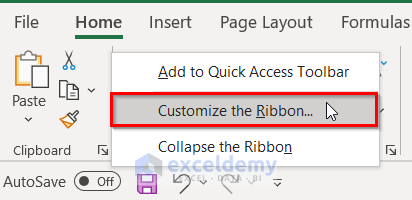
- Right-click on any tab in the ribbon area.
- Click on Customize the Ribbon.
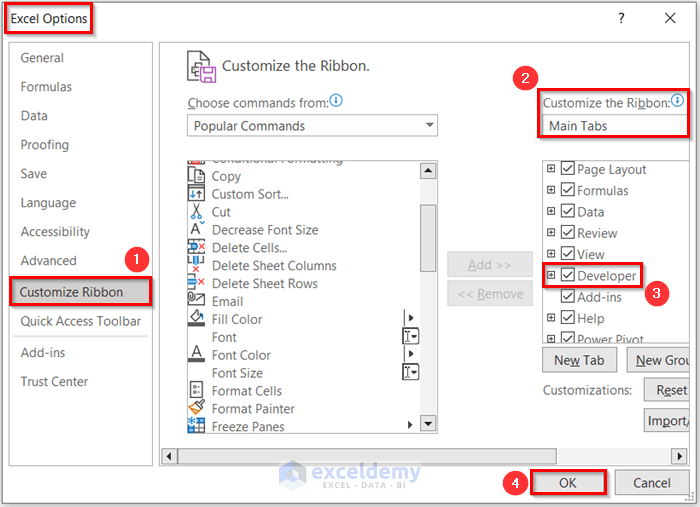
- The Excel Options dialog box will appear.
- Go to Customize Ribbon.
- Under Customize the Ribbon on the right, select Main Tabs and check the Developer box.
- Click OK.
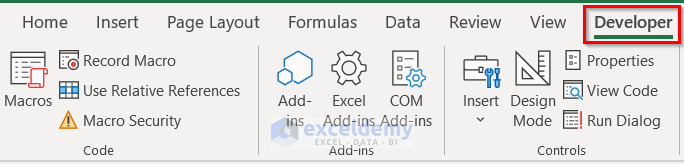
- You will find the Developer tab in the Ribbon.
Step 2 – Recording the Excel Macro
- Select cell C4.
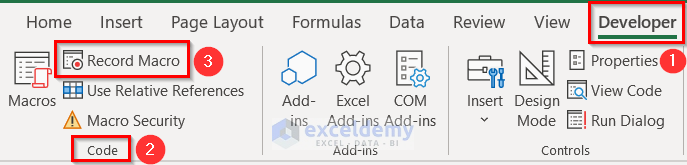
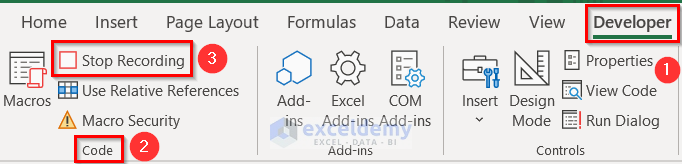
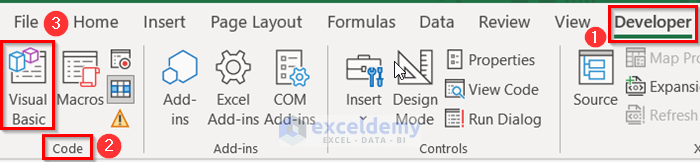
- Go to the Developer tab and the Code group, then click on Record Macro (see screenshot).
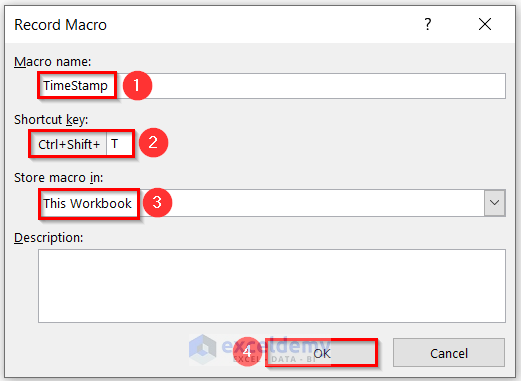
The Record Macro dialog box will appear.
- Go to Macro name and type any name (TimeStamp).
- For Shortcut key, enter Ctrl + Shift + T (you can set any unused Shortcut key as you wish).
- For Store macro in, select This Workbook.
- Hit OK.
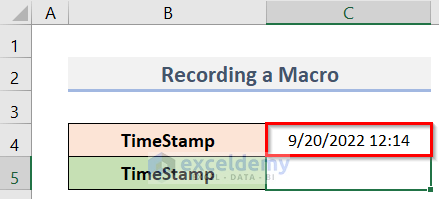
- To get the current date and time, use the following formula in cell C4:
=NOW()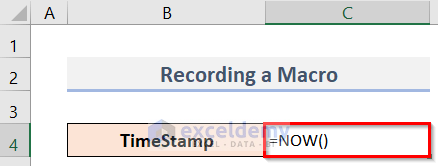
- After pressing Enter, you will get the current date and time in cell C4.
- The next cell (C5) will get selected.
- To stop the recording, go to the Developer tab and select Stop Recording.
Step 3 – Running the Recorded Macro in Excel
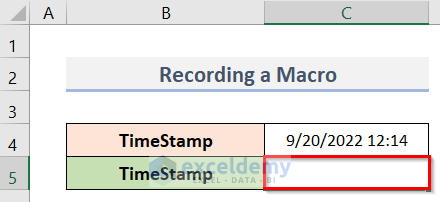
- Select an empty cell (C5).
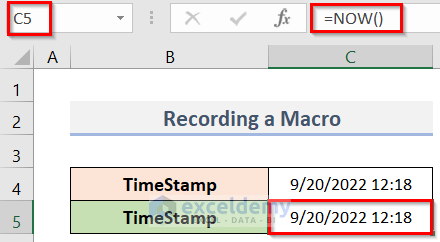
- Press Ctrl + Shift + T to execute the macro.
- You will find the date and time in cell C5.
Step 4 – Examining the Recorded Excel Macro
- Right-click on the sheet tab name (Recording Macro).
- Select View Code.
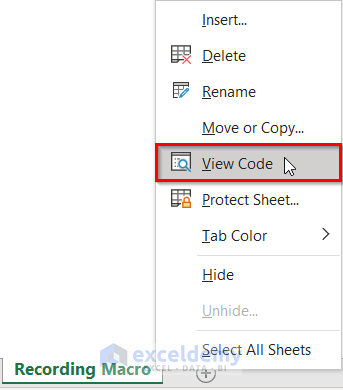
- The VBA code window will open.
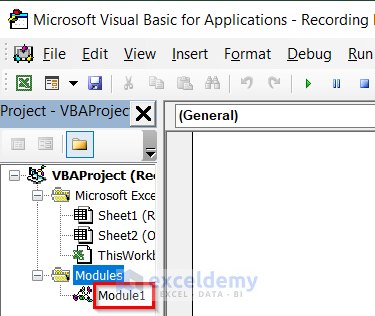
- To see the VBA code, double-click on Modules.
- You will find Module1 below Modules. Double-click on it (Module1).
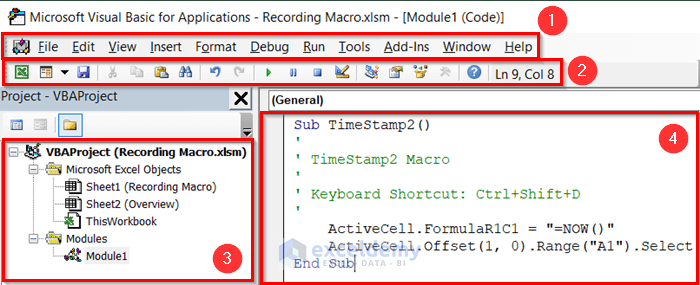
- You will see the following VBA code in the Module1 window (see screenshot):
Sub TimeStamp()
'
' TimeStamp Macro
'
' Keyboard Shortcut: Ctrl+Shift+T
'
ActiveCell.FormulaR1C1 = "=NOW()"
Range("C5").Select
End Sub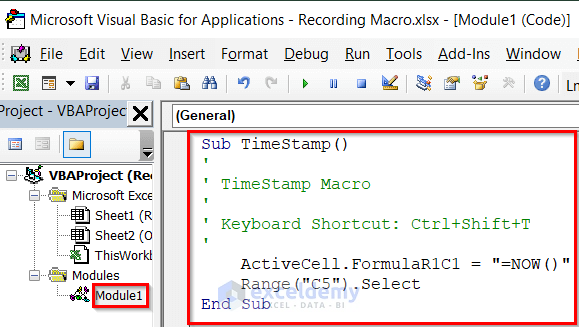
In the VBA code, the first statement inserts the NOW() formula into the active cell (C4).
The second statement selects cell C5 because we pressed Enter after inserting the formula in cell C4, so the cell pointer moved to cell C5.
Step 5 – Re-Recording the Macro in Excel Using Relative References
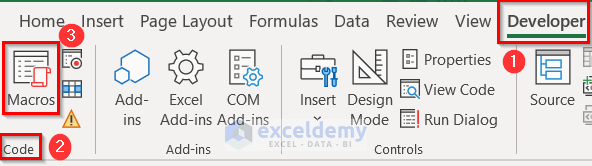
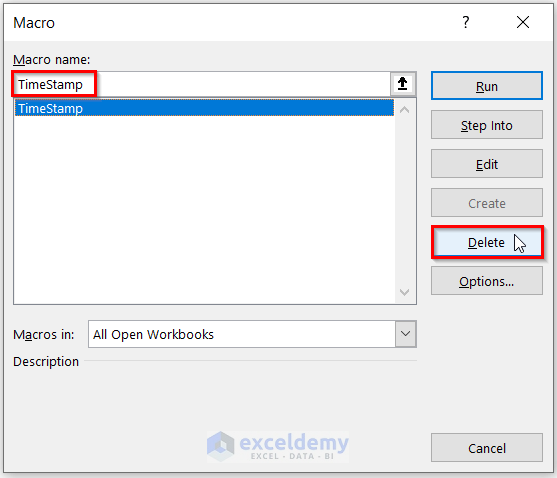
- To delete the recorded macro, go to the Developer tab and click on Macros.
- The Macro window will pop up.
- Select the Macro name (TimeStamp).
- Click on Delete.
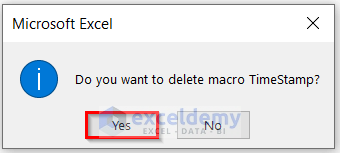
- A Microsoft Excel message box will appear.
- Click Yes.
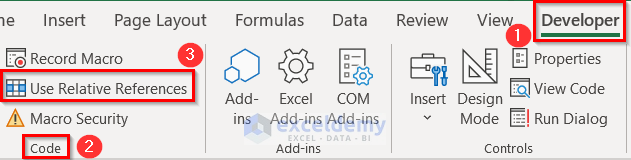
- You can start re-recording the macro Using Relative References.
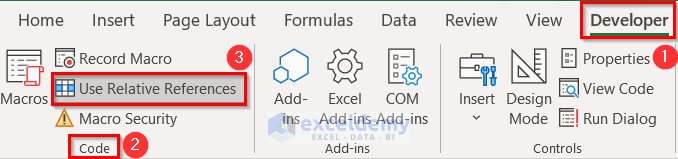
- Before you start your recording again, click the Use Relative References command in the Code group of the Developer tab (see screenshot).
- This control is a toggle. By default, this control is turned off.
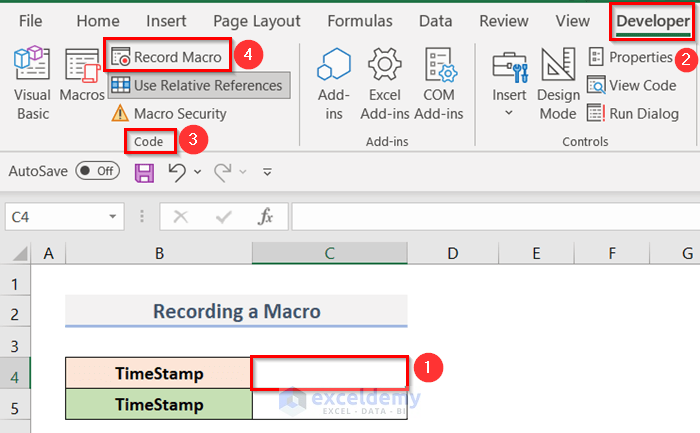
- To re-record the macro, select the cell C4 and click Record Macro.
- The Record Macro dialog box will open again.
- You can use the previous Macro name or you can change it if you want.
- We have typed TimeStamp2 in the Macro name box.
- You can also change the Shortcut key for executing the macro or use the previous one.
- We have inserted Ctrl + Shift + D for the Shortcut key.
- The Store macro in box must have This Workbook.
- Click OK.

- Go to cell C4 again and use the following formula:
=NOW()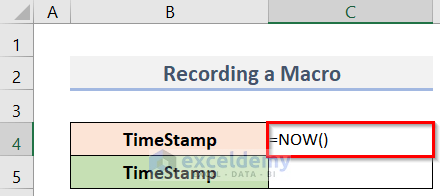
- Press Enter, and the next cell (C5) is selected.
- Go to the Developer tab and click Stop Recording (see screenshot).

- Check the VBA code again via View Code.
- The following figure shows the new macro, recorded with relative references in effect:
Sub TimeStamp2()
'
' TimeStamp2 Macro
'
' Keyboard Shortcut: Ctrl+Shift+D
'
ActiveCell.FormulaR1C1 = "=NOW()"
ActiveCell.Offset(1, 0).Range("A1").Select
End Sub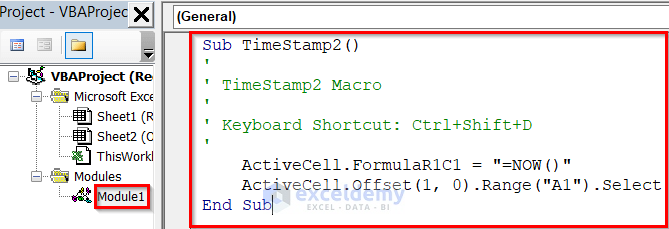
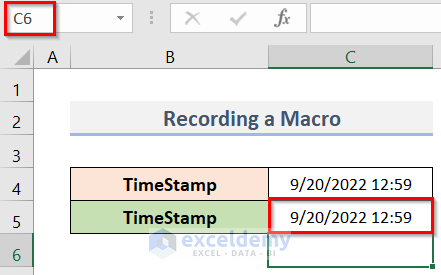
- Apply the shortcut (Ctrl + Shift + D) in cell C5.
- You will see the date and time in cell C5, and the next cell C6 will be selected.
Step 6 – Saving the Recorded Macro
- Open the VBA code window (Developer > Visual Basic)
- Click on the Save button (see screenshot).
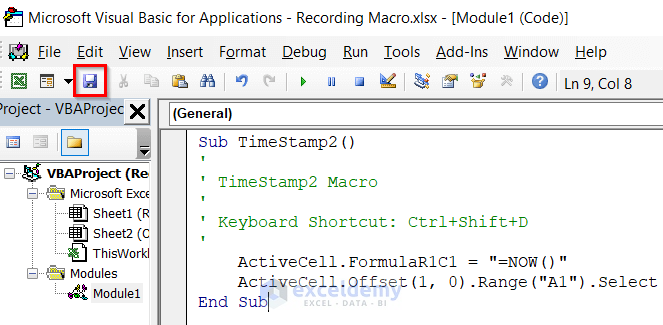
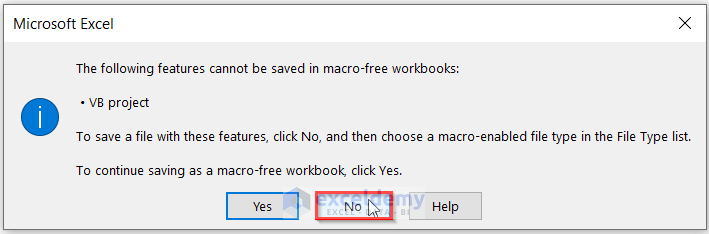
- The Microsoft Excel message box will pop up.
- To save the file as macro-enabled, click on the No option.
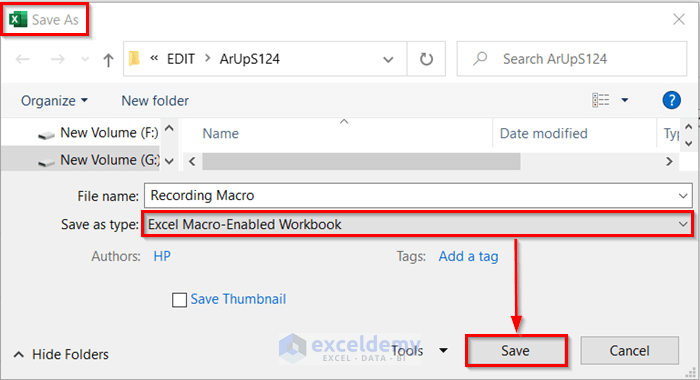
- The Save As dialog box will appear.
- Click on the Save as type dropdown.
- Select Excel Macro-Enabled Workbook from the dropdown.
- Click on the Save button.
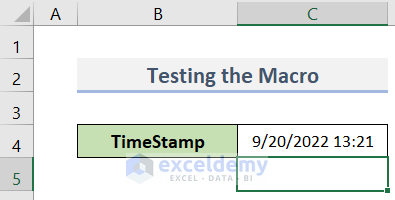
Step 7 – Testing the Recorded Macro
We have a new workbook (Testing). This workbook contains a worksheet named Testing Macro.
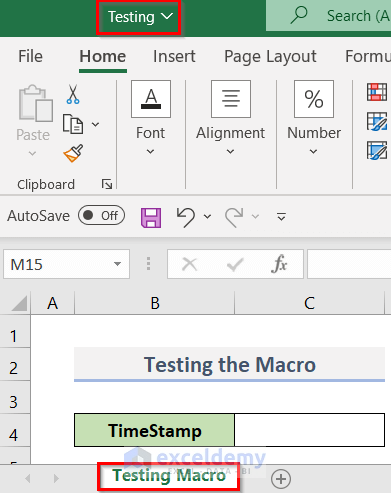
- Open the workbook that contains the macro.
- Select the cell (C4) in which you want to apply the macro.
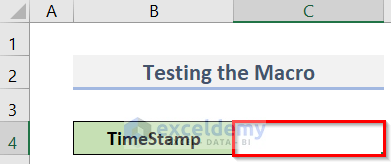
- While rerecording the macro, we inserted Ctrl + Shift + D as the shortcut key.
- Press that shortcut (Ctrl + Shift + D) on the keyboard.
- You will get the date and time in cell C4 and then the next cell (C5) will be selected.
Read More: How to Edit Macros in Excel
What Components Are on the Backend of a Recorded Macro in Excel?
- To open the VBA code window, go to the Developer tab and select Visual Basic.
- The VBA code window will open.
- To see the code of the macro, double-click on Modules and double-click on Module1.
- We can see all the components of the macro we just recorded.
- The first box (1) is the Menu Bar.
- The second one (2) indicates the Toolbar.
- The third box (3) refers to the Project Explorer.
- The fourth one (4) is the Code Window.
What Gets and Doesn’t Get Recorded by Macro in Excel?
Things Macro Records:
- Cells that are selected with the keyboard or mouse.
- Scrolling.
- Changing the location of the Excel window.
- Editing or formatting the formulas, texts, and cells.
- Opening new worksheets or workbooks and saving the workbooks.
- Adding, removing, and shifting Excel sheets.
- Running other macros.
Things Macro Doesn’t Record:
- Movements of the mouse.
- Switching out the ribbon.
- Things related to the VBA code window.
- Programs that are not Excel-related.
Useful Tips for Recording Macro in Excel
- Record macros with the Use Relative References command. Go to the Developer tab and click on Use Relative References (see screenshot).
- Utilize keyboard shortcuts to choose ranges.
- Choose your recordings wisely.
- Before executing a macro, create a backup or save the file.
- Keep the recorded macro as simple as possible.
Download the Practice Workbook
Related Articles
- How to Save VBA Code in Excel
- Excel Macro Shortcut Key
- 25 VBA Macro Example for Enhanced Productivity
- Types of VBA Macros in Excel
- How to Remove Macros from Excel
- How to Save Macros in Excel Permanently
- How to Use Excel VBA to Run Macro When Cell Value Changes
- Excel VBA to Pause and Resume Macro
- Excel Macro Enabled Workbook


Your lessons are amazing.
I am learning to record macros and always used to wonder what the recorded jargon’s meant.
Reading through your lessons made my life easy.
Thanks a loads for post such wonderful lesson.