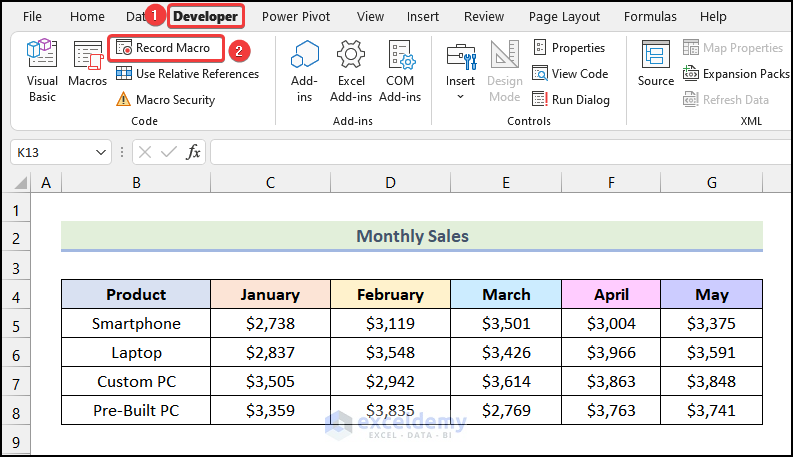
In the following dataset, we have the Monthly sales data of a tech store. We’ll assign a macro shortcut key and edit an assigned macro shortcut key in Excel.

Method 1 – Using the Record Macro Option to Assign an Excel Macro Shortcut Key
Steps:
- Go to the Developer tab.
- Select the Record Macro option from the Code group.
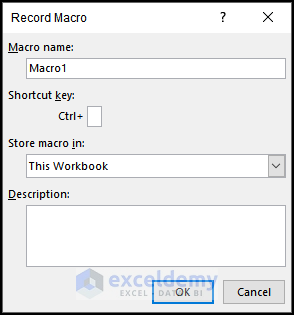
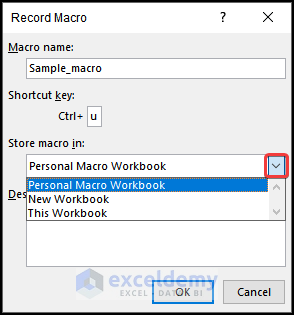
The Record Macro dialog box will open as shown in the following image.
Note: You can also use the keyboard shortcut Alt + L + R to open the Record Macro dialogue box directly from your worksheet.
- Rename the Macro name. We have used the name Sample_macro.
- In the Shortcut key box, type in the shortcut key combination you want to use to enable this macro. We used Ctrl + U (lowercase U).
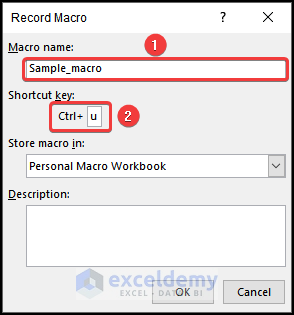
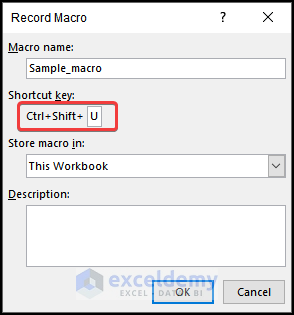
Note: Assigning the macro shortcut key is case-sensitive. If you enter an uppercase letter, the shortcut key combination will be Ctrl + Shift + your assigned key.
- Click on the drop-down icon under the Store macro in option.
You will see 3 options in the drop-down menu.
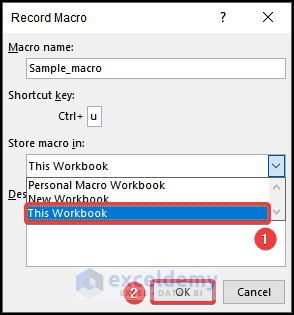
- Personal Macro Workbook → Choosing this option will permanently save this macro shortcut key for your workbook.
- New Workbook → Selecting this will save the macro shortcut key in a new workbook.
- This Workbook → By choosing this, the macro shortcut key will only be active in the current workbook.
- Choose the This Workbook option from the drop-down. You can choose other options according to your requirements.
- Click on OK.
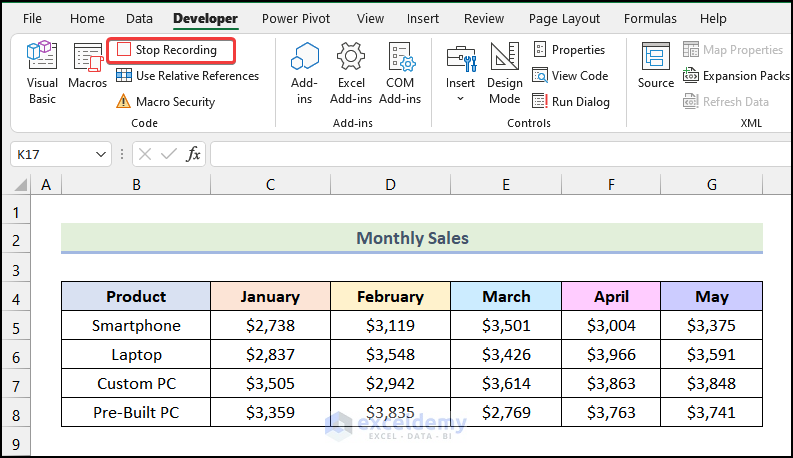
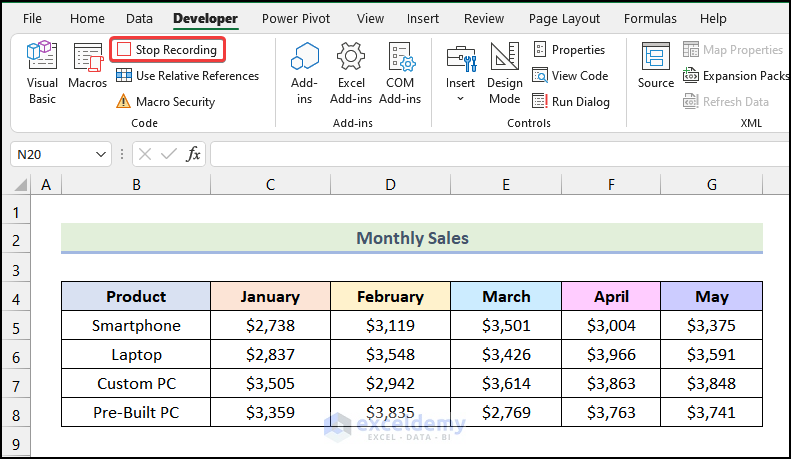
- Click on the Stop Recording option from the Code group under the Developer tab and your macro shortcut key will be added.
Read More: Types of VBA Macros in Excel
Method 2 – Editing an Excel Macro Shortcut Key of an Assigned Macro
Steps:
- Go to the Developer tab from Ribbon.
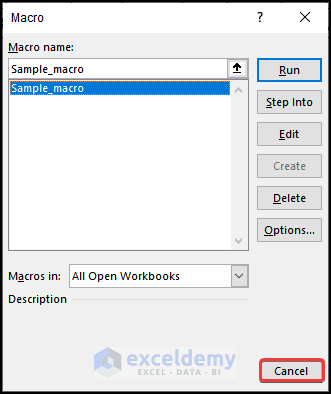
- Select the Macros option from the Code group.
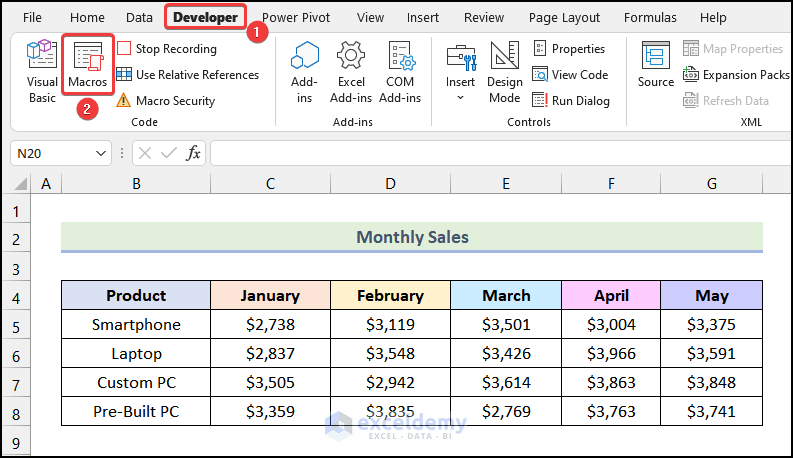
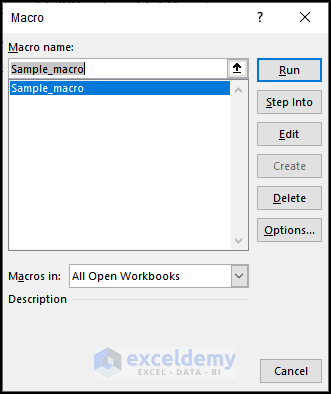
The Macro dialog box will be visible on your worksheet as shown in the following image.
Note: You can also use the keyboard shortcut Alt + L + PM to open the Macro dialogue box directly from your worksheet.
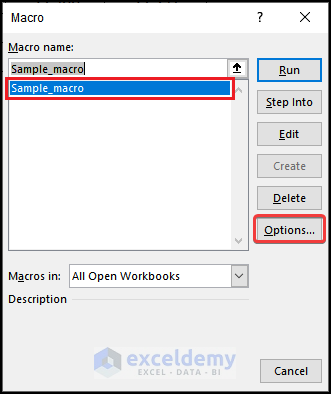
- Choose the macro of which you want to edit the shortcut key.
- Click on the Options as marked in the image given below.
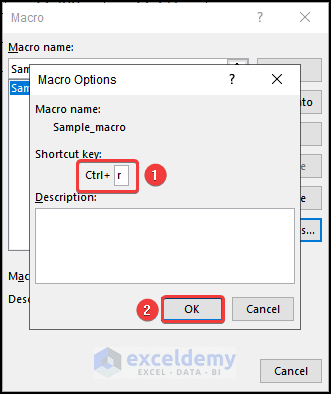
The Macro Options dialog box will open.
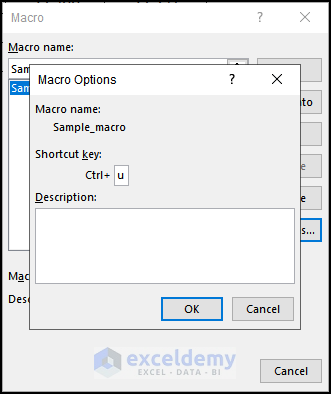
- Edit the Shortcut key according to your preference. We changed the shortcut key to Ctrl + R (lowercase R).
- Click on OK.
- You will be redirected to the Macro dialog box. Click on the Cancel option.
- Click on Stop Recording.
Read More: How to Edit Macros in Excel
Things to Remember
- While assigning the macro shortcut key, if you have CAPS LOCK enabled, the shortcut key combination will be like Ctrl + Shift + your specified key.
- If you have 2 or more workbooks that have macros that contain the same macro shortcut key, the macro that will run is the macro that is alphabetically first in the list of available macros.
Download the Practice Workbook
Related Articles
- How to Save VBA Code in Excel
- Using Macro Recorder in Excel
- How to Record a Macro in Excel
- 25 VBA Macro Example for Enhanced Productivity
- How to Remove Macros from Excel
- How to Save Macros in Excel Permanently
- How to Use Excel VBA to Run Macro When Cell Value Changes
- Excel VBA to Pause and Resume Macro
- Excel Macro Enabled Workbook

