Download Practice Workbook
What Is Name Manager in Excel?
Name Manager in Excel is used to create, modify, and delete named ranges. Named ranges are descriptive identifiers assigned to specific worksheet cells or ranges of cells. By naming ranges, we can refer to them in computations without having to use cell references.
For instance, when working with formulas in Excel, we occasionally use names rather than cell references. Name Manager allows us to add a new reference, amend an existing reference or delete a reference.
How to Launch Name Manager in Excel
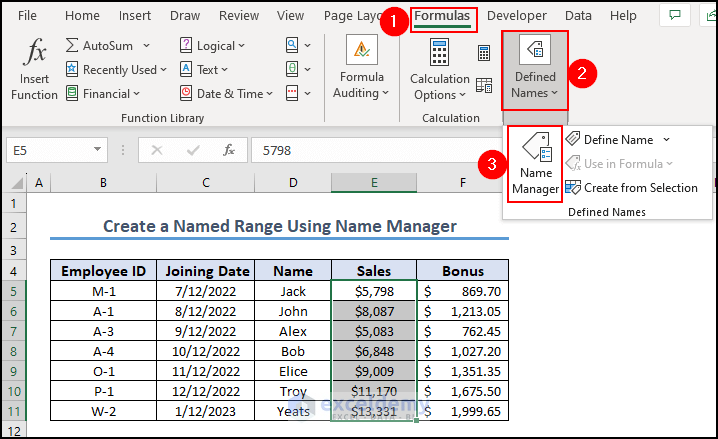
You can find the Name manager on the “Formulas” tab in the “Defined Names” area. You can also access it by “Ctrl + F3”.
Different Columns of Name Manager
Name manager can be used to create a new name in Excel, although it is mostly used to access existing names. Here are some columns that display information in the name manager:
- Name: The Name column may contain a defined name or the name of a table. A defined name can refer to a single cell, a range of cells, a formula, or a constant value, while a table name refers to a table used to organize information into rows and columns.
- Value: In the Value column, you can see what the current value is. Names may have different meanings depending on what they represent.
- Refers To: The reference or formula associated with the name.
- Scope: It indicates if a name is applicable to a worksheet or the entire workbook in the Scope column.
- Comment: In the Comment column, you can provide additional information about a given name. It permits up to 255 characters for the name description.
When Do We Use Excel Name Manager?
Excel’s Name Manager is useful for creating, organizing and managing named ranges and formulas within a workbook. It is useful when you need to organize and manage named ranges and formulas in a workbook. It helps improve the readability, maintainability and efficiency of your spreadsheets, particularly in complex situations or when working with macros and data validation.
How to Create a Named Range Using Name Manager in Excel
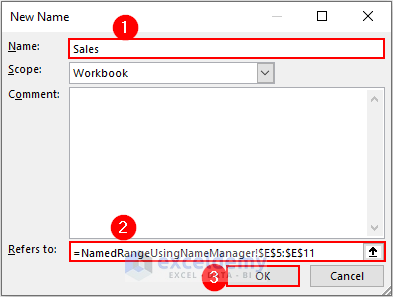
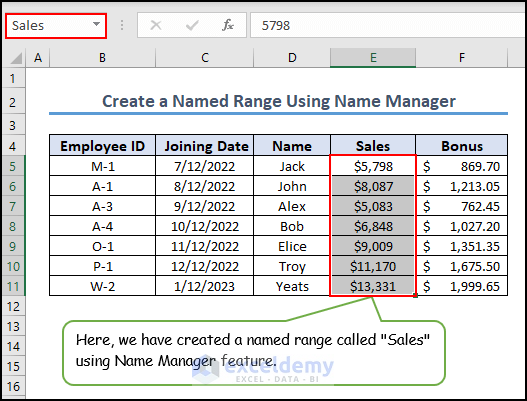
- Select the data range to give a specific name. In our case, it is E5:E11.
- Go to the Formulas tab>> choose Name Manager from the Defined Names drop-down.
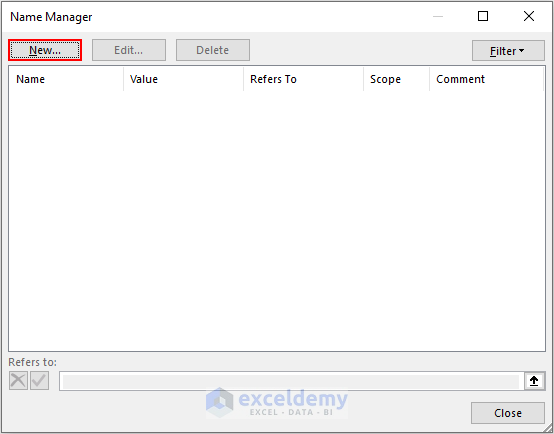
- A dialog box named Name Manager will open up.
- Click on the New tab.
- Enter a name in the Name We have given ‘Sales’.
- The range of cells (B5:B11) selected earlier will be visible in the Refers to box.
- Press OK and your named range is now ready.
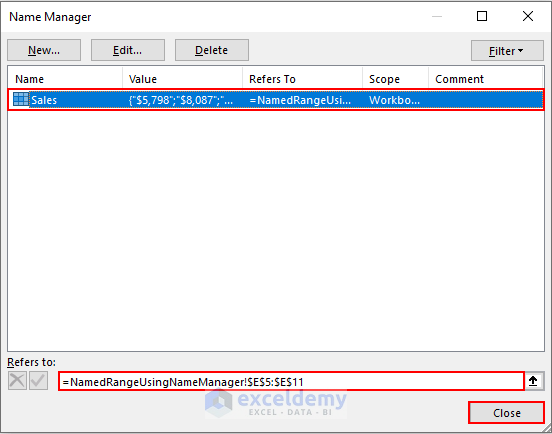
- The Name Manager window will reappear where we’ll find the newly given name of our cell ranges.
- Click Close.
- If we select the data range in the Excel worksheet, we’ll see the name (Sales) assigned for it in the Name Box.
Excel’s Name Manager: 5 Different Scenarios
In the previous section, we created a named range called “Sales”. Using Name Manager, we can also edit, delete, and filter Excel names.
Scenario 1 – Editing Named Range in Excel
- Select the named range of the working worksheet and click Edit.
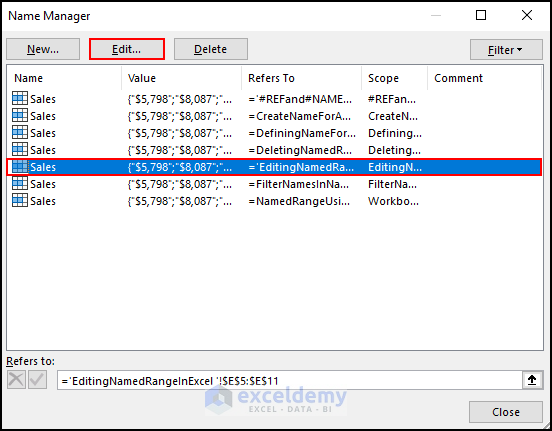
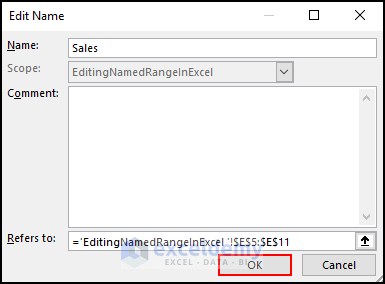
- It will take you to the Edit Name dialog box where you can edit as per your requirements.
- Click OK.
Read More: How to Edit Defined Names in Excel
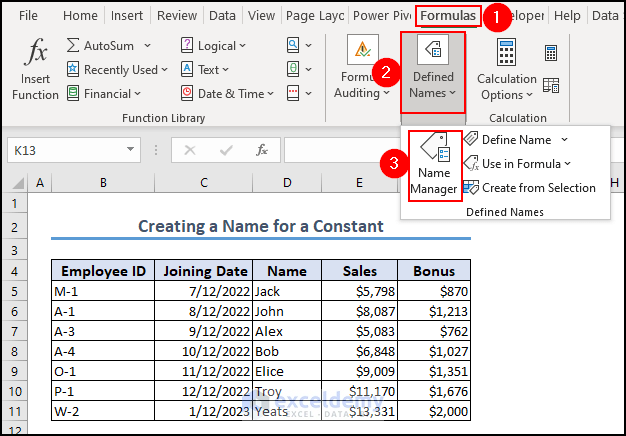
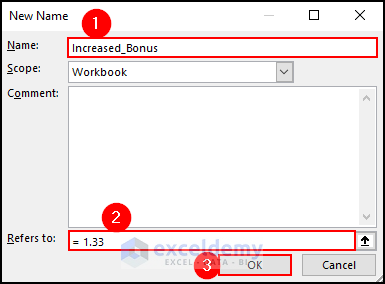
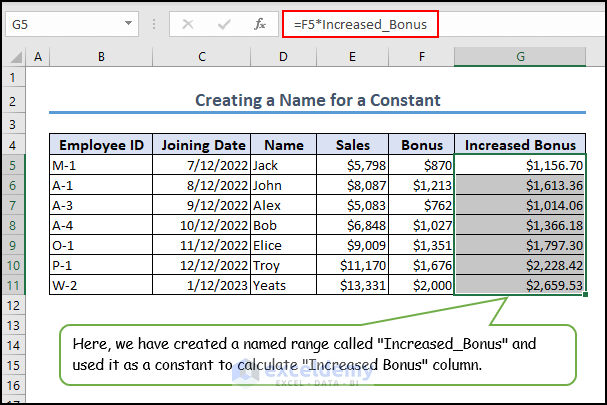
Scenario 2 – Create a Name for a Constant in Excel
A name can be created for both a cell range and a constant without referencing a cell. Suppose we need a conversion factor to simplify our calculations. We can then assign that value a name so we won’t have to refer to it every time.
Let’s say we want to add a new column named “Increased Bonus” where we will show the increased bonus of each employee. We will multiply 1.33 by their current bonus. So we will create a name so that we don’t have to refer to it for each calculation.
- To create the name range, go to the Formulas tab>> choose Name Manager from the Defined Names drop-down.
- A dialog box named Name Manager will open up.
- Click on the New tab.
- In the “Name” box enter “Increased_Bonus” and in the “Refers to” box, specify the value as 1.33.
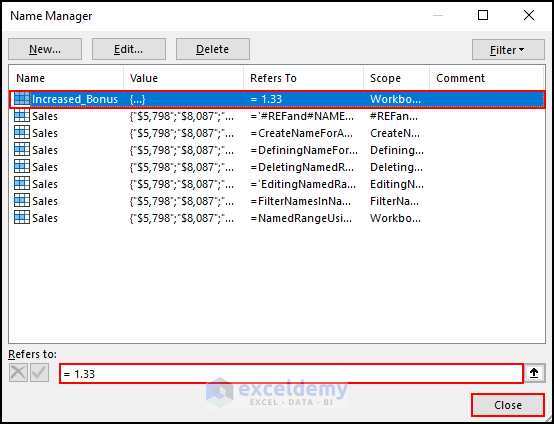
- The name “Increased_Bonus” is created in the Name Manager dialog box.
- Click Close.
- We can calculate the Increased Bonus using the newly created named range “Increased_Bonus”.
- It will show in the suggestion list to select.
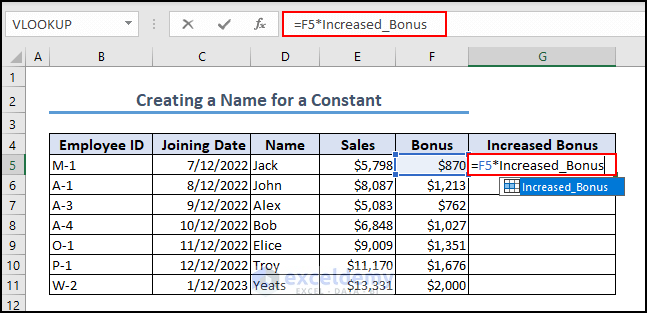
- AutoFill the rest to calculate the ‘Increased Bonus’ for each employee.
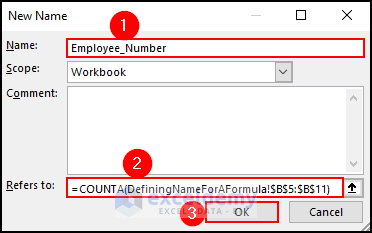
Scenario 3 – Defining Name for an Excel Formula
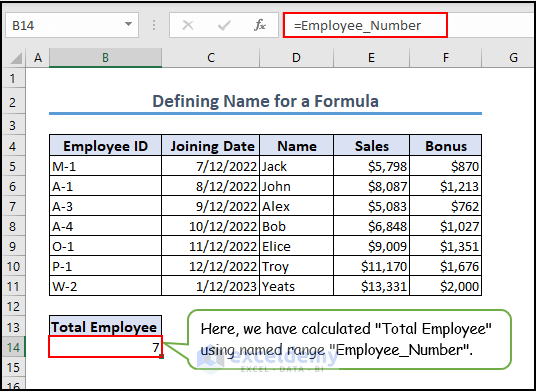
Suppose we wish to determine the total number of employees there. We need to create a named formula:
- Go to the New Name dialog box.
- In the “Name” box, enter “Employee_Number” and in the “Refers to” box, specify the formula.
- Calculate Total Employee using Employee_Number named range.
- The final output will be as shown in the image below.
Read More: How to Copy a Sheet If Name Already Exists in Excel
Scenario 4 – Filter Names in Name Manager
There is another option named “Filter” in the Name Manager dialog box. By using this, we can filter out the relevant ranges.
- Click on Filter in the Name Manager dialog box.
- You will see the different options.
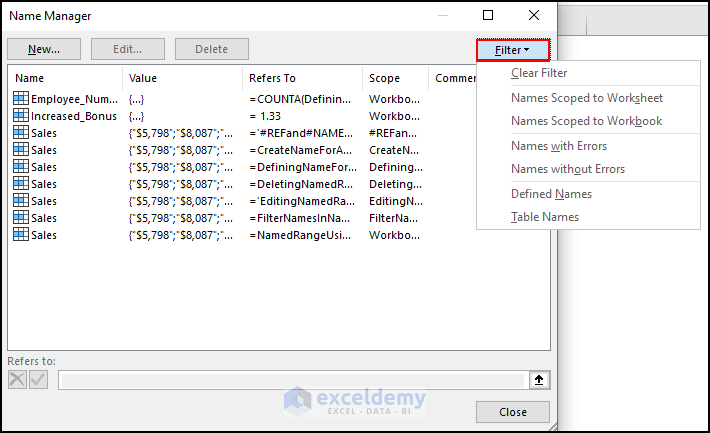
We can see the filters that work on the areas with the right names.
Scenario 5 – Deleting Named Range in Excel
- Select the named range that you want to delete and click Delete.

- The named range will be removed from Name Manager.
Read More: How to Delete Defined Names in Excel
Naming Rules for Name Manager in Excel
- Excel names should not exceed 255 characters.
- Excel names cannot contain spaces or most punctuation characters. A name must begin with either a letter, an underscore, or a backslash.
- Names in Excel are case-insensitive.
- Ranges cannot be named as cell references. So, we cannot name a range like “A1” or “AA1”.
- We can define a range using a single letter except “c,” “C,” “r,” or “R” since they are used as shortcuts.
Some Shortcuts of Excel Name Manager
- Press “Ctrl + F3” to open the Excel Name Manager.
- Press “Ctrl + Shift + F3” to create named ranges from a selection.
- To get a list of all Excel names in a workbook press “F3”.
Benefits of Using Name Manager in Excel
- Centralized Management: The Name Manager organizes all workbook names. View, modify, and organize all specified names in one location. This unified administration makes updating named ranges, cells, and formulae easier.
- Visibility and Understanding: The Name Manager makes spreadsheet names more visible and understandable. It displays the name, scope, reference, and comments for each declared name. This detailed description makes it easy to understand and troubleshoot each name.
- Advanced Editing and Refactoring: The Name Manager lets you alter specified names. You may quickly edit the name, reference, formula, scope, or remove names. This functionality helps you easily update and handle dependent references while reworking or rearranging your worksheet.
- Efficient Workbook Navigation: The Name Manager makes workbook navigation easier. It lets you jump to named ranges, cells, and formulae from the Name Manager panel. In large spreadsheets with many named items, it’s time-saving.
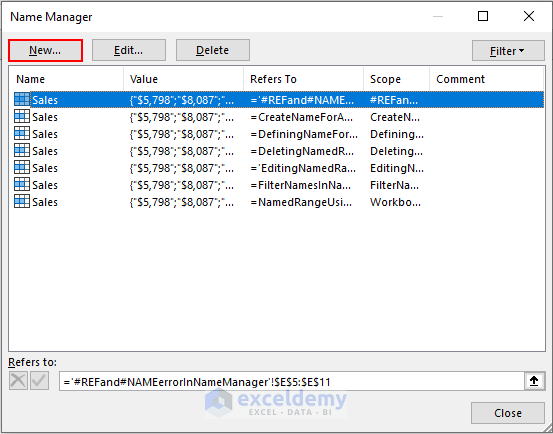
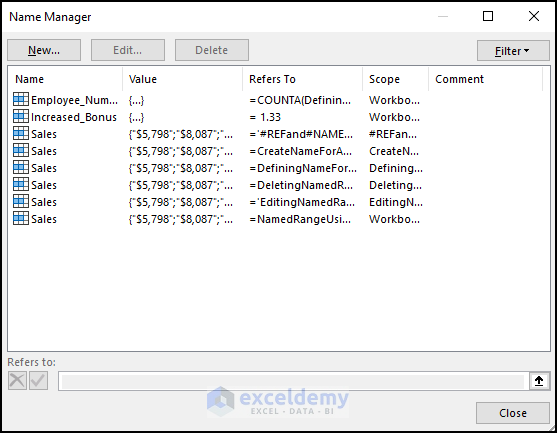
Errors While Using Name Manager in Excel (#REF and #NAME)
- By default, Microsoft Excel tries to keep the set names consistent and accurate by automatically changing range references when we add or remove cells from a named range.
- For instance, we have created a new named range “Joining_Info” where all employees joining information is stored.
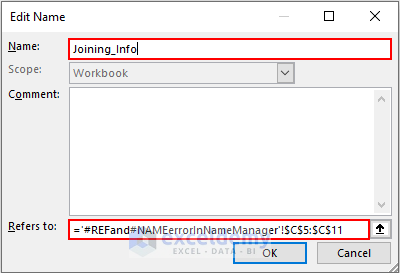
- If we insert a new row between rows C5:C11, or delete a row from that range, the reference will update accordingly.
- As soon as all cells (C5:C11) are deleted from Joining_Info named range, the name becomes invalid and shows #REF!
- We sometimes misspell or remove a named range. If a formula uses a range which doesn’t exist, the #NAME? error will occur.
Tips for Using Name Manager in Excel
- When creating named ranges, use descriptive and meaningful names that clearly indicate the purpose or content of the range. This will make it easier for you and others to understand and work with the named ranges in your workbook.
- If you have multiple named ranges in your workbook, consider organizing them into groups or categories. For example, you can prefix or group related named ranges with a common identifier or use a naming convention to categorize them. This can help in locating and managing named ranges more efficiently.
- Create dynamic formulas using Name Manager. Whenever your data changes, you won’t have to manually update the formulas.
- Avoid naming your ranges with reserved words or cell references, as this can lead to conflicts or confusion. Excel has a set of reserved words with specific functions; using them as range names may result in unexpected behavior.
Name Manager Excel: Knowledge Hub
- [Solved!] Names Not in Name Manager in Excel
- [Fixed!] Name Manager Delete Option Greyed out in Excel
<< Go Back to Excel Formulas | Learn Excel
Get FREE Advanced Excel Exercises with Solutions!
