In this article, I’ll show you how you can write to a text file using VBA in Excel.
How to Write to a Text File Using Excel VBA (Quick View)
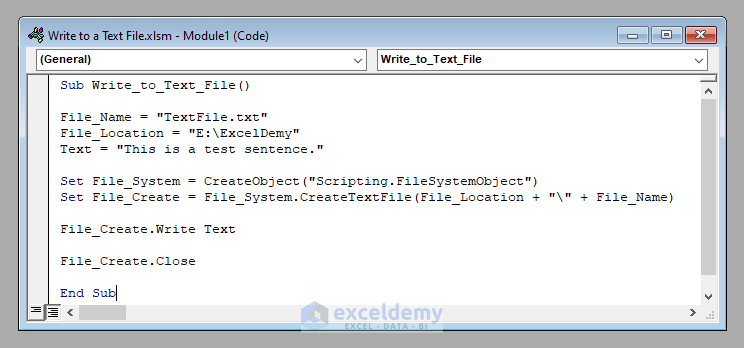
Sub Write_to_Text_File()

File_Name = "TextFile.txt"
File_Location = "E:\ExcelDemy"
Text = "This is a test sentence."

Set File_System = CreateObject("Scripting.FileSystemObject")
Set File_Create = File_System.CreateTextFile(File_Location + "\" + File_Name)

File_Create.Write Text
File_Create.Close

End Sub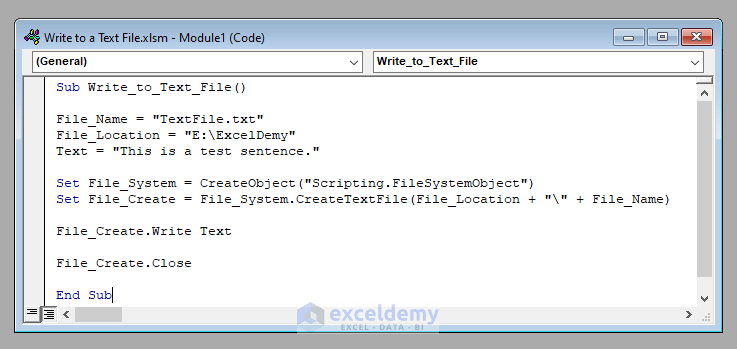
An Overview of the VBA Code to Write to a Text File Using Excel VBA (Step-by-Step Analysis)
So, let’s go to our main discussion today without further delay. We’ll break down the VBA code step-by-step to learn how to write to a text file using Excel VBA.
⧪ Step 1: Inserting the Necessary Inputs
First of all, we have to insert the necessary inputs into the code. The inputs include the file name, the file location, and the text that you want to write.
Put these according to your needs.
File_Name = "TextFile.txt"
File_Location = "E:\ExcelDemy"
Text = "This is a test sentence."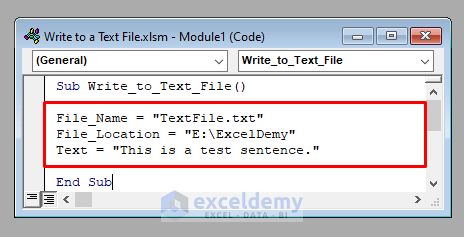
⧪ Step 2: Declaring the Necessary Objects
Next, we need to declare a few necessary objects to the code. They are: a FileSystemObject and a FileCreateObject. The FileCreateObject will create the required text file in our given location.
Set File_System = CreateObject("Scripting.FileSystemObject")
Set File_Create = File_System.CreateTextFile(File_Location + "\" + File_Name)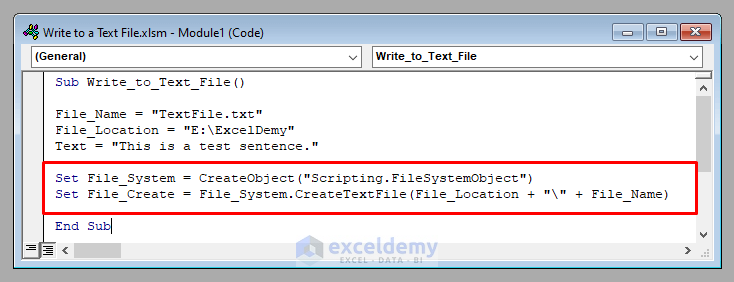
⧪ Step 3: Writing the Text to the File
This is the most important step. We’ll write the required text to the text file using the Write method of VBA.
File_Create.Write Text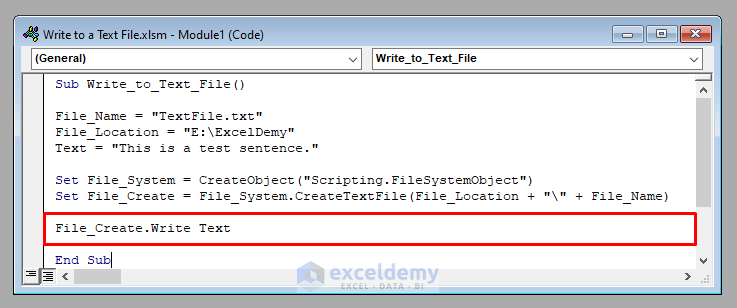
⧪ Step 4: Closing the FileCreateObject
Finally, we’ll close the FileCreateObject.
File_Create.Close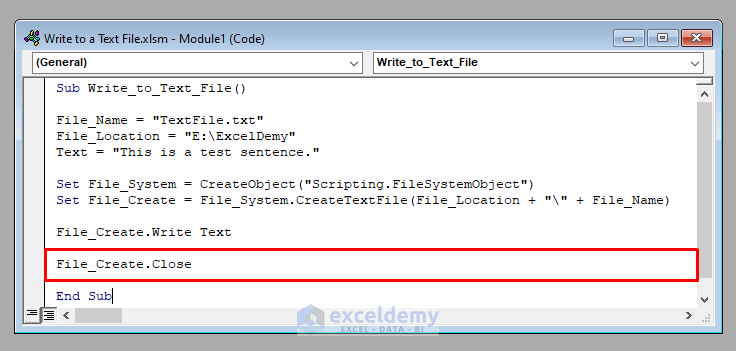
So the complete VBA code will be:
⧭ VBA Code:
Sub Write_to_Text_File()

File_Name = "TextFile.txt"
File_Location = "E:\ExcelDemy"
Text = "This is a test sentence."

Set File_System = CreateObject("Scripting.FileSystemObject")
Set File_Create = File_System.CreateTextFile(File_Location + "\" + File_Name)

File_Create.Write Text
File_Create.Close

End Sub
Developing a Macro to Write a Text to a Text File Using Excel VBA
We’ve seen the step-by-step analysis of the code to write a text to a text file using VBA.
Now let’s see how to use the code to send the Email
⧪ Step 1: Opening the VBA Window
Press ALT + F11 on your keyboard to open the Visual Basic window.
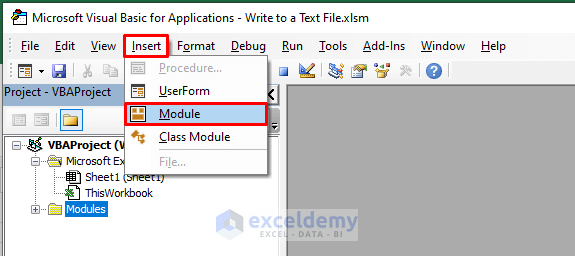
⧪ Step 2: Inserting a New Module
Go to Insert > Module in the toolbar. Click on Module. A new module called Module1 (or anything else depending on your past history) will open.
⧪ Step 3: Putting the VBA Code
This is the most important step. Insert the given VBA code in the module.
⧪ Step 4: Running the Code
Click on the Run Macro tool from the toolbar above.
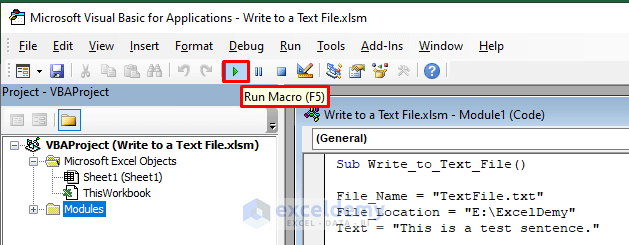
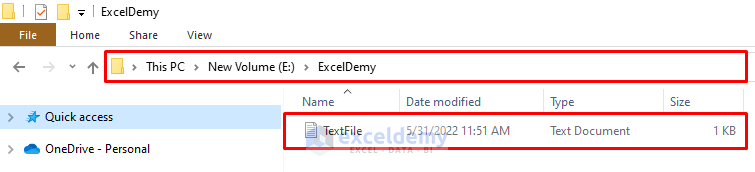
The code will run. And you’ll find a text file created in your desired location (E:\ExcelDemy) with the desired name (TextFile.txt).
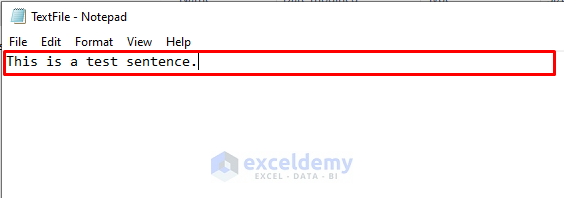
It contains the given text.
Read More: Macro to Convert Excel File into Pipe Delimited Text File
Things to Remember
- Make sure the location mentioned in the code to create the text file is a valid one on your computer. Otherwise, it’ll show an error.
- If you want to select the folder manually after running the code each time, other than fixing it within the code, you can use the VBA FileDialog object.
Download Practice Workbook
Download this practice workbook to exercise while you are reading this article.
Conclusion
Therefore, this is the process to develop a Macro to send an Email from Excel with an attachment. Do you have any questions? Feel free to ask us.
Get FREE Advanced Excel Exercises with Solutions!
