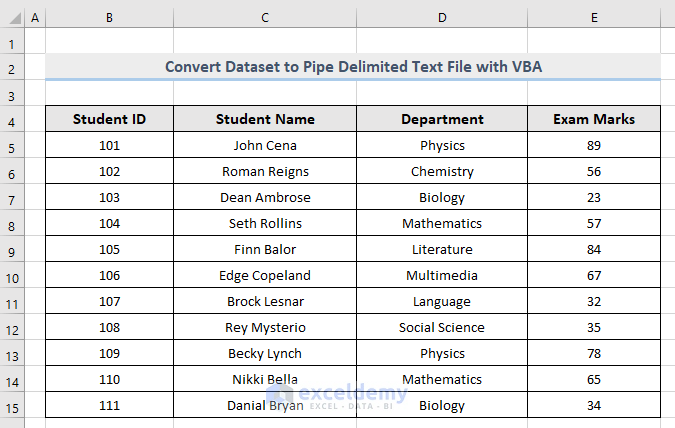
We have the following dataset. The contents of the dataset are relatively irrelevant to the code we’ll use.
Method 1 – Macro to Transfer Contents from an Excel Sheet to a Pipe-Delimited Text File in the Active Folder
Steps:
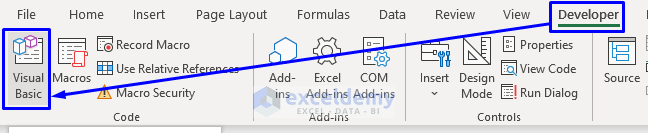
- Press Alt + F11 on your keyboard or go to the tab Developer and select Visual Basic to open the Visual Basic Editor.
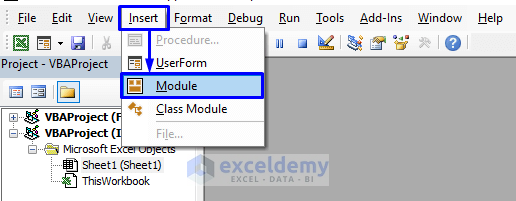
- From the menu bar, click Insert and select Module.
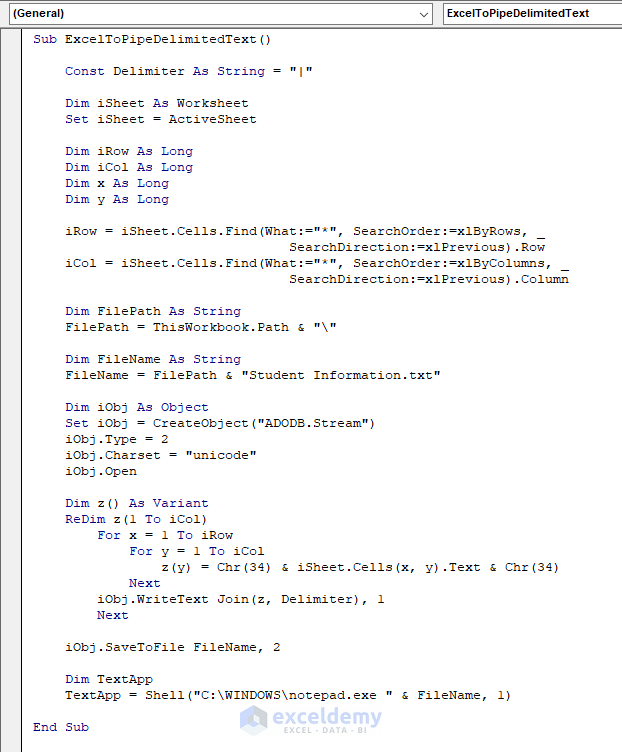
- Copy the following code and paste it into the code window.
Sub ExcelToPipeDelimitedText()
    Const Delimiter As String = "|"
    Dim iSheet As Worksheet
    Set iSheet = ActiveSheet
    Dim iRow As Long
    Dim iCol As Long
    Dim x As Long
    Dim y As Long
    iRow = iSheet.Cells.Find(What:="*", SearchOrder:=xlByRows, SearchDirection:=xlPrevious).Row
    iCol = iSheet.Cells.Find(What:="*", SearchOrder:=xlByColumns, SearchDirection:=xlPrevious).Column
    Dim FilePath As String
    FilePath = ThisWorkbook.Path & "\"
    Dim FileName As String
    FileName = FilePath & "Student Information.txt"
    Dim iObj As Object
    Set iObj = CreateObject("ADODB.Stream")
    iObj.Type = 2
    iObj.Charset = "unicode"
    iObj.Open
    Dim z() As Variant
    ReDim z(1 To iCol)
        For x = 1 To iRow
            For y = 1 To iCol
                z(y) = Chr(34) & iSheet.Cells(x, y).Text & Chr(34)
            Next
        iObj.WriteText Join(z, Delimiter), 1
        Next
    iObj.SaveToFile FileName, 2
    Dim TextApp
    TextApp = Shell("C:\WINDOWS\notepad.exe " & FileName, 1)
End Sub
Your code is now ready to run.
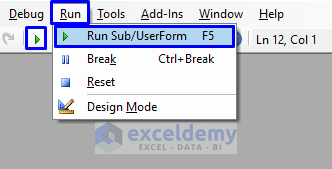
- Press F5 on your keyboard, select Run and go to Run Sub/UserForm, or click on the small Run icon in the sub-menu bar to run the macro.
Here’s the result.

We get a new text file named “Student Information” (the name was provided in the code under FileName) in the active folder.
VBA Code Explanation
Sub ExcelToPipeDelimitedText()This is the name for the sub-procedure of the macro.
Const Delimiter As String = "|"We specify the pipe delimiter (“|”).
Dim iRow As Long
Dim iCol As Long
Dim x As Long
Dim y As Long
We declare the necessary variables for the macro.
iRow = iSheet.Cells.Find(What:="*", SearchOrder:=xlByRows, SearchDirection:=xlPrevious).Row
iCol = iSheet.Cells.Find(What:="*", SearchOrder:=xlByColumns, SearchDirection:=xlPrevious).Column
These two lines go through all the values in the rows and the columns of the dataset.
Dim FilePath As String
  FilePath = ThisWorkbook.Path & "\"
These lines specify the active folder as the path for the text file.
Dim FileName As String
  FileName = FilePath & "Student Information.txt"
We specify the file name “Student Information” as the text file name in our case. You can modify the name according to your need.
Dim iObj As Object
  Set iObj = CreateObject("ADODB.Stream")
  iObj.Type = 2
  iObj.Charset = "unicode"
  iObj.Open
We specify the type of the data of the text with the Type property.
Dim z() As Variant
  ReDim z(1 To iCol)
   For x = 1 To iRow
      For y = 1 To iCol
         z(y) = Chr(34) & iSheet.Cells(x, y).Text & Chr(34)
      Next
      iObj.WriteText Join(z, Delimiter), 1
   Next
  iObj.SaveToFile FileName, 2
A FOR Loop scans through the whole dataset and stores the values of the cells in a text file. The values are separated by the delimiter specified in the code.
Dim TextApp
  TextApp = Shell("C:\WINDOWS\notepad.exe " & FileName, 1)
This is the path of the application type to convert the Excel contents. We used Notepad as the app.
End SubThis ends the sub-procedure of the macro.
Read More: How to Write to a Text File Using Excel VBA
Method 2 – VBA Macro to Export Excel Contents within the Specified Range to a Pipe-Delimited Text File
Steps:
- Open the Visual Basic Editor from the Developer tab and Insert a Module in the code window.
- Copy the following code and paste it into the code window.
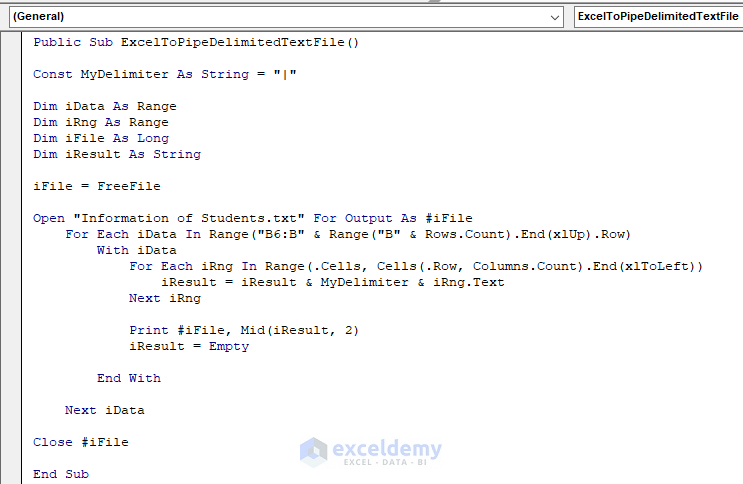
Public Sub ExcelToPipeDelimitedTextFile()
Const MyDelimiter As String = "|"
Dim iData As Range
Dim iRng As Range
Dim iFile As Long
Dim iResult As String
iFile = FreeFile
Open "Information of Students.txt" For Output As #iFile
    For Each iData In Range("B6:B" & Range("B" & Rows.Count).End(xlUp).Row)
        With iData
            For Each iRng In Range(.Cells, Cells(.Row, Columns.Count).End(xlToLeft))
                iResult = iResult & MyDelimiter & iRng.Text
            Next iRng
            Print #iFile, Mid(iResult, 2)
            iResult = Empty
        End With
    Next iData
Close #iFile
End Sub
Your code is now ready to run.
- Run the code. The result is shown in the image below.
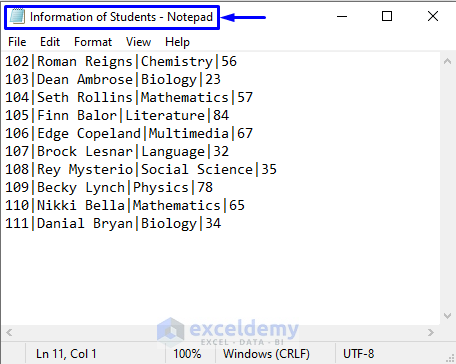
We get a newly created text file named “Information of Students” (the name was provided in the code). It carries the exact contents from the Excel sheet where the values from each cell are separated with pipe delimiters in the text file.
Note: If you don’t find this newly created “Information of Students” text file in the active folder, look for the file in the system’s main hard disk (usually the C drive in the Windows operating system).
VBA Code Explanation
Public Sub ExcelToPipeDelimitedTextFile()Here’s the name for the sub-procedure of the macro.
Const MyDelimiter As String = "|"This specifies the pipe delimiter (“|”).
Dim iData As Range
Dim iRng As Range
Dim iFile As Long
Dim iResult As String
We declared the necessary variables for the macro.
iFile = FreeFileWe return the file number with the FreeFile function.
Open "Information of Students.txt" For Output As #iFileThis specifies the name of the text file. “Information of Students” is the text file name in our case. You can modify the name according to your need.
For Each iData In Range("B6:B" & Range("B" & Rows.Count).End(xlUp).Row)
  With iData
    For Each iRng In Range(.Cells, Cells(.Row, Columns.Count).End(xlToLeft))
      iResult = iResult & MyDelimiter & iRng.Text
    Next iRng
    Print #iFile, Mid(iResult, 2)
    iResult = Empty
  End With
Next iData
This piece of code first specifies the range. We started our range from B6 and are going to the end of the sheet. The code prints every value of that range joined by the delimiter in the text file. This is a continuous iteration process until it covers the last cell count of the dataset.
Close #iFileThis macro line closes the file.
End SubWe end the macro.
Method 8 – Macro to Convert Excel File to a Pipe-Delimited Text File with a User-Defined Name in a User-Defined Folder
Steps:
- Open the Visual Basic Editor from the Developer tab and Insert a Module in the code window.
- Copy the following code and paste it into the code window.
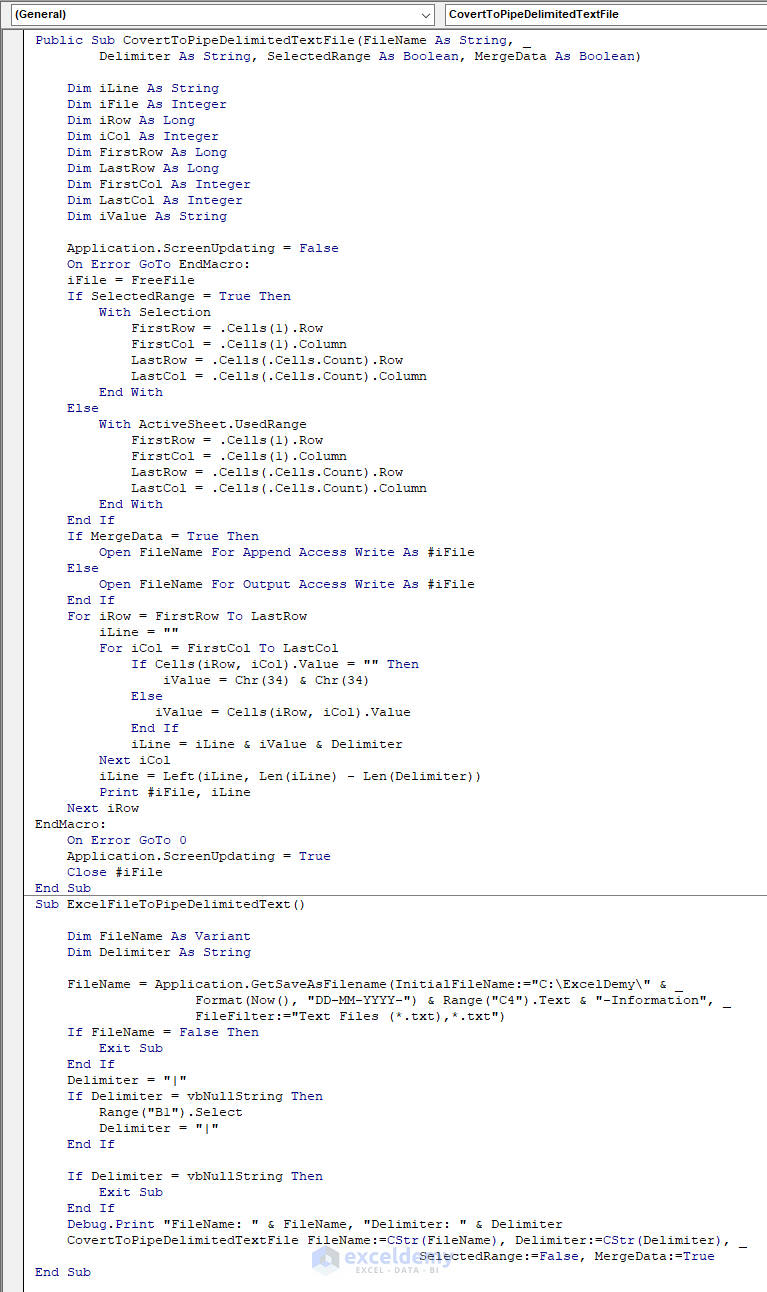
Public Sub CovertToPipeDelimitedTextFile(FileName As String, Delimiter As String, SelectedRange As Boolean, MergeData As Boolean)
    Dim iLine As String
    Dim iFile As Integer
    Dim iRow As Long
    Dim iCol As Integer
    Dim FirstRow As Long
    Dim LastRow As Long
    Dim FirstCol As Integer
    Dim LastCol As Integer
    Dim iValue As String
    Application.ScreenUpdating = False
    On Error GoTo EndMacro:
    iFile = FreeFile
    If SelectedRange = True Then
        With Selection
            FirstRow = .Cells(1).Row
            FirstCol = .Cells(1).Column
            LastRow = .Cells(.Cells.Count).Row
            LastCol = .Cells(.Cells.Count).Column
        End With
    Else
        With ActiveSheet.UsedRange
            FirstRow = .Cells(1).Row
            FirstCol = .Cells(1).Column
            LastRow = .Cells(.Cells.Count).Row
            LastCol = .Cells(.Cells.Count).Column
        End With
    End If
    If MergeData = True Then
        Open FileName For Append Access Write As #iFile
    Else
        Open FileName For Output Access Write As #iFile
    End If
    For iRow = FirstRow To LastRow
        iLine = ""
        For iCol = FirstCol To LastCol
            If Cells(iRow, iCol).Value = "" Then
                iValue = Chr(34) & Chr(34)
            Else
               iValue = Cells(iRow, iCol).Value
            End If
            iLine = iLine & iValue & Delimiter
        Next iCol
        iLine = Left(iLine, Len(iLine) - Len(Delimiter))
        Print #iFile, iLine
    Next iRow
EndMacro:
    On Error GoTo 0
    Application.ScreenUpdating = True
    Close #iFile
End Sub
Sub ExcelFileToPipeDelimitedText()
    Dim FileName As Variant
    Dim Delimiter As String
    FileName = Application.GetSaveAsFilename(InitialFileName:="C:\ExcelDemy\" & Format(Now(), "DD-MM-YYYY-") & Range("C4").Text & "-Information", FileFilter:="Text Files (*.txt),*.txt")
    If FileName = False Then
        Exit Sub
    End If
    Delimiter = "|"
    If Delimiter = vbNullString Then
        Range("B1").Select
        Delimiter = "|"
    End If
    If Delimiter = vbNullString Then
        Exit Sub
    End If
    Debug.Print "FileName: " & FileName, "Delimiter: " & Delimiter
        CovertToPipeDelimitedTextFile FileName:=CStr(FileName), Delimiter:=CStr(Delimiter), SelectedRange:=False, MergeData:=True
End Sub
Your code is now ready to run.
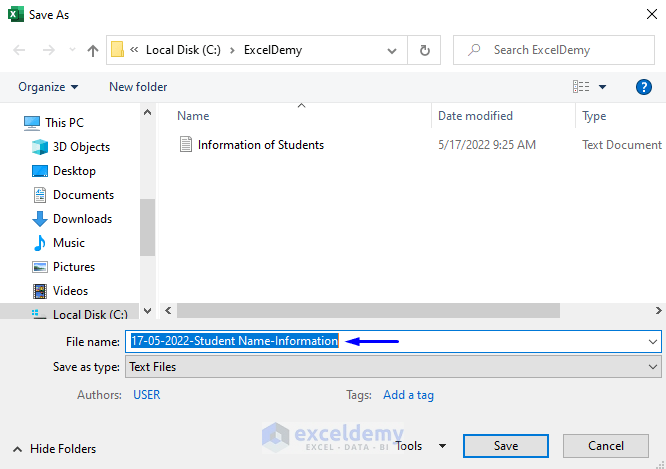
- After you Run this piece of code, you’ll get a pop-up Save As system window.
- The name for the text file you provided in the code will be displayed in the File name. You can change the file name from here.
- You can save the file anywhere in your system.
- Press Save when you enter the name and go to the folder you want.
- Here’s the result.
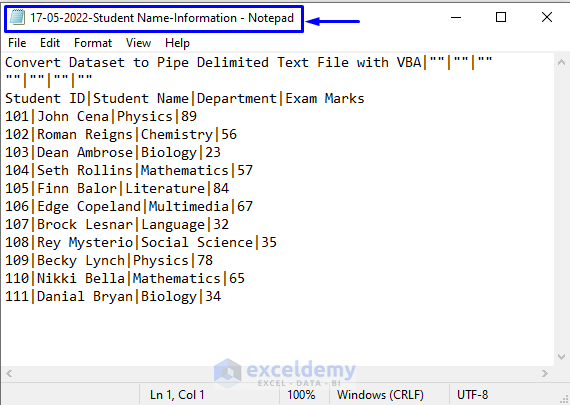
We get a newly created text file named “17-05-2022-Student Name-Information” (the name was provided in the code). It carries the exact contents from the Excel sheet where the values from each cell are separated with pipe delimiters in the text file.
VBA Code Explanation
Public Sub CovertToPipeDelimitedTextFile(FileName As String, Delimiter As String, SelectedRange As Boolean, MergeData As Boolean)This specifies a name for the sub-procedure of the macro. The name of the output file, delimiter, range to convert and the output data are passed inside the parentheses as the arguments of the macro.
Dim iLine As String
Dim iFile As Integer
Dim iRow As Long
Dim iCol As Integer
Dim FirstRow As Long
Dim LastRow As Long
Dim FirstCol As Integer
Dim LastCol As Integer
Dim iValue As String
We declared the necessary variables for the macro.
Application.ScreenUpdating = FalseTurns off the screen updating event.
On Error GoTo EndMacro:If an error occurs, the code goes to the EndMacro statement.
iFile = FreeFile
  If SelectedRange = True Then
    With Selection
      FirstRow = .Cells(1).Row
      FirstCol = .Cells(1).Column
      LastRow = .Cells(.Cells.Count).Row
      LastCol = .Cells(.Cells.Count).Column
    End With
  Else
    With ActiveSheet.UsedRange
      FirstRow = .Cells(1).Row
      FirstCol = .Cells(1).Column
      LastRow = .Cells(.Cells.Count).Row
      LastCol = .Cells(.Cells.Count).Column
    End With
  End If
Returns the file number with the FreeFile function. First, it will check for any selected range, and then count the rows and columns in the range. If there is no selected range, the used range will be the input value here.
If MergeData = True Then
   Open FileName For Append Access Write As #iFile
Else
   Open FileName For Output Access Write As #iFile
End If
This piece of code generates the output file.
For iRow = FirstRow To LastRow
    iLine = ""
    For iCol = FirstCol To LastCol
       If Cells(iRow, iCol).Value = "" Then
          iValue = Chr(34) & Chr(34)
       Else
         iValue = Cells(iRow, iCol).Value
       End If
         iLine = iLine & iValue & Delimiter
    Next iCol
    iLine = Left(iLine, Len(iLine) - Len(Delimiter))
    Print #iFile, iLine
Next iRow
It starts iterating through the first row to the last row of the range. It takes the values from each row and column and places them in the specified file separated by the delimiter.
EndMacro:
  On Error GoTo 0
The EndMacro statement. If any error occurs, returns null.
Application.ScreenUpdating = TrueTurns on the screen updating event.
Close #iFileThis macro line closes the file.
End SubEnds the existing sub-procedure of the macro.
Sub ExcelFileToPipeDelimitedText()Initiates another macro to perform the file naming procedure.
Dim FileName As Variant
Dim Delimiter As String
Declare the rest of the necessary variables for the macro.
FileName = Application.GetSaveAsFilename(InitialFileName:="C:\ExcelDemy\" & Format(Now(), "DD-MM-YYYY-") & Range("C4").Text & "-Information", FileFilter:="Text Files (*.txt),*.txt")We define the path, then define the name with the current date along with the cell value of C4 and the string “Information” with it.
If FileName = False Then
    Exit Sub
End If
    Delimiter = "|"
If Delimiter = vbNullString Then
    Range("B1").Select
    Delimiter = "|"
End If
If Delimiter = vbNullString Then
    Exit Sub
End If
This piece of code works with the Delimiter and names the file based on it.
Debug.Print "FileName: " & FileName, "Delimiter: " & Delimiter
  CovertToPipeDelimitedTextFile FileName:=CStr(FileName), Delimiter:=CStr(Delimiter), SelectedRange:=False, MergeData:=True
Convert the contents from the Excel file to the text file. Contents from the Excel file are separated with the delimiter in the text file.
End SubEnds the sub-procedure of the macro.
Download the Practice Workbook
Get FREE Advanced Excel Exercises with Solutions!

This is very helpful however I need the resulting txt file to reflect
X|X|XXXX|XXX| and not “X”|”X”|”XXXX”|. How can I remove the “” around the variables.
Thank you
Hi Jesse,
Thanks for your comment. Have you checked the method no. 2 (VBA Macro to Export Excel Contents with Specified Range to a Pipe Delimited Text File) of this article? I think that solves your problem.
If you were trying to do this using Method 8 like I was, search the code for this line:
“iValue = Chr(34) & Chr(34)” (it only appears once)
Then replace “Chr(34) & Chr(34)” with two, double-quotation marks. The end result should be:
iValue = “”
Hope this helps!
Hello Jon H,
Thank you for sharing this tip! Replacing Chr(34) & Chr(34) with “” is a great clarification and should make the code more straightforward for others to understand and implement. This will surely be helpful for anyone working with Method 8!
Regards
ExcelDemy