The video below illustrates how to use Target Row to delete an entire row. By selecting Target Row, we have deleted all rows with marks less than 70 and no color.
How to Launch VBA Editor in Excel
To launch the VBA Editor in ExceL:
- Open Microsoft Excel.
- Click on the Developer tab in the ribbon and click on the Visual Basic icon in the Code group.

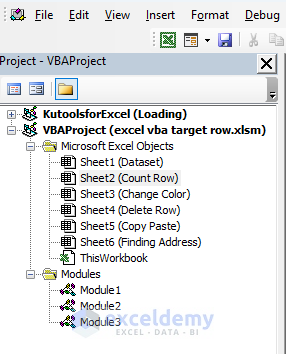
- This will open the VBA Editor Window, in which the Project Explorer is on the left-hand side and the Code Editor is in the main area.
- Select Module from the Insert tab.
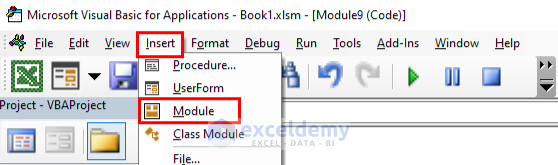
- A new Module will be created where you can Write or Edit your VBA code in the Code Editor window.
Note: By default, the Developer tab remains hidden. In that case, you have to enable the Developer tab. To do this, go to File > Options > Customize Ribbon and check the box next to Developer in the right-hand pane.
How to Insert VBA Code for Event Handlers
Inserting VBA code for Event Handlers is different from the normal procedure.
You have to insert the code on the same Sheet you will take as a worksheet. If you perform Event Handlers in Sheet2, insert the code in Sheet2 in the Microsoft Excel Objects folder. You don’t need to run the code. When you change anything in the workbook, the code will run automatically.
Method 1 – Counting Selected Row Numbers with Target Row
Steps:
- Enter the following code into the sheet where you want to apply it:
Private Sub Worksheet_SelectionChange(ByVal Target As Range)
Dim x As Long
x = Target.Rows.Count
'show in the MsgBox
MsgBox x
End Sub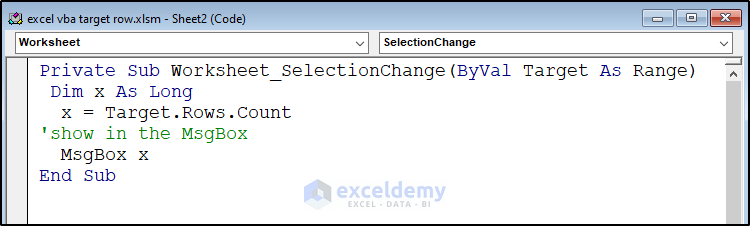
This code will run when you select any range in the worksheet. It counts the number of selected rows and assigns them as x. Then the value of x is shown in the MsgBox.
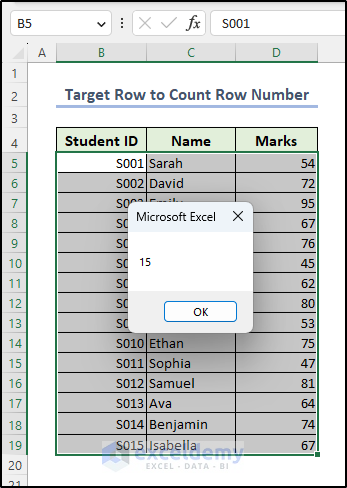
- Go to the worksheet and select the range B5:D19.
- A MsgBox will appear showing the number of selected rows.
Method 2 – Changing the Interior Color with Target Row
Steps:
- Enter the following code into the same sheet as the dataset:
Private Sub Worksheet_SelectionChange(ByVal Target As Range)
Dim x, y As Integer
x = Target.Row
y = Target.Column
'change interior color if condition is satisfied
If Target.Value >= 70 Then
Range(Cells(x, y - 2), Cells(x, y)).Interior.Color = RGB(144, 238, 144)
End If
End Sub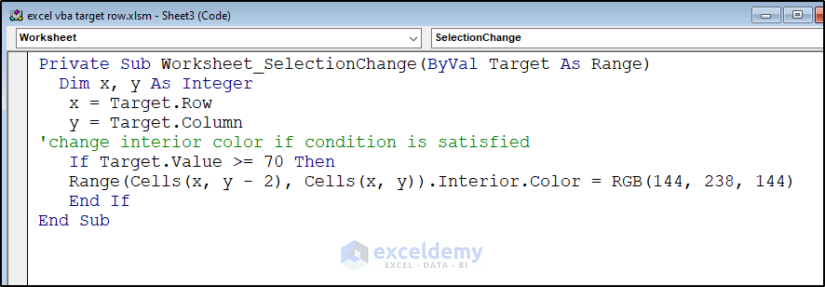
VBA Code Breakdown
This code will run when you select any range in the worksheet.
x = Target.Row
y = Target.Column- The values of x and y are, respectively, the row and column number of the selected cell.
If Target.Value >= 70 Then
   Range(Cells(x, y - 2), Cells(x, y)).Interior.Color = RGB(144, 238, 144)
End If- If the selected cell value is greater than or equal to 70, the row is highlighted with the cells and range properties.
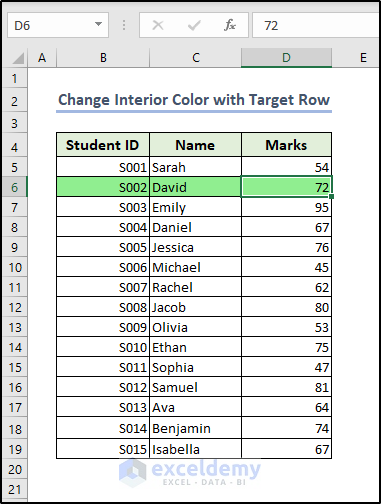
- Go to your dataset and select cell D6.
- The range B6:D6 will be highlighted, as shown in the below image.
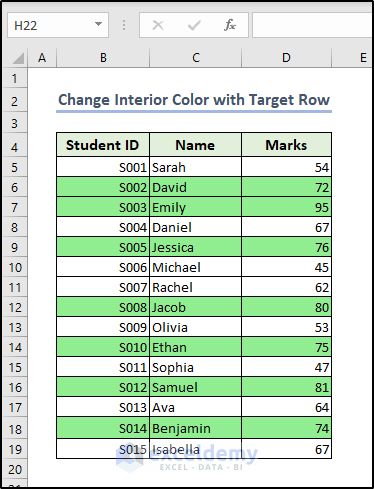
- Select every cell in the Marks column. Those with marks less than 70 will remain unchanged. However, all the rows with marks equal to or greater than 70 will be highlighted, as shown in the image below.
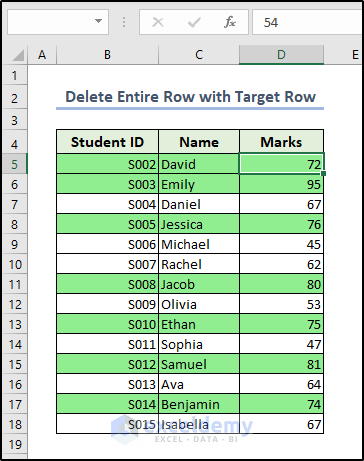
Method 3 – Deleting an Entire Row with Target Row
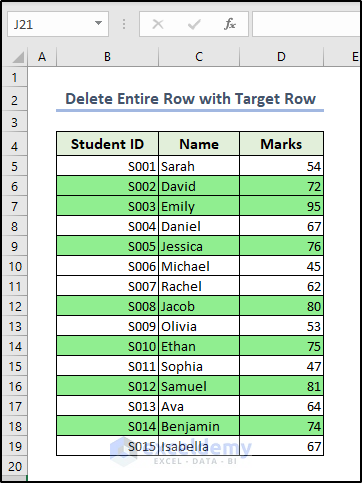
We have the same dataset as previously used. We have kept the highlighted rows. Furthermore, we want to delete all those rows that have marks less than 70 and no color.
Steps:
- Enter the following code into the same sheet as the dataset:
Private Sub Worksheet_SelectionChange(ByVal Target As Range)
Dim x, y As Integer
x = Target.Row
y = Target.Column
'delete row if condition is satisfied
If Target.Value < 70 Then
Range(Cells(x, y - 2), Cells(x, y)).EntireRow.Delete
End If
End Sub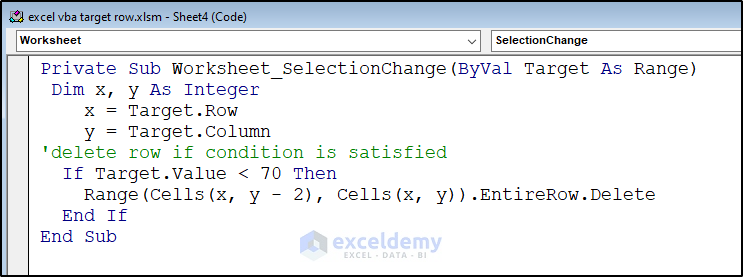
This code checks the condition with an If loop and deletes the entire row upon meeting the condition.
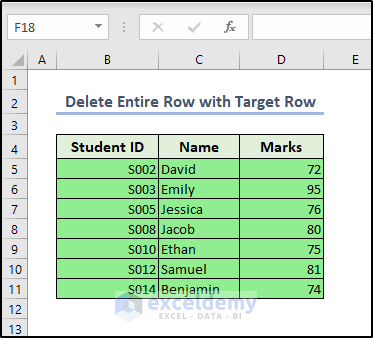
- Select cell D5. As the marks in this cell are less than 70, the entire row will be deleted.
- Select all other cells with marks. All the rows with marks less than 70 will be deleted.
Note: Two consecutive rows (S006, S007)have marks of less than 70. If you select marks of S006, the entire row will be deleted, but the row of S007 will take its place and remain selected. To solve this problem, you should first select the marks’ cell of the last row and then select each cell upward.
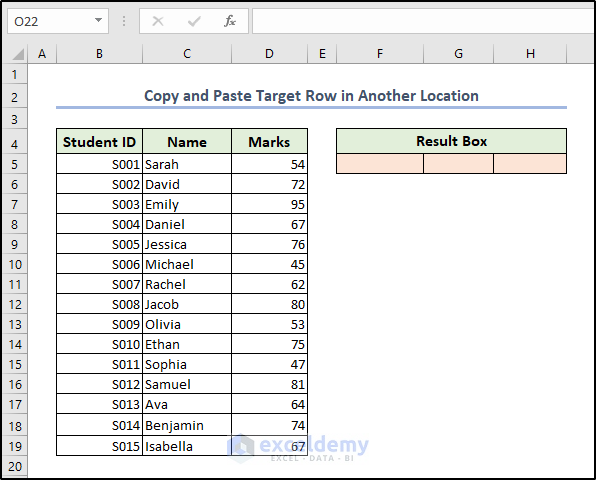
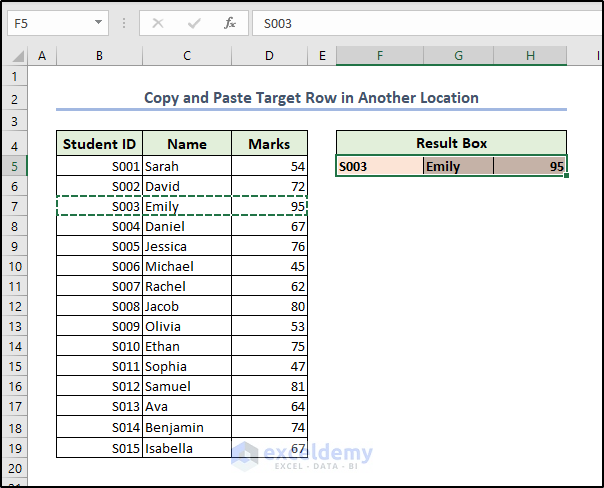
Method 4 – Copy and Paste the Entire Row Using Target Row
We have taken the same dataset with a Result Box. We will use a code that checks the marks. If the marks are equal to or greater than 70, the code will copy the row in F5:H5.
Steps:
- Enter the following code in the same sheet as your dataset.
Private Sub Worksheet_SelectionChange(ByVal Target As Range)
If Target.Cells.Count = 1 Then
Dim x As Long
Dim y As Long
x = Target.Row
y = Target.Column
'Copy Row if Condition is Met and Paste in a Specific Range
If Target.Value >= 70 Then
Range(Cells(x, y - 2), Cells(x, y)).Copy
Range("F5:H5").PasteSpecial xlPasteValues
Else: Range("F5:H5").ClearContents
End If
End If
End Sub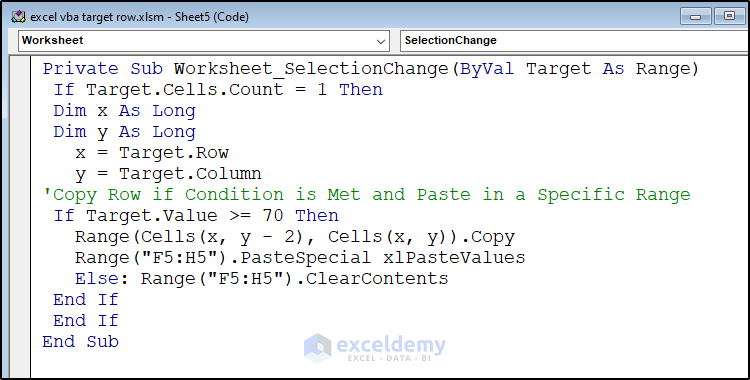
VBA Code Breakdown
If Target.Cells.Count = 1 ThenThis code will work if you select only one cell.
 Range(Cells(x, y - 2), Cells(x, y)).Copy
 Range("F5:H5").PasteSpecial xlPasteValues
Upon satisfying the condition, the code copies the row and pastes it to another location.
Else: Range("F5:H5").ClearContentsThe code clears the contents in the result box if the condition is not met.
- Go to the worksheet and select D7.
- If the mark is more than 70, the code will copy and paste the entire row into the Result Box.
How to Find Range Address with Target.Address in Excel VBA
We can easily find the address of any Target row by using Target.Address. This can also be done with Event Handlers. If we select any range, the program will show the Target Address in an MsgBox.
Steps:
- Enter the following code in the same sheet as the dataset:
Private Sub Worksheet_SelectionChange(ByVal Target As Range)
Dim x As String
'set x as Target Address
x = Target.Address
'show Target Address in MsgBox
MsgBox x
End Sub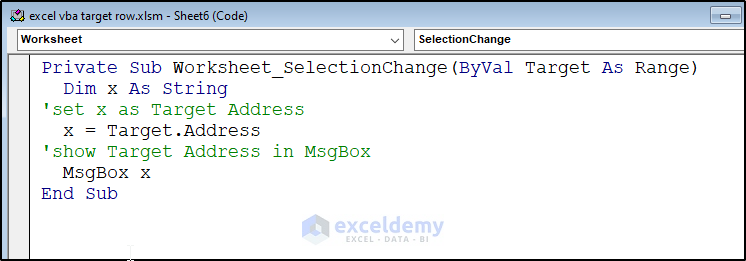
VBA Code Breakdown
This code assigns the Target Address to x and then shows it in the MsgBox.
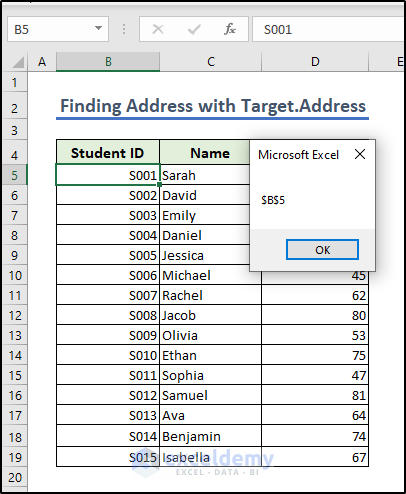
- Go to your worksheet and select any cell, say B5.
- The MsgBox will show the Target Address.
- Select the whole dataset.
- The MsgBox shows the Target Address.

Things to Remember
- The codes we used for Target Row have to be inserted in the Sheet. And a code will only work if the worksheet also has that particular code.
- The Event Handlers are very sensitive. When you don’t want the macro to run, make sure you have commented the code properly.
- You should select the range properly. If the code wants you to select only one cell, you have to select one cell. If you select multiple cells, the code will not work.
Download the Practice Workbook
You can download this workbook to practice.

