Here’s an overview of shape information that you can get with Excel VBA.
How to Launch the VBA Editor in Excel
- Press Alt + F11 to open the Microsoft Visual Basic window.
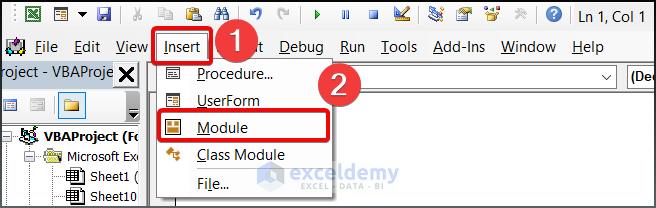
- Select Insert and Module to open a blank module.
Excel VBA for Shape Position: 4 Different Cases
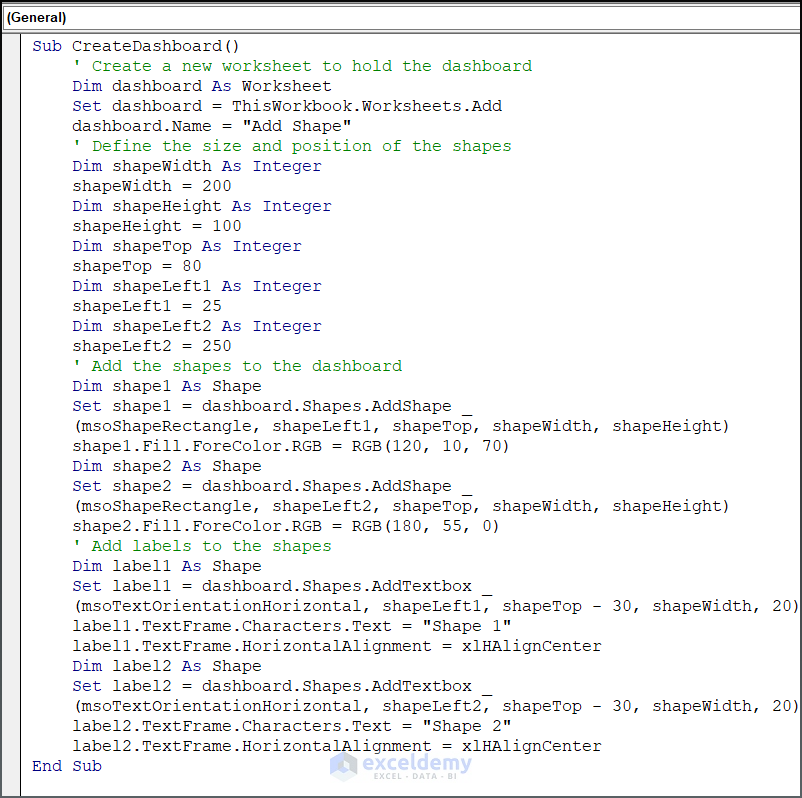
Case 1 – Importing Excel VBA Shape in a Specific Position
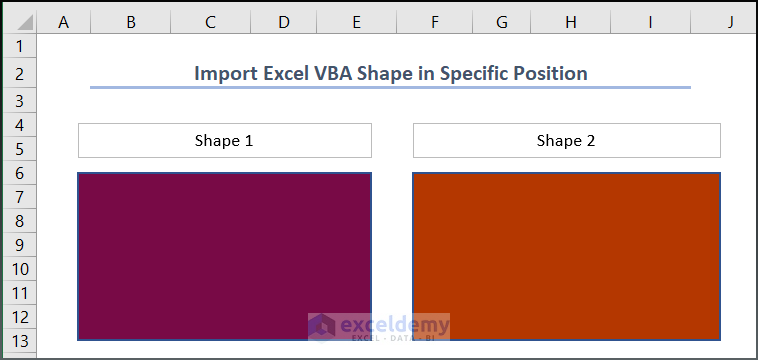
The following VBA code creates a dashboard worksheet in the current workbook and adds two rectangles with AddShape and two labels to it thereafter.
Sub CreateDashboard()
' Create a new worksheet to hold the dashboard
Dim dashboard As Worksheet
Set dashboard = ThisWorkbook.Worksheets.Add
dashboard.Name = "Add Shape"
' Define the size and position of the shapes
Dim shapeWidth As Integer
shapeWidth = 200
Dim shapeHeight As Integer
shapeHeight = 100
Dim shapeTop As Integer
shapeTop = 100
Dim shapeLeft1 As Integer
shapeLeft1 = 100
Dim shapeLeft2 As Integer
shapeLeft2 = 350
' Add the shapes to the dashboard
Dim shape1 As Shape
Set shape1 = dashboard.Shapes.AddShape(msoShapeRectangle, shapeLeft1, shapeTop, shapeWidth, shapeHeight)
shape1.Fill.ForeColor.RGB = RGB(255, 0, 0)
Dim shape2 As Shape
Set shape2 = dashboard.Shapes.AddShape(msoShapeRectangle, shapeLeft2, shapeTop, shapeWidth, shapeHeight)
shape2.Fill.ForeColor.RGB = RGB(0, 255, 0)
' Add labels to the shapes
Dim label1 As Shape
Set label1 = dashboard.Shapes.AddTextbox(msoTextOrientationHorizontal, shapeLeft1, shapeTop - 30, shapeWidth, 20)
label1.TextFrame.Characters.Text = "Shape 1"
label1.TextFrame.HorizontalAlignment = xlHAlignCenter
Dim label2 As Shape
Set label2 = dashboard.Shapes.AddTextbox(msoTextOrientationHorizontal, shapeLeft2, shapeTop - 30, shapeWidth, 20)
label2.TextFrame.Characters.Text = "Shape 2"
label2.TextFrame.HorizontalAlignment = xlHAlignCenter
End Sub
Code Breakdown
Worksheets.Addcreates a new worksheet to hold the dashboard.
shapeWidth, shapeHeight, shaeTop, shapeLeft1, shapeLeft2variables are used to set the size and position of the shapes that will be added to the worksheet.
Set shape1 = dashboard.Shapes.AddShape(msoShapeRectangle, shapeLeft1, shapeTop, shapeWidth, shapeHeight)shape1.Fill.ForeColor.RGB = RGB(255, 0, 0)adds two shapes to the worksheet using the AddShape method. The first shape is a red rectangle, and the second shape is a green rectangle.
TextFrame.Characters.Textadds labels to the two shapes using the AddTextbox method. The labels are positioned above the shapes, and their text is set to Shape 1 and Shape 2, respectively. The horizontal alignment of the labels is centered using the HorizontalAlignment property.
Case 2 – Determining the Shape Position Through the Cell Address
We have put some shapes in the worksheet.

The following VBA code retrieves the location of a selected shape on a worksheet by checking the type of the selection and displaying its address accordingly.
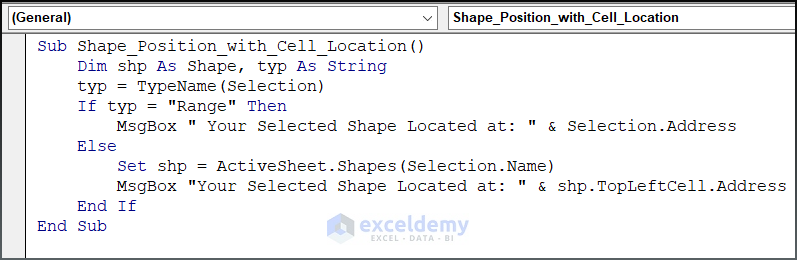
Sub Shape_Position_with_Cell_Location()
Dim shp As Shape, typ As String
typ = TypeName(Selection)
If typ = "Range" Then
MsgBox " Your Selected Shape Located at: " & Selection.Address
Else
Set shp = ActiveSheet.Shapes(Selection.Name)
MsgBox "Your Selected Shape Located at: " & shp.TopLeftCell.Address
End If
End Sub
Code Breakdown
- The first line defines a sub-procedure named Shape_Position_with_Cell_Location.
- The typ variable is assigned the result of the TypeName This function returns the type of the selected object as a string.
- An If statement is used to check whether the selected object is a range or a shape. If it is a range, a message box is displayed that shows the address of the selected range. If it is a shape, the next block of code is executed.
- A message box is displayed that shows the address of the top-left cell of the selected shape.
- The End Sub statement marks the end of the sub-procedure.
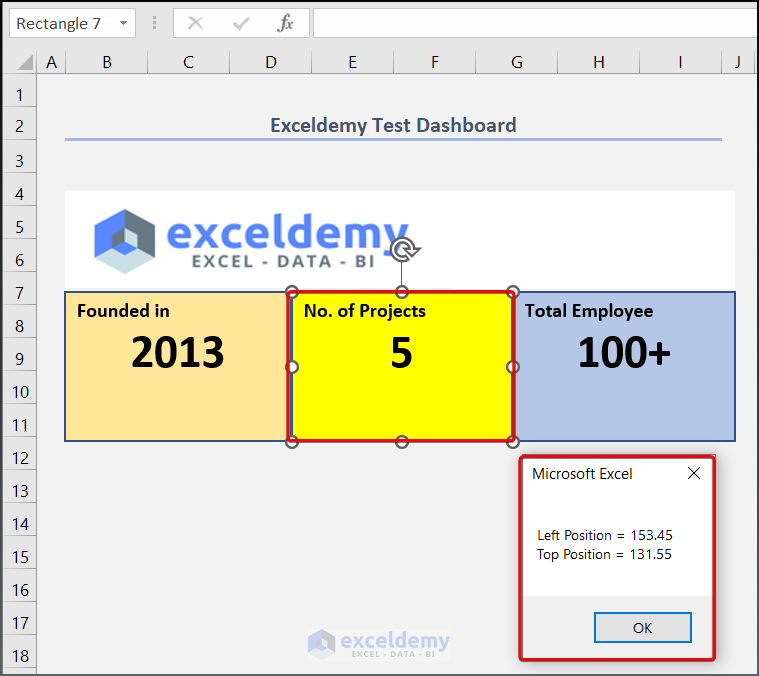
Case 3 – Discovering Shape Position
Let’s use the same worksheet as before to determine what shapes are being used.
This code determines the shapes from the selection and retrieves its location in terms of Left Position and Top Position.
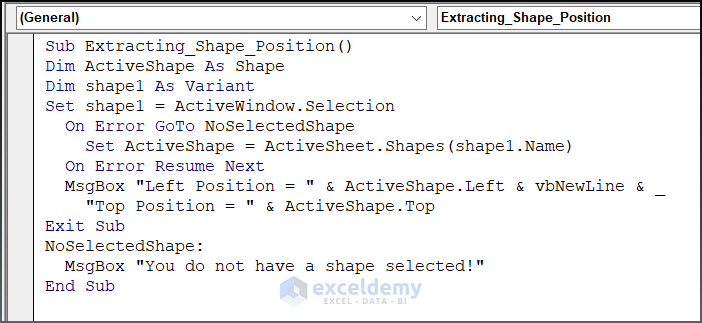
Sub Extracting_Shape_Position()
Dim ActiveShape As Shape
Dim shape1 As Variant
Set shape1 = ActiveWindow.Selection
On Error GoTo NoSelectedShape
Set ActiveShape = ActiveSheet.Shapes(shape1.Name)
On Error Resume Next
MsgBox "Left Position = " & ActiveShape.Left & vbNewLine & _
"Top Position = " & ActiveShape.Top
Exit Sub
NoSelectedShape:
MsgBox "You do not have a shape selected!
End Sub
Code Breakdown
- In the first line, the ActiveShape variable is declared and will be used to store the selected shape.
- The second line declares a variable called shape1 as a Variant data type. This variable will be used to store the selection made by the user.
- The third line assigns the value of the user’s selection to the shape1 variable using Selection property.
- The On Error GoTo NoSelectedShape statement sets up an error handler. If an error occurs when attempting to retrieve the selected shape, the code will jump to the NoSelectedShape.
- The Set ActiveShape = ActiveSheet.Shapes(shape1.Name) line attempts to set the ActiveShape variable to the selected shape. If the selection is not a shape or if an error occurs, the error handler will be triggered.
- The On Error Resume Next statement resumes normal error-handling behavior.
- The MsgBox statement displays a message box with the left and top positions of the selected shape.
- The Exit Sub statement exits the subroutine.
- The NoSelectedShape label is where the code jumps if an error occurs. It displays a message box notifying the user that no shape has been selected.
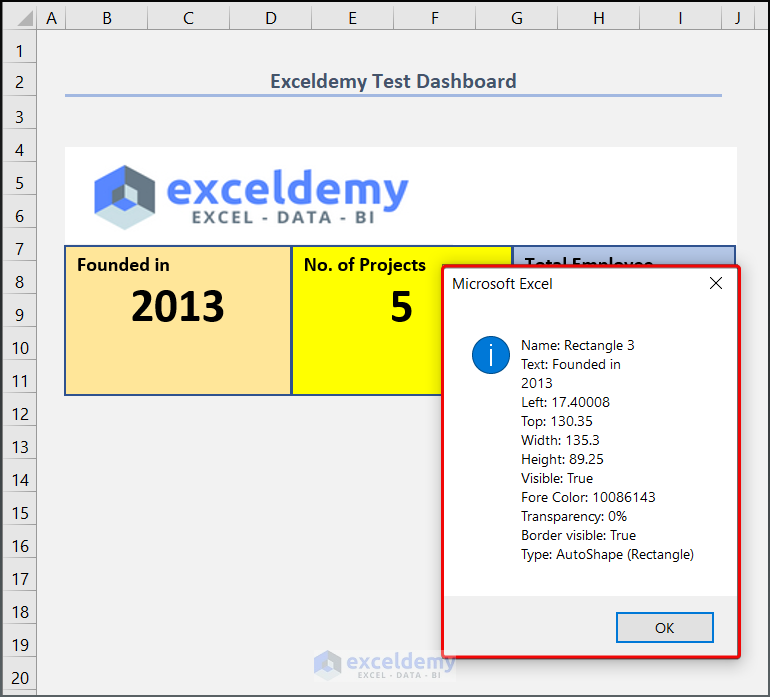
Case 4 – Viewing the Detailed Specification of a Shape Position in Excel VBA
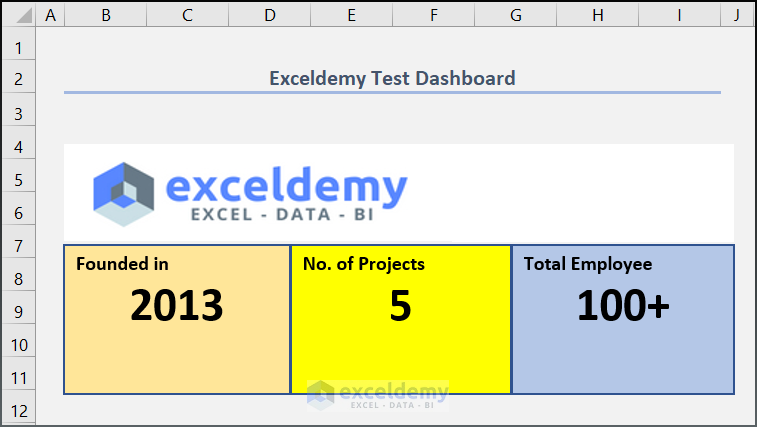
Let’s try to get more information about the selection.

We’ll add more code to get the other properties associated with the shape, like shape type, location, color, transparency, etc.
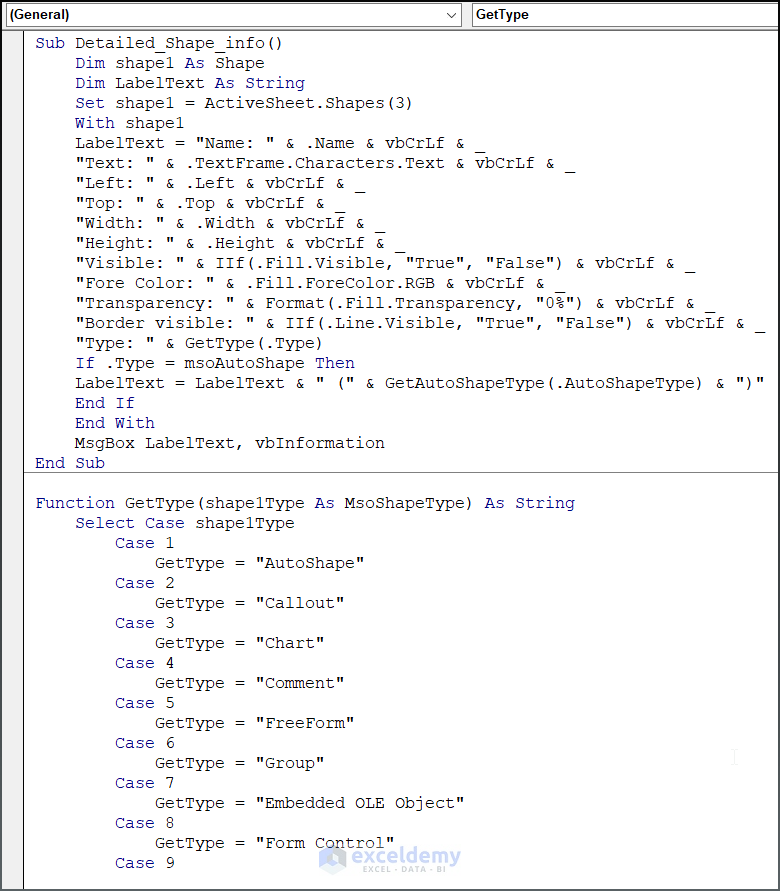
Sub Detailed_Shape_info()
Dim shape1 As Shape
Dim LabelText As String
Set shape1 = ActiveSheet.Shapes(3)
With shape1
LabelText = "Name: " & .Name & vbCrLf & _
"Text: " & .TextFrame.Characters.Text & vbCrLf & _
"Left: " & .Left & vbCrLf & _
"Top: " & .Top & vbCrLf & _
"Width: " & .Width & vbCrLf & _
"Height: " & .Height & vbCrLf & _
"Visible: " & IIf(.Fill.Visible, "True", "False") & vbCrLf & _
"Fore Color: " & .Fill.ForeColor.RGB & vbCrLf & _
"Transparency: " & Format(.Fill.Transparency, "0%") & vbCrLf & _
"Border visible: " & IIf(.Line.Visible, "True", "False") & vbCrLf & _
"Type: " & GetType(.Type)
If .Type = msoAutoShape Then
LabelText = LabelText & " (" & GetAutoShapeType(.AutoShapeType) & ")"
End If
End With
MsgBox LabelText, vbInformation
End Sub
Function GetType(shape1Type As MsoShapeType) As String
Select Case shape1Type
Case 1
GetType = "AutoShape"
Case 2
GetType = "Callout"
Case 3
GetType = "Chart"
Case 4
GetType = "Comment"
Case 5
GetType = "FreeForm"
Case 6
GetType = "Group"
Case 7
GetType = "Embedded OLE Object"
Case 8
GetType = "Form Control"
Case 9
GetType = "Line"
Case 10
GetType = "Linked OLE Object"
Case 11
GetType = "Linked Picture"
Case 12
GetType = "OLE Control"
Case 13
GetType = "Picture"
Case Else
GetType = "Other"
End Select
End FunctionFunction GetAutoShapeType(shape1Type As MsoAutoShapeType) As String
Select Case shape1Type
Case 1
GetAutoShapeType = "Rectangle"
Case 2
GetAutoShapeType = "Parallelogram"
Case 3
GetAutoShapeType = "Trapezoid"
Case 4
GetAutoShapeType = "Diamond"
Case 5
GetAutoShapeType = "Rounded Rectangle"
Case 6
GetAutoShapeType = "Octagon"
Case 7
GetAutoShapeType = "Isosceles Triangle"
Case 8
GetAutoShapeType = "Right Triangle"
Case 9
GetAutoShapeType = "Oval"
Case 10
GetAutoShapeType = "Hexagon"
Case 11
GetAutoShapeType = "Cross"
Case 12
GetAutoShapeType = "Regular Pentagon"
Case 13
GetAutoShapeType = "Can"
Case Else
GetAutoShapeType = "Other"
End Select
End FunctionCode Breakdown
- Two variables shape1 and LabelText are defined. The shape1 variable will be used to store the shape being inspected, and LabelText will be used to store the text that will be displayed in a message box.
- Set shape1 = ActiveSheet.Shapes(3) sets the “shape1” variable to the third shape in the active worksheet. This line is just an example and can be changed to select any specific shape.
- The With statement is used to apply a series of property assignments to the shape1 This statement is followed by a series of lines that extract specific properties of the shape and store them in the LabelText variable.
- The MsgBox statement displays the LabelText variable in a message box with the vbInformation argument indicating that it should be displayed with an information icon.
- Two functions are defined below the macro: GetType and GetAutoShapeType. These functions take a numeric argument representing the type of shape or auto shape, respectively, and return a string describing the shape type.

Rectangle 3 indicates the leftmost rectangle.
Frequently Asked Questions
How do I change the position of a shape in Excel?
Select the shape, click and hold on the border of the shape, drag it to its new position, and release the mouse button. Alternatively, you can follow the View tab in the Show group, then select Task Panes > Size & Position to change the position.
Where is the location of the shape in Excel?
The location of a shape in Excel refers to its position on the worksheet or chart. You can view and adjust the location of a shape in Excel by selecting it and checking its position in the Size & Properties or Format tab on the ribbon.
How do I set a shape object in Excel VBA?
To set a shape object in Excel VBA, you can use the following code:
Dim shp As Shape
Set shp = ActiveSheet.Shapes("Shape Name")
This code declares a variable shp as a Shape object and assigns it to the shape with the name Shape Name on the active sheet.
Download the Practice Workbook
Related Articles
<< Go Back to Excel Shapes | Learn Excel
Get FREE Advanced Excel Exercises with Solutions!

Hi. So far so good – helped a lot. However I wish to place small rectangles at each of the 12 positions on a clock-face. Each shape will be placed at an angle of 30 deg. more than its neighbour. I have found how to do this by increment but how would I do it with an absolute placement. i.e. regardless of the angle the shape is placed at the start i need something like:
With ActiveSheet.Shapes(“Rect1”)
.Left = 410
.Top = 110
.AbsoluteAngle = 30 ‘degrees This would tilt rectangle to the ‘one-o-clock’ position.
End With
Any help will be much apreciated.
B
Hello Barry
Thanks for your compliment. Your appreciation means a lot to us. Thanks once again for sharing an exciting problem.
I have reviewed your requirements. You wanted to place small rectangles at each of the 12 positions on a clock face. Besides, each shape will be placed at an angle of 30 degrees; more than its neighbor. Don’t worry! I have come up with a sub-procedure and a user-defined function to fulfill your goal.
SOLUTION Overview:
Excel VBA Sub-procedure:
I hope you have found the solution, you were looking for. I have attached the solution workbook as well; good luck.
DOWNLOAD SOLUTION WORKBOOK
Regards
Lutfor Rahman Shimanto
Excel & VBA Developer
ExcelDemy